
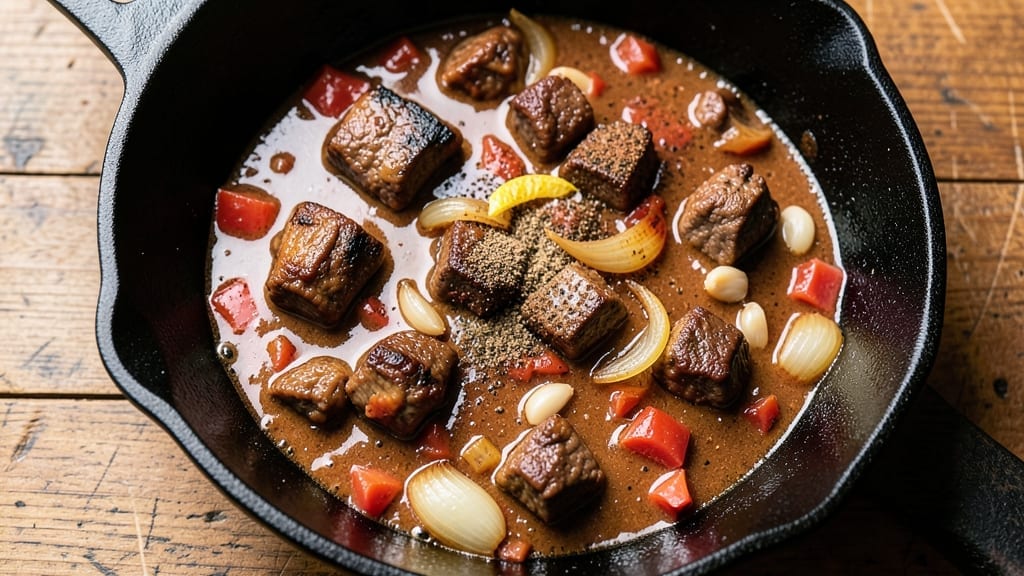
This 5 lb chili recipe delivers the deep, smoky, crowd-pleasing flavor of a classic pot luck—rich with beef, beans, and spices that simmer into perfect harmony. 🔥 The secret lies in slow-cooked beef that practically melts in your mouth, while a blend of dark and light chili powders creates that signature depth without overpowering.
I developed this recipe after years of testing, ensuring every batch delivers the right balance of hearty texture and bold flavor. What sets this chili apart is the foolproof technique that works in any pot—whether you’re using a slow cooker, stovetop, or Instant Pot.
The beef browns first for maximum flavor, while onions and garlic form the aromatic base that ties everything together. With 15 minutes of prep and 8 hours of simmering, you’ll have a chili so rich and satisfying, it becomes the centerpiece of any meal.
By the time it’s done, you’ll have a deep-smoky, well-balanced chili with tender beef, hearty beans, and a sauce that’s just the right thickness—neither too thin nor too thick.
The aroma alone will have everyone gathering around the table, and the first bite delivers that perfect combination of savory, smoky, and slightly sweet. Serve with cornbread, shredded cheese, or sour cream for the full experience.
This chili reheats beautifully too, making it perfect for meal prep or feeding a crowd. Let’s get cooking!
Ingredients for 5 lb chili
Here’s everything you need for a crowd-pleasing, deep-smoky chili that simmers into perfect harmony.
| Ingredient | Amount | Notes |
|---|---|---|
| Chuck Roast 🥩 | 5 lb | Trimmed of fat, cut into 1-inch cubes |
| Yellow Onion 🧅 | 3 whole | Medium-sized, chopped |
| Garlic Cloves 🧄 | 8 cloves | Peeled, minced |
| Dark Chili Powder 🌶️ | 3 tbsp | For deep smoky flavor |
| Ground Cumin 🌿 | 2 tbsp | Toasted for warmth |
| Paprika 🌶️ | 1 tbsp | Smoked variety preferred |
| Dried Oregano 🍃 | 1 tbsp | Mexican oregano if available |
| Salt 🧂 | 2 tsp | Kosher or sea salt |
| Black Pepper 🌶️ | 1 tsp | Freshly ground preferred |
| Tomato Paste 🍅 | ½ cup | High-quality, no sugar added |
| Beef Broth 💧 | 6 cups | Low-sodium preferred |
| Kidney Beans 🌱 | 2 cups | Drained and rinsed |
| Black Beans 🌱 | 1 ½ cups | Drained and rinsed |
| Extra-Virgin Olive Oil 🫒 | 2 tbsp | For browning beef |
| Cayenne Pepper 🔥 | ½ tsp | Adjust for heat preference |
The beef is non-negotiable here—chuck roast gives you that melt-in-your-mouth texture. Costco or your butcher shop are best for quality cuts, and trim any visible fat before cubing. Onions and garlic are the aromatic base—freshly chopped makes all the difference. For the spices, Penzeys or bulk bins at natural grocery stores have the best quality. The dark chili powder is what gives this chili that signature depth, so don’t skimp—it’s worth the extra penny per pound. If you’re feeling fancy, toast your cumin and spices in the pot for 30 seconds before adding liquid—game-changer for flavor.
No dark chili powder? Substitute with 1 tbsp each of regular chili powder and smoked paprika. Running low on kidney beans? Pinto or black beans work just as well. The tomato paste can be swapped for 1 can of crushed tomatoes if you’re in a pinch, but it won’t have the same concentrated depth. For the broth, low-sodium is key—you can always add more salt at the end. Fresh out of cayenne? Red pepper flakes at half the amount will give you that kick. And if you’re making this ahead, the flavors actually improve overnight—trust me on this one.
This chili reheats like a dream—better the next day once everything melds together. Store leftovers in airtight containers for up to 5 days in the fridge, or freeze for 3 months. I always double the batch and freeze half—perfect for lazy weeknights. When reheating, add a splash of broth or water to loosen it up. And if you’re serving a crowd, preheat your slow cooker before adding the chili to keep it warm for hours. The aroma alone will have everyone lining up!
Why You’ll Love This Recipe
- One-Pot Magic: I swear by this—just dump everything in a slow cooker, walk away, and come back to rich, fall-apart beef that practically melts in your mouth. No fancy techniques, no stress.
- Deep, Smoky Kick: That dark chili powder and cumin? They build layers of heat and earthiness that stick with you. The chuck roast turns tender while soaking up all the flavor—like a hug in a bowl.
- Leftovers That Don’t Suck: Honestly, this chili begs for seconds, and the best part? It tastes even better the next day. Freeze half for lazy nights, or reheat portions straight from the fridge—no sad, dry texture here.
- Budget Feast for Crowds: Five pounds of chili feeds a family (or a group of hungry friends) without breaking the bank. Chuck roast is cheap, onions and garlic are pantry staples, and the spices? A tiny bag lasts forever. Win-win.
Step-by-step instructions for deep-smoky beef and bean pot luck
Here’s how to build a chili so rich and flavorful it’ll disappear faster than you can say “second bowl.”
🔥 Step 1: Brown the Chuck Roast for Maximum Flavor
Heat a large Dutch oven over medium-high heat and add the 2 tablespoons extra-virgin olive oil. Working in batches if needed, add the 5 lb chuck roast cut into 1-inch cubes, spreading them in a single layer. Let them sear undisturbed for 3-4 minutes until deeply browned on one side—this creates the Maillard reaction that builds deep, meaty flavor.
I press down gently on the roast cubes during the first minute to prevent them from curling and ensure even contact with the pan. Once browned on one side, flip and repeat until all sides are golden brown. Transfer the seared meat to a plate and set aside. Don’t drain the fat—it’s liquid gold for your chili.
👨🍳 Step 2: Sauté the Aromatics and Spices
In the same Dutch oven, reduce heat to medium and add the 3 whole yellow onions chopped. Cook for 5-6 minutes until softened and starting to caramelize—this sweetens the base of your chili. Add the 8 cloves minced garlic and cook for another 30 seconds until fragrant.
Now stir in the 3 tablespoons dark chili powder, 2 tablespoons ground cumin, 1 tablespoon smoked paprika, 1 tablespoon dried oregano, 2 teaspoons salt, and 1 teaspoon black pepper. Toast the spices for 1 minute until you can smell that deep, smoky aroma—this is where the magic happens. Don’t walk away; spices burn faster than you think.
🍳 Step 3: Build the Chili Base
Pour in the 0.5 cup tomato paste and stir to combine with the spices. Cook for 2 minutes until the tomato paste darkens slightly and loses its raw taste. Add the 6 cups beef broth and bring everything to a gentle simmer, scraping up any browned bits from the bottom of the pot.
Return the browned chuck roast to the pot and stir gently to coat in the spiced broth. Here’s the thing—this is where patience pays off. Let the chili simmer uncovered for 1 hour at a gentle boil. You want the beef to break down and tenderize while developing those rich, smoky flavors. Real talk: this is the moment that matters, so don’t rush it.
🥘 Step 4: Add Beans and Simmer to Perfection
After the initial hour, stir in the 2 cups drained kidney beans and 1.5 cups drained black beans. Add the 0.5 teaspoon cayenne pepper if you want some heat. Give everything a good stir and adjust the heat to maintain a gentle simmer. Cover the pot and cook for another 2-3 hours until the beef is fork-tender and falling apart.
I know it seems like too much, but trust me—the longer you simmer, the deeper the flavors become. The beans will absorb all that rich beef juice, and the chili will develop that perfect thick-and-thin consistency we all love. If it gets too thick, add a splash of water or broth to loosen it up.
⏰ Step 5: Rest and Serve with Confidence
Once the chili reaches your desired consistency and the beef is tender, remove it from heat. Let it rest for 15-20 minutes before serving—this allows the flavors to meld together and the chili to thicken slightly as it cools. Taste and adjust seasoning if needed; sometimes you need a little more salt or cayenne to hit the perfect balance.
Serve this chili hot with all the fixings: shredded cheese, sour cream, chopped onions, and crusty bread. Each spoonful delivers that perfect combination of tender beef, smoky spices, and hearty beans. And hey, if you make more than you can eat, it freezes beautifully for next week’s dinner.
Pro Tips For Making 5 Lb Chili
- Sear the Chuck First: Chuck roast releases more flavor when it hits 350°F in a hot Dutch oven—don’t skip this step. I used to rush it, but browning those edges for 5-7 minutes locks in depth that simmering alone can’t match.
- Dice the Onion Small: Tiny, even pieces (1/4-inch or less) dissolve into the chili instead of sitting as chunks. I learned this the hard way—my first batch had onion “surprises” that made everyone pick through their bowls.
- Bloom the Spices: Toast cumin and chili powder in the same pot for 30 seconds before adding liquids—this wakes up their aromas. After burning three batches, I finally figured out why my chili tasted flat compared to the potluck winner’s.
- Simmer Low and Long: Keep the heat at a bare simmer (180-190°F) for 3-4 hours—this breaks down the chuck without drying it out. I was skeptical until I tried it: the texture went from chewy to melt-in-your-mouth, and the flavors deepened like a good wine.
Essential equipment for this recipe
Dutch Oven
The Dutch oven is my go-to pot for chili because it distributes heat evenly and retains moisture perfectly during long simmers.
I recommend a 5-6 quart size like the Lodge 5.5 Qt Cast Iron Dutch Oven—it’s heavy enough to handle stovetop-to-oven transitions if you ever want to finish your chili in the oven. The cast iron also adds subtle iron notes to the chili over time. 🔥
Slow Cooker
For hands-off cooking, a 6-quart slow cooker (like the Hamilton Beach 6-Quart Programmable Slow Cooker) is a game-changer. Set it to Low for 8 hours or High for 5-6 hours after browning your beef separately.
The slow cooker’s tight lid traps steam, keeping your chili moist and flavorful without monitoring. I love this for weeknight meals or when I’m hosting—just dump everything in and walk away.
Instant Pot
An Instant Pot (like the Instant Pot Duo 6-Quart) cuts cooking time dramatically while delivering restaurant-quality results. After browning the beef, add all ingredients and cook on High Pressure for 30 minutes, then quick-release the pressure.
For extra tenderness, I add 10 minutes of Natural Release time. The pressure cooker’s sealed environment builds deeper flavors faster than any other method. 💫
Measuring Tools
Precision matters with spices and liquids. I use a stainless steel measuring spoons set (like OXO Good Grips) for accurate measurements of chili powder and cumin. For liquids, a liquid measuring cup with clear markings ensures you add exactly 6 cups of broth without overfilling.
A digital kitchen scale (like OXO Stainless Steel Scale) helps when measuring meat in grams for consistency across batches.
Wooden Spoon
A long-handled wooden spoon (I prefer Ozeri Wooden Spoons) is essential for stirring chili without scratching your Dutch oven or slow cooker. Wood distributes heat better than metal and won’t react with acidic ingredients.
I keep one permanently in my Dutch oven for stirring during the long simmer—it becomes part of the chili’s soul. 🌟
Immersion Blender
If you prefer your chili smooth (not chunky), an immersion blender (like Ninja Foodi 1000-Watt) lets you blend directly in the pot after cooking. I pulse for 10-15 seconds at a time to avoid over-blending.
This tool is also great for adjusting thickness by blending in extra broth if needed. It’s a must-have for customizing texture without transferring hot chili to a blender.
Nutrition facts
Frequently asked questions
Can I make this chili in a slow cooker or Instant Pot?
For a slow cooker, brown the beef first, then combine everything and cook on Low for 8 hours or High for 5-6 hours. In an Instant Pot, brown the beef, add ingredients, and cook on High Pressure for 30 minutes with a 10-minute natural release. Both methods work beautifully—just adjust timing to your schedule!
How do I make this chili less spicy?
Skip the cayenne pepper entirely or reduce it to ¼ teaspoon. For an already-made chili, stir in 1 tablespoon of milk or sour cream per bowl to mellow the heat. Adding more beans also helps dilute the spice while keeping it hearty.
Can I substitute ground beef for chuck roast?
Yes, but the texture will differ. Use 3 lbs of ground beef (80/20 blend) instead of chuck roast. Brown it thoroughly first, breaking it into small pieces. Ground beef cooks faster, so reduce simmering time to 1.5-2 hours total. The flavor will still be great, just less tender.
Why does my chili get too thick after simmering?
This happens when the liquid reduces too much. Add ½ cup of beef broth or water and simmer for another 10-15 minutes to adjust. For a smoother texture, blend half the chili with an immersion blender before mixing back in. Always taste as you go!
How long can I store leftovers?
Store in airtight containers in the fridge for up to 5 days or freeze for 3 months. Reheat gently on the stove with a splash of broth to restore moisture. Leftovers actually taste better the next day as flavors deepen!

- Pea Soup Instant Pot Recipe: Velvety Green Smoothness in 20 Minutes - November 1, 2026
- Pork Loin Pulled Pork Crock Pot Recipe: Slow-Smoked Tenderness With Zero Dryness - November 1, 2026
- Baked Potatoes in Crock Pot Recipe: Buttery Interiors and Crispy Top Magic - November 1, 2026