
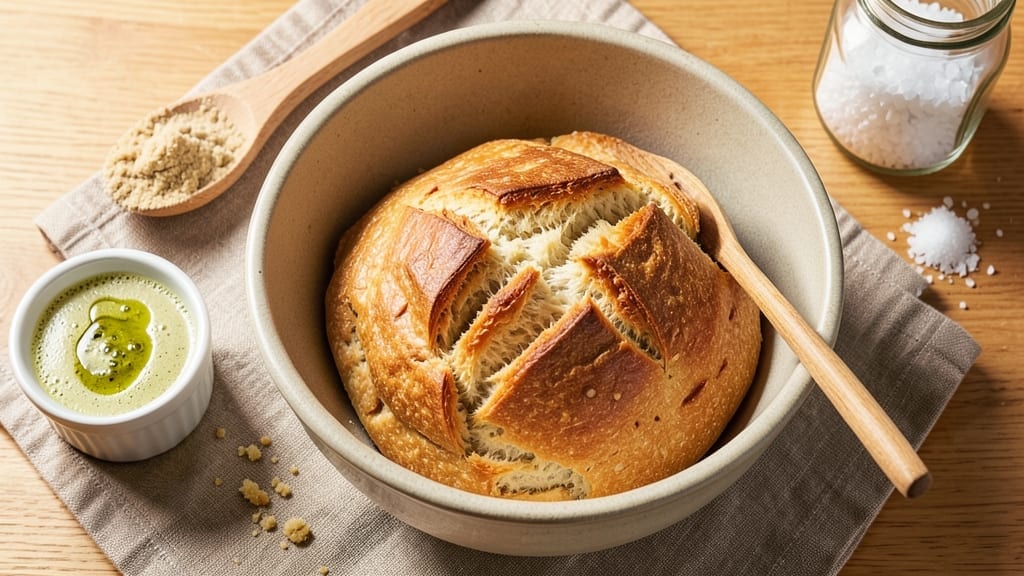
Mastering artisan bread in just 5 minutes of active prep feels like magic—and it’s the secret to restaurant-quality loaves without the hours of kneading. This no-knead method transforms simple ingredients (flour, yeast, water, salt) into a crusty, airy loaf with minimal effort, using science-backed techniques that deliver professional results.
The key? A long, hands-off rise that develops flavor and texture while you handle other tasks.
What sets this recipe apart is the foolproof technique: mix, rest, shape, and bake—no advanced skills required. The dough develops its own structure through slow fermentation, creating that signature artisan crumb without your intervention.
You’ll end up with a loaf that’s crisp on the outside, tender inside, and packed with flavor, all while spending less time in the kitchen than it takes to order takeout.
This method works perfectly for beginners but delivers restaurant-quality results even for experienced bakers. The crust develops a satisfying snap, while the interior remains soft and open—just like your favorite bakery loaf.
Whether you’re feeding a family or treating yourself to homemade bread, this recipe proves you don’t need hours to create something extraordinary.
The beauty of this approach is its flexibility: bake a single loaf for dinner or scale it up for a crowd. The same principles apply whether you’re using a Dutch oven, baking stone, or even a cast-iron skillet.
Let’s get started on your 5-minute artisan bread masterpiece—the kitchen will smell amazing before you know it.
Ingredients for 5 min artisan bread master
Four simple ingredients transform into restaurant-quality bread with just five minutes of active work.
| Ingredient | Amount | Notes |
|---|---|---|
| Bread Flour 🌾 | 3 ½ cups | High-protein for structure (12-14%) |
| Active Dry Yeast 🍞 | ¼ tsp | Freshly opened for potency |
| Granulated Sugar 🍚 | ½ tsp | Feeds yeast for faster rise |
| Salt 🧂 | 1 ½ tsp | Diamond Crystal preferred |
| Extra-Virgin Olive Oil 🫒 | ½ tsp | For dough elasticity |
| Warm Water 💧 | 1 ¼ cups | 105-110°F for yeast activation |
| Cornmeal 🌽 | ¼ cup | For dusting parchment paper |
| Coarse Sea Salt 🧂 | ½ tsp | For final crust sprinkle |
| Ice Water ❄️ | ¼ cup | For shaping dough (optional) |
The flour is everything here—King Arthur or Caputo bread flour give that signature artisan crumb, but King Arthur all-purpose works in a pinch. Yeast loses potency fast, so check the expiration date—if it’s older than a month, toss it. Warm water should feel like bathwater (105-110°F)—too hot kills yeast, too cold makes it sluggish. For the olive oil, Californian extra-virgin adds subtle fruitiness, but any good-quality oil works. Pro tip: Use a thermometer to test water temp if you’re unsure.
No bread flour? All-purpose plus 1 tbsp vital wheat gluten mimics the protein structure. Short on yeast? Instant yeast works 1:1, but active dry needs 10 minutes to proof. The sugar can be swapped for honey or maple syrup (use half the amount). For salt, kosher or sea salt works—just measure carefully since grain size varies. No Dutch oven? A cast-iron skillet or baking stone creates steam for that crisp crust. The cornmeal keeps dough from sticking to parchment—don’t skip this step if you want clean slices.
This dough is a 24-hour hands-off project—perfect for meal prep. Shape it, let it rise overnight in the fridge, then bake when you’re ready. The shaped loaf keeps 3 days wrapped at room temp or 1 week frozen. For reheating, wrap cooled bread in foil and warm at 350°F for 10 minutes. The crust stays crispy for days if stored properly. Freeze extras as 1-inch slices for perfect toast anytime.
Why You’ll Love This Recipe
- No-Knead Nightmare Over: I mix the dough in a bowl—no stand mixer, no fancy tools—just my hands and a splash of olive oil. Honestly, the yeast does all the work while I sip my coffee, and by the time I’m ready to shape it, the magic’s already started.
- Crusty Yet Approachable: That golden crust? It’s all thanks to the bread flour and a quick steam trick (just spray the bowl with water before baking). Between us, it tastes like a bakery loaf but with half the effort—no sad, dense disappointment here.
- Sandwich Hero Every Time: Between us, this bread is my go-to for grilled cheese, toast, or even a quick charcuterie board. The olive oil keeps it rich without overpowering, and the texture holds up to anything—even my toddler’s peanut butter finger-painting sessions.
- Leftovers That Last: One batch feeds my family for days. I freeze slices for toast or croutons, and the dough itself keeps in the fridge for up to 3 days—no waste, no stress. Plus, the cost? Ridiculously cheap compared to store-bought.
Step-by-step instructions for no-knead artisan bread
This hands-off method delivers bakery-quality bread with minimal effort and maximum flavor.
Activate the Yeast with Warm Water and Sugar
In a large mixing bowl, combine the 1.25 cups warm water (between 105-110°F) with the 0.5 tsp granulated sugar and 0.25 tsp active dry yeast. Stir gently with a wooden spoon and let sit for 5-10 minutes until you see bubbles forming on the surface and the mixture smells slightly fruity.
This step is critical—if the water’s too hot, you’ll kill the yeast; if too cold, it won’t activate. The bubbles confirm the yeast is alive and ready to work its magic. If no bubbles appear after 10 minutes, your yeast may be dead, and you’ll need to start over.
Mix the Dough with Flour, Salt, and Olive Oil
Add the 3.5 cups bread flour and 1.5 tsp salt to the yeast mixture. Stir vigorously with a wooden spoon or your hands until a shaggy dough forms that pulls away from the sides of the bowl. Then drizzle in the 0.5 tsp extra-virgin olive oil and mix until fully incorporated.
At this stage, the dough will be sticky and uneven. That’s normal! The high-protein bread flour gives it structure, while the olive oil adds elasticity. Don’t worry if it doesn’t look perfect—this is a no-knead recipe, so we’re relying on time and steam to develop the gluten.
Cover and Rest for 12-18 Hours at Room Temperature
Lightly oil a clean kitchen towel or plastic wrap with a bit of olive oil, then drape it over the bowl to cover the dough. Let it rest in a warm, draft-free spot for 12-18 hours. You’ll know it’s ready when the dough has nearly doubled in size and looks puffy with small bubbles on the surface.
This long fermentation is what gives artisan bread its complex flavor and open crumb. I like to place the bowl in a slightly warm spot (like near the oven with the light on) to encourage even rising. Avoid moving the bowl during this time—disturbing the dough can slow down fermentation.
Shape and Score the Dough Before Baking
Preheat your oven to 450°F with a Dutch oven inside for 45 minutes to get it piping hot. While the oven heats, turn the dough out onto a lightly floured surface and gently shape it into a round loaf by folding the edges toward the center and tucking them under.
Use a sharp knife or lame to make a ½-inch deep slash down the center of the dough. This isn’t just for looks—it controls where the bread expands during baking, preventing it from cracking unpredictably. The slash should be just deep enough to see the pale dough underneath.
Bake for a Crusty, Golden Loaf
Carefully transfer the shaped dough to the preheated Dutch oven, cover it, and bake for 30 minutes. Then remove the lid and continue baking for another 10-15 minutes until the crust is deep golden brown and sounds hollow when tapped on the bottom.
For extra flavor, you can sprinkle the 0.5 tsp coarse sea salt over the top during the final 5 minutes of baking. Let the bread cool on a wire rack for at least 1 hour before slicing—this allows the steam to escape and prevents a gummy interior. The crust should be crisp, the crumb open and airy, and the flavor rich and slightly tangy from the long fermentation.
Pro Tips For Making 5 Min Artisan Bread Master
- Bloom the Yeast First: DESCRIPTION: Skip the guesswork—proof the yeast in warm water with a pinch of sugar for 5 minutes until bubbly. I learned this the hard way: dead yeast means dough that won’t rise, no matter how long you knead. (And yes, even if you’re impatient like me, wait for the bubbles.)
- Weigh Your Flour: DESCRIPTION: Ditch the scooping—use a kitchen scale for 500g bread flour. Volume measurements vary wildly, and too much flour makes dense, chewy bread. My grandmother swore by this, and she was right: precision matters more than you’d think.
- Oil the Bowl Properly: DESCRIPTION: Coat the mixing bowl with at least 2 tablespoons of olive oil—don’t skimp. The dough needs that slick barrier to prevent sticking, especially if you’re shaping it right after mixing. (Your future self will thank you when the dough doesn’t tear apart.)
- Steam the Oven: DESCRIPTION: Spray the baking stone or tray with water and place a metal bowl of boiling water in the oven before preheating. The steam mimics a bakery’s environment, giving you that crisp crust and soft interior in under 20 minutes. Sounds weird, but it works—every time.
Creative variations of this recipe
Sweet & Savory Twist
Add 1 tbsp honey or maple syrup to the dough during mixing for a subtle sweetness that caramelizes beautifully in the crust. I love pairing this with 1 tsp cinnamon and ½ tsp cardamom for a Middle Eastern-inspired loaf.
Brush the baked bread with a mix of 2 tbsp melted butter and 1 tsp cinnamon sugar for an extra-special touch. 🍯
Herb-Infused Variations
Stir in 1 tbsp fresh rosemary or thyme leaves (finely chopped) when mixing the dough for an aromatic twist. For a Mediterranean flavor, add 1 tsp dried oregano and ½ tsp garlic powder.
The herbs infuse the dough during fermentation, creating a fragrant loaf perfect for dipping in olive oil. 🌿
Seeded & Nutty Loaves
Fold in ¼ cup sunflower seeds or pumpkin seeds before shaping for added texture and nutrition. For a nutty version, mix in ¼ cup chopped walnuts or pecans—just be sure to toast them first to enhance their flavor. These additions add crunch and depth to every bite. 🌰
Whole Wheat Adaptation
Replace 1 cup of the bread flour with whole wheat flour for a nuttier, heartier loaf. To maintain structure, add 1 tbsp vital wheat gluten along with the whole wheat flour. The result is a denser crumb with a richer flavor—great for sandwiches or toast. 🌾
Cheesy Artisan Bread
Fold in ½ cup shredded sharp cheddar or Pecorino Romano during the final shaping step. The cheese melts slightly during baking, creating pockets of gooey goodness. For extra decadence, sprinkle ½ cup grated Parmesan over the top before baking.
This version is perfect for serving with soups or as a side dish. 🧀
Garlic & Herb Focaccia
Shape the dough into a flat rectangle on a baking sheet and dimple the top with your fingers. Brush with 2 tbsp olive oil, then sprinkle with 2 minced garlic cloves, 1 tsp dried rosemary, and ½ tsp flaky sea salt.
Bake uncovered for 20-25 minutes until golden. This variation is ideal for dipping in balsamic vinegar. 🧄
Nutrition facts
Frequently asked questions
Why does this recipe say “5 minutes” when bread-making usually takes hours?
The 5 minutes refers only to the active prep time—mixing, shaping, and scoring. The magic happens during the 12-18 hour hands-off fermentation, which develops flavor and texture while you sleep or go about your day. This is the secret to authentic artisan bread without the hours of kneading!
Can I make this bread without a Dutch oven?
Yes! Use a cast-iron skillet, baking stone, or even a pizza steel. For best results, place a metal bowl filled with boiling water in the oven to create steam during the first 20 minutes of baking. This mimics the steam trap of a Dutch oven and gives you that perfect crust.
What if my dough doesn’t rise properly?
Check your yeast first—it should be fresh (test by dissolving 1/4 tsp in 1/4 cup warm water with 1 tsp sugar; if it bubbles in 5 minutes, it’s good). Keep the dough in a warm spot (like near the oven with the light on) and avoid drafts. If it’s still flat after 18 hours, your yeast may be dead—start over with fresh yeast.
How do I store this bread to keep it fresh?
Wrap the cooled loaf in a clean kitchen towel or beeswax wrap and store at room temperature for 3 days. For longer storage, freeze slices wrapped in plastic—they’ll toast up perfectly! Never refrigerate artisan bread, as this dries it out faster. The crust stays crispy for days this way.
Can I add seeds or nuts to this dough?
Fold in ¼ cup seeds (sunflower, pumpkin) or ¼ cup chopped nuts (walnuts, pecans) during the final shaping. Toast the nuts/seeds first for extra flavor. For best results, use toasted everything bagel seasoning or garlic powder to enhance their taste. These additions add texture and nutrition without changing the basic method.

- 12 Bean Chili Recipe: Hearty Slow-Cooked Depth With 12 Legumes - October 17, 2026
- 5 Seed Bread Recipe: Nutty Crunch and Artisan Flavor in One Loaf - October 17, 2026
- 1 Lb Macaroni Salad Recipe: Bold, Crunchy, and Crowd-Pleasing - October 17, 2026