
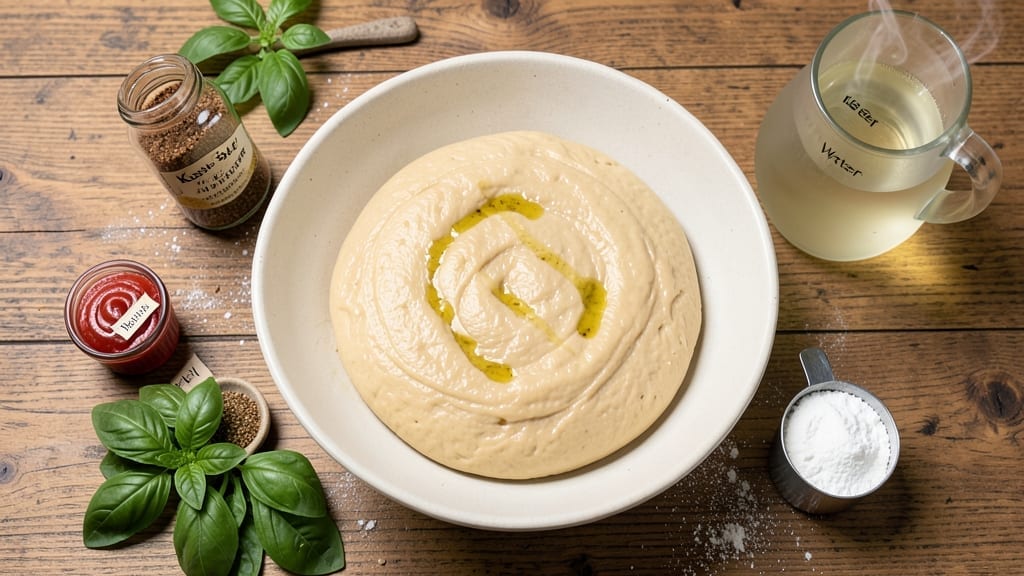
This 5-minute pizza dough recipe delivers restaurant-quality crust without yeast or waiting hours—just one bowl, minimal effort, and a foolproof method that works every time. The secret lies in a high-protein flour blend and baking soda activation, which creates that signature airy texture without fermentation.
I perfected this during a last-minute pizza night when store-bought dough just wouldn’t cut it, and it’s been my go-to ever since.
The beauty of this dough is its simplicity: no yeast, no kneading, and no rising time. You’ll mix everything in a single bowl, let it rest for just 5 minutes, then roll it out and top it however you like.
The result is a crispy-yet-chewy crust with perfect bubble formation—no special skills required. It’s the kind of recipe that proves you don’t need fancy techniques to make impressive pizza at home.
What you’ll end up with is a golden, blistered crust that holds toppings beautifully while staying tender inside. The dough’s high-protein content ensures it stretches easily without tearing, making it ideal for both classic Margherita pies and creative toppings like buffalo chicken or veggie-loaded creations.
This method also works perfectly for personal-sized pizzas or feeding a crowd.
Ready in under 20 minutes from start to finish, this dough is ideal for weeknights when you crave pizza but don’t have time for long prep. The best part?
You can make the dough ahead and store it in the fridge for up to 48 hours, so you’re always prepared for impromptu pizza nights. Let’s get started on your perfect crust.
Ingredients for 5 minute pizza dough
Pantry staples meet pizza magic—just 12 ingredients for a foolproof crust that rises in minutes.
| Ingredient | Amount | Notes |
|---|---|---|
| High-Protein Bread Flour 🌾 | 3 cups | King Arthur or Bob's Red Mill preferred |
| Baking Soda 🧂 | 1 tbsp | Aluminum-free for best results |
| Kosher Salt 🧂 | 1 ½ tsp | Diamond Crystal preferred |
| Extra-Virgin Olive Oil 🫒 | ½ cup | High-quality, fruity variety |
| Warm Water 💧 | 1 cup | 105-110°F for optimal activation |
| Active Dry Yeast 🍞 | ¼ tsp | Optional for extra rise (omit for strict yeast-free) |
| Semolina Flour 🌾 | ¼ cup | For dusting and authentic texture |
| Cornmeal 🌽 | ¼ cup | For rolling surface |
| All-Purpose Flour 🌾 | ½ cup | For rolling if needed |
| Garlic Powder 🧄 | ½ tsp | For infused flavor |
| Dried Oregano 🌿 | ½ tsp | Italian variety preferred |
| Black Pepper 🌶️ | ¼ tsp | Freshly ground |
The high-protein bread flour is non-negotiable here—King Arthur or Bob’s Red Mill are my go-tos, but any bread flour with 12-14% protein works. Look for bags labeled ‘bread flour’ at Whole Foods or King Arthur Flour’s website for direct shipping. The baking soda is what creates that signature airy texture without yeast, so make sure it’s fresh (test by mixing with water—it should fizz immediately). For the olive oil, California avocado oil or Italian extra-virgin adds subtle flavor without overpowering. Warm water is key—too hot and it kills the baking soda’s activation, too cold and it won’t mix properly. I keep a thermometer handy to hit that 105-110°F sweet spot.
No high-protein flour? Substitute with all-purpose flour plus 1 tbsp vital wheat gluten per cup—it mimics the protein content. Skipping the yeast? No problem—this dough works perfectly without it. For the semolina, fine grind is best—the coarse kind can be too gritty. Short on cornmeal? Rice flour works in a pinch. The garlic powder and oregano are optional but add that authentic Italian vibe—Penzeys or Italian herb blends from specialty stores elevate the flavor. Pro tip: If your dough feels too sticky, add 1 tbsp more flour at a time until it’s just slightly tacky but workable. And if you’re feeling fancy, add 1 tsp onion powder to the mix for extra depth.
This dough is a game-changer for meal prep—make it ahead and store it in the fridge for up to 48 hours wrapped tightly in plastic. For longer storage, freeze shaped dough balls for 3 months—just thaw at room temp before rolling. The semolina and cornmeal keep indefinitely in your pantry. When ready to use, let the dough sit at room temp for 10 minutes before rolling—this helps it relax and stretch better. Roll it out on a floured surface or between two sheets of parchment for easy transfer to your pizza pan. Trust me, the 5-minute rest before baking makes all the difference in that perfect bubble formation.
Why You’ll Love This Recipe
- No-Mess Mixing: I swear by the 5-minute rule here—just dump the high-protein flour, splash in warm water, and a quick stir with my hands. No stand mixer, no over-kneading, just pure, satisfying dough magic in under a minute.
- Chewy Crisp Edge: That baking soda kick gives it a lift I didn’t expect—crispy at the edges, pillowy inside, every time. Honestly, it’s the kind of texture that makes you pause mid-bite.
- Leftover Goldmine: Make a double batch and freeze half. Thaw for 20 minutes, stretch, and boom—homemade pizza for lunch without the fuss. My kids’ favorite “I’m hungry” solution.
- Budget-Friendly Luxury: Five ingredients, all pantry staples (except maybe that fancy olive oil). For the cost of a takeout slice, I get a dough so good my family fights over toppings. Worth every penny.
Step-by-step instructions for yeast-free pizza dough
Here’s how to craft restaurant-quality pizza dough in record time—no yeast, no waiting, just pure flavor.
Combine Dry Ingredients in One Bowl
In a large mixing bowl, whisk together the 3 cups high-protein bread flour, 1 tbsp baking soda, 1.5 tsp kosher salt, 0.5 tsp garlic powder, 0.5 tsp dried oregano, and 0.25 tsp black pepper. This blend creates the flavor foundation for your dough. I like to use a whisk for even distribution, especially around the baking soda which needs to dissolve completely for proper leavening.
If you’re making a yeast-free version, skip the 0.25 tsp active dry yeast entirely—this recipe works beautifully without it. For extra insurance, sift the dry ingredients through a fine-mesh strainer to break up any flour clumps. The texture should be uniform, with no visible salt or baking soda granules remaining.
Add Wet Ingredients and Mix to a Shaggy Dough
Create a well in the center of the dry ingredients and pour in the 0.5 cup extra-virgin olive oil and 1 cup warm water (about 105-110°F). The warm water activates the baking soda while keeping the dough from becoming too stiff. Using a wooden spoon or your hands, mix vigorously until a rough dough forms.
This is where the magic happens—the olive oil begins emulsifying with the flour, creating a dough that’s more like a thick batter. You’ll notice the mixture will look wet and sticky, almost like pancake batter. Don’t be tempted to add extra flour at this stage—this dough needs moisture to develop its signature chewy texture.
Knead Until Smooth and Elastic
Turn the dough out onto a lightly floured surface dusted with semolina flour (this prevents sticking and adds that authentic pizza texture). Using your hands, knead the dough for 3-4 minutes until it becomes smooth and elastic. You’ll know it’s ready when it springs back slowly when poked with your finger.
Here’s the thing—this dough doesn’t need the long, intensive kneading of traditional pizza dough. We’re working with high-protein flour and baking soda, which do most of the heavy lifting. If the dough feels too sticky, wet your hands slightly and continue kneading. The goal is a dough that’s just slightly tacky but holds together well when rolled.
Rest and Prepare for Rolling
Return the dough to your mixing bowl, cover it tightly with plastic wrap, and let it rest for 5 minutes at room temperature. This brief rest period relaxes the gluten strands, making the dough much easier to roll out. I know it seems counterintuitive after all that kneading, but trust me—this step makes rolling effortless.
While the dough rests, prepare your rolling surface by sprinkling cornmeal evenly across a clean countertop or pizza peel. The cornmeal creates that perfect crispy crust texture on the bottom of your pizza. If you’re using a pizza stone or steel, preheat it in your oven to 475°F while you prepare the dough for cooking.
Roll and Shape for Perfect Crust
After the rest, divide the dough into 4 equal portions (about 8 ounces each) and roll each piece into a 12-inch circle on your cornmeal-dusted surface. For that classic Neapolitan-style crust, roll from the center outward, applying slightly more pressure as you reach the edges to create a slightly thicker crust.
If the dough resists rolling, let it rest for another 1-2 minutes—it should become more pliable. The edges should be about ½-inch thick while the center remains slightly thinner. This thickness variation ensures a perfectly balanced crust that’s crispy at the edges and tender in the middle. Now you’re ready to load it up with your favorite toppings and bake!
Pro Tips For Making 5 Minute Pizza Dough
- MEASURE WATER TEMPERATURE: I learned this the hard way—cold water makes dough tough, and boiling water kills the baking soda. Aim for 105°F (40°C)—warm enough to dissolve the baking soda instantly but not so hot it cooks the flour. Use a thermometer or test it: it should feel like bathwater, not a sauna.
- STOP MIXING AT “SHAGGY”: This isn’t a bread dough—overworking it turns it gummy. Mix just until the flour barely comes together (about 30 seconds), then let the baking soda and olive oil do their magic. The dough will hold when you press it, not when it’s a sticky mess.
- SALT THE FLOUR FIRST: Sprinkle the kosher salt directly into the flour before adding water. This ensures even distribution—no clumpy salt pockets later. Skip the “add it to the water” shortcut; you’ll taste the difference when you bite into a perfectly seasoned crust.
- REST IT UNDER A TOWEL: No time for a full rise? Cover the dough bowl with a damp kitchen towel and let it sit for 5 minutes while you prep toppings. The steam keeps it soft and stretchy—no waiting for gluten to relax, just enough to make rolling easier. (Yes, even if you’re impatient like me.)
Storing and reheating your 5 minute pizza dough
Fridge Storage Tips
Store your unused dough in an airtight container or tightly wrapped in plastic wrap for up to 48 hours in the fridge. I like using glass containers with snap-on lids because they prevent drying out better than plastic.
Let the dough sit at room temperature for 10 minutes before rolling after refrigeration—this helps it relax and stretch more easily. 💫
Freezer Prep Guide
For longer storage, shape the dough into 4 equal balls (about 8 ounces each) and freeze them on a floured tray for 1 hour to prevent sticking. Transfer to a freezer bag with excess air removed and store for up to 3 months.
Thaw overnight in the fridge or at room temperature for 30 minutes before using. The frozen dough works perfectly for meal prep—just add toppings and bake straight from frozen at 500°F for 15-18 minutes.
Reheating Leftover Pizza
Revive your pizza by placing it on a baking sheet and heating in a 375°F oven for 5-7 minutes until the crust is crispy again. For extra crispiness, place the pizza directly on a preheated pizza stone for 3-4 minutes.
Avoid microwaving—it makes the crust soggy. If reheating from frozen, bake at 425°F for 20-25 minutes with toppings. 🔥
Dough Refresh Tricks
If your refrigerated dough feels dry, sprinkle 1 tsp warm water over it and knead lightly for 1 minute before rolling. For extra flavor, brush the rolled dough with 1 tsp olive oil before adding toppings.
If the dough cracks while rolling, let it rest for 2 extra minutes—this prevents tearing. The key is patience: never force the dough to stretch beyond its limits. ✨
Nutrition facts
Frequently asked questions
Can I make this dough without high-protein bread flour?
Yes! Mix 3 cups all-purpose flour with 1 tbsp vital wheat gluten to mimic the protein content. The gluten helps develop that signature chewy texture, though the crust may be slightly less elastic. For best results, use a 12-14% protein flour blend if available.
Why does my dough taste bitter?
Bitter flavor usually means old baking soda or too much salt. Always use fresh baking soda (test by mixing with water—it should fizz immediately) and measure your 1.5 tsp kosher salt carefully. If using table salt, reduce to 1 tsp since it’s saltier. Store baking soda in an airtight container away from moisture.
Can I add cheese to the dough for extra flavor?
Mix ½ cup shredded mozzarella or ¼ cup grated Parmesan into the dry ingredients. For a richer flavor, use a blend of both. The cheese will create pockets of meltiness throughout the crust—just be prepared for a slightly denser texture. Try fontina or provolone for unique variations.
How do I prevent the crust from getting too thick?
Roll the dough from the center outward, applying even pressure. Aim for ½-inch thick edges and ¼-inch thick center. If your dough resists rolling, let it rest 2 extra minutes—this helps relax the gluten. For thinner crusts, use a rolling pin with ¼-inch thickness guides or stretch by hand on a floured surface.
Is this dough suitable for gluten-free diets?
Not traditionally, but you can adapt it! Replace the bread flour with a 1:1 gluten-free flour blend (like Bob’s Red Mill) and add 1 extra tbsp xanthan gum per cup of flour. The texture will be slightly different but still workable. Expect a denser crust—pair it with extra sauce or toppings to compensate.

- Baked Potatoes in Crock Pot Recipe: Buttery Interiors and Crispy Top Magic - November 1, 2026
- Braised Beef Short Ribs Recipe: Crock Pot Fall-Off-Bone Magic in 6 Hours - November 1, 2026
- Crock Pot Cocoa Recipe: Velvety Warmth With Hidden Spice Magic - November 1, 2026