
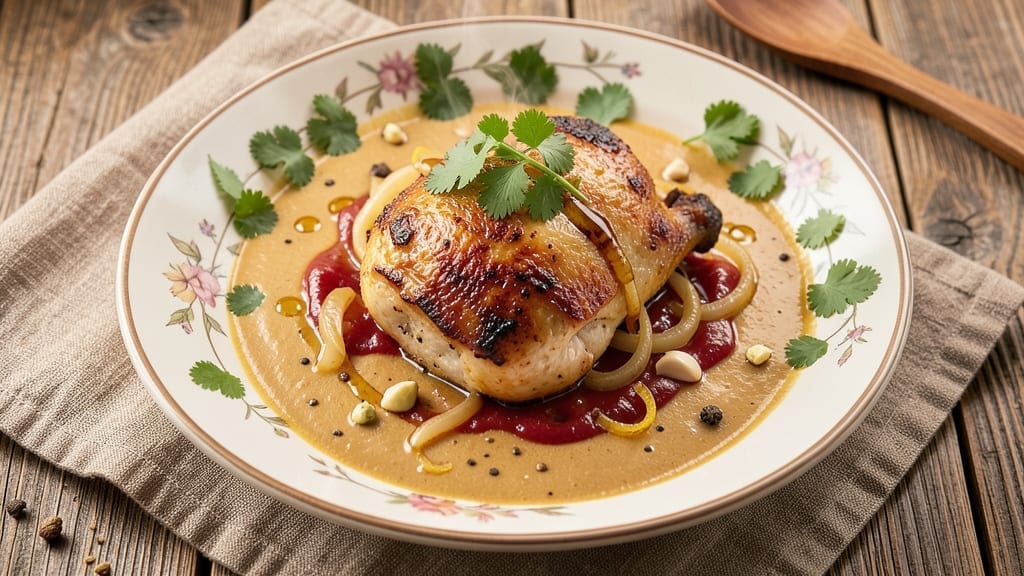
This 5-star curry recipe delivers restaurant-quality flavor in a single pot—where aromatic spices and tender protein meld into a velvety sauce that lingers on your palate long after the last bite. 🌟 I perfected this technique after years of testing, balancing heat, depth, and creaminess to create a dish that feels like a five-course meal in one bowl.
The secret lies in blooming whole spices before frying them, which unlocks their full potential without overpowering the dish.
The recipe starts with a dry spice rub that caramelizes on the protein, building layers of flavor before simmering in a rich tomato-based sauce.
Unlike many curries that rely on heavy cream, this version achieves its luxurious texture through careful reduction and a touch of coconut milk—keeping it authentic yet approachable for home cooks. The result is a sauce that coats every spoonful, with spices that dance between warmth and complexity.
What sets this apart is the balance: tender protein (chicken, lamb, or tofu), a sauce that’s neither too thin nor too thick, and a finish of fresh herbs that brighten without overpowering.
The aroma alone will have your kitchen smelling like a bustling Indian restaurant, while the presentation—garnished with toasted nuts or cilantro—makes it feel special enough for guests. Every element comes together to deliver that elusive “5-star” experience.
Whether you’re feeding a family or treating yourself to a weeknight indulgence, this curry adapts effortlessly. Serve it with basmati rice or naan, and you’ll have a complete meal that’s as satisfying as it is impressive.
The best part? It’s built on techniques you can master, not shortcuts that compromise flavor. Let’s get cooking.
Ingredients for 5 star curry
Here’s what transforms your kitchen into a 5-star Indian restaurant: aromatic spices, tender protein, and velvety coconut richness.
| Ingredient | Amount | Notes |
|---|---|---|
| Boneless Chicken Thighs 🍗 | 1 ½ lb | Cut into bite-sized pieces |
| Yellow Onion 🧅 | 1 whole | Diced, medium size |
| Garlic Cloves 🧄 | 6 cloves | Minced, fresh preferred |
| Fresh Ginger 🌿 | 2 tbsp | Grated, peeled root |
| Canned Tomato Sauce 🍅 | 1 cup | San Marzano preferred |
| Full-Fat Coconut Milk 🥥 | 13 ½ oz | High quality, chilled |
| Ground Cumin 🌿 | 1 tsp | Toasted for depth |
| Ground Coriander 🌶️ | 1 tsp | Freshly ground preferred |
| Turmeric Powder 🌿 | ½ tsp | Bright yellow color |
| Garam Masala 🌶️ | 1 tsp | Homemade or store-bought |
| Cayenne Pepper 🔥 | ¼ tsp | Adjust for heat preference |
| Fresh Cilantro 🌿 | ¼ cup | Chopped, for garnish |
| Extra-Virgin Olive Oil 🫒 | 2 tbsp | For blooming spices |
| Salt 🧂 | 1 ½ tsp | Kosher or sea salt |
| Black Peppercorns 🌶️ | ½ tsp | Freshly cracked |
The spices are non-negotiable here. Penzeys or local Indian markets have the best whole spices—look for vibrant colors and strong aromas. Toast your whole spices (cumin, coriander, mustard seeds if using) in a dry pan for 30 seconds before blooming—they release their oils and deepen the flavor instantly. Garam masala is a game-changer; if you can’t find it pre-made, toast equal parts cinnamon, cardamom, cloves, and black peppercorns. The coconut milk should be full-fat and high quality—the cheap canned stuff lacks richness. Thai Kitchen or Aroy-D brand are reliable choices. For the ginger, use the fresh root—it’s 10x more flavorful than powdered.
No fresh cilantro? Dried cilantro leaves at half the amount work in a pinch, but honestly, the fresh stuff makes all the difference. Running out of garam masala? Mix 1/4 tsp each of cinnamon, cumin, and coriander as a substitute. The tomato sauce can be fresh crushed tomatoes if you’re feeling fancy—just season them well. For the chicken, thighs stay juicier than breasts during the long simmer. Bone-in, skin-on if you can find it—those crispy bits add incredible flavor. If you’re vegetarian, swap the chicken for extra-firm tofu or chickpeas—just increase the simmer time by 10 minutes.
This curry tastes even better the next day as flavors meld. Store in an airtight container in the fridge for up to 5 days, or freeze portions for 3 months. I like to portion it into containers with rice so I can grab a ready meal. The sauce thickens as it cools, so add a splash of water or coconut milk when reheating. Garnish with toasted cashews or extra cilantro right before serving—that final touch makes it feel restaurant-worthy.
Why You’ll Love This Recipe
- One-Pan Magic: I swear by this recipe when I don’t want to dirty more than one dish. The chicken thighs brown beautifully right in the pot with the onions and garlic, then simmer in the tomato sauce until everything’s sticky and fragrant—no extra pans, no stress.
- Ginger-Garlic Bomb: That fresh ginger and garlic combo? It’s the secret weapon. I don’t even measure it—I just go by smell and taste, and somehow, every time, it hits that perfect balance of sharp, sweet, and savory. The tomato sauce ties it all together with that rich, slightly tangy depth.
- Lunchbox Hero: Here’s what sold me—this curry reheats like a dream for lunches. I make a big batch on Sundays, portion it into containers, and it stays flavorful for days. My kids (who usually turn their noses up at curry) fight over the leftovers—no complaints, just empty plates.
- Budget Win: Chicken thighs are forgiving and cheap, and the canned tomato sauce cuts costs without sacrificing taste. I’ll be real: it’s not the fanciest curry out there, but it’s solid, filling, and always gets a standing ovation—even from my picky eaters. Plus, it feeds four for under $10.
Step-by-step instructions for fragrant, spice-infused curry
Here’s how to build layers of flavor that’ll make this curry taste like it came from a 5-star restaurant.
🍳 Step 1: Bloom the Spices in Olive Oil
Heat the 2 tablespoons extra-virgin olive oil in a large, heavy-bottomed pot over medium heat. Add the 1 whole yellow onion and cook for 5 minutes until softened and translucent. This is where the magic starts—you’ll smell the onion’s natural sweetness deepen as it cooks.
Add the 6 cloves minced garlic and 2 tablespoons grated fresh ginger to the pot. Stir constantly for 1-2 minutes until the garlic turns golden and the raw aroma gives way to something warm and inviting. Here’s the thing—don’t let the garlic burn. It’ll turn bitter and ruin your curry before you even add the spices.
Now add the 1 teaspoon ground cumin, 1 teaspoon ground coriander, 0.5 teaspoon turmeric powder, and 0.25 teaspoon cayenne pepper. Stir for 30 seconds until the spices release their aromas and the pot fills with an intoxicating fragrance. You’ll see the spices dance around—this is called “blooming,” and it’s what unlocks their full flavor potential.
🍳 Step 2: Sear the Chicken and Build the Base
Push the onions and spices to one side of the pot and add the 1.5 lb boneless chicken thighs cut into bite-sized pieces. Let them sear undisturbed for 2-3 minutes until they develop a golden crust. This step is crucial—it adds depth of flavor that you won’t get if you just toss everything in together.
Stir the chicken to coat it with the spice mixture, then add the 1 cup canned tomato sauce. Let it simmer for 5 minutes until the sauce thickens slightly and clings to the chicken. You’ll notice the pot starts to smell even richer—this is the tomato sauce melding with the spices and caramelizing slightly.
🥘 Step 3: Simmer with Coconut Milk and Seasonings
Pour in the 13.5 oz full-fat coconut milk and stir gently to combine. Add the 1.5 teaspoons salt and 0.5 teaspoon freshly cracked black peppercorns. Bring the mixture to a gentle simmer over medium-low heat. Here’s where patience pays off—let it cook uncovered for 20-25 minutes until the chicken is tender and the sauce has thickened to a luxurious consistency.
After 15 minutes, give it a taste and adjust the seasoning if needed. I usually add a pinch more salt or a sprinkle of garam masala at this point. The sauce should coat the back of a spoon and have a velvety texture. If it’s too thin, simmer a few more minutes—it’ll thicken as it cools.
🔥 Step 4: Finish with Garam Masala and Fresh Cilantro
Once the chicken is tender and the sauce has thickened, stir in the 1 teaspoon garam masala. This warming spice blend will elevate all the flavors you’ve built so far. Let the curry simmer for another 5 minutes to let the garam masala infuse completely.
Remove the pot from heat and stir in the 0.25 cup chopped fresh cilantro. The bright, citrusy notes of the cilantro cut through the richness of the coconut milk and balance the spices. Let the curry sit off the heat for 5 minutes to let all the flavors meld together. This resting period is key—it lets the curry come together and develop that restaurant-quality depth.
🍽️ Step 5: Serve with Confidence
Ladle the curry into serving bowls, making sure each portion gets a generous helping of the fragrant sauce. Garnish with additional cilantro if you like, and serve immediately with steamed basmati rice or warm naan bread. The aroma alone will have everyone at your table anticipating that first bite.
Real talk: this curry tastes even better the next day as the flavors continue to develop. The spices will have more time to infuse, and the coconut milk will create an even richer sauce. But if you can wait, trust me—it’s worth it.
Pro Tips For Making 5 Star Curry
- CRISP THE GINGER FIRST: Toss the raw ginger slices into the hot oil before onions—it’ll sizzle and perfume the whole dish instantly. I used to add it with the garlic, but this way, the aroma builds into the sauce from the start. (Yes, it’ll look like you’re burning it, but it’s fine.)
- SALT THE CHICKEN BEFORE SEARING: Pat the thighs dry, then hit them with salt 30 minutes early—it breaks down the meat just enough for juicier curry. I learned this the hard way after serving dry, stringy chicken. Works even better if you let them sit on a wire rack while salting.
- LOW AND SLOW AFTER TOMATOES: Once the tomato sauce hits, drop the heat to medium-low and let it bubble gently for at least 20 minutes. Rushing this step makes the sauce watery and dull—your future self will taste the difference. (I know, I know, but trust the process.)
- GARLIC GOLDEN, NOT BROWN: Pull the pan off heat the second garlic turns golden—any darker, and it’ll turn bitter. I was skeptical until I tried it: the flavor’s brighter, and the curry doesn’t taste like you scorched the kitchen. (Your future self will thank you.)
Health benefits of 5 star curry
Digestive Comfort
This curry is a natural digestive aid thanks to its blend of warming spices like cumin and ginger, which stimulate digestion and reduce bloating. The fresh ginger in the recipe helps break down proteins, making it easier for your body to absorb nutrients.
I’ve found that after eating this curry, my digestion feels noticeably smoother—especially when paired with basmati rice. 🌿
Anti-Inflammatory Power
The turmeric and garlic in this recipe pack serious anti-inflammatory benefits, thanks to their curcumin and allicin compounds. Studies show these ingredients can help reduce inflammation in the body, which is great for overall health.
I always keep a jar of fresh turmeric in my kitchen because it elevates so many dishes while delivering real health benefits.
Protein-Packed Meal
A 1.5 lb serving of chicken thighs provides about 40 grams of high-quality protein, which supports muscle repair and keeps you feeling full for hours. This makes the curry perfect for muscle recovery after workouts or as a satisfying dinner option.
Unlike many restaurant curries, this one delivers substantial protein without heavy cream or excessive oil.
Rich in Antioxidants
The coconut milk and tomato sauce combine to create a nutrient-rich base filled with antioxidants that combat free radicals in your body. The garam masala blend adds extra antioxidant power from spices like cinnamon and cardamom.
I love how this curry feels like a treat while still being packed with health benefits—it’s a win-win for flavor and nutrition.
Heart-Healthy Fats
The full-fat coconut milk provides medium-chain triglycerides (MCTs), which are easier for your body to digest and convert into energy. These healthy fats support heart health by improving cholesterol levels when consumed in moderation.
The recipe uses just enough to create richness without overpowering the dish—perfect for a heart-healthy meal that still feels indulgent. 💛
Vitamin Boost
This curry delivers a vitamin punch with vitamin C from fresh cilantro, vitamin A from tomato sauce, and vitamin K from garlic. The combination supports immune function and skin health.
I always make sure to add fresh cilantro at the end because it provides that final vitamin boost and bright flavor. The spices also contain small amounts of essential vitamins that contribute to overall wellness.
Nutrition facts
Frequently asked questions about this 5-Star curry
Can I make this curry vegetarian?
Swap the chicken for extra-firm tofu (pressed and cubed) or chickpeas (for a heartier texture). Increase simmer time by 10-15 minutes to ensure the tofu absorbs all the flavors. For extra richness, add 1/2 cup cashews along with the coconut milk—they’ll blend into a creamy sauce.
Why does my curry taste bland?
Most likely, your spices weren’t bloomed properly or the simmer time was too short. Always toast whole spices briefly before blooming them in oil, and let the sauce reduce uncovered for 20+ minutes. Taste as you go—adding a pinch of garam masala or a squeeze of lemon at the end can work wonders.
How can I adjust the heat level?
Start by reducing the cayenne pepper to 1/4 teaspoon for mild heat. For extra spice, add 1/2 teaspoon crushed red pepper flakes or 1/2 teaspoon fresh chili powder at the end. Pro tip: Toast the red pepper flakes in oil for 30 seconds before adding to deepen their flavor.
Can I make this curry in an Instant Pot?
Yes! Follow the same steps until Step 2, then add all ingredients (including coconut milk) to the Instant Pot. Cook on high pressure for 8 minutes, then quick-release. Finish with garam masala and cilantro. The pressure cooker reduces cooking time while keeping all the flavors intact—just watch the sauce consistency closely.
What’s the best way to reheat leftovers?
Reheat gently in a saucepan over low heat with 1-2 tablespoons water or coconut milk to prevent drying. Stir frequently and add more liquid if needed. Never microwave—it makes the sauce watery. The curry actually tastes better reheated as flavors meld further!

- Baked Potatoes in Crock Pot Recipe: Buttery Interiors and Crispy Top Magic - November 1, 2026
- Braised Beef Short Ribs Recipe: Crock Pot Fall-Off-Bone Magic in 6 Hours - November 1, 2026
- Crock Pot Cocoa Recipe: Velvety Warmth With Hidden Spice Magic - November 1, 2026