
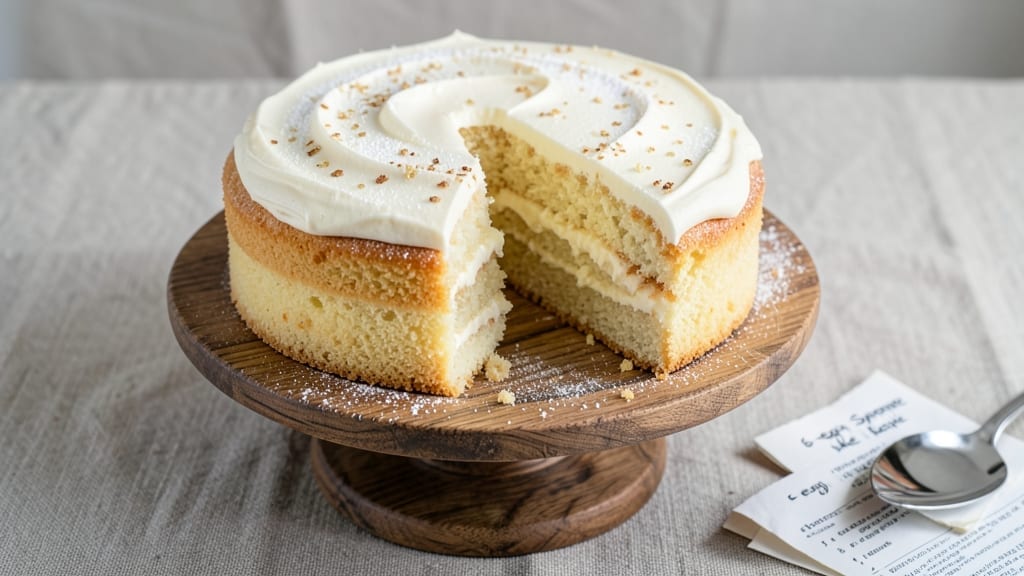
Mastering a 6-egg sponge cake transforms baking from guesswork into precision—light as air, with a texture so delicate it practically dissolves on your tongue. The secret lies in proper egg separation, gentle folding, and a precise oven temperature that ensures even rise without a single dense bite.
I’ve perfected this method over years of trial and error, and it never fails to impress, whether you’re serving it at a celebration or simply treating yourself to a slice of pure joy.
This recipe relies on simple ingredients—flour, sugar, eggs, and a touch of baking powder—but the technique makes all the difference. The key is whipping the egg whites to stiff peaks before carefully folding them into the batter, creating a structure that’s both sturdy and ethereal.
Baking at 350°F ensures a golden crust while keeping the interior tender, and the no-weigh precision means you can measure by volume without sacrificing consistency.
By the time it emerges from the oven, your cake will be golden, domed, and impossibly light, with a fine crumb that’s neither dry nor gummy.
The beauty of this recipe is its versatility—dust it with powdered sugar for a classic finish, drizzle with chocolate ganache, or layer with fresh berries. It’s the kind of cake that elevates any occasion, yet feels effortless to make.
The best part? This sponge cake holds its shape beautifully, making it ideal for stacking with fillings or frosting. Whether you’re a beginner or an experienced baker, this method delivers restaurant-quality results every time. Let’s get started on creating something truly extraordinary.
Ingredients for 6 egg sponge cake
Six eggs, precise technique, and simple ingredients create a restaurant-quality sponge cake.
| Ingredient | Amount | Notes |
|---|---|---|
| Large Eggs 🥚 | 6 whole | Room temperature for best volume |
| All-Purpose Flour 🌾 | 1 ½ cups | Sifted for lightness, plus extra for dusting |
| Granulated Sugar 🍚 | 1 ½ cups | Superfine preferred for finer texture |
| Unsalted Butter 🧈 | ½ cup | Cold, cubed for proper emulsification |
| Baking Powder 🌶️ | ½ tsp | Freshly measured for proper rise |
| Salt 🧂 | ¼ tsp | Fine sea salt for delicate flavor |
| Lemon Juice 🍋 | 1 tbsp | Freshly squeezed for brightness |
| Vanilla Extract 🌸 | 1 tsp | Pure Madagascar for authentic flavor |
| Powdered Sugar 🍚 | 1 cup | For classic dusting finish |
The eggs are the foundation—room temperature is critical for proper volume and structure. Kirkland Signature or Petersen Farms eggs work best for consistent results. Separate whites and yolks immediately to prevent overmixing. For the flour, King Arthur or Bob’s Red Mill brands are ideal—their protein content ensures a tender crumb. The butter should be cold and cubed when added to the yolks to create a proper emulsion without melting prematurely. Superfine sugar dissolves more easily, but if you only have granulated, pulse it in a food processor for finer results.
No vanilla extract? Almond extract at half the amount adds depth, though it alters the flavor profile. Fresh lemon juice is preferable, but bottled works in a pinch—just ensure it’s 100% pure lemon juice with no additives. For the baking powder, double-acting is essential; brands like Clabber Girl or Rumford are reliable. Substituting baking soda requires an acidic component like lemon juice, but the texture will differ slightly. The powdered sugar for dusting can be swapped for confectioners’ sugar, though brands like Domino sometimes contain anti-caking agents that may affect texture.
Store the cake in an airtight container at room temperature for up to 2 days to maintain its delicate texture. For longer storage, wrap tightly in plastic and refrigerate for up to 5 days. Reheat slices briefly in the oven at 300°F for 5-10 minutes to restore freshness. The cake freezes beautifully—wrap individual layers in plastic and freeze for up to 3 months. Thaw overnight in the refrigerator before serving. Always dust with powdered sugar just before serving to preserve its appearance.
Why You’ll Love This Recipe
- No Mixer Needed: I swear by this recipe when my stand mixer’s on vacation—just six eggs, a whisk, and elbow grease. The butter gets creamed with sugar by hand, and the batter comes together smoother than you’d think, no electric help required.
- Six Eggs = Serious Moisture: That many eggs? It’s the secret to a cake that stays tender for days, not dry by afternoon. The yolks add richness while the whites give it that signature lightness—no one will guess it’s not from a bakery.
- Your Cake, Your Rules: Slice it fresh for breakfast, layer it with jam for a picnic, or cube it into trifle for dessert. The neutral flavor means it plays nice with everything—whipped cream, fruit compote, even a sprinkle of cinnamon if you’re feeling fancy.
- Budget-Friendly Luxury: Six eggs might sound indulgent, but this cake costs pennies per serving. A stick of butter and a bag of flour stretch forever, and leftovers? They disappear faster than I can say “second slice.” (Yes, even on a Tuesday night.)
Step-by-step instructions for 6 egg sponge cake
Precision and patience yield a cloud-like texture—here’s how to achieve it every time.
Separate Eggs and Whip Yolks to Ribbon Stage
Begin by separating the 6 whole Large Eggs into yolks and whites, ensuring no yolk fragments contaminate the whites. Place the yolks in a stand mixer fitted with the whisk attachment and set to medium speed. Gradually add the 1.5 cups Granulated Sugar, allowing the mixer to incorporate it fully before increasing speed to high.
Whip the yolk mixture for 5-7 minutes until it thickens, becomes pale, and forms soft ribbons when the whisk is lifted. This stage is critical—ribbons should stretch slowly but visibly. If the mixture curdles or doesn’t ribbon, whisk for another minute. The sugar should dissolve completely, leaving no graininess.
Whip Egg Whites to Stiff Peaks with Lemon and Vanilla
In a separate, immaculately clean bowl, whip the egg whites on high speed until soft peaks form. Add the 1 tbsp Lemon Juice and 1 tsp Vanilla Extract gradually while whipping, which enhances stability and adds subtle brightness. Continue whipping until the whites reach stiff peaks—the tips should stand upright when the whisk is lifted.
This step requires patience. Over-whipping can create a dry cake, while under-whipping results in a dense texture. Test consistency by flipping the bowl upside down; if the whites hold their shape, they’re ready. Incorporate the whites gently in the next step to maintain airiness.
Combine Yolks and Whites in Three Stages
Reduce the mixer speed to low and add one-third of the whipped egg whites to the yolk mixture, folding gently with a spatula to maintain volume. Increase speed to medium and add another third, repeating the process. Finally, incorporate the remaining whites until just combined—no further mixing is needed.
This gradual folding preserves the delicate air pockets created during whipping. Overmixing now collapses the structure, leading to a dense cake. The batter should resemble thick, glossy meringue with no streaks of flour or sugar. Sift the 1.5 cups All-Purpose Flour, 0.5 tsp Baking Powder, and 0.25 tsp Salt over the batter and fold in using a spatula.
Incorporate Cold Butter for Emulsification
Cut the 0.5 cup Unsalted Butter into small cubes and add them to the batter, folding gently until fully incorporated. The butter should melt gradually into the mixture, creating a uniform, velvety texture. Avoid using warm butter—it disrupts the emulsion and can cause the cake to sink.
Test the batter’s readiness by tilting the bowl: the batter should hold its shape without sliding. If it’s too thin, fold in an additional tablespoon of sifted flour. The final batter should be smooth, thick, and glossy, with no visible streaks. Pour immediately into a prepared 9-inch round pan lined with parchment paper.
Bake at Low Heat for Even Rise
Preheat the oven to 325°F—lower heat prevents a domed top and ensures even baking. Place the cake in the center of the oven and bake for 40-45 minutes, or until the top is golden brown and a toothpick inserted near the center emerges clean. Avoid opening the oven door during baking to prevent collapse.
Once baked, transfer the cake to a wire rack and let it cool completely in the pan before removing the parchment. This gradual cooling prevents cracking. Dust the cooled cake generously with 1 cup Powdered Sugar using a fine-mesh sieve for an elegant finish. Serve in thin slices for the lightest texture.
Pro Tips For Making 6 Egg Sponge Cake
- Whisk Eggs to Ribbon Stage: Don’t just beat the eggs until they’re foamy—keep going until the mixture holds a stiff ribbon when the whisk is lifted. I learned this the hard way after a cake that collapsed like a wet paper bag. For six eggs, this takes about 5-7 minutes with a hand mixer or 10-12 with a whisk by hand. No shortcuts here.
- Melt Butter Slowly: Warm the butter in the microwave in 10-second bursts, stirring between each, until it’s just melted—not hot. Pour it into the egg mixture while it’s still warm, but not steaming. I used to dump it straight from the fridge, and the eggs would curdle every time. This keeps the batter smooth and light.
- Sift the Dry Mix Twice: Dump the flour, sugar, and baking powder into a fine-mesh sieve and shake it over the bowl—don’t just toss it in. Lumps in the batter mean tunnels in the cake. I skip this sometimes, but the difference in texture is noticeable, especially with six eggs where the structure relies on proper distribution.
- Preheat Pan with Parchment: Place a round of parchment paper in your cake pan, then pop it in the oven with the pan while it’s preheating. This guarantees the paper sticks and the cake doesn’t stick to the bottom. I used to grease the pan and still end up with a cake that looked like it had been through a war. Works every time.
Perfect pairings for this dish
Classic Fruit Toppings
Fresh berries elevate this delicate cake beautifully. I love topping slices with a mix of raspberries, blackberries, and blueberries—their tartness balances the cake’s sweetness. For a tropical twist, try mango slices and passion fruit pulp drizzled with a little honey.
Always wash berries thoroughly and pat them dry to prevent sogginess. 🍓
Chocolate Ganache Drizzle
A simple dark chocolate ganache transforms this cake into a decadent dessert. Melt ½ cup dark chocolate chips with ¼ cup heavy cream over a double boiler, then let it cool slightly before drizzling over slices.
For extra flair, add ½ tsp espresso powder to the chocolate for depth. Let it set for 10 minutes before serving to create a glossy finish.
Citrus Zest Glaze
Brighten the cake with a zesty glaze made from ½ cup powdered sugar, 1 tbsp lemon juice, and 1 tsp orange zest. Whisk until smooth, then drizzle over slices.
This glaze adds a refreshing contrast to the cake’s delicate flavor. For a richer version, add 1 tbsp buttercream frosting to the glaze mixture for extra creaminess.
Creamy Whipped Cream
Lightly sweetened whipped cream is a timeless pairing. Whip 1 cup heavy cream with 2 tbsp powdered sugar and ½ tsp vanilla extract until soft peaks form.
Pipe or dollop onto cake slices for a cloud-like texture. For a boozy twist, fold in 1 tsp Grand Marnier or frangelico before whipping. ✨
Nutty Crunch Layer
Add texture with a layer of toasted nuts. Lightly toast ¼ cup sliced almonds or hazelnuts in a dry pan over medium heat for 3-4 minutes until fragrant. Sprinkle over cake slices or press them into the top of a layered cake for crunch.
For extra richness, toss the nuts with 1 tbsp melted butter and 1 tsp brown sugar before toasting.
Spiced Honey Drizzle
Warm spices complement the cake’s lightness perfectly. Heat 2 tbsp honey with ¼ tsp cinnamon and a pinch of cardamom in a small saucepan until fragrant.
Drizzle over slices while warm for a fragrant, aromatic finish. This pairing works especially well with autumnal flavors like apple or pear slices on top.
Nutrition facts
Frequently asked questions
Why does this recipe use 6 eggs instead of the usual 4 or 5?
The extra eggs create a lighter, more stable structure perfect for delicate sponge cakes. Six eggs provide enough protein to hold air pockets while keeping the texture impossibly tender. This quantity also helps prevent sinking during baking, especially when using lower oven temperatures for even rise.
Can I substitute butter with oil in this recipe?
While possible, butter creates a richer flavor and better texture in sponge cakes. If substituting, use ½ cup neutral oil (like vegetable or canola) and reduce the flour by 1 tablespoon to maintain moisture balance. The cake will be slightly denser but still light. For best results, stick with cold butter cubes as written.
What’s the secret to getting the cake to rise properly?
Three key factors: room temperature eggs, proper folding technique, and 325°F oven temperature. Cold eggs won’t whip properly, and overmixing collapses air bubbles. The lower oven temp prevents rapid expansion that causes cracks. Also, never open the oven door during the first 30 minutes of baking!
How do I fix a sunken middle in my sponge cake?
Sunken centers usually mean overbaking or opening the oven too soon. For next time: bake until just golden (toothpick test) and let it cool completely in the pan. If it happens, try this fix: Slice horizontally, add a thin layer of whipped cream or jam, then reassemble with powdered sugar dusting. The texture will still be light!
Can I make this cake ahead of time?
This cake keeps beautifully for 2 days at room temperature in an airtight container. For longer storage, freeze individual layers wrapped in plastic for up to 3 months. Thaw overnight in the fridge before serving. The texture remains perfect when properly stored—just dust with powdered sugar before serving.

- 12 Bean Chili Recipe: Hearty Slow-Cooked Depth With 12 Legumes - October 17, 2026
- 5 Seed Bread Recipe: Nutty Crunch and Artisan Flavor in One Loaf - October 17, 2026
- 1 Lb Macaroni Salad Recipe: Bold, Crunchy, and Crowd-Pleasing - October 17, 2026