
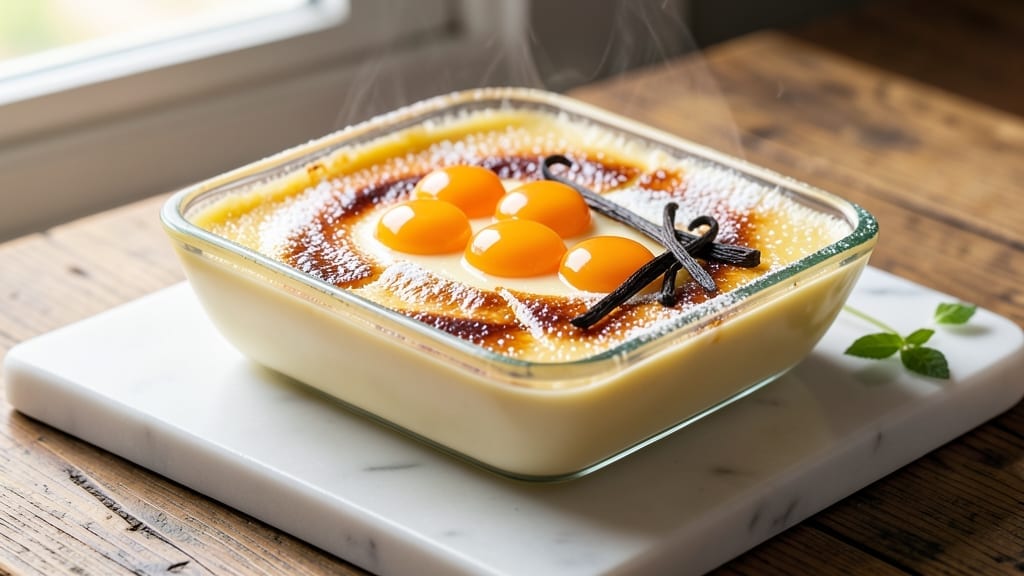
A 6-egg-yolk crème brûlée delivers the perfect balance of silky vanilla custard and crackly caramelized sugar—this is the recipe that finally convinced me to torch my own desserts at home. 🔥 The secret lies in the slow water bath bake, which transforms rich egg yolks into velvety perfection, while the sugar topping caramelizes into a mirror-like crust that shatters at the slightest touch.
I’ve made this version dozens of times, and it never fails to impress, whether served at dinner parties or as a decadent weekend treat.
What sets this recipe apart is the foolproof technique that ensures your custard stays luscious and the sugar topping develops that signature crackle. No special equipment is needed—just a baking dish, a torch (or broiler as a backup), and patience for the chilling process.
The vanilla bean infusion adds depth, while the cornstarch helps stabilize the custard for that signature texture. Even if you’ve burned custards before, this method is designed to prevent common mistakes like curdling or uneven caramelization.
By the time you’re done, you’ll have restaurant-quality crème brûlée with a golden, crackly crust that gives way to creamy custard in every bite. The aroma alone—warm vanilla and caramel—will have everyone gathering around.
This isn’t just dessert; it’s an experience that feels luxurious without requiring a fancy kitchen. Trust me, once you master this, you’ll never buy store-bought again.
Serve it chilled with a splash of vanilla liqueur or coffee for extra flair, or keep it classic with fresh berries on the side. The possibilities are endless, but the technique stays the same—simple, reliable, and absolutely worth the effort. Let’s get started!
Ingredients for 6 egg yolk creme brulee
Six egg yolks and a few pantry staples create restaurant-worthy crème brûlée at home.
| Ingredient | Amount | Notes |
|---|---|---|
| Large Egg Yolks 🥚 | 6 whole | Fresh, room temperature preferred |
| Heavy Cream 🥛 | 2 cups | Full-fat for best texture |
| Granulated Sugar 🍚 | 1 cup | Superfine preferred for smooth custard |
| Vanilla Bean 🌿 | 1 whole | Scraped seeds plus pod infused |
| Cornstarch 🌾 | 2 tbsp | For silky texture |
| Salt 🧂 | ¼ tsp | Fine sea salt preferred |
| Granulated Sugar (Topping) 🍚 | ½ cup | Superfine for even caramelization |
| Whole Milk 🥛 | 1 cup | Warmed for custard |
| Unsalted Butter 🧈 | 2 tbsp | Cold, cut into pieces |
The egg yolks are the star—fresh is non-negotiable. Grab them from the back of the fridge (they keep better there) and let them sit at room temp for 30 minutes before using. Whole Foods or Trader Joe’s carry the best quality, but any grocery store’s large eggs work. The vanilla bean? Madagascar Bourbon is my go-to—it’s worth the splurge for that deep, floral flavor. If you can’t find one, vanilla extract works in a pinch (use 1 tsp + pod). The cornstarch is your secret weapon—it keeps the custard silky instead of grainy, so don’t skip it.
Heavy cream can be swapped for half-and-half if that’s what you’ve got, but trust me on the full-fat version. No vanilla bean? Pure vanilla extract at double the amount (2 tsp) works, but you’ll miss that beautiful speckled custard. Superfine sugar is ideal, but if you only have regular granulated, pulse it in a food processor for 30 seconds to break up the grains. The topping sugar should be superfine too—it caramelizes more evenly. For a dairy-free version, use coconut cream (full-fat) and almond milk, but the texture won’t be identical.
This custard is all about patience—chill it overnight for the best results. Store any leftovers covered in the fridge for up to 3 days, but honestly, it’s best the day it’s made. If you’re making ahead, assemble the custard cups 12 hours before baking so everything’s ready to go. The topping sugar keeps forever in a cool, dry place, so buy extra if you’re hosting often. Pro tip: Use a metal rack under your baking dish to prevent soggy bottoms—trust me, it makes a difference.
Why You’ll Love This Recipe
- No Torch Needed: I’ll admit, I used to avoid creme brulee because of the torch drama. This version skips the fancy tools—just a broiler and a sprinkle of sugar. The yolks and cream blend so smoothly, the caramelized top happens every time, even if I’m not feeling patient.
- Vanilla-Powered Magic: That split vanilla bean? Oh, it’s worth the tiny splurge. The custard gets this deep, floral warmth that makes the creamy center taste like a hug. Honestly, I’ve tried store-bought vanilla paste, but this? It’s the difference between a good dessert and one people actually remember.
- Weeknight Dessert Hack: I make this when I’ve got guests over but no time to bake. Six ramekins mean I can serve smaller portions or save half for later—no one has to know it’s not fresh. The cornstarch keeps it silky, so it doesn’t curdle, even if I rush the cooking.
- Budget Luxury: Egg yolks and heavy cream are cheaper than you think, especially if you buy in bulk. Six servings cost me less than takeout, and it feels like a Michelin-star moment. Plus, the leftovers reheat beautifully—just a quick dip in warm water, and it’s like it was just made.
Step-by-step instructions for silky vanilla crème brûlée
Here’s how to make restaurant-quality crème brûlée with a perfect caramelized crust every time.
🍳 Step 1: Infuse the Vanilla and Warm the Dairy
Split the whole vanilla bean lengthwise and scrape out the seeds. Add both the seeds and the pod to the 2 cups heavy cream in a small saucepan. Warm over medium heat until just steaming—about 5 minutes. You’ll see tiny bubbles forming at the edges and smell the vanilla’s rich aroma. Remove from heat and let steep for 10 minutes while you prepare the rest.
Meanwhile, warm the 1 cup whole milk in a separate saucepan until it reaches 180°F (about 5 minutes on medium heat). This temperature is crucial—it ensures your custard sets properly without becoming grainy. Keep both liquids warm until ready to use.
👨🍳 Step 2: Whisk the Custard Base to Perfection
In a medium bowl, whisk together the 6 whole egg yolks, 1 cup granulated sugar, 2 tbsp cornstarch, and ¼ tsp salt until smooth and pale. I like to use a whisk for this step—it incorporates air and helps create that signature silky texture. The mixture should be completely homogeneous with no streaks of egg or sugar.
Slowly pour the warm vanilla cream and milk into the yolk mixture while whisking constantly. This gradual addition prevents scrambling the eggs. The custard should be thick but pourable. Here’s the thing—if you see any curdling at this stage, don’t panic. Just whisk vigorously for another 30 seconds to smooth it out.
🥘 Step 3: Strain and Pour into Ramekins
Strain the custard through a fine-mesh sieve into a measuring cup to remove any potential lumps. This step ensures your crème brûlée will have that ultra-smooth texture we’re after. Preheat your oven to 325°F while you prepare the ramekins.
Divide the custard evenly among 6 ramekins (about ⅓ cup each). Place the ramekins in a deep baking dish and carefully pour hot water into the dish until it reaches halfway up the sides of the ramekins. This water bath creates gentle, even heat that prevents the custard from forming a skin on top.
⏰ Step 4: Bake Until Just Set
Bake for 35-40 minutes until the custards are set but still slightly wobbly in the center. You’ll know they’re ready when the edges are firm but the center still jiggles like jelly. This slight wobble is crucial—it ensures the perfect creamy texture. If you overbake, the custard will become grainy.
Remove from the water bath and let the custards cool to room temperature. Then refrigerate for at least 4 hours or overnight. The longer they chill, the thicker and more luxurious the texture becomes. I like to make mine the night before so they’re perfectly chilled for serving.
🔥 Step 5: Torch the Sugar Crust
Just before serving, sprinkle each custard with an even layer of the ½ cup granulated sugar (topping). Use a fine-mesh sieve for the most even distribution. I press down gently with my finger to help the sugar adhere to the custard surface.
Using a kitchen torch, carefully caramelize the sugar until it’s deep golden brown with dark spots. Work quickly but steadily—you want even coverage without burning. If you don’t have a torch, broil for 1-2 minutes, watching closely to prevent burning. Let the crust cool for 2 minutes before serving to allow it to harden slightly.
Pro Tips For Making 6 Egg Yolk Creme Brulee
- Whisk Yolks Until Pale: You’re not just mixing—you’re emulsifying. Beat those 6 yolks with the sugar until the mixture turns almost white and thickens noticeably. I learned this the hard way: under-whisked yolks mean a custard that’s either grainy or won’t set properly. (Yes, even if your arm starts to protest.)
- Split Vanilla Bean Properly: Scrape all the seeds out of that vanilla bean—don’t just slice it in half and toss it in. Use the back of a knife to scrape the sides of the pod first, then chop the pod finely. The seeds are where the magic lives, and skipping this step means your custard will taste like vanilla advertising, not vanilla flavor.
- Strain the Custard: No matter how careful you are, tiny bits of cornstarch or vanilla specks will sneak in. Pour the finished custard through a fine-mesh sieve into your ramekins—it’s the only way to guarantee a silky texture. I used to skip this, and my creme brulee always felt off somehow. (Your future self will thank you.)
- Chill Custard Before Torching: Let the custard cool to room temperature before refrigerating—don’t rush it. Cold custard shrinks when it hits the fridge, and you’ll end up with sad, uneven layers. Give it 30 minutes to settle, then pop it in. Trust me, the wait prevents a custard disaster.
Flavor customization for this 6 egg yolk creme brulee
Citrus Zest Twist
Brighten your crème brûlée by adding 1 tbsp lemon or orange zest to the custard mixture along with the vanilla. The citrus pairs beautifully with vanilla, adding a refreshing contrast that cuts through the richness.
I like to use Meyer lemons for their natural sweetness—just make sure to remove any bitter white pith. For extra flair, sprinkle a pinch of zest over the torched sugar topping before serving. 🌿
Spiced Vanilla Infusion
Warm the cream with ½ tsp cinnamon and ¼ tsp cardamom (ground) along with the vanilla bean for a subtly aromatic twist. These warm spices complement the vanilla beautifully while adding depth.
For a bolder flavor, add a pinch of nutmeg or a strip of orange peel to the cream while it steeps. The spices will infuse the custard without overpowering it.
Coffee or Espresso Base
Swap the vanilla cream for a coffee-infused version by adding 1-2 tbsp instant espresso powder or ½ cup strong brewed coffee to the warm cream. This creates a decadent tiramisu-inspired crème brûlée that pairs perfectly with a splash of Kahlúa or dark rum.
For a lighter touch, use decaf coffee to avoid bitterness. The coffee enhances the caramel notes in the sugar topping beautifully.
Salted Caramel Swirl
Add a luxurious touch by swirling 2 tbsp salted caramel sauce (homemade or store-bought) into each ramekin before baking. Use a spoon to create marbled patterns in the custard. The caramel will soften slightly during baking but remain distinct, adding pockets of rich, buttery flavor.
Top with extra flaky sea salt after torching the sugar for a sophisticated finish. 💫
Boozy Infusions
For an adult-friendly version, infuse the cream with 1 oz vanilla liqueur (like Godiva) or ½ cup bourbon instead of plain cream. The alcohol adds depth and a subtle warmth that complements the vanilla.
If using bourbon, reduce the baking time by 5 minutes since it lowers the custard’s setting point. Serve with a side of whipped cream for extra indulgence.
Chocolate-Dipped Ramekins
For a decadent twist, dip the edges of your ramekins in melted dark chocolate before adding the custard. This creates a chocolatey border that contrasts beautifully with the vanilla custard. Use 70% dark chocolate for a balance of richness and bitterness.
Let the chocolate set slightly before filling with custard, and garnish with chocolate shavings after torching the sugar topping. 🍫
Nutrition facts
Frequently asked questions
Why do you need to strain the custard?
Straining removes any potential lumps or cooked egg bits that could make your crème brûlée grainy. The fine-mesh sieve creates that signature ultra-smooth texture by catching any imperfections. Think of it as insurance for that silky, restaurant-quality finish you’re aiming for.
Can I use regular granulated sugar instead of superfine?
Yes, but pulse it in a food processor for 30 seconds first to break up the grains. Superfine sugar dissolves more evenly, preventing grainy spots in your custard. For the topping, superfine ensures a smoother caramelization—though regular sugar works if spread very thinly.
What if my custard curdles during baking?
Don’t panic! Remove it immediately and stir vigorously for 1-2 minutes. If it’s still lumpy, strain it again before pouring into ramekins. The water bath should prevent this, but if it happens, the custard will still taste great—just slightly less silky. The key is keeping everything warm but not boiling.
How do I know when the sugar topping is done?
Look for deep golden brown spots with some dark caramelization—it should crackle when tapped. If using a torch, work in quick passes to avoid burning. For broiling, watch closely after 1 minute. The crust should harden slightly in 2 minutes but still crack when tapped.
Can I make this ahead of time?
Assemble the custard in ramekins 12 hours before baking. Bake as directed, then chill for 4+ hours. The sugar topping can be added up to 24 hours ahead. Store leftovers covered in the fridge for 3 days. The flavors actually improve with time!

- Pea Soup Instant Pot Recipe: Velvety Green Smoothness in 20 Minutes - November 1, 2026
- Pork Loin Pulled Pork Crock Pot Recipe: Slow-Smoked Tenderness With Zero Dryness - November 1, 2026
- Baked Potatoes in Crock Pot Recipe: Buttery Interiors and Crispy Top Magic - November 1, 2026