
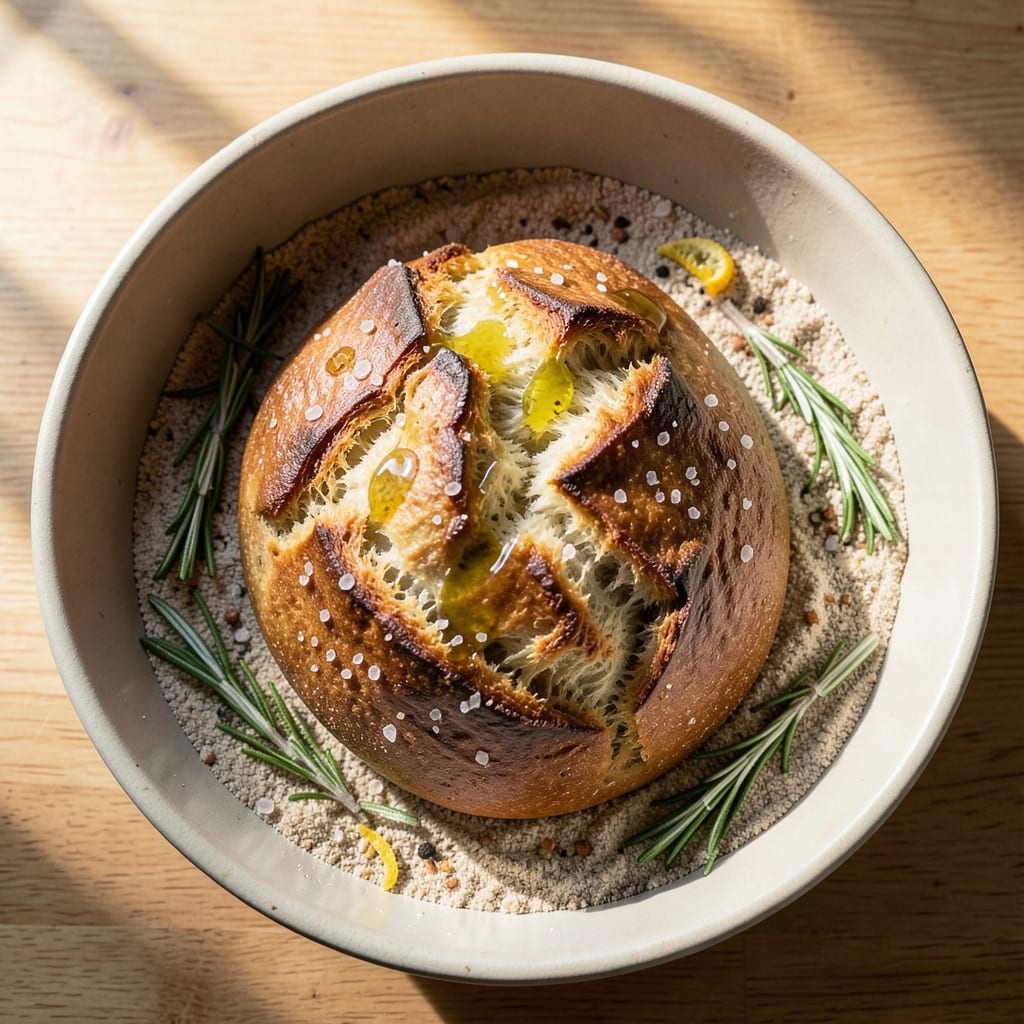
A 6-hour bread recipe that delivers a golden crust and airy crumb without kneading is the game-changer your kitchen needs. This method transforms simple ingredients into artisanal-quality bread with minimal effort—ideal for busy schedules or weekend baking projects.
The secret lies in controlled fermentation, which develops deep flavor and texture while you handle other tasks.
This recipe simplifies the process with a no-knead approach, requiring only flour, water, yeast, and salt. The dough rests for 4 hours at room temperature, allowing gluten to relax naturally, followed by a 2-hour cold proof for even better texture.
No special equipment is needed—just a mixing bowl, a warm spot, and patience (which, in this case, pays off dramatically).
By the time you pull it from the oven, you’ll have a loaf with a crispy, caramelized crust and an open, airy crumb that’s perfect for sandwiches or toast. The slow fermentation enhances flavor, making this bread taste like it came from a bakery.
Whether you’re a beginner or an experienced baker, this method delivers professional results with minimal fuss.
Serve warm with butter, olive oil, or your favorite jam for a satisfying meal. The beauty of this recipe is its flexibility—adjust the fermentation time based on your schedule, and you’ll always end up with a loaf that’s worth the wait. Let’s get started!
Ingredients for 6 hour bread
Four simple ingredients transform into bakery-style bread with just 6 hours of patience.
| Ingredient | Amount | Notes |
|---|---|---|
| All-Purpose Flour 🌾 | 4 cups | Unbleached, high-protein preferred |
| Active Dry Yeast 🍞 | ¼ tsp | Freshly opened for best results |
| Warm Water 💧 | 1 ½ cups | 110°F for optimal yeast activation |
| Diamond Crystal Kosher Salt 🧂 | 1 ½ tsp | Fine grain preferred |
| Extra-Virgin Olive Oil 🫒 | 1 tbsp | For dough coating |
| Cornmeal 🌽 | ¼ cup | For dusting baking sheet |
| Ice Water ❄️ | ½ cup | For cold proofing |
| Coarse Sea Salt 🧂 | 1 tsp | For crust sprinkle |
| Honey 🍯 | 1 tbsp | Optional for crust sheen |
Flour is where the magic happens—King Arthur or Bob’s Red Mill are my go-tos for consistent results. The yeast should be freshly opened; if you’ve had it sitting in your pantry for months, it’s time to toss it. Warm water is critical: too hot kills the yeast, too cold makes it sluggish. I always use a thermometer to hit 110°F—just warm enough to touch without burning. For the salt, Diamond Crystal dissolves more easily than Morton, which matters when you’re mixing by hand. The olive oil adds richness without overpowering the bread’s natural flavor, and a fruity, extra-virgin variety works best here.
No yeast? Instant yeast works 1:1, but active dry is traditional. Running short on flour? Whole wheat can replace up to 20%, but the texture will be denser. Cornmeal is optional but creates that perfect pull-away crust. If you’re in a pinch, semolina or all-purpose flour works too. The honey is purely decorative—skip it if you’re avoiding sugar, but it does give that bakery-style sheen. For the cold proof, ice water is key—it slows fermentation just enough to develop flavor without overproofing. If you forget to chill, just pop it back in the fridge for 30 minutes before baking.
This dough keeps beautifully—48 hours in the fridge if you want to prep ahead. For best results, bake within 24 hours of mixing. The proofed dough can sit overnight in the fridge, then proof at room temp for 1-2 hours before baking. If you’re making multiple loaves, shape them one at a time and keep the others covered with a damp towel. The baked loaves stay fresh for 3 days wrapped in a towel, or freeze for 3 months for fresh-from-the-oven flavor anytime.
Why You’ll Love This Recipe
- No-Fuss Mix-In: I swear by this recipe because it’s that simple—just flour, yeast, water, a pinch of salt, and a drizzle of olive oil. No fancy tools, no measuring cups with questionable markings. Honestly, I’ve made it in a bowl that’s seen better days and still ended up with golden crust.
- Crusty Yet Tender: That olive oil in the dough? It’s the secret weapon. You get a crust with just enough bite to hold a sandwich or dip, but the inside stays soft enough to melt like butter. I’ll be real: my first loaf surprised me—it didn’t taste like “homemade bread” in a sad way. It tasted like actual bread.
- Weeknight Workhorse: Between us, this is my go-to for meal prep. Toss slices in a bag for lunches, or use it to soak up sauces when dinner gets lazy. I’ve even frozen extra loaves—just thaw and toast. (Yes, even on a Tuesday night when takeout feels like a chore.)
- Pantry Staple Magic: Five ingredients, all of which you probably already have. No specialty flours, no exorbitant yeast packets—just the basics. And because it keeps well (if you can resist eating it all at once), it’s my budget-friendly way to avoid sad, store-bought loaves that taste like cardboard.
Step-by-step instructions for golden crust and airy crumb without a single knead
Here’s how to transform simple ingredients into a restaurant-worthy loaf with minimal effort.
Activate the Yeast and Mix the Dough
In a large bowl, whisk together the 1.5 cups warm water (about 110°F) with the 0.25 tsp active dry yeast and let it sit for 5-10 minutes until frothy. This step is crucial—if the yeast doesn’t foam, it’s not active, and your bread won’t rise properly. I always test the water temperature first with my finger; it should feel warm but not hot to the touch.
Once the yeast is bubbly, add the 4 cups all-purpose flour and 1.5 tsp diamond crystal kosher salt to the bowl. Stir with a wooden spoon until a shaggy dough forms. Then drizzle in the 1 tbsp extra-virgin olive oil and mix until just combined. The dough will be sticky but shouldn’t require flour to handle—this is normal for this no-knead method. Here’s the thing—don’t overmix. Just until everything comes together, about 2 minutes of stirring.
First Rise and Cold Proof
Cover the bowl tightly with plastic wrap and let the dough rise at room temperature for 1 hour. You’ll see it puff up slightly and develop small bubbles on the surface. This initial rise develops flavor and structure without requiring your attention. I like to place the bowl in a slightly warm spot—like on top of the turned-off oven with the light on—to encourage even rising.
After the first rise, transfer the dough to a lightly oiled bowl, cover again, and refrigerate for 12-16 hours. This cold proofing is where the magic happens—it allows the gluten to relax and develop slowly, creating that perfect open crumb structure. I usually do this overnight, but as little as 8 hours works in a pinch. The dough will rise significantly during this time, so don’t be surprised if it doubles in size.
Shape and Second Rise
Remove the dough from the refrigerator and let it sit at room temperature for 30 minutes to soften slightly. Line a baking sheet with parchment paper and dust it lightly with 0.25 cup cornmeal. Gently shape the dough into a round loaf by folding the edges toward the center and tucking them under. Place it seam-side up on the prepared baking sheet. This shaping creates tension in the dough that translates to an open, airy crumb.
Cover the shaped loaf loosely with plastic wrap and let it rise at room temperature for 1-2 hours until it has nearly doubled in size. You’ll know it’s ready when the dough springs back slowly when poked with your finger. I like to preheat my oven to 425°F during this final rise so it’s ready when the dough is. This is the moment that matters—the dough should be puffy with visible bubbles, but not so much that it collapses when you handle it.
Score and Bake
Preheat your oven to 425°F with a baking stone or inverted baking sheet on the middle rack. Once preheated, score the top of the dough with a sharp serrated knife in a crosshatch pattern or simple diagonal cut. This helps control the expansion and creates that beautiful crust pattern. Dip your finger in water and run it along the knife if needed—this prevents sticking and makes for cleaner cuts.
Bake the bread for 30-35 minutes until it’s golden brown and sounds hollow when tapped on the bottom. The internal temperature should reach 205-210°F. I always check for doneness by looking for a deep golden color and that irresistible crust. If you’re using the optional 1 tbsp honey, brush it lightly over the top during the last 5 minutes of baking for extra sheen and flavor.
Cool and Serve
Remove the bread from the oven and transfer it to a wire rack to cool completely. This is the hardest part—waiting 1 hour before slicing. I know it’s tempting to cut into that warm, fragrant loaf immediately, but resisting gives you that perfect crumb structure. The bread will continue to set as it cools, and the crust will firm up just enough to hold its shape when sliced.
Once cooled, slice the bread and serve with your favorite butter or olive oil. Each slice should reveal an open, airy crumb with a crisp, golden crust. The flavor will be rich and slightly tangy from the long fermentation, with just the right balance of saltiness from the kosher salt. Store any leftovers in an airtight container at room temperature for up to 3 days, or freeze for longer storage.
Pro Tips For Making 6 Hour Bread
- Measure Salt by Weight: Diamond Crystal kosher salt clumps like a drama queen. Use a kitchen scale for 2% of your flour weight—no guessing, no dense loaves. I learned this the hard way after a batch turned out tasting like a sad, unsalted cracker.
- Proof Yeast in Water First: Skip mixing yeast with flour—it’s a waste of time. Dissolve it in warm water (110°F) with a pinch of sugar first, then let it foam for 5–10 minutes. If it’s sluggish, your yeast is dead or your water’s too hot. No excuses.
- Don’t Over-Knead the Dough: This isn’t a workout for your arms. After 5–7 minutes of kneading by hand (or 3–4 minutes with a mixer), the dough should spring back when poked. Overwork it, and you’ll end up with a chewy brick instead of airy bread. I know, I’ve made that mistake too.
- Use Olive Oil Sparingly: A tablespoon or two in the dough makes it tender, but go overboard, and you’ll get a greasy, dense loaf. Brush the top with a light coat before baking for shine—not a pool. Trust me, your bread will thank you.
Creative variations of this recipe
Sourdough Twist
Swap the yeast for a ¼ cup active sourdough starter (fed and bubbly) and reduce the water to 1 cup. Replace the salt with 1 tsp apple cider vinegar for tang.
Let the dough ferment at room temperature for 8 hours before cold-proofing—this builds complex flavors. Score deeply before baking for that classic sourdough look. 🌾
Whole Wheat Boost
Replace 2 cups all-purpose flour with whole wheat flour for a nuttier, denser loaf. Add 1 tbsp vital wheat gluten to improve rise and texture. Expect a slightly shorter bake time (25-30 minutes) due to the denser crumb. Brush with olive oil instead of honey for moisture.
Honey Wheat Sweet
Add 2 tbsp honey to the dough and top with 1 tbsp chopped walnuts or sunflower seeds before baking. The sweetness caramelizes beautifully, creating a sticky, golden crust. Reduce the salt to 1 tsp to balance flavors. Perfect for breakfast with yogurt or as a dessert loaf.
Herb & Garlic Loaf
Mix 1 tbsp chopped fresh rosemary or thyme into the dough, plus 2 minced garlic cloves dissolved in the warm water. Shape into a round and bake as directed. The aromatics infuse the bread with earthy depth. Serve with garlic butter or olive tapenade for dipping. ✨
Cheesy Pull-Apart
Fold ½ cup shredded sharp cheddar or Parmesan into the dough after the first rise. Shape into a round, then cut a deep cross before baking. The cheese melts into gooey pockets—ideal for sharing. Reduce the water slightly (1.25 cups) to prevent stickiness from the cheese.
Seeded Multigrain
Replace 1 cup flour with pumpkin seeds, sesame seeds, and flaxseeds (total ½ cup mixed). Add 1 tsp extra olive oil for binding. The seeds add crunch and nutrients. Brush the baked loaf with garlic-infused oil for extra flavor. 💫
Nutrition facts
Frequently asked questions
Why does this bread need a 6-hour process?
The extended time creates a superior texture and flavor. The 4-hour room-temperature rise develops gluten structure naturally, while the 2-hour cold proof enhances fermentation for a tangy depth. This slow process mimics artisanal bread-making without requiring kneading.
Can I adjust the fermentation times?
Yes, but with caution. For a quicker version, reduce the cold proof to 1 hour, but expect less flavor. For maximum flavor, extend to 24 hours in the fridge. Always check dough springiness before baking—it should bounce back slowly when poked.
What if my dough doesn’t rise?
Check these first: 110°F water (too hot kills yeast), fresh yeast (test with warm water first), and proper sealing (use plastic wrap tightly). If still flat after 2 hours, discard and start fresh. Cold environments slow fermentation—move to a warmer spot if needed.
How do I get a crispier crust?
Preheat your oven to 425°F with a baking stone or steel. Score the dough deeply before baking, then brush with water or honey during the last 5 minutes. For extra crunch, bake for 5 minutes uncovered after removing from oven.
Can I make this in a Dutch oven?
Shape the dough into a round, place in a preheated Dutch oven with lid, then bake for 35-40 minutes. The steam creates a crispier crust and softer interior. Just remove the lid after 20 minutes to brown the top.

- 12 Bean Chili Recipe: Hearty Slow-Cooked Depth With 12 Legumes - October 17, 2026
- 5 Seed Bread Recipe: Nutty Crunch and Artisan Flavor in One Loaf - October 17, 2026
- 1 Lb Macaroni Salad Recipe: Bold, Crunchy, and Crowd-Pleasing - October 17, 2026