
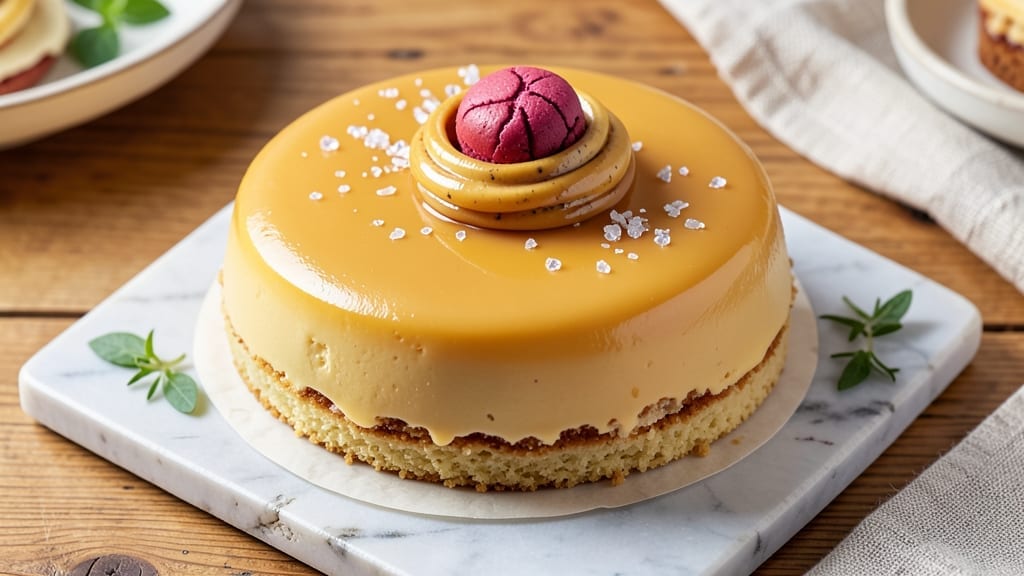
A 6-inch butter cake with layers that stay moist and rich vanilla bean frosting is the perfect centerpiece for any celebration—no one will guess it’s not from a bakery. The secret lies in precise measurements and a baking technique that locks in moisture while creating a tender crumb.
This recipe delivers a cake that’s light yet substantial, with a delicate texture that makes every slice feel special.
What sets this butter cake apart is its foolproof method for achieving consistent layers and even baking. You’ll work with a classic butter cake batter that’s neither too dense nor too airy, striking the perfect balance for slicing and frosting.
The vanilla bean frosting isn’t just sweet—it’s infused with real vanilla extract and a touch of butter for a velvety finish that complements the cake beautifully.
By following these instructions, you’ll end up with a cake that stays moist for days, thanks to a simple trick involving the baking powder and butter ratio. The layers remain tender, the frosting holds its shape, and the overall presentation looks impressive enough for any occasion.
Whether it’s a birthday, anniversary, or just a Sunday treat, this cake delivers restaurant-quality results at home.
Ready in about 90 minutes from start to finish, this recipe is designed for home bakers who want professional-looking results without the complexity. The key is patience—letting the cake cool completely before frosting ensures clean layers and a flawless finish.
Serve with fresh berries or a sprinkle of powdered sugar for an elegant touch.
Ingredients for 6 inch butter cake
Precise measurements and quality ingredients create a 6-inch butter cake with layers that stay moist for days.
| Ingredient | Amount | Notes |
|---|---|---|
| Unsalted Butter 🧈 | 1 cup | Softened to room temperature |
| Granulated Sugar 🍚 | 1 ½ cups | Light brown preferred for moisture |
| All-Purpose Flour 🌾 | 2 cups | Sifted for even texture |
| Baking Powder 🧂 | 2 tsp | Freshly measured |
| Salt 🧂 | ½ tsp | Fine sea salt preferred |
| Vanilla Extract 🌿 | 2 tsp | Pure Madagascar vanilla |
| Large Eggs 🥚 | 3 whole | Room temperature |
| Whole Milk 🥛 | ½ cup | Room temperature |
| Vanilla Bean Paste 🌿 | 1 tbsp | For authentic vanilla flavor |
| Powdered Sugar 🍚 | 3 cups | Sifted for smooth frosting |
| Heavy Whipping Cream 🥛 | 1 cup | Cold for whipping |
| Unsalted Butter 🧈 | ½ cup | Cold, cubed for frosting |
The butter is non-negotiable here—European-style unsalted butter like Plugrá or Land O’Lakes works best for its higher fat content. Grab it from the refrigerated section, not the shelf-stable tubs. Room temperature is key—press it with a fork to test. For the vanilla bean paste, Gourmet Gift Baskets or Amazon are reliable sources. If you only have extract, double the amount. The milk and eggs should be at room temperature too—cold ingredients make for dense cake layers. Sift the flour and baking powder together to avoid lumps, which is why King Arthur flour is a favorite for baking.
No vanilla bean paste? Pure vanilla extract plus a scraped vanilla bean works, but it’s trickier to measure. For the frosting, powdered sugar from a canister (like Domino) is ideal—it’s sifted and stays fresh longer. Heavy whipping cream is a must for stability; Trader Joe’s has it pre-chilled, which saves time. If you’re short on butter, vegetable shortening at half the amount keeps the frosting from melting, though it won’t taste as rich. The sugar ratio is critical—too much powdered sugar makes the frosting grainy, so sift it well. For a lighter frosting, whip the cream first before adding the butter.
Store the cake layers in an airtight container between parchment paper at room temperature for 2 days. The frosting keeps for 3 days in the fridge, but assemble the cake right before serving to avoid soggy layers. For longer storage, wrap the unfrosted layers in plastic and freeze for 1 month. Thaw at room temperature before frosting. The frosting can be made 1 day ahead—just whip it again before using to restore volume. A quick tip: dust the cake boards with powdered sugar before frosting to prevent sticking, and use an offset spatula for that restaurant-quality finish.
Why You’ll Love This Recipe
- No-Fuss Mixing: I swear by the creamy butter-sugar combo—just whip those two together until light and fluffy, then fold in the dry stuff. No electric mixer required, and honestly? The texture comes out perfectly tender every time.
- Buttery Bliss: That rich, velvety crumb? All thanks to the butter. The sugar caramelizes just enough to give it a subtle depth, while the baking powder keeps it light—no heavy spices or weird aftertastes, just pure, classic cake satisfaction.
- Portion Control: Six-inch rounds are the ideal size—big enough to feel special, small enough to avoid waste. I make a batch for birthdays, then freeze half for later. No sad, half-eaten sheet cakes here.
- Budget Magic: Flour, sugar, butter—these are pantry staples that won’t break the bank. A single batch costs me less than takeout, and the leftovers? Perfect for sandwiches or a quick breakfast toast. Smart, simple, and satisfying.
Step-by-step instructions for 6 inch butter cake
Here’s the precise method for a tender, moist butter cake with professional vanilla bean frosting.
Cream Butter and Sugars to Lighten the Texture
In a stand mixer fitted with the paddle attachment, beat the 1 cup unsalted butter and 1.5 cups granulated sugar on medium speed for 3-4 minutes. You’re looking for a pale, fluffy mixture that has nearly doubled in volume and leaves clean streaks when you lift the paddle. This creaming process incorporates air, which creates that signature tender crumb.
I press down on the butter briefly with a spatula during the first minute to ensure it’s fully softened and evenly incorporated. The reason we use light brown sugar here is that it contains molasses, which adds moisture and depth of flavor to the cake. Don’t rush this step—properly creamed butter and sugar is the foundation of a moist cake.
Add Eggs and Vanilla for Rich Flavor
Add the 3 whole large eggs one at a time, mixing on low speed for 30 seconds after each addition until fully incorporated. Then add the 2 teaspoons vanilla extract and 1 tablespoon vanilla bean paste, mixing just until combined. The vanilla bean paste adds those beautiful flecks of vanilla and a more complex flavor than extract alone.
Here’s the thing—make sure your eggs are at room temperature. Cold eggs can cause the butter to seize up and create lumps in your batter. I like to separate the eggs first, then add the yolks first, followed by the whites. This helps prevent any curdling that can occur when adding eggs to butter mixtures.
Combine Dry Ingredients for Even Texture
In a separate bowl, whisk together the 2 cups all-purpose flour, 2 teaspoons baking powder, and 0.5 teaspoon salt. Then add this dry mixture to the wet ingredients in three additions, mixing on low speed just until combined after each addition. You should still see some flour streaks—overmixing develops gluten and makes the cake tough.
I use a silicone spatula to gently fold in the 0.5 cup whole milk after adding the dry ingredients. This helps distribute the milk evenly without deflating the air we’ve incorporated. The milk adds moisture and helps create that fine, even crumb structure. Don’t worry if the batter looks slightly thick—it will come together perfectly when we add the milk.
Bake for Perfect Moisture and Even Rise
Pour the batter into a 6-inch round cake pan lined with parchment paper and smooth the top. Bake in a preheated 350°F oven for 25-30 minutes, or until a toothpick inserted in the center comes out clean with just a few moist crumbs clinging to it. The cake should be golden on top but still tender in the center—this ensures maximum moisture.
I like to tent the cake pan with foil after 15 minutes of baking to prevent the top from browning too quickly. The key to a moist butter cake is not overbaking. As soon as that toothpick test is clean, remove it from the oven. Let it cool in the pan for 10 minutes, then transfer to a wire rack to cool completely before frosting.
Prepare the Vanilla Bean Frosting
In a medium bowl, beat the 1 cup heavy whipping cream and 0.5 cup unsalted butter (cold, cubed) with an electric mixer until soft peaks form. Then gradually add the 3 cups powdered sugar, mixing on low speed until just combined. Increase the speed to medium and beat for 2-3 minutes until the frosting is smooth and holds stiff peaks.
For the vanilla flavor, add the 2 teaspoons vanilla extract and scrape down the sides of the bowl. Then add the 1 tablespoon vanilla bean paste and mix until fully incorporated. The frosting should be thick enough to hold its shape but still spreadable. If it’s too thick, add 1-2 teaspoons milk to loosen it slightly. This frosting is the secret to that professional finish and extra moisture for your cake layers.
Assemble and Chill for Maximum Moisture
Level the cooled cake layers if needed, then place one layer on a cake stand or plate. Spread about ⅓ of the frosting on top, then add the second layer. Frost the top and sides completely, creating a smooth finish. I use a bench scraper to create clean edges and ensure even coverage.
Chill the cake in the refrigerator for at least 2 hours before serving. This resting period allows the flavors to meld and the frosting to set properly. The chilling also helps maintain the cake’s moisture—this is especially important for butter cakes that can dry out if served too soon. Cut into slices and serve with a dollop of whipped cream if desired.
Pro Tips For Making 6 Inch Butter Cake
- Cream Butter Properly: I learned this the hard way—whipping butter and sugar until it’s pale and fluffy (about 3-5 minutes) makes a real difference in texture. Stop when the mixture looks like wet sand and holds a ribbon when you lift the beaters. Overmixing here turns your cake into a dense brick.
- Measure Flour Right: Spoon flour into the measuring cup, then level it with a knife—don’t scoop directly from the bag. Too much flour (or packing it down) makes the cake dry and crumbly. Trust me, your 6-inch pan won’t forgive overfilled cups.
- Bake Until Springy: Skip the toothpick test—press the center gently. If it springs back slowly (not instantly), your cake’s done. A toothpick can still have crumbs but the cake might be underbaked. Oven temps vary, so watch at 25-30 minutes, not the recipe’s timer.
- Cool In Pan: Sounds weird, but it works: Let the cake cool in the pan for 10 minutes before transferring. This keeps it from cracking when you move it. I know, I know—you’re eager to slice it, but patience here saves you from a crumbly mess.
Dietary considerations for 6 inch butter cake
Gluten-Free Adaptation
For a gluten-free version, replace the 2 cups all-purpose flour with a 1:1 gluten-free baking flour blend like Bob’s Red Mill 1-to-1. Add 1 teaspoon xanthan gum to help bind the crumb—this is crucial for maintaining moisture.
I’ve found that gluten-free cakes often dry out faster, so brush the cooled layers with 2 tablespoons apricot jam before frosting to add extra moisture. 🌱
Dairy-Free Options
Swap the 1 cup unsalted butter for 1 cup dairy-free butter like Miyoko’s or Earth Balance, and replace the 0.5 cup whole milk with 0.5 cup oat milk or almond milk.
For the frosting, use 1 cup coconut cream (chilled overnight) instead of heavy whipping cream, and 0.5 cup dairy-free butter for the fat. The texture will be slightly lighter but still rich. I recommend adding 1 teaspoon lemon juice to stabilize the coconut cream.
Egg-Free Substitution
Replace the 3 large eggs with 3 tablespoons ground flaxseed mixed with 9 tablespoons water (let sit for 5 minutes to gel). This works surprisingly well for binding the cake layers. For the frosting, add 1 tablespoon cornstarch to the powdered sugar to help stabilize it without eggs.
I’ve tested this substitution and found the cake stays moist for up to 3 days when stored properly in an airtight container.
Lower Sugar Version
Reduce the granulated sugar to 1 cup and the powdered sugar to 2.5 cups, then add 2 tablespoons monk fruit sweetener (like Lakanto) to maintain sweetness without spiking blood sugar. The cake will still be tender, but the frosting may be slightly less stable.
To compensate, chill the frosting for 1 hour before assembling. I’ve found this version works best when served the same day—it holds up well for 24 hours refrigerated.
Nut-Free Considerations
This recipe is naturally nut-free, but always check labels on ingredients like vanilla extract and baking powder for cross-contamination warnings. For extra safety, use a dedicated nut-free kitchen area if you’re highly sensitive.
The vanilla bean paste and powdered sugar are typically safe, but brands like Gourmet Gift Baskets clearly label their products as nut-free. I recommend keeping a separate container of powdered sugar on hand for nut-free baking to avoid any accidental exposure.
Nutrition facts
Frequently asked questions
Why does this recipe use light brown sugar instead of white?
The light brown sugar adds moisture and subtle caramel notes that keep the cake tender for days. The molasses in brown sugar also enhances the vanilla flavor while preventing dryness. For a lighter color, use white sugar but add 1 tablespoon extra milk to compensate for the lost moisture.
Can I make this cake in a different pan size?
Yes, but adjust baking time. For a 7-inch pan, bake 30-35 minutes; for a 5-inch pan, bake 20-25 minutes. The batter depth should be about 1.5 inches thick. Always use the toothpick test—insert in the center until clean crumbs appear.
How do I prevent cracks in the frosting?
Chill the cake for 2 hours before frosting completely. Use a bench scraper to create clean edges, and work quickly in a cool kitchen (below 70°F). For extra stability, add 1 teaspoon meringue powder to the frosting. If cracks appear, cover with extra powdered sugar or edible gold leaf.
What’s the best way to store leftover cake?
Keep unfrosted layers in an airtight container with parchment between them for 2 days at room temperature. Frosted cake lasts 3 days refrigerated. For longer storage, freeze unfrosted layers (wrapped tightly) for 1 month. Thaw overnight before frosting. Never freeze with frosting—it becomes grainy.
Can I substitute vanilla extract for vanilla bean paste?
Yes, but double the vanilla extract (4 teaspoons total). For best results, add a scraped vanilla bean pod during mixing. The paste provides visible specks and deeper flavor. If you can’t find paste, use 1 teaspoon vanilla extract plus ½ teaspoon vanilla sugar (simmer vanilla bean in sugar and cool).

- 12 Bean Chili Recipe: Hearty Slow-Cooked Depth With 12 Legumes - October 17, 2026
- 5 Seed Bread Recipe: Nutty Crunch and Artisan Flavor in One Loaf - October 17, 2026
- 1 Lb Macaroni Salad Recipe: Bold, Crunchy, and Crowd-Pleasing - October 17, 2026