
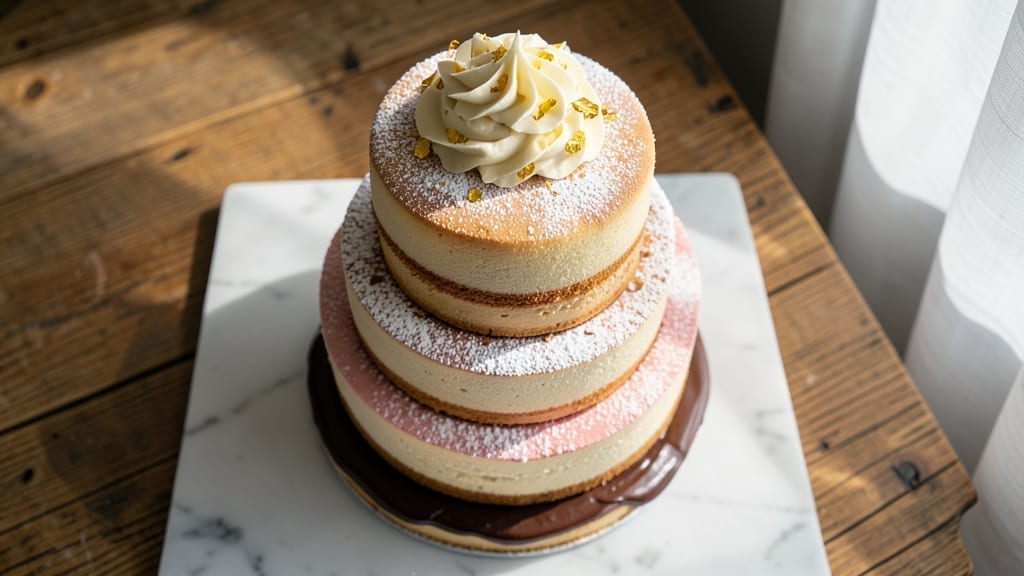
A 6-inch tall cake isn’t just dessert—it’s a statement piece that transforms any celebration into something extraordinary. This recipe delivers layers of vanilla bean swirls and velvety frosting that create both height and elegance without the complexity.
The secret lies in precise measurements, proper layering, and a sturdy crumb coat that holds every swirl in place.
What sets this cake apart is its foolproof structure—each layer is baked to perfect doneness, ensuring stability while maintaining moisture. The vanilla bean paste infuses every bite with aromatic richness, while the buttercream frosting, piped in generous swirls, creates both visual drama and structural support.
No special equipment is needed, just patience and attention to technique.
By the time you’re done, you’ll have a showstopping cake that stands tall and proud, with clean layers, smooth frosting, and swirls that look like they came from a professional bakery.
The frosting isn’t just decorative—it’s designed to hold its shape, so your cake stays impressive from first slice to last.
Perfect for birthdays, anniversaries, or even a special Sunday treat, this recipe scales beautifully for any occasion. Whether you’re a beginner or an experienced baker, the step-by-step instructions will guide you to a cake that’s as delicious as it is stunning. Let’s get started!
Ingredients for 6 inch tall cake
Twelve ingredients, four layers—this is how you build a showstopping cake that stands tall.
| Ingredient | Amount | Notes |
|---|---|---|
| All-Purpose Flour 🌾 | 2 ½ cups | Sifted for light texture |
| Unsalted Butter 🧈 | 1 ½ cups | Cold, cubed for baking |
| Granulated Sugar 🍚 | 2 cups | Superfine for smoother layers |
| Vanilla Bean Paste 🌿 | 2 tbsp | High-quality for rich flavor |
| Large Eggs 🥚 | 4 whole | Room temperature for even mixing |
| Baking Powder 🍞 | 2 tsp | Freshly measured for lift |
| Fine Sea Salt 🧂 | ½ tsp | Diamond Crystal preferred |
| Whole Milk 🥛 | 1 cup | Room temperature for batter |
| Vanilla Extract 🌸 | 2 tsp | Pure Madagascar preferred |
| Buttercream Frosting 🧈 | 4 cups | Homemade for stability |
| Powdered Sugar 🍚 | 3 cups | Sifted for smooth frosting |
| Heavy Whipping Cream 🥛 | 1 ½ cups | Cold for stiff peaks |
| Vanilla Extract 🌸 | 1 tbsp | Same as cake batter |
The flour and butter are your foundation. King Arthur flour or Gold Medal gives the best structure—no substitutions here. For butter, Plugrá or Land O’Lakes unsalted work perfectly, but avoid salted. The vanilla bean paste? Look for Madagascar or Tahitian in the baking aisle—it’s worth the splurge. If you can’t find paste, split a vanilla bean and scrape the seeds. Pre-sift your flour and powdered sugar to avoid lumps, and measure everything by weight if possible for precision. The eggs should be at room temperature—cold eggs can cause cracks in your layers.
No vanilla bean paste? Double the vanilla extract, but you’ll miss that depth of flavor. Running low on powdered sugar? Sift granulated sugar through a fine-mesh sieve—it’s not ideal, but works in a pinch. For the buttercream, European-style butter (like Miyoko’s) gives richer flavor, but regular unsalted works fine. If you’re short on heavy cream, whipped topping from a can (like Redi-Whip) can substitute, but it won’t hold swirls as well. The frosting needs to be stiff but pipeable—if it’s too soft, chill it 10 minutes before piping. Pro tip: Use a piping bag with a star tip for those professional-looking swirls, but a ziplock bag with a corner snipped works too.
Store your cake layers wrapped in plastic at room temperature for up to 2 days—they’ll stay moist but not soggy. The frosting? Keep it refrigerated in an airtight container for up to 5 days, but bring it to room temperature before using. To assemble, level your layers with a serrated knife—a gentle sawing motion works best. For extra stability, chill the cake between layers and frosting. Leftovers? Slice and freeze individual portions—they thaw beautifully. And if you’re making this ahead? Bake the layers 1 day in advance, then assemble when ready to serve.
Why You’ll Love This Recipe
- Here’s what sold me: this feeds a crowd but costs less than takeout. All-purpose flour and butter are pantry staples, and eggs stretch further than you’d think. Plus, leftovers? Just slice and reheat—no sad, dry cake here. It’s my secret weapon for parties on a budget.
- No Mixer Needed: I swear by this recipe because it’s all about the creaming method—just butter, sugar, and a hand mixer (or even a whisk in a pinch). The butter gets light and fluffy in minutes, and the vanilla bean paste adds that deep, luxurious flavor without extra fuss.
- Butter-Sugar Magic: That first bite? Rich, tender crumb with a whisper of vanilla that lingers. The sugar caramelizes just enough to give it a subtle sweetness, but the flour keeps it light—no dry, heavy cake here. Honestly, it’s the kind of taste that makes people ask, “What’s in it?”
- Showstopper for Any Event: Six inches tall? Instant wow factor. It’s perfect for birthdays (no one expects a tower this size for a casual gathering), baby showers, or even just because. Between us, I’ve used it to impress at holiday dinners—minimal effort, maximum drama.
Step-by-step instructions for vanilla bean swirl cake
Here’s how to build a stunning six-inch cake with perfect vanilla layers and swirls.
Prepare the Cake Batter with Precision
Preheat your oven to 350°F and grease three 6-inch round cake pans with butter and line the bottoms with parchment paper. In a medium bowl, whisk together the 2.5 cups all-purpose flour, 2 tsp baking powder, and 0.5 tsp fine sea salt. Sift this dry mixture directly into a large mixing bowl for a light, airy texture.
In the bowl with dry ingredients, add the 1.5 cups unsalted butter (cold and cubed) and use a hand mixer on medium speed until the mixture resembles coarse crumbs with pea-sized butter pieces. Gradually add the 2 cups granulated sugar while mixing on low speed to prevent sugar from flying. This gradual incorporation creates a smoother batter.
Incorporate Wet Ingredients for Perfect Texture
Add the 4 whole large eggs one at a time, mixing on low speed after each addition until fully incorporated. The batter should be thick and smooth—if it looks slightly curdled, don’t worry, as the vanilla bean paste will help emulsify it. Stir in the 2 tbsp vanilla bean paste and 2 tsp vanilla extract, scraping down the sides of the bowl as needed.
In a separate small bowl, whisk together the 1 cup whole milk and let it sit at room temperature. With the mixer on low speed, gradually pour in the milk while mixing until just combined. The batter should be smooth but thick enough to hold peaks when dropped from a spoon. Overmixing at this stage can develop gluten, so stop as soon as it’s uniform.
Bake the Layers with Even Heat Distribution
Divide the batter evenly among the three prepared cake pans, filling each about ⅔ full. Tap each pan firmly on the counter 3-4 times to remove any air bubbles and ensure even rising. Bake in the preheated oven for 25-30 minutes, rotating the pans halfway through for even baking. The cakes are done when a toothpick inserted into the center comes out clean and the tops spring back when gently pressed.
Remove the cakes from the oven and let them cool in their pans for 10 minutes, then transfer to a wire rack to cool completely. While they cool, prepare your buttercream frosting by beating the 1.5 cups heavy whipping cream to stiff peaks, then gradually adding the 3 cups powdered sugar and 1 tbsp vanilla extract until smooth and fluffy. This buttercream will create the signature swirls and hold the cake together beautifully.
Assemble the Cake with Decadent Frosting Layers
Place the first cake layer on a cake stand or plate. Spread a thin layer of the 4 cups buttercream frosting (about ¼ cup) evenly over the top, leaving a ½-inch border uncovered. This creates a “crust” that prevents the filling from oozing out. Place the second cake layer on top, then repeat the process with another thin layer of frosting. Finally, place the third layer and cover the entire cake with a ¼-inch thick layer of frosting, smoothing with a spatula for an even surface.
Chill the assembled cake in the refrigerator for 30 minutes to firm up the frosting. Once chilled, use an offset spatula to create swirls by dragging the frosting from the center outward in smooth, overlapping motions. For extra drama, pipe additional buttercream rosettes or borders around the edges using a piping bag fitted with a star tip. The contrast of the swirls against the smooth frosting will make your cake look like a professional bakery creation.
Pro Tips For Making 6 Inch Tall Cake
- Cream Butter Slowly: I learned this the hard way—dumping cold butter into sugar and whipping it into submission just makes a greasy mess. Instead, let the butter sit out for 30 minutes first, then beat it with the sugar on medium-high until it’s just pale yellow and fluffy. That’s the moment it’s ready to bind properly with the eggs.
- Sift the Flour Twice: Your future self will thank you—sift that flour before measuring it into the bowl. Not only does it aerate the batter for a lighter rise, but it also prevents lumps that turn into dense pockets in a 6-inch cake. (Yes, even if you’re impatient like me.)
- Room-Temp Eggs Matter: Cold eggs from the fridge? They’ll curdle when they hit the warm butter mixture, and you’ll end up with a cake that’s gummy instead of tender. Pop them in a bowl of warm water for 10 minutes—just enough to bring them to about 70°F. Trust me, the texture difference is night and day.
- Test for Doneness Early: Skip the guesswork—insert a toothpick at the center of the cake when the edges look set. If it comes out clean but the cake still jiggles slightly, it’s done. Overbaking dries out the layers, and you’ll end up with a sad, dense tower. Pull it out just before you think you should.
Common mistakes when making your 6 inch tall cake
Overmixing the Batter
I’ve seen beginners whip the batter until it’s smooth and silky, but that’s a recipe for dense, tough layers. Once the flour and butter form coarse crumbs, mix just until combined—about 30 seconds after the last ingredient. Overmixing develops gluten, which makes your cake layers chewy instead of tender. 🌾
Skipping the Room-Temp Eggs
Cold eggs can cause cracks or uneven baking in your layers. Let them sit at room temperature for at least 30 minutes before using. If you’re in a rush, place them in warm water for 5 minutes to speed up the process.
Trust me, this small step makes a huge difference in texture.
Uneven Layer Heights
If your layers aren’t the same height, your cake will wobble like a drunk piñata. Use a serrated knife to level the tops after baking—this ensures clean, even layers. Pro tip: Place the cake on a cutting board and gently saw back and forth until flat.
A cake leveler tool works too, but a knife is more precise for small cakes.
Ignoring the Crumb Coat
That thin layer of frosting between cake layers isn’t just for looks—it’s structural. Without it, filling seeps out, and your swirls won’t hold. Spread a ¼-inch layer of frosting on each layer before stacking, leaving a ½-inch border uncovered. Chill for 10 minutes between layers to set it up.
Chilling Too Long Before Frosting
If your cake sits too long before frosting, it can dry out or absorb moisture from the frosting. Assemble it within 2 hours of baking, but don’t rush—let layers cool completely first.
For extra insurance, brush each layer with simple syrup (¼ cup sugar + ¼ cup water) before frosting to keep them moist.
Using Soft Frosting for Swirls
If your buttercream is too soft, those elegant swirls will collapse like a deflated balloon. Chill your frosting for 15-20 minutes before piping, or add 1 tbsp cornstarch to stabilize it.
For the swirls, use a Wilton 1M tip or a ziplock bag with a corner snipped—drag the frosting from the center outward in smooth strokes for that bakery-worthy look. ✨
Nutrition facts
Frequently asked questions
How do I adjust this recipe for a 4-inch or 8-inch cake?
For a 4-inch cake, reduce each layer to ⅓ of the batter (bake in one 4-inch pan) and use 1 cup frosting total. For an 8-inch cake, increase to 4 layers (bake in two 8-inch pans) and double the frosting to 8 cups. Always adjust baking time by 2-3 minutes per inch of height—test with a toothpick.
Can I substitute vanilla extract for vanilla bean paste?
Yes, but the flavor won’t be as rich. Use double the vanilla extract (4 tsp total) and add ½ tsp ground vanilla beans (or scrape seeds from 1 bean) for depth. The paste’s seeds create those signature specks in the batter that extract alone can’t replicate.
Why did my cake layers sink in the middle?
This usually happens from overmixing (developing gluten) or opening the oven too soon. Let cakes cool 10 minutes in pans before removing, and avoid peeking at them while baking. For extra support, chill the pans 15 minutes before baking. A toothpick test is key—wait until it comes out clean but the cake springs back when pressed.
How do I make this cake gluten-free?
Replace the all-purpose flour with a 1:1 gluten-free baking flour blend (like Bob’s Red Mill) plus ½ tsp xanthan gum. Reduce the milk by 2 tbsp (GF flours absorb more liquid) and increase the butter by 1 tbsp for moisture. Chill the batter 30 minutes before baking to prevent spreading. Frosting stays the same—just ensure your powdered sugar is GF.
Can I make this cake ahead of time?
Bake the layers 1-2 days ahead and store wrapped at room temperature. Assemble the cake 4 hours before serving—this gives the frosting time to set. For long-term storage, freeze fully assembled (unfrosted) layers for up to 1 month. Thaw overnight in the fridge before decorating. The frosting can be made 3 days ahead and kept refrigerated.

- Baked Potatoes in Crock Pot Recipe: Buttery Interiors and Crispy Top Magic - November 1, 2026
- Braised Beef Short Ribs Recipe: Crock Pot Fall-Off-Bone Magic in 6 Hours - November 1, 2026
- Crock Pot Cocoa Recipe: Velvety Warmth With Hidden Spice Magic - November 1, 2026