
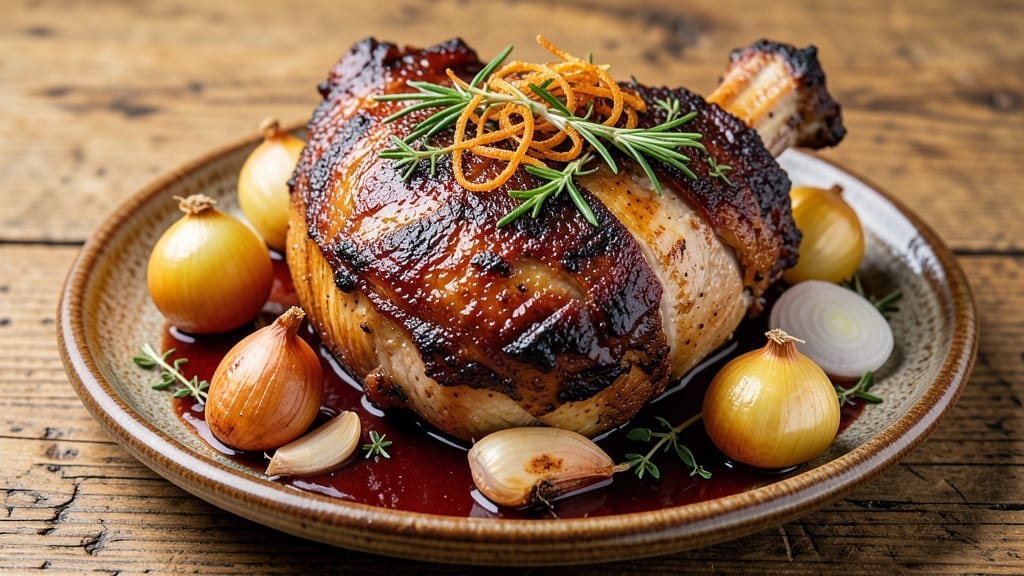
Transforming a tough cut into melt-in-your-mouth perfection, this 7-bone chuck roast recipe delivers restaurant-quality results right in your oven. The secret lies in searing the meat first to lock in juices, then slow-braising until it practically falls apart—no pressure cooker required.
I perfected this method during a particularly chilly Portland winter when I needed a dish that could feed a crowd without spending hours in the kitchen.
What sets this recipe apart is the balance of time and tenderness. While the roast braises for 4-5 hours at a low temperature, the aromatics—garlic, onions, and herbs—infuse every bite with deep, savory flavor.
The key technique is resting the meat before carving, allowing those juices to redistribute for maximum succulence. This isn’t just dinner; it’s a meal that becomes the centerpiece of any gathering.
By the time you’re done, you’ll have a roast that shreds effortlessly, yielding tender, juicy pieces perfect for sandwiches, tacos, or serving alongside roasted vegetables. The rich, caramelized sauce clings to every bite, making each forkful worth the wait.
This is comfort food at its finest—substantial enough for a family dinner but impressive enough for company.
For those with leftovers (and trust me, there will be), the roast keeps beautifully in the fridge for up to 5 days, making it ideal for meal prep. Pair with mashed potatoes, crusty bread, or a simple green salad to round out the meal.
Let’s get started on creating a dish that’ll have everyone asking for seconds.
Ingredients for 7 bone chuck roast recipe oven
Six ingredients transform tough chuck roast into melt-in-your-mouth perfection—no fancy techniques needed.
| Ingredient | Amount | Notes |
|---|---|---|
| Chuck Roast (7-bone) 🥩 | 4 lb | Center-cut for best tenderness |
| Yellow Onions 🧅 | 2 whole | Medium size, sliced into half-moons |
| Garlic Cloves 🧄 | 6 cloves | Peeled, smashed for maximum flavor |
| Fresh Rosemary 🌿 | ¼ cup | Chopped, stems removed |
| Fresh Thyme 🌿 | 1 tbsp | Leaves only, stems discarded |
| Beef Broth 💧 | 3 cups | Low-sodium preferred |
| Red Wine 🍷 | 1 cup | Bold dry variety like Cabernet |
| Tomato Paste 🍅 | 2 tbsp | Smooth, not chunky |
| Olive Oil 🫒 | 2 tbsp | Extra-virgin for searing |
| Salt 🧂 | 2 tsp | Kosher or sea salt |
| Black Pepper 🌶️ | 1 tsp | Freshly ground preferred |
| Balsamic Vinegar 🍶 | 1 tbsp | For sauce depth |
| Honey 🍯 | 1 tbsp | Light variety for balance |
| All-Purpose Flour 🌾 | 1 tbsp | For sauce thickening |
The chuck roast is the star here, so pick a center-cut 7-bone—it’s more tender and holds up better to long braising. I always grab mine from Costco when I’m feeding a crowd, but the regular supermarket chuck works just fine. Look for good marbling—those little fat streaks are what keep the meat juicy. If you’re buying a whole roast, trim any large fat caps before searing. The onions and garlic? Yellow onions add sweetness, while garlic brings depth, so don’t skimp—smash those cloves for extra flavor punch. Fresh herbs make all the difference too—rosemary’s piney notes and thyme’s earthiness elevate everything.
No red wine? Substitute extra beef broth with a splash of balsamic vinegar—it gives that same tangy depth. Fresh rosemary hard to find? Dried works at half the amount, but trust me, fresh is worth hunting down. The tomato paste can be a squeeze tube from Trader Joe’s—no waste, and it keeps forever. If you’re short on time, pre-minced garlic works, but fresh smashed cloves release more flavor. For the honey, light varieties like clover won’t overpower the dish. And if you’re worried about the flour making the sauce too thick, just add a splash more broth at the end—it’s easy to adjust.
This roast tastes even better the next day once all the flavors meld together. Store leftovers in an airtight container in the fridge for up to 5 days—perfect for quick lunches. The sauce thickens as it cools, so you can reheat portions with a splash of water or broth. For longer storage, freeze individual portions for up to 3 months. I always make a double batch because it disappears fast—sandwiches, tacos, or just reheated with crusty bread. The sauce keeps separately for 1 week in the fridge, so you can use it on other dishes too.
Why You’ll Love This Recipe
- Set-and-Forget Magic: I swear by this one—toss the roast and veggies in the oven, then walk away. The rosemary and thyme infuse while you handle emails or binge a show. That slow-cooked garlic aroma? Pure reward for minimal effort.
- Deep, Caramelized Crust: Here’s what sold me—the onions and garlic get golden on the edges while the meat stays juicy inside. The rosemary leaves crisp up just enough to add that earthy bite, like a hug from a French bistro.
- Weeknight Crowd-Feeder: Between us, this is my secret weapon for game nights or lazy Sundays. One roast feeds six, and the leftovers? Even better the next day. (Yes, even on a Tuesday night.)
- Budget Meal, Luxe Feel: A 7-bone chuck roast costs less than half the price of a fancy cut, but it delivers restaurant-quality flavor. Fresh herbs elevate it without breaking the bank—no fancy techniques, just honest, satisfying comfort.
Step-by-step instructions for 7-Bone chuck roast
Here’s how to transform a tough cut into melt-in-your-mouth perfection with minimal effort.
Sear the Chuck Roast for Deep Flavor
Preheat your oven to 300°F—we’ll use it later, but first we need to build flavor. Heat 1 tablespoon of the olive oil in a large Dutch oven over medium-high heat until shimmering. Place the 4 lb chuck roast fat-side down in the pan and let it sit undisturbed for 5 minutes until a deep golden crust forms.
Flip the roast and sear the other side for another 5 minutes. You’ll hear the fat sizzling—this is where the magic happens. Remove the roast and set it aside on a plate. The goal here is to create a flavorful crust that will infuse the braising liquid later. If you’re worried about overcrowding, work in batches if needed, but I’ve never had this issue with a Dutch oven.
Build the Aromatic Base
In the same Dutch oven, add the remaining 1 tablespoon olive oil and let it heat for 30 seconds. Add the sliced 2 whole yellow onions and cook for 5-6 minutes until they begin to soften and turn translucent. Here’s the thing—don’t rush this step. Onions should caramelize slightly at the edges for maximum flavor.
Add the 6 smashed garlic cloves, 0.25 cup chopped fresh rosemary, and 1 tablespoon fresh thyme leaves. Stir everything together and cook for another 1 minute until the garlic becomes fragrant. This aromatic base forms the flavor foundation for your roast, so take your time here. The goal is to develop those deep, savory notes that will permeate every bite.
Deglaze and Create the Braising Liquid
Pour in the 1 cup red wine and scrape up all those delicious browned bits from the bottom of the pan using a wooden spoon. This deglazing step captures all the flavor that would otherwise burn. Let the wine simmer for 2-3 minutes until it reduces by about half and becomes slightly syrupy.
Add the 2 tablespoons tomato paste, 3 cups beef broth, 2 teaspoons salt, and 1 teaspoon black pepper. Stir everything together until the tomato paste dissolves completely. This creates the perfect braising liquid that will tenderize the chuck roast while infusing it with rich flavors. The liquid should come about halfway up the sides of the roast—if it’s too shallow, add a splash of water.
Braise Until Fork-Tender
Return the chuck roast to the Dutch oven, fat-side up. Bring the liquid to a gentle simmer, then cover tightly with the lid. Transfer to the preheated 300°F oven and braise for 3 hours. This low-and-slow cooking method is what transforms tough chuck roast into tender, shreddable meat.
Here’s where patience pays off. Check the roast after 2 hours—it should be softening but still have some resistance. If it’s falling apart easily, it’s ready. If not, continue cooking. The internal temperature should reach 200-205°F when done. Don’t be tempted to lift the lid and peek—every time you do, you lose heat and moisture, extending the cooking time.
Finish with Sweet and Tangy Sauce
Once the roast is fork-tender, remove it from the oven and transfer it to a cutting board. Tent loosely with foil and let it rest for 15-20 minutes. While it rests, increase the oven temperature to 400°F.
Strain the braising liquid through a fine-mesh sieve into a saucepan, discarding the solids. Return the liquid to the Dutch oven and add the 1 tablespoon balsamic vinegar and 1 tablespoon honey. Simmer uncovered for 5-7 minutes until the sauce thickens slightly. This step adds a beautiful balance of sweet and tangy notes that complement the rich beef flavors.
Create a Crispy Top and Serve
Return the roast to the Dutch oven and spoon the sauce over the top. Sprinkle 1 tablespoon all-purpose flour evenly over the roast. Place the Dutch oven back in the oven and broil for 3-5 minutes** until the top develops a golden-brown crust. This final step adds texture and visual appeal to your dish.
Slice the chuck roast against the grain into ¼-inch thick pieces and serve with the reduced sauce spooned over the top. The meat should be so tender it practically falls apart with a fork. This dish tastes even better the next day as the flavors continue to meld, so consider making extra for leftovers—it’s perfect for sandwiches or tacos.
Pro Tips For Making 7 Bone Chuck Roast Recipe Oven
- Sear First, Then Roast: Chuck roast needs that crust to keep it juicy, so don’t skip the sear. Pat it bone-dry, then hit it with high heat in your oven (425°F) for 10-15 minutes—yes, even if it looks raw inside. I learned this the hard way when my roast turned out gray and sad.
- Slice Onions for Even Cooking: Whole onions burn, half-moons take forever—slice them into even ¼-inch pieces. They’ll caramelize faster and release flavor without turning to mush. Trust me, your roast (and your patience) will thank you.
- Don’t Crowd the Pan: If you’re using a Dutch oven, resist the urge to pile everything in. Overcrowding steams the onions instead of browning them. Work in batches—2-3 minutes per side max—so they get crispy edges and deep flavor.
- Rest Under Foil: Pull the roast out 15 minutes early, tent it loosely with foil, and let it sit. The internal temp will climb to perfect doneness (145°F for medium-rare) while the juices redistribute. Skipping this step means dry meat—no one wants that.
Essential equipment for perfect results
Dutch Oven Essentials
Your Dutch oven is the workhorse of this recipe—I swear by my Le Creuset 6-quart for even heat distribution and durable construction. The deep sides prevent spills during braising, and the tight-fitting lid traps moisture perfectly.
If you don’t own one, a heavy-bottomed pot with a lid will work, but you might need to adjust cooking times slightly. For budget-friendly options, check out Lodge’s 5.5-quart Dutch oven—it’s my go-to for weeknight cooking. 🔥
Meat Thermometer Must-Have
Invest in a reliable meat thermometer—I use the ThermoWorks Smoke for its accuracy and durability. The probe should reach the thickest part of the roast to monitor 200-205°F internal temperature.
Without one, you risk overcooking or undercooking. For a more affordable option, the Taylor Precision Digital works just as well. Never guess with meat temps—this is where precision matters most.
Wooden Spoon Set
A set of wooden spoons is non-negotiable for this recipe. I use OXO Good Grips because they’re heat-resistant and won’t scratch your Dutch oven. Wood helps scrape up those precious browned bits during deglazing, which adds depth to your sauce.
Avoid metal utensils—they can react with acidic ingredients like wine and tomato paste. Keep one by your stove at all times for braising recipes.
Fine-Mesh Sieve
For that silky-smooth sauce, a fine-mesh sieve is essential. I prefer the OXO Good Grips Stainless Steel because it’s durable and easy to clean. This tool separates the braising liquid from solids, giving you a clean, flavorful sauce.
If you don’t have one, a cheesecloth works in a pinch, but it requires more effort. Strain the liquid while warm for best results—it flows more easily and leaves fewer solids behind.
Instant-Read Thermometer
An instant-read thermometer is your secret weapon for perfect doneness. I keep one handy for checking both the meat and sauce temperatures. The Thermoworks Thin Needle Probe is my favorite because it’s fast and accurate.
Use it to verify the 400°F broil temperature when finishing the roast. This ensures your sauce reduces properly without burning. Keep it within reach while cooking for quick checks.
Basting Brush
A basting brush helps create that beautiful golden crust during the final broiling step. I use a silicon brush because it’s heat-resistant and easy to clean. Brush the roast with its own sauce before broiling to add moisture and color.
This tool also comes in handy for basting other meats like turkey or ham. Keep one in your kitchen for those finishing touches that make all the difference. 💫
Nutrition facts
Frequently asked questions
Can I use a different cut of beef instead of chuck roast?
While chuck roast is ideal for this recipe, you can substitute with bottom round roast or brisket—both work well with long braising. However, avoid leaner cuts like sirloin or tenderloin as they won’t become tender enough. If using brisket, increase cooking time by 30-45 minutes since it’s denser.
How do I know when the roast is fully cooked?
Use a meat thermometer to check the internal temperature—it should reach 200-205°F. The meat should also be fork-tender, falling apart easily when tested. If it’s still slightly firm, return it to the oven for another 30 minutes covered. Never rely on color alone.
Can I make this recipe in a slow cooker instead?
Sear the roast first, then transfer everything to a 6-quart slow cooker on low for 8-10 hours. Skip the broiling step at the end—just shred the meat and mix with the sauce. The flavors develop beautifully this way, though the texture will be slightly more shredded than oven-braised.
What’s the best way to reheat leftovers?
Reheat in a skillet with a splash of beef broth over medium-low heat until warmed through (165°F). For convenience, microwave portions covered for 2-3 minutes, stirring halfway. Never reheat in the oven—it dries out the meat. Leftovers keep well for 5 days in the fridge.
Why did my roast turn out dry?
This usually happens from overcooking or not resting properly. Always let the roast rest 15-20 minutes before slicing—this lets juices redistribute. Also, check your oven temperature with an instant-read thermometer—if it runs hot, reduce to 275°F instead. Don’t skip the searing step either!

- Pea Soup Instant Pot Recipe: Velvety Green Smoothness in 20 Minutes - November 1, 2026
- Pork Loin Pulled Pork Crock Pot Recipe: Slow-Smoked Tenderness With Zero Dryness - November 1, 2026
- Baked Potatoes in Crock Pot Recipe: Buttery Interiors and Crispy Top Magic - November 1, 2026