
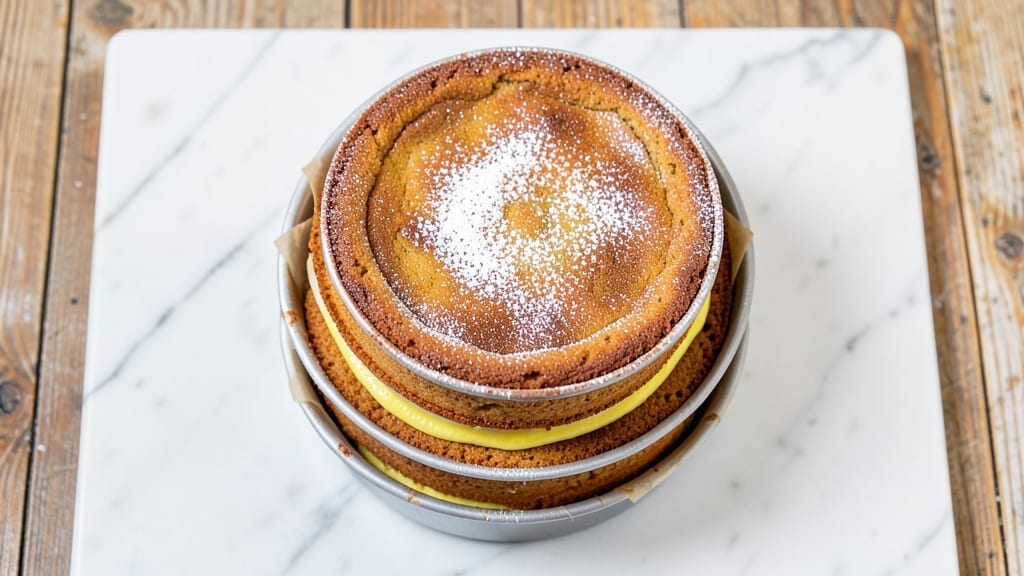
Mastering a 7-day cake that stays moist and delicious isn’t just possible—it’s a game-changer for special occasions. This recipe transforms traditional layering techniques into a foolproof process, ensuring each slice tastes fresh even on day seven.
The secret lies in precise baking times, strategic fillings, and storage methods that lock in moisture without sacrificing texture.
Start with three perfectly baked sponge layers, each cooled completely to prevent steam buildup that causes sogginess. Between layers, a light custard filling (not too sweet) acts as a moisture barrier while adding richness.
The final touch? A stabilized buttercream that creates a protective seal, preventing dryness over time. Every step is designed to maintain that just-baked quality.
By day seven, your cake will still deliver tender, moist layers with crisp edges—no rubbery or stale bites in sight. The key is balancing baking temperatures, fillings, and storage conditions to preserve freshness.
Whether for a celebration or a showstopping dessert, this method ensures your cake stays as impressive as the day it was made.
Ready to elevate your cake game? Let’s break down the step-by-step process, from baking to final assembly, so you can serve a cake that defies the “day-old” rule. Here’s how to make it happen.
Ingredients for 7 day cake
Three layers, two fillings, one secret to lasting moisture—here’s how to make it happen.
| Ingredient | Amount | Notes |
|---|---|---|
| All-Purpose Flour 🌾 | 3 ½ cups | Sifted for light texture |
| Granulated Sugar 🍚 | 2 ½ cups | Superfine preferred for smoothness |
| Unsalted Butter 🧈 | 2 cups | Room temperature, full-fat |
| Large Eggs 🥚 | 6 whole | Room temperature for even mixing |
| Whole Milk 🥛 | 1 ½ cups | Room temperature for best incorporation |
| Baking Powder 🧂 | 2 tsp | Diamond Crystal preferred |
| Salt 🧂 | ½ tsp | Fine sea salt preferred |
| Vanilla Extract 🍯 | 2 tsp | Pure Madagascar bourbon |
| Light Corn Syrup 🍯 | ½ cup | For moisture retention |
| Heavy Cream 🥛 | 1 ½ cups | Cold for stable buttercream |
| Powdered Sugar 🍚 | 4 cups | Sifted for smooth buttercream |
| Lemon Zest 🍋 | 1 tbsp | Freshly grated for brightness |
| Lemon Juice 🍋 | 2 tbsp | Freshly squeezed for acidity |
| Egg Yolks 🥚 | 4 whole | For custard filling |
| Whole Milk 🥛 | 1 cup | For custard filling |
| Granulated Sugar 🍚 | ½ cup | For custard filling |
| Cornstarch 🌾 | 2 tbsp | For custard stability |
The flour is non-negotiable here—King Arthur or Gold Medal brands work best for that tender crumb. Room-temperature butter is critical for even mixing, so take it out 30 minutes before baking. The custard filling is where moisture magic happens, so use egg yolks instead of whole eggs to prevent curdling. For the custard, light corn syrup keeps it silky for days, while the lemon zest adds brightness that won’t fade. Pro tip: measure your dry ingredients by weight if you’re feeling fancy—1 cup flour = 130g—for perfect consistency every time.
No vanilla extract? Almond extract at half the amount works in a pinch, but you’ll miss that rich depth. Short on corn syrup? Honey or maple syrup will work, but reduce the custard’s liquid by 1 tbsp to keep it stable. The buttercream needs cold heavy cream—if it’s too warm, your frosting will be soupy. For the sponge layers, sift your dry ingredients to avoid dense cake. And if you’re baking in high humidity? Add 1 tbsp extra flour to each layer to compensate. The custard filling can be made a day ahead—store it in the fridge and stir before using.
Store your cake in an airtight container at room temperature for up to 5 days, or in the fridge for 7 days. The buttercream acts as a moisture seal, so don’t skip the final layer—it’s what keeps everything fresh. For long-term storage, wrap each layer individually in plastic wrap, then assemble when ready to serve. The custard filling can be reheated gently if it thickens too much—just warm it with a splash of milk. And if you’re serving it cold? Chill for 2 hours before slicing for cleaner cuts.
Why You’ll Love This Recipe
- Pantry Staples Only: I swear by this recipe because it uses what’s already in my cupboards—no specialty ingredients, just flour, sugar, butter, eggs, and milk. That buttercream? Rich but simple, with just enough sugar to make it irresistible without tasting like a bakery overdid it.
- Moist for Days: This isn’t your dry, crumbly cake that turns into sawdust by Wednesday. The milk keeps it tender, and the butter ensures that seventh slice is just as good as the first—no sad, stale aftertaste here.
- Birthday to Brunch: Serve it frosted for a celebration or slice it plain with coffee—this cake adapts to any moment. My kids ask for it at sleepovers, and my book club requests it for potlucks. One batch, endless uses.
- Budget-Friendly Magic: A single batch costs me less than takeout, and leftovers? They’re my secret weapon for busy mornings. Wrap a slice in foil, and it’s breakfast on the go—no reheating required.
Step-by-step instructions for a 7-Day cake with perfect moisture
Here’s how to build a cake that stays deliciously moist for a full week.
Prepare the Cake Layers for Maximum Moisture
Preheat your oven to 350°F and grease three 9-inch round cake pans with butter or baking spray. Line the bottoms with parchment paper for easy removal. In a large bowl, whisk together the 3.5 cups all-purpose flour, 2.5 cups granulated sugar, 2 tsp baking powder, and 0.5 tsp salt. This dry mixture should be smooth with no lumps—sift it if needed for the lightest texture.
In a separate bowl, cream the 2 cups unsalted butter and 6 whole large eggs on medium speed until light and fluffy, about 3-4 minutes. This step is crucial—it incorporates air that helps create a tender crumb. Gradually add the 1.5 cups whole milk and 0.5 cup light corn syrup while mixing on low speed. The syrup acts as a moisture retainer, ensuring your cake stays fresh for days.
With the mixer running on low, alternately add the dry ingredients and 2 tsp vanilla extract in three additions. Mix just until combined—overmixing develops gluten, which can make the cake dense. Divide the batter evenly among the prepared pans and bake for 25-30 minutes, until a toothpick inserted in the center comes out clean. Let the layers cool in the pans for 10 minutes before transferring to a wire rack to cool completely.
Create the Lemon Custard Filling for Bright Flavor
While the cake layers cool, prepare the custard filling by combining the 4 whole egg yolks, 1 cup whole milk, 0.5 cup granulated sugar, and 2 tbsp cornstarch in a medium saucepan. Whisk vigorously to eliminate any lumps—this ensures a smooth, velvety texture. Place the pan over medium heat and cook, stirring constantly, until the mixture thickens enough to coat the back of a spoon, about 5-7 minutes.
Remove from heat and stir in the 1 tbsp lemon zest and 2 tbsp lemon juice. The bright citrus notes cut through the richness of the buttercream and keep the cake tasting fresh. Let the custard cool to room temperature before using. If it thickens too much, whisk in a splash of milk to reach a pourable consistency.
Assemble the Cake with Buttercream Layers
Once the cake layers are completely cool, level the tops if necessary using a serrated knife. Place the first layer on a cake stand or plate and spread a thin layer of the 1.5 cups heavy cream and 4 cups powdered sugar buttercream (whipped together until smooth) to help the filling adhere. Spoon about ½ cup of the lemon custard over the buttercream and spread it evenly, leaving a ½-inch border at the edges.
Repeat with the remaining two layers, adding buttercream and custard between each. For the top layer, simply place it on the cake without spreading buttercream or filling—this keeps the top clean for decorating. Chill the assembled cake in the refrigerator for at least 2 hours before frosting the exterior. This step prevents the layers from shifting while you work.
Frost and Decorate for a Professional Finish
Using the remaining buttercream, cover the entire cake with a crusting method—spread a thin layer of buttercream over the top and sides, then chill for 15 minutes to set. Repeat this process two more times, chilling between each layer. This technique creates a smooth, polished finish without cracking. Once fully frosted, use a spatula to create swirls or smooth the surface for a clean look.
For extra moisture retention, brush the exposed cake layers with a simple syrup made by dissolving ¼ cup granulated sugar in ¼ cup hot water. This keeps the cake tender and prevents drying out over time. Store the cake in an airtight container at room temperature for up to 3 days or refrigerate for up to 7 days. Bring it to room temperature before serving for the best texture and flavor.
Pro Tips For Making 7 Day Cake
- Measure Butter Cold: Take the butter straight from the fridge—no softening, no room-temperature nonsense. Creaming cold butter with sugar creates tiny air pockets that make the cake light and tender, not dense. I used to rush this step, and the cake always turned out heavier. Trust me, the fridge is your friend here.
- Sift the Flour Twice: Don’t just dump the flour into the bowl—sift it first, then sift it again after mixing the wet ingredients. This cuts out lumps and ensures even distribution, so the cake bakes uniformly. My first few batches had weird pockets of dryness until I learned this.
- Don’t Overmix the Batter: Mix the wet and dry ingredients just until combined—maybe 10-12 strokes with a spatula. Overmixing develops gluten, which makes the cake tough instead of soft. I’ve ruined perfectly good cakes by turning them into gluten-heavy bricks, and it’s not pretty.
- Use Room-Temp Eggs: Let the eggs sit out for 30 minutes before cracking them into the batter. Room-temperature eggs blend more smoothly with the butter and sugar, giving you a creamier texture. Cold eggs? They’ll make the batter look curdled, and that’s a vibe no one wants in their cake.
Best sauces and condiments for these flavors
Lemon Curd Topping
Swap the custard filling for a rich lemon curd made with 4 egg yolks, ½ cup lemon juice, ½ cup sugar, and 4 tbsp butter. Cook over low heat until thickened, then strain for a silky texture.
Spread between layers and on top for a tangy twist that keeps the cake bright and moist for days. 🍋
Chocolate Ganache
Replace the buttercream with a dark chocolate ganache made from 1 cup heavy cream and 8 oz dark chocolate (70% cocoa). Once cooled to room temperature, it creates a glossy, moisture-sealing layer.
Drizzle over the top or use as a filling between layers for a decadent flavor. This works especially well with a vanilla sponge.
Berry Compote
Use a strawberry or raspberry compote as a filling—simmer 1 cup mixed berries, 2 tbsp sugar, and 1 tbsp lemon juice until thickened. Cool completely before spreading between layers.
The natural fruit acids prevent dryness while adding vibrant color. Store compote in an airtight container in the fridge for up to 5 days.
Salted Caramel Sauce
For a sweet-salty balance, drizzle salted caramel sauce between layers or over the top. Make it with 1 cup sugar, ½ cup heavy cream, and a pinch of flaky sea salt.
Let it cool to a spreadable consistency before using. This sauce adds moisture while keeping the cake rich and indulgent. 💛
Coffee Buttercream
Infuse your buttercream with 1 tbsp instant coffee dissolved in 2 tbsp hot water before whipping. The coffee enhances the vanilla flavor while adding a subtle depth that pairs beautifully with chocolate or fruit fillings.
This works especially well for a mocha-themed cake and helps maintain moisture for the full week.
Honey Glaze Finish
Brush the top layer with a honey glaze made from ½ cup honey and 1 tbsp lemon juice before decorating. This adds a glossy sheen while keeping the cake ultra-moist.
The natural sweetness complements any filling and prevents the top from drying out during storage. Apply just before serving for the best results.
Nutrition facts
Frequently asked questions
Why does this cake stay moist for 7 days?
The secret lies in three key techniques: light corn syrup in the batter retains moisture, the lemon custard filling adds hydration between layers, and the buttercream crusting method creates an airtight seal. The custard’s acidity also prevents staling, while the syrup keeps the crumb tender.
Can I make the cake layers ahead of time?
Yes! Bake the layers up to 2 days ahead and store them wrapped tightly in plastic at room temperature. For longer storage, freeze them wrapped in plastic wrap for up to 1 month. Thaw overnight in the fridge before assembling. This gives you flexibility for multi-day projects like weddings.
How do I prevent the cake from drying out between layers?
Never skip the thin buttercream layer before adding filling—it acts as a moisture barrier. Also, ensure your custard is at room temperature before spreading, and avoid overfilling the layers. The buttercream’s fat content naturally preserves freshness. For extra protection, brush the top layer with simple syrup before decorating.
What’s the best way to store a partially frosted cake?
If you’ve assembled but not fully frosted, wrap the cake tightly in plastic wrap and refrigerate. For the final frosting, work in a cool environment (like a chilled kitchen) to prevent melting. Store the completed cake in an airtight container at room temperature for 3 days or refrigerate for 7 days. Always bring it to room temperature before serving.
Can I substitute the custard filling with something else?
Try berry compote, chocolate ganache, or salted caramel sauce—all maintain moisture while adding unique flavors. Just ensure your alternative filling is at room temperature before using. The key is keeping it pourable and not overly sweet to prevent sogginess.

- Baked Potatoes in Crock Pot Recipe: Buttery Interiors and Crispy Top Magic - November 1, 2026
- Braised Beef Short Ribs Recipe: Crock Pot Fall-Off-Bone Magic in 6 Hours - November 1, 2026
- Crock Pot Cocoa Recipe: Velvety Warmth With Hidden Spice Magic - November 1, 2026