
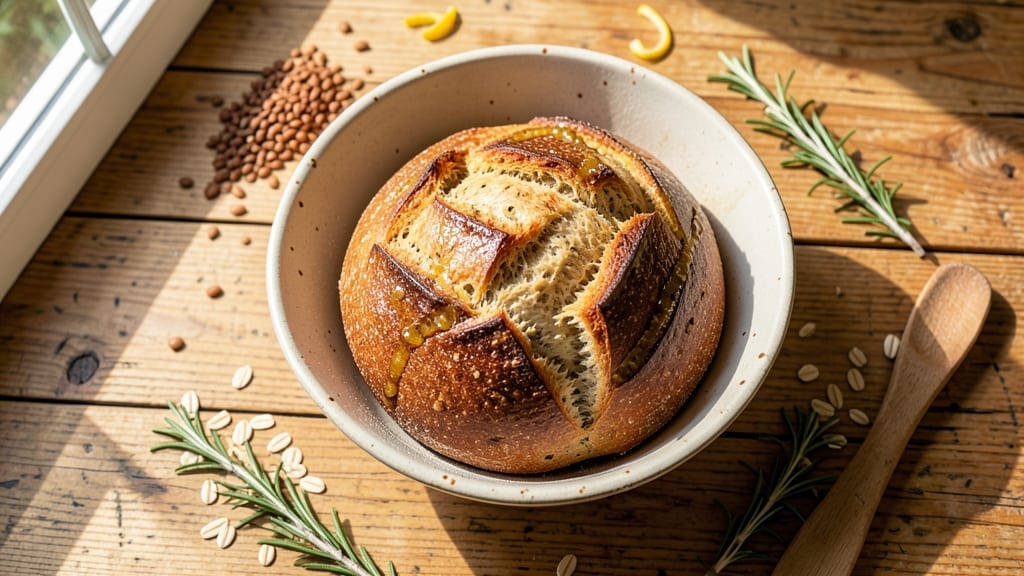
Baking a 7-grain flour bread with its nutty depth and chewy texture transforms ordinary meals into something extraordinary—this recipe delivers a crusty loaf that rivals artisanal bakeries. The secret lies in balancing hydration and fermentation, where whole grains absorb moisture differently than refined flour.
I’ve refined this method over years to ensure consistent rise and flavor, even when using a mix of grains like rye, wheat, and barley.
The dough requires patience—kneading develops gluten for structure while fermentation unlocks the grains’ natural sweetness. A slow fermentation (overnight in the fridge) enhances flavor complexity, while precise shaping creates the signature open crumb.
This isn’t just bread; it’s a textural experience with crispy edges, a soft interior, and a nutty aroma that fills your kitchen.
Perfect for sandwiches, toast, or serving alongside soups, this loaf stays fresh for days when wrapped properly. The recipe accommodates both yeast-based and sourdough starters, giving you flexibility based on your baking routine.
Whether you’re a home baker or a seasoned artisan, the step-by-step process ensures a foolproof, restaurant-quality result every time.
For those short on time, a shorter fermentation works, though flavor depth may be slightly diminished. Store leftovers in an airtight container or freeze slices for later use.
The key to success? Precision in measuring and timing—trust the process, and you’ll end up with a loaf that’s worth every minute of effort.
Ingredients for 7 grain flour bread
Seven distinct flours and one yeast packet—this is your complete toolkit for artisanal bread magic.
| Ingredient | Amount | Notes |
|---|---|---|
| Whole Wheat Flour 🌾 | 2 cups | High-protein for better gluten development |
| Rye Flour 🌾 | 1 ½ cups | Dark rye for nutty depth |
| Barley Flour 🌾 | ½ cup | Pearled barley for chewy texture |
| Spelt Flour 🌾 | ½ cup | Ancient grain for mild sweetness |
| Oat Flour 🌾 | ½ cup | Ground from rolled oats |
| Buckwheat Flour 🌾 | ¼ cup | Rich, earthy flavor profile |
| Cornmeal 🌽 | ¼ cup | Fine grind for texture |
| Active Dry Yeast 🍞 | 2 ¼ tsp | Instant yeast works too |
| Honey 🍯 | 2 tbsp | Wildflower for subtle floral notes |
| Salt 🧂 | 1 ½ tsp | Diamond Crystal preferred |
| Warm Water 💧 | 2 ½ cups | 110°F for yeast activation |
| Extra-Virgin Olive Oil 🫒 | 1 tbsp | For dough enrichment |
| Cornstarch 🌾 | 1 tbsp | For dusting and shaping |
The flours here are non-negotiable for that signature nutty depth. King Arthur or Bob’s Red Mill are your best bets for quality—avoid the cheap grocery store brands that taste like dust. Rye and buckwheat should be dark, almost black, for maximum flavor punch. Spelt and whole wheat? Stone-ground versions add texture. If you can’t find buckwheat flour, blend buckwheat groats yourself—it’s worth the effort. The yeast matters too: Saf-Instant is my go-to for foolproof activation. Store your flours in airtight containers or they’ll go rancid faster than you’d think.
Running short on one flour? Substitute with whole grain pastry flour at a 1:1 ratio—it’s less nutty but keeps the structure. No honey? Maple syrup or agave work in a pinch, though honey’s floral notes are ideal. The olive oil can be swapped for avocado oil if you’re avoiding nuts. For the water, room temperature is fine—just don’t use cold straight from the tap. The cornstarch isn’t just for dusting: it helps prevent sticking when shaping the dough. If you’re gluten-sensitive, this recipe isn’t for you—whole grains mean whole gluten development.
This dough needs patience—ferment overnight in the fridge for maximum flavor. Shape it loosely to avoid overworking the gluten. For storage, wrap tightly in a cotton towel inside a plastic bag—keeps it fresh for 5-7 days. Freeze slices for up to 3 months by wrapping individually. Pro tip: Toast slices directly from frozen for crispy edges. The bread’s aroma alone makes the waiting worthwhile—trust me, it’s worth every minute of fermentation time.
Why You’ll Love This Recipe
- No-Knead Magic: I swear by this—just mix the flours (whole wheat, rye, barley, spelt, oats), add water and yeast, let it rise overnight, and bake. No rolling, no punching, no stress. The dough practically does the work for you.
- Earthy Depth Explosion: That blend of rye and barley? Rich, toasty, almost nutty. The spelt adds a subtle sweetness, while the oats give it a satisfying chew. It’s the kind of bread that makes you slow down and actually taste each bite—no dry, bland loaf here.
- Weeknight to Picnic Hero: I keep a loaf in the freezer for lazy mornings, pack slices for sandwiches, and even toast it for charcuterie boards. Honestly, it’s my go-to for everything—from breakfast toast to dinner sides—without ever feeling repetitive.
- Pantry Stash Winner: Between us, this bread lasts forever. The rye and whole wheat keep it fresh for days, and I’ve had leftovers turn into croutons, breadcrumbs, or even French toast. Plus, using pantry staples? Budget-friendly without sacrificing flavor.
Step-by-step instructions for 7 grain flour bread
Here’s how to craft a rustic loaf with complex flavor and perfect texture using these seven specialty flours.
Activate the Yeast and Mix the Wet Ingredients
In a large bowl, combine the 2.5 cups warm water (about 110°F) with the 2 tbsp honey and 2.25 tsp active dry yeast. Let this sit for 5-10 minutes until you see frothy bubbles forming on the surface—this confirms the yeast is alive and ready to work. The honey not only feeds the yeast but also adds subtle floral sweetness that balances the earthy flours.
In a separate small bowl, whisk together the 1 tbsp extra-virgin olive oil and 1.5 tsp salt. The olive oil will enrich the dough while the salt enhances all the nutty flavors from the different flours. If your salt is iodized, reduce slightly to prevent over-salting the complex flavor profile.
Combine All Dry Ingredients
Add all the dry ingredients to your mixing bowl in this order: 2 cups whole wheat flour, 1.5 cups rye flour, 0.5 cup barley flour, 0.5 cup spelt flour, 0.5 cup oat flour, 0.25 cup buckwheat flour, and 0.25 cup cornmeal. The order matters here—the whole wheat and rye go first for better gluten development, while the buckwheat and cornmeal add texture at the end. Mix with a wooden spoon or dough whisk until the dry ingredients are fully combined and no flour pockets remain.
This blend of flours creates a beautiful contrast in texture and flavor—rye for depth, spelt for sweetness, and buckwheat for earthiness. The oat flour adds a pleasant chewiness that’s perfect for a crusty loaf. Don’t worry if the mixture looks uneven at this stage; it will come together during mixing.
Mix and Knead the Dough
Gradually add the yeast mixture and olive oil mixture to the dry ingredients while mixing with your hands or a dough whisk. The dough will be shaggy at first but will begin to come together as you work. Once all ingredients are incorporated, turn the dough out onto a lightly floured surface and knead for 8-10 minutes until smooth and elastic. The dough should be slightly tacky but not sticky—add more cornstarch if needed to prevent sticking.
This dough is different from traditional bread dough because of the high proportion of whole grains and alternative flours. It won’t develop as much gluten as wheat-only dough, but that’s okay—we want to preserve the unique textures each flour brings. The kneading should be firm but not aggressive to avoid overworking the delicate gluten structure.
First Rise and Shaping
Lightly oil a large bowl, place the dough inside, and cover with a damp towel or plastic wrap. Let it rise in a warm place for 1.5-2 hours or until it has doubled in size. The dough should be puffy and jiggly when gently pressed—this indicates proper fermentation. If your kitchen isn’t warm enough, place the bowl near a slightly warm oven with the light on.
Once risen, punch down the dough to release air and shape it into a round loaf or a batard shape. For a rustic look, you can shape it into a freeform boule. Dust your work surface with cornstarch to prevent sticking, and handle the dough gently to avoid deflating it. The shaping helps create an even crumb and beautiful oven spring when baked.
Second Rise and Baking
Place the shaped dough on a parchment-lined baking sheet and let it rise again for 30-45 minutes until it has puffed noticeably. Preheat your oven to 400°F with a Dutch oven inside for 30 minutes—this creates steam for a perfect crust. Carefully transfer the dough (with parchment) into the hot Dutch oven and cover with the lid.
Bake for 30 minutes covered, then remove the lid and bake for another 15-20 minutes until the bread is deep golden brown and sounds hollow when tapped on the bottom. The internal temperature should reach 190-200°F when measured with an instant-read thermometer. The crust should be crisp and the interior should have an open, airy crumb with pockets of moisture from the steam baking.
Cooling and Serving
Remove the bread from the oven and let it cool on a wire rack for at least 1 hour before slicing. This resting period allows the steam to escape and the crumb to set properly. The bread will be warm inside with a crisp crust that gives way to a tender, chewy interior with pockets of air from the fermentation.
Slice the bread and serve with your favorite butter or olive oil. The flavor profile is complex—nutty from the rye and buckwheat, slightly sweet from the spelt and honey, with a pleasant chewiness from the oat and barley flours. Store any leftovers wrapped in a cloth bag at room temperature for up to 3 days, or freeze for longer storage.
Pro Tips For Making 7 Grain Flour Bread
- Prep Your Flours First: Sift each grain flour separately before mixing—whole wheat and rye especially clump like stubborn snow. I learned this the hard way when my first batch turned into a dense brick because I just dumped everything in. A quick 2-minute sift per flour keeps the texture light and even.
- Hydrate Oat Flour Separately: Oat flour soaks up water like a sponge, throwing off the dough’s balance. Mix it with just the yeast and a splash of warm water first, then fold it in last—this keeps the rest of the dough from turning into glue. (Yes, even if you’re impatient like me.)
- Don’t Over-Knead the Dough: Seven-grain dough is delicate—overworking it turns it gummy, especially with spelt and barley. Knead just until the flours come together (about 5-6 minutes by hand), then let the gluten relax. I used to fight it, but now I trust the dough to do its thing.
- Steam the First 15 Minutes: The crust on this bread can dry out fast. Place a metal bowl of boiling water in the oven when you bake, then remove it after 15 minutes. The steam gives you a crispy crust without burning the outside while the center bakes. (Your future self will thank you.)
Storing and reheating this 7 grain flour bread
Room-Temp Storage
Wrap your freshly baked loaf in a clean cotton towel or linen cloth to preserve moisture, then place it in a sturdy paper bag or airtight container. Store at room temperature (below 75°F) for up to 3 days—the towel prevents condensation that can make the crust soggy.
I keep mine on the counter in a wooden bread box for that old-world charm, but any breathable container works. The nutty flavors actually deepen over time, making day-old slices even more delicious. 🌾
Fridge Preservation
If you need to store for 4-5 days, slice the bread and wrap each slice in parchment paper, then place in a ziplock bag with a paper towel to absorb excess moisture.
The fridge slows staling but can dry out the crust—reheat slices in a toaster or oven for 3-5 minutes at 350°F to restore freshness. For whole loaves, freeze instead—fridge storage isn’t ideal for this dense, multi-grain bread. ❄️
Freezer-Friendly Slices
For long-term storage, slice the cooled bread and wrap each piece in plastic wrap, then place in a freezer bag with parchment paper between layers. Label with the date—these slices stay fresh for up to 3 months.
To reheat, toast directly from frozen in a toaster or warm in a skillet over medium heat for 1-2 minutes per side until crispy. The freezer method preserves the chewy interior and crisp crust better than refrigeration. 🍞
Reviving Stale Bread
If your bread loses its crispness, don’t toss it! Sprinkle stale slices with 1 tsp water, cover with a damp paper towel, and microwave for 15-20 seconds to restore moisture.
For a crispy texture, brush slices with melted butter or olive oil and toast in a skillet over medium heat for 2 minutes. Even “stale” 7-grain bread can become a crunchy delight with this quick fix. 🔥
Dutch Oven Baking Hack
If you’re reheating a whole loaf, place it in a cold Dutch oven with ½ cup water in the bottom. Cover and bake at 350°F for 10 minutes—the steam recreates the bakery-fresh crust.
For extra flavor, sprinkle 1 tsp honey or olive oil on top before reheating. This method works wonders for bringing back that just-out-of-the-oven texture. 💫
Nutrition facts
Frequently asked questions
Why does my 7-grain dough feel different from regular bread dough?
The whole grains and alternative flours in this recipe absorb moisture differently and develop less gluten than refined flour. Expect a stickier, denser texture during kneading—this is normal! The dough should be slightly tacky but not wet. Use cornstarch as needed to prevent sticking, and avoid over-kneading to preserve the unique textures each flour contributes.
Can I substitute any of the specialty flours?
Yes, but with trade-offs. For example, swap buckwheat flour with whole grain pastry flour at a 1:1 ratio, though you’ll lose some earthy depth. Avoid replacing rye or spelt—they’re key for flavor and structure. If you’re missing oat flour, blend rolled oats into a fine powder. Always measure by weight (grams) for consistency, as volume varies between flours.
How do I know when the dough is fully fermented?
Press the dough gently—if it springs back slowly (not immediately) and leaves a slight indent, it’s ready. For a more reliable test, use the “poke test”: press your finger into the dough. If the indentation stays for 10 seconds, fermentation is complete. Cold weather slows yeast activity, so extend rise times by 30-60 minutes if your kitchen is below 70°F.
Why did my bread turn out dense instead of light and airy?
Dense bread often results from under-fermentation, over-kneading, or insufficient steam during baking. Check these fixes: 1) Extend the first rise to 2-3 hours (or overnight in the fridge), 2) Avoid kneading beyond 8-10 minutes, and 3) Ensure your Dutch oven is preheated with steam by adding ½ cup boiling water to the bottom before baking.
Can I make this bread without a Dutch oven?
Line a baking sheet with parchment, place the shaped dough on it, and create steam by placing a metal bowl of boiling water on the lower oven rack. Bake at 400°F for 35-40 minutes, covering the loaf with foil after 20 minutes to prevent over-browning. The crust won’t be as crispy, but the interior will still be delicious.

- Pork Loin Pulled Pork Crock Pot Recipe: Slow-Smoked Tenderness With Zero Dryness - November 1, 2026
- Baked Potatoes in Crock Pot Recipe: Buttery Interiors and Crispy Top Magic - November 1, 2026
- Braised Beef Short Ribs Recipe: Crock Pot Fall-Off-Bone Magic in 6 Hours - November 1, 2026