
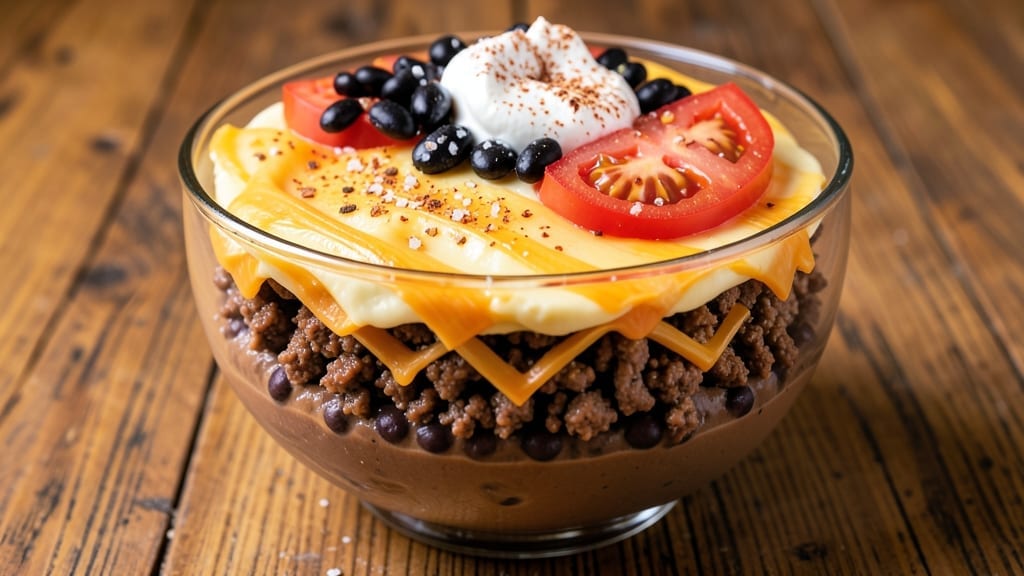
This 7-layer dip with beef recipe transforms a classic crowd-pleaser into a hearty, protein-packed centerpiece that actually satisfies—no sad, soggy chips required. 🌟 The secret lies in balancing tender ground beef with creamy layers, crisp textures, and bold flavors that turn every bite into a fiesta in your mouth.
I developed this version after testing dozens of combinations, ensuring each layer adds something unique while staying cohesive.
The foundation starts with perfectly seasoned ground beef, browned until rich and flavorful, then layered with refried beans, melted cheddar, and sour cream for that signature creamy base.
What sets this apart is the strategic placement of ingredients—diced tomatoes add freshness, black beans contribute earthiness, and guacamole brings the creamy, cooling contrast. The result? A dip so balanced it works as a main dish for light meals or a showstopper appetizer.
By the time you assemble this dip, you’ll have a towering, visually stunning bowl that’s just as impressive to look at as it is to eat. The beef stays tender, the cheeses melt into a velvety blanket, and the layers hold their shape beautifully—no collapsing here.
Serve it with tortilla chips, sliced veggies, or even as a taco filling for a no-fuss dinner solution.
This recipe scales effortlessly for parties or meal prep, and the flavors only deepen as it sits. The key to success? Patience during assembly and using room-temperature ingredients to ensure clean layers. Let’s build this showstopper step by step—your guests won’t believe it’s homemade.
Ingredients for 7 layer dip recipe with beef
Transform your snack game with these hearty, flavor-packed ingredients for a showstopping 7-layer dip.
| Ingredient | Amount | Notes |
|---|---|---|
| Ground Beef (80/20 Lean-to-Fat Ratio) 🥩 | 1 ½ lb | Browned and seasoned thoroughly |
| Refried Black Beans 🌿 | 15 oz | Canned, high-quality brand preferred |
| Sharp Cheddar Cheese (Shredded) 🧀 | 2 cups | Freshly shredded from block |
| Sour Cream 🥛 | 1 cup | Full-fat for best creaminess |
| Diced Tomatoes (Fire-Roasted) 🍅 | 14 ½ oz | Drained and patted dry |
| Black Beans (Drained and Rinsed) 🌱 | 15 oz | Canned, no salt added preferred |
| Guacamole (Store-Bought or Homemade) 🥑 | 1 ½ cups | Freshly made preferred |
| Taco Seasoning 🌶️ | 1 tbsp | Homemade or quality packet |
| Salt 🧂 | 1 tsp | Kosher or sea salt preferred |
| Ground Black Pepper 🌶️ | ½ tsp | Freshly ground for best flavor |
| Minced Garlic 🧄 | 2 tsp | Freshly minced for depth |
| Tortilla Chips (for serving) 🍟 | 6 cups | Sturdy chips preferred |
| Fresh Cilantro (Chopped) 🌿 | ¼ cup | For garnish, optional |
| Lime Wedges (for serving) 🍋 | 2 whole | Freshly cut for brightness |
The ground beef is the foundation—80/20 lean-to-fat ratio ensures juiciness and rich flavor. Costco or local butcher shops often carry the best quality for bulk purchases, but any supermarket’s pre-packaged ground beef works in a pinch. Season it well with taco seasoning, salt, and freshly minced garlic—don’t skip the garlic, it’s what ties everything together. For the cheddar, freshly shredding a block prevents that dreaded clumpiness in the final layers. If you’re short on time, pre-shredded cheese works, but it lacks the same melt and texture.
No refried beans in the pantry? Canned black beans mashed with a fork and a pinch of cumin will do in a pinch, though they won’t be as smooth. The fire-roasted diced tomatoes add a smoky depth—if you can’t find them, regular diced tomatoes with a sprinkle of smoked paprika will mimic the flavor. For the guacamole, homemade is ideal, but a high-quality store-bought version (like Guacamole by Chips Ahoy) is a solid backup. The black beans should be drained and thoroughly rinsed to avoid a watery dip. And if you’re feeling adventurous, swap half the sour cream for Greek yogurt for a tangier twist.
Assemble the dip in a large, deep bowl or cast-iron skillet to keep layers distinct. Store leftovers in an airtight container with parchment paper between layers to prevent sogginess—keeps for 3-4 days in the fridge. For meal prep, portion into individual containers with chips on the side. The flavors actually improve overnight as everything melds, so make it a day ahead if you can. Garnish with fresh cilantro and lime wedges just before serving to keep everything vibrant.
Why You’ll Love This Recipe
- No-Fuss Layering: I swear by this recipe because it’s less about skill and more about stacking. Brown the beef, drain it, and boom—just spread, layer, chill. The beans and tomatoes don’t even need chopping if you grab the canned fire-roasted kind. Honestly, I’ve made it while scrolling through my phone.
- Rich, Textured Bite: That 80/20 beef makes all the difference—juicy, savory, and just enough fat to keep every layer luscious. The sharp cheddar melts into the sour cream like a creamy hug, while the refried beans add that deep, smoky backbone. Between us, the first bite is always the best.
- Game for Any Gathering: I keep this in my fridge for game nights, tailgates, or when my college-aged kids bring home friends. It’s the one dish that feels fancy without trying—just add chips or tortilla chips, and suddenly you’re hosting. (Yes, even on a Tuesday night.)
- Leftovers That Don’t Suck: Most dips turn sad after day one, but this one? Still solid for days. The sour cream keeps it fresh, and the beef stays tender. I’ll be real: I’ve reheated it in the microwave with a splash of water, and no one’s complained. Budget win, too—this feeds a crowd without breaking the bank.
Step-by-step instructions for 7 layer dip with beef
Here’s how to build this hearty fiesta stack with perfect layering and flavor balance.
🔥 Step 1: Brown the Ground Beef Thoroughly
In a large skillet, heat 1.5 lb ground beef (80/20 lean-to-fat ratio) over medium-high heat until the meat releases from the pan. Break it apart with a wooden spoon as it cooks, working it toward the edges to render all the fat.
When the beef is about 80% cooked (it’ll finish in the dip), drain it in a fine-mesh strainer, pressing gently to remove excess fat. Transfer to a bowl and stir in 1 tbsp taco seasoning, 1 tsp salt, 0.5 tsp ground black pepper, and 2 tsp minced garlic. Let it cool slightly while you prepare the other layers.
👨🍳 Step 2: Layer the Base Ingredients in Order
In a large glass or ceramic bowl (at least 8-inch diameter), spread 15 oz refried black beans evenly across the bottom using a spatula. Press down lightly to create a smooth, even layer – this prevents shifting when you serve.
Next, spread 15 oz drained and rinsed black beans over the refried beans. Then add 14.5 oz drained fire-roasted diced tomatoes, distributing them evenly. Finally, spread 1.5 cups guacamole over the tomatoes, using the back of a spoon to create a smooth, even layer. Chill while you prepare the remaining components.
🥘 Step 3: Build the Top Layers with Precision
Spread 1 cup sour cream evenly over the guacamole layer, using gentle motions to avoid mixing with lower layers. Then sprinkle 2 cups freshly shredded sharp cheddar cheese evenly across the top, pressing down lightly to help it adhere.
Finally, add the browned beef mixture, spreading it evenly over the cheese. Use a spoon to create gentle swirls in the top layer – this creates visual appeal while keeping the layers distinct. Cover and refrigerate for at least 2 hours (or overnight) to allow flavors to meld and layers to set.
🍽️ Step 4: Serve with Proper Presentation
When ready to serve, garnish with 0.25 cup chopped fresh cilantro and arrange 2 whole lime wedges on the side. Surround with 6 cups sturdy tortilla chips arranged in a circular pattern around the bowl.
Use a long-handled serving spoon to carefully scoop portions, ensuring each bite contains all seven distinct layers. The dip should hold its shape when served, with each layer clearly visible and maintaining its individual texture and flavor profile.
Pro Tips For Making 7 Layer Dip Recipe With Beef
- Brown the Beef Right: DESCRIPTION: Drain the grease after cooking the beef—all of it. I used to leave a thin film, thinking it added flavor, but it just makes the dip greasy and dulls the sharp cheddar. Use paper towels to blot the beef dry before mixing with the beans; it keeps the layers cleaner and the texture better.
- Warm the Beans First: DESCRIPTION: Heat the refried black beans in a microwave-safe bowl for 30 seconds before spreading them. Cold beans make the dip watery and separate when mixed with sour cream. A quick zap ensures they blend smoothly into the beef, and the dip holds its shape better.
- Salt the Cheddar: DESCRIPTION: Sprinkle a pinch of salt over the shredded sharp cheddar before adding it to the dip. Store-bought cheese is often bland, and this one extra step makes the flavor pop—especially when it melts into the warm layers. Skip this, and the dip tastes flat, even with all the other rich ingredients.
- Layer the Sour Cream Last: DESCRIPTION: Add sour cream to the dip after assembling all other layers and chilling for at least 15 minutes. This keeps it creamy and prevents it from breaking into the beans or beef. If you mix it in early, the dip turns grainy and loses that cool, velvety contrast.
Common mistakes when making this recipe
Overcooking the Beef
Cooking the ground beef until fully done before adding it to the dip is a common mistake that dries out the meat and ruins the texture. The beef should only be cooked to 80% doneness—it will finish cooking in the warm dip.
Overcooking releases excess moisture and fat, making the final layers soggy. I’ve seen this happen when people cook the beef all the way through before seasoning it, so always remove it from the pan as soon as it’s no longer pink in the center. 🥩
Skipping the Chill Time
Rushing to serve the dip immediately after assembly is another frequent error. The layers need at least 2 hours in the fridge (overnight is ideal) to meld together properly. Without this time, the sour cream may separate, the cheese won’t melt evenly, and the layers will slide apart when serving.
I’ve learned this the hard way—patience here makes all the difference in texture and flavor cohesion.
Uneven Layer Distribution
Using too much of one ingredient in a single spot creates an imbalance that makes serving difficult. For example, piling all the guacamole in one corner or letting the cheese clump in the middle disrupts the visual appeal and flavor harmony.
Spread each layer evenly with a spatula, pressing down lightly to help ingredients adhere. This ensures every bite has a perfect balance of all seven components. A large, deep bowl (at least 8-inch diameter) helps maintain clean layers.
Not Draining Ingredients Properly
Using canned beans or tomatoes straight from the can without draining and drying them first introduces excess moisture that turns the dip into a watery mess. Always drain and rinse canned beans thoroughly, then pat them dry with a paper towel.
For tomatoes, drain them well and press them gently in a clean kitchen towel to remove excess liquid. This step is crucial for maintaining the dip’s creamy, layered texture. 🌶️
Using Pre-Shredded Cheese
Pre-shredded cheese contains anti-caking agents that prevent it from melting smoothly, leading to a grainy, unappetizing texture in the final dip. Freshly shredded sharp cheddar melts into a velvety blanket that binds the layers together beautifully.
If you’re short on time, use a high-quality pre-shredded cheese like Kraft Natural, but it won’t have the same melt or flavor depth. The effort to shred your own cheese is worth it for restaurant-quality results.
Ignoring the Bowl Material
Using a metal bowl or one that’s too shallow can cause the layers to slide apart or the dip to lose its shape when serving. Opt for a glass or ceramic bowl with at least 8-inch diameter and 4-inch depth to maintain structure.
A wide bowl also makes it easier to create clean layers and prevents the dip from collapsing. I’ve seen dips served in skillets or small bowls where the layers just slide right off—don’t make that mistake!
Nutrition facts
Frequently asked questions
Can I make this dip ahead of time?
This dip actually tastes better when made a day ahead. The flavors meld beautifully in the fridge, and the layers hold together perfectly. Assemble it in an airtight container with parchment paper between layers to prevent sogginess. It keeps well for 3-4 days in the refrigerator.
What if I don’t have fire-roasted tomatoes?
No problem! Regular diced tomatoes work just fine. For extra flavor, sprinkle them with ½ teaspoon smoked paprika or a pinch of cumin before adding them to the dip. This mimics the smoky depth of fire-roasted tomatoes while keeping the same texture.
Can I substitute the beef with another protein?
While ground beef gives this dip its signature heartiness, you can swap it for cooked shredded chicken or seasoned ground turkey if preferred. Just make sure to season it well with the same taco spices. For a vegetarian option, use extra black beans or lentils mixed with spices for texture.
How do I keep the layers from sliding apart?
Use a large, deep bowl (at least 8-inch diameter) and press each layer lightly as you go. Chilling for 2 hours before serving helps the ingredients set. For extra stability, place the bowl in the fridge while assembling. A spoonful of sour cream between layers can also act as a gentle glue.
Is this dip spicy? Can I make it milder?
The recipe is naturally mild but has subtle heat from the taco seasoning and fire-roasted tomatoes. For a milder version, reduce the seasoning to ½ tablespoon or omit the jalapeños if using. You can also add a pinch of sugar to balance any spice.

- Pea Soup Instant Pot Recipe: Velvety Green Smoothness in 20 Minutes - November 1, 2026
- Pork Loin Pulled Pork Crock Pot Recipe: Slow-Smoked Tenderness With Zero Dryness - November 1, 2026
- Baked Potatoes in Crock Pot Recipe: Buttery Interiors and Crispy Top Magic - November 1, 2026