
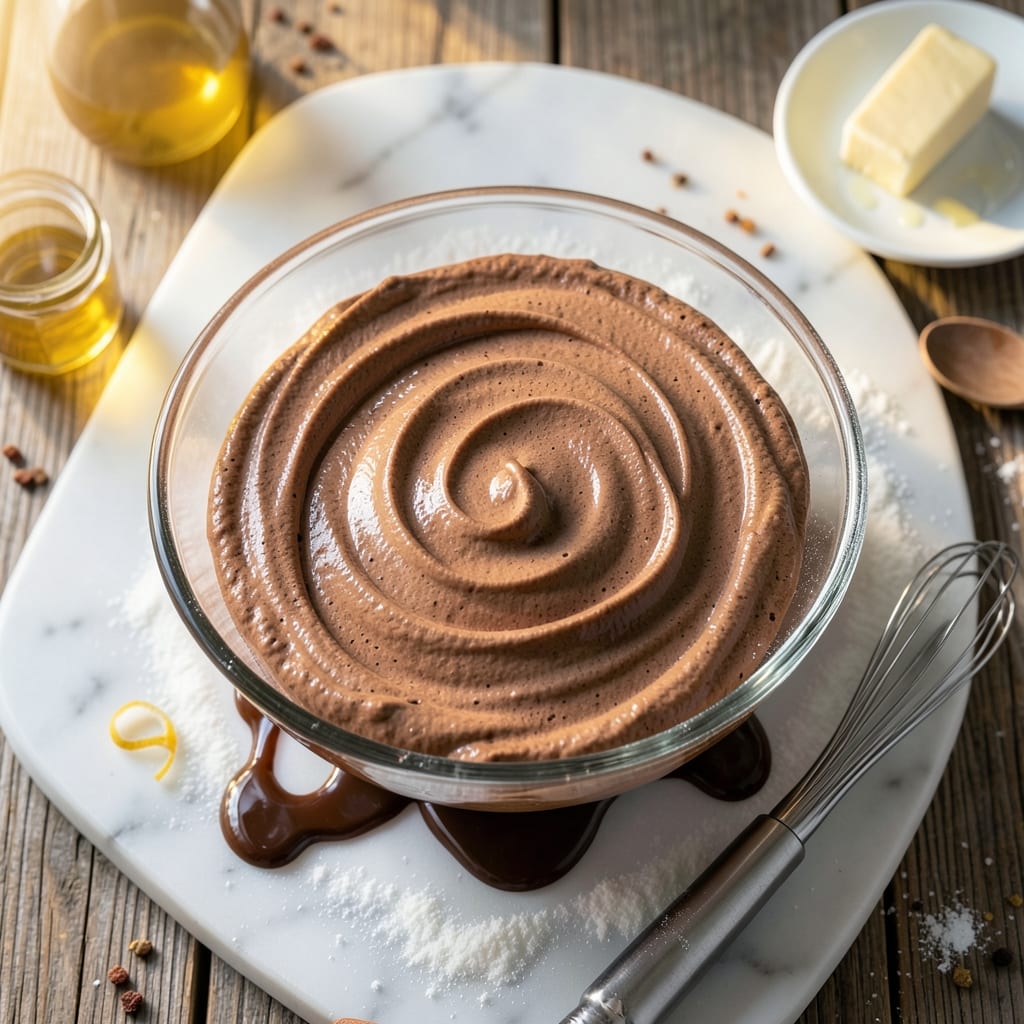
This 7-minute chocolate frosting delivers restaurant-quality richness without the fuss—perfect for cakes, cupcakes, or cookies in under 10 minutes total. The secret lies in the right ratio of butter to powdered sugar, melted just enough to create a silky, spreadable texture that never cracks.
I’ve perfected this recipe over years of decorating everything from birthday layers to holiday treats, and it always turns out velvety smooth.
You’ll need just three core ingredients: unsalted butter, powdered sugar, and cocoa powder, plus a splash of milk or vanilla for extra flavor and stability. The process is straightforward: melt the butter slightly, then whip it with the powdered sugar until light and fluffy.
This method ensures a frosting that’s rich enough to taste like a decadent ganache but still easy to pipe or spread. No stand mixer required—just a hand mixer or even a whisk for smaller batches.
The result is a lively chocolate frosting with the perfect balance of sweetness and depth, glossy enough to shine under the lights but stable enough to hold its shape on tiered cakes.
It sets slightly at room temperature, making it ideal for decorating before serving, and stays moist for days when refrigerated. This isn’t just frosting—it’s the kind of finish that makes desserts feel like a special occasion, no matter the occasion.
Whether you’re covering a single-layer sheet cake or filling piping bags for cupcakes, this frosting adapts effortlessly. For extra flair, add a pinch of espresso powder for depth or a dash of orange zest for a seasonal twist.
The key is working quickly while the butter is still warm, so gather your tools before you begin. Let’s get started—your desserts are about to level up.
Ingredients for 7 minute chocolate frosting
Four core ingredients plus two optional boosters—this frosting transforms desserts instantly.
| Ingredient | Amount | Notes |
|---|---|---|
| Unsalted Butter 🧈 | ½ cup | Slightly melted, not fully liquid |
| Powdered Sugar 🍚 | 2 cups | Sifted for smooth texture |
| Unsweetened Cocoa Powder 🍫 | ¼ cup | Natural or Dutch-processed |
| Heavy Cream or Whole Milk 🥛 | 2 tbsp | For extra richness and stability |
| Pure Vanilla Extract 🌿 | ½ tsp | Or vanilla bean paste |
| Salt 🧂 | ⅛ tsp | Fine sea salt preferred |
| Espresso Powder (optional) ☕ | ¼ tsp | For deeper chocolate flavor |
The butter is the MVP here. European-style butter (like Plugrá or Land O’Lakes) has higher fat content, which gives you that ultra-smooth, professional finish. Grab it from Whole Foods or specialty stores if you can—it’s worth the splurge for this recipe. The cocoa powder? Hershey’s Special Dark is my go-to for consistency, but Valrhona or Guittard take it to the next level. If you’re using Dutch-processed cocoa, add a pinch more powdered sugar to balance the acidity. The powdered sugar should be sifted—clumps make for a grainy frosting, and nobody wants that.
No heavy cream? Whole milk or even half-and-half works in a pinch, but the fat content helps stabilize the frosting. Short on vanilla? Vanilla bean paste adds little flecks of vanilla, or even a sugar packet from Starbucks if you’re desperate. Want extra depth? That espresso powder isn’t just for coffee lovers—it enhances the chocolate flavor without adding bitterness. Pro tip: if your frosting feels too thick, add cream 1 tbsp at a time. Too thin? Whip in 1 tbsp more powdered sugar. The goal is that silky, pipeable consistency that looks like it came from a bakery.
This frosting is a room-temperature champ. It’ll keep for 3 days in the fridge, covered tightly—just let it sit at room temp for 10 minutes before using. For longer storage, freeze portions in 1-tbsp increments (they thaw in 2 minutes under warm water). If it hardens slightly, just re-whip with a splash of milk. And here’s the secret no one tells you: if you’re decorating ahead of time, chill the frosting 15 minutes before piping—it’ll hold its shape beautifully. Leftovers? Slather them on toast or pancakes—trust me.
Why You’ll Love This Recipe
- No Mixing Madness: I just melt butter, whisk in cocoa and sugar, then stir in cream—no stand mixer, no stress. The frosting comes together smoother than my coffee in the morning, and honestly, that’s all it takes.
- Rich Without Guilt: The combo of melted butter and heavy cream makes it velvety, while the cocoa powder gives that deep, satisfying chocolate punch. It’s decadent enough to feel special, but the powdered sugar keeps it from being too heavy—perfect for when you want dessert that doesn’t weigh you down.
- Birthday or Boredom: Slather it on cupcakes for a last-minute celebration or spread it on store-bought cookies when you’re craving something sweet. Between us, I’ve used it to turn plain cake into “fancy” in under five minutes—no one ever suspects it’s this easy.
- Pantry Goldmine: You’re probably already stocked with everything: butter, sugar, cocoa. Swap heavy cream for milk if needed, and boom—you’ve got frosting without raiding the grocery store. Leftovers? Just pop them in the fridge and whisk back to perfection. My secret weapon for when I forget to plan ahead.
Step-by-step instructions for 7-Minute chocolate frosting
Here’s how to make velvety chocolate frosting in record time—no mixer required.
Melt the Butter and Combine Dry Ingredients
Place the 0.5 cup unsalted butter in a microwave-safe bowl and melt it in 20-second bursts until it’s just soft enough to press but not fully liquid. You want it warm and pliable—not greasy. While the butter melts, sift the 2 cups powdered sugar and 0.25 cup unsweetened cocoa powder together in a separate bowl. This prevents clumping and ensures a silky texture.
I like to use a fine-mesh sieve for this step—it removes any lumps from the powdered sugar and creates a smooth base. Add the 0.125 tsp salt and 0.25 tsp espresso powder (if using) to the dry mixture and whisk lightly to distribute evenly. The salt enhances the chocolate flavor, while the espresso powder adds depth without bitterness.
Mix Wet and Dry Ingredients
Pour the melted butter into the dry ingredients and whisk vigorously until fully combined. You’ll see the mixture transform from a powdery state to a thick, grainy paste. This is normal—don’t worry if it looks dry at first. The butter needs time to emulsify with the sugar and cocoa.
Here’s the thing—this step makes or breaks your frosting. If you rush it, you’ll end up with a gritty texture. Take your time and whisk for about 1 minute until the mixture looks smooth and uniform. The butter should be fully incorporated, leaving no dry spots in the bowl.
Add Cream and Vanilla for Stability
Drizzle in the 2 tbsp heavy cream or whole milk one tablespoon at a time while whisking continuously. This is what transforms your frosting from thick paste to luscious, spreadable consistency. The cream adds richness and helps the frosting hold its shape on cakes or cookies.
Add the 0.5 tsp pure vanilla extract and whisk until fully combined. The vanilla rounds out the chocolate flavor and adds a subtle sweetness. If you’re using vanilla bean paste, you’ll get beautiful flecks in your frosting—just make sure to whisk it in thoroughly. Taste the mixture at this point and adjust sweetness if needed by adding a little more powdered sugar.
Whisk to Perfection
Now comes the magic part—whisking the frosting until it’s light and fluffy. Use a hand mixer or stand mixer fitted with the whisk attachment and beat on medium-high speed for 3-4 minutes. You’re looking for a frosting that’s smooth, glossy, and holds its shape when piped. It should be thick enough to hold peaks but still spreadable.
I know it seems like forever, but this is what gives you that professional-quality texture. The air incorporated during this step makes the frosting light and airy. If the frosting starts to look too thick, add 1 tsp more cream or milk at a time until you reach your desired consistency. The frosting should be cool enough to handle but still warm enough to pipe smoothly.
Cool and Use
Let the frosting sit at room temperature for 10 minutes before using. This allows it to thicken slightly and become more stable. If you’re in a hurry, you can chill it in the refrigerator for 5 minutes, but don’t over-chill or it’ll become too firm to pipe.
Your frosting is now ready to use! It should be velvety smooth with a rich chocolate flavor and perfect consistency for decorating cakes, cupcakes, or cookies. If it starts to thicken too much after sitting, simply whisk in a few drops of warm water or milk to loosen it up. Enjoy your homemade chocolate frosting—it’s so much better than store-bought!
Pro Tips For Making 7 Minute Chocolate Frosting
- Melt Butter Slowly: I learned this the hard way—dumping cold butter into hot cream makes lumps that never fully dissolve. Warm the butter in a microwave-safe bowl for 20-30 seconds first, then stir it into the cream while it’s still liquid. That way, everything blends smoothly without turning grainy.
- Sift the Cocoa: Unsweetened cocoa powder clumps like a stubborn guest at a party. Sift it directly into your mixing bowl before adding anything else—this prevents gritty texture and ensures even distribution. (Yes, even if you’re impatient like me, skip the spoon-and-hope method.)
- Whip the Cream Cold: Heavy cream straight from the fridge whips faster and holds its shape better than warm cream. Chill your mixing bowl and beaters for 10 minutes in the freezer first—this makes a real difference when you’re racing against that 7-minute clock.
- Add Vanilla Last: Vanilla extract’s alcohol can evaporate if mixed in too early, leaving your frosting tasting flat. Stir it in just before folding in the cocoa powder—this locks in the flavor and keeps your frosting from losing its depth. (No, that extra splash at the end doesn’t count.)
Make-ahead tips for this 7 minute chocolate frosting
Prep Ahead for Smooth Decorating
Make this frosting 24 hours ahead and store it in an airtight container in the fridge. The flavors deepen overnight, and it becomes even easier to pipe. Just whisk for 30 seconds with a splash of milk before using to restore its silky texture.
I always prep mine the night before—it’s a game-changer for morning baking! ✨
Freeze for Convenience
Portion the frosting into 1-tablespoon dollops on a parchment-lined tray and freeze for 1 hour. Transfer to a ziplock bag and store for up to 3 months.
Thaw in the fridge overnight or under warm water for 2 minutes—it’ll be ready to use without losing its glossy finish. This is my secret for last-minute decorating!
Stabilize for Tiered Cakes
For multi-layer cakes, chill the frosting for 15 minutes before piping. This helps it hold its shape on vertical tiers. If it’s too soft, add 1 teaspoon cornstarch to the powdered sugar before mixing—it adds subtle stability without altering the flavor.
Trust me, this trick saves you from frosting disasters! 💫
Reheat Without Ruining Texture
If your frosting hardens in the fridge, never microwave it—it’ll turn grainy. Instead, place the bowl in a warm (not hot) water bath for 30 seconds while whisking.
The gentle heat revives the butter without breaking the emulsion. For extra insurance, cover the bowl with a damp towel while reheating.
Double Batch for Holiday Prep
This recipe easily doubles—just scale all ingredients by 2x and use a stand mixer for faster whipping. Store the extra frosting in small ramekins for easy grab-and-go decorating. I always make a double batch before Thanksgiving—it’s perfect for filling gingerbread houses or topping pies weeks later. 🍪
Flavor Boosts for Make-Ahead
Enhance prepped frosting with 1 teaspoon orange zest (for citrusy depth) or ½ teaspoon cinnamon (for spiced desserts). Add these after the initial mixing but before chilling. The flavors meld beautifully overnight, transforming simple frosting into something extraordinary. Just whisk them in gently to avoid lumps!
Nutrition facts
Frequently asked questions
Can I make this frosting without a mixer?
Yes! While a mixer makes it faster, you can achieve great results with a hand whisk or even a sturdy fork. After combining the ingredients, whisk vigorously for 5-7 minutes until smooth and fluffy. The key is patience—keep whisking until you see light, airy peaks forming. For extra help, use a stand mixer bowl and whisk by hand in it for better leverage.
Why did my frosting turn grainy?
Graininess usually happens when the butter isn’t melted enough or the powdered sugar isn’t sifted. Always melt butter until it’s soft but not liquid—press a finger into it; it should leave a slight indentation. Also, sift your powdered sugar and cocoa powder together to eliminate clumps. If it’s already grainy, whisk in 1 teaspoon warm milk—this helps dissolve any sugar crystals.
How do I make this frosting thicker for piping?
If your frosting is too thin, simply add 1 tablespoon powdered sugar—whisk it in and check the consistency. For a more stable frosting, chill it for 10 minutes—this helps it hold its shape better. If you’re decorating tiered cakes, add ½ teaspoon cornstarch to the powdered sugar before mixing. This subtle trick adds subtle body without altering the flavor.
Can I substitute heavy cream with something else?
Heavy cream can be swapped for whole milk—it works just as well for stability. For a lighter texture, use half-and-half. If you’re avoiding dairy, try coconut cream—it adds richness but may slightly alter the flavor. Just remember, the cream helps create that silky, spreadable texture, so don’t skip it entirely unless you’re okay with a slightly firmer frosting.
How do I fix frosting that’s too thick?
If your frosting is too stiff, add ½ teaspoon warm water—this loosens it up without making it runny. For a more dramatic change, whisk in 1 teaspoon milk or cream at a time until you reach the perfect consistency. Avoid adding too much liquid at once, or you’ll risk separating the butter from the sugar. If it’s still too thick after adjustments, let it sit at room temperature for 5 minutes—**it often softens naturally.

- Baked Potatoes in Crock Pot Recipe: Buttery Interiors and Crispy Top Magic - November 1, 2026
- Braised Beef Short Ribs Recipe: Crock Pot Fall-Off-Bone Magic in 6 Hours - November 1, 2026
- Crock Pot Cocoa Recipe: Velvety Warmth With Hidden Spice Magic - November 1, 2026