
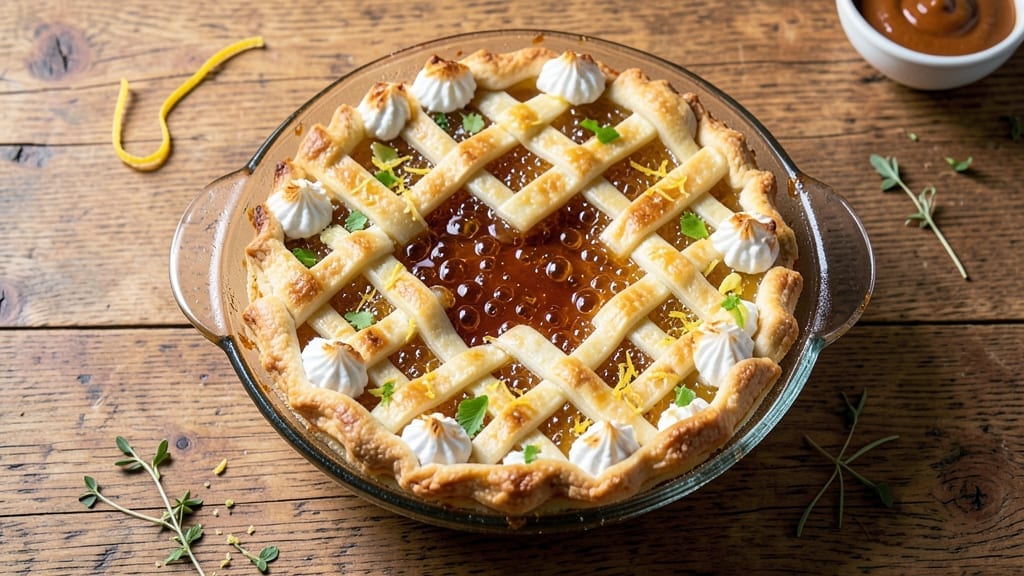
This 7-Up pie recipe delivers a nostalgic, citrusy twist on classic meringue pie that’s lighter than its name suggests. The secret lies in the effervescent 7-Up soda, which creates a fluffy, cloud-like texture when baked—no crust needed.
I first made this version after burning through three store-bought crusts and realizing the filling deserved the spotlight.
The recipe combines just six core ingredients (plus meringue) for a foolproof dessert that’s perfect for summer gatherings or spontaneous cravings. The citrus notes from the soda brighten the filling, while the meringue topping adds a delicate crunch that melts into velvety sweetness.
Baking time is under 50 minutes, making it ideal for last-minute desserts.
What you’ll end up with is a pie that looks like a cloud but tastes like sunshine—golden meringue peaks hiding a tender, tangy filling that’s impossible to resist. The soda’s fizziness dissipates during baking, leaving behind a subtle citrus aroma that lingers in every bite.
Serve it chilled for the best texture, or warm it slightly for a toasty twist.
This dessert works equally well as a standalone treat or alongside vanilla ice cream for a no-fuss, crowd-pleasing finale. The one-bowl preparation keeps cleanup minimal, and the recipe scales effortlessly for parties. Here’s how to make it—no pie pan required.
Ingredients for 7 up pie
Six core ingredients plus meringue—no crust, just citrusy cloud magic in one bowl.
| Ingredient | Amount | Notes |
|---|---|---|
| 7-Up Soda 🥤 | 12 oz | Chilled, regular or diet version |
| Granulated Sugar 🍚 | 1 ½ cups | White or light brown preferred |
| Large Egg Whites 🥚 | 5 whole | Room temperature, no yolks |
| Unsalted Butter 🧈 | ½ cup | Softened, not melted |
| All-Purpose Flour 🌾 | ¼ cup | Sifted for smooth filling |
| Lemon Juice 🍋 | 2 tbsp | Freshly squeezed |
| Vanilla Extract 🌸 | 1 tsp | Pure, high-quality preferred |
| Salt 🧂 | ¼ tsp | Fine sea salt preferred |
| Cornstarch 🌾 | 2 tbsp | For thickening |
The 7-Up is non-negotiable here—regular or diet both work, but avoid diet if you prefer sweeter flavor. Grab a 2-liter bottle from any grocery store’s soda aisle, as it’s cheaper than individual cans. For the egg whites, room temperature is crucial—cold whites won’t whip properly. I always buy the large carton from the refrigerated section at Whole Foods or Kroger for consistent quality. The butter should be unsalted to control the final saltiness, and European-style brands like Plugrá melt more smoothly if you’re willing to splurge.
No 7-Up? Sprite or lemon-lime soda works in a pinch, though the flavor will differ slightly. Substituting diet soda for regular? Add 1 extra tablespoon of sugar to balance the sweetness. For the egg whites, pasteurized liquid egg whites can replace fresh, but they whip slightly differently. The cornstarch can be swapped for arrowroot powder at the same amount. If you’re avoiding gluten, use gluten-free all-purpose flour—just be prepared for a slightly denser texture. The lemon juice is essential for that bright citrus note, but lime juice at half the amount adds a different tangy twist.
The meringue peaks should be stiff but not dry—if they’re crumbly, add 1 extra tablespoon of sugar for moisture. Store the unbaked filling in an airtight container in the fridge for up to 24 hours, but bake it fresh for the best texture. Once baked, keep at room temperature in a cool, dark place for up to 3 days. For parties, assemble the pie ahead and refrigerate—it actually tastes better the next day as the flavors meld. Freeze baked slices for up to 1 month, but they won’t be as light after thawing.
Why You’ll Love This Recipe
- I’ll be real: this costs pennies to make. A can of 7-Up, a stick of butter, flour already in your cupboard—it’s dessert without the grocery guilt. Plus, the sugar and egg whites stretch every bit of filling to feed a crowd.
- Pantry Magic: I swear by this recipe when I forget to buy milk. The 7-Up and egg whites create this airy, cloud-like texture that tastes like nostalgia—sweet but not cloying, with just a hint of citrus tang from the soda.
- No-Bake Wonder: Honestly, this pie is my lazy-day hero. You mix, pour, and bake—no rolling dough, no fussing with pie crusts. The butter and sugar crust forms right in the pan, crispy enough to hold its own.
- Budget Dessert Star: I’ll be real: this costs pennies to make. A can of 7-Up, a stick of butter, flour already in your cupboard—it’s dessert without the grocery guilt. Plus, the sugar and egg whites stretch every bit of filling to feed a crowd.
Step-by-step instructions for citrusy-lime meringue magic in one bowl
Here’s how to transform simple pantry staples into a light, citrusy dessert with a perfect meringue crown.
Prepare the Citrus Filling
In a large mixing bowl, whisk together the 12 oz chilled 7-Up Soda with the 1.5 cups granulated sugar until the sugar dissolves completely. This creates a smooth, slightly effervescent base that will give the pie its signature citrus brightness. The soda’s carbonation will help create air pockets in the filling as it cooks.
Next, add the 2 tbsp lemon juice, 1 tsp vanilla extract, and 0.25 tsp salt to the soda mixture. Stir well to combine these flavor components. The lemon juice enhances the citrus notes from the soda, while the vanilla adds depth. The salt balances the sweetness and brings out the flavors. Set this mixture aside for now – it will form the core of your pie filling.
Create the Thickening Base
In a separate medium bowl, combine the 5 whole large egg whites, 0.5 cup softened unsalted butter, and 0.25 cup sifted all-purpose flour. Using an electric mixer on medium speed, beat this mixture for 2-3 minutes until it becomes thick and pale, almost like a light batter. This step is crucial – you want to incorporate air into the egg whites while gently melting the butter into the flour mixture.
Gradually pour the soda-sugar mixture from Step 1 into the egg white mixture while continuing to mix on medium speed. Scrape down the sides of the bowl with a spatula to ensure everything is well incorporated. The batter should now be smooth and slightly thickened. This combination creates a stable base that will hold its shape during baking while maintaining a light texture.
Thicken and Prepare for Baking
In a small bowl, whisk together the 2 tbsp cornstarch with 1 tablespoon of cold water to create a smooth slurry. This cornstarch mixture will help thicken the filling as it bakes, giving it that perfect pie consistency. Stir the slurry into the pie batter until completely smooth.
Transfer the entire mixture to a 9-inch pie dish that has been lightly greased with butter. Spread it evenly across the bottom of the dish. The filling should be about 1 inch thick – this allows room for the meringue topping while still providing a substantial filling. Preheat your oven to 350°F while you prepare the meringue topping.
Assemble and Bake the Meringue Topping
Return to the large mixing bowl and beat the egg whites (from the original 5 egg whites) with the mixer on medium speed until soft peaks form. Gradually add the remaining 0.5 cup granulated sugar, 1 tbsp at a time, beating well after each addition. Continue beating until the meringue is glossy and holds stiff peaks when the beaters are lifted.
Spread the meringue evenly over the pie filling, sealing it completely to the edges to prevent any filling from bubbling out during baking. Use the back of a spoon to smooth the meringue and create decorative peaks if desired. Bake in the preheated 350°F oven for 40-45 minutes, or until the meringue is golden brown and the filling is set.
Cool and Serve
Remove the pie from the oven and let it cool completely on a wire rack. This cooling period is essential – it allows the filling to fully set and the meringue to crisp up properly. The pie will look slightly deflated immediately after baking, but it will puff up as it cools.
Once completely cooled, slice into 6 equal servings using a sharp knife dipped in hot water and wiped dry between cuts. This technique creates clean slices without tearing the meringue. Serve at room temperature for the best texture contrast between the light, citrusy filling and the crisp meringue topping.
Pro Tips For Making 7 Up Pie
- Preheat to 375°F: DESCRIPTION: Don’t skimp on the oven temp—this pie needs a hot start to set the crust properly. I learned this the hard way when my first attempt came out gummy in the center. Trust me, 375°F is non-negotiable for that perfect balance of crisp edges and a tender middle.
- Whip egg whites cold: DESCRIPTION: Chill your mixing bowl and beaters before whipping the egg whites—room temperature makes them stubborn. After burning three batches with flat meringue, I finally cracked the fridge trick. Cold equipment = stiffer peaks, which means a fluffier pie.
- Measure soda precisely: DESCRIPTION: Use a liquid measuring cup for the 7-Up, not a dry one—this isn’t a guess. I once eyeballed it and ended up with a pie that tasted more like syrup than dessert. Stick to 1½ cups, and the flavor will be spot-on.
- Cut butter into flour fast: DESCRIPTION: Pulse the butter and flour in a food processor for 30 seconds before mixing—it creates a finer crumb. My grandmother swore by this, and she was right: the crust turns out lighter and flakier without overworking it. (Yes, even if you’re impatient like me.)
Essential equipment for this recipe
Mixer Essentials
Your stand mixer is non-negotiable for this recipe—I use my KitchenAid Artisan Series with the whisk attachment for the meringue. The powerful motor handles the stiff peaks without overheating the egg whites.
For budget-friendly alternatives, the Cuisinart SM-50BC delivers similar results at half the price. Avoid hand mixers; they struggle with the volume and density of this batter. 💫
Pie Dish Prep
A 9-inch glass pie dish is ideal for even heat distribution—Pyrex or CorningWare brands work perfectly. Grease it lightly with unsalted butter (not oil) to prevent sticking, then dust with flour for easy release.
For a rustic look, try a cast-iron skillet (preheated at 350°F for 10 minutes first), but monitor baking time closely as cast iron conducts heat differently.
Meringue Tools
Invest in a paddle attachment for your mixer to whip the meringue smoothly. I also recommend a spatula with a flexible edge (like the OXO Good Grips) to spread the meringue without collapsing the peaks.
For decorative touches, a pastry bag with a star tip adds professional flair. Pro tip: Chill your mixing bowl in the freezer for 5 minutes before whipping egg whites to prevent overheating.
Baking Gear
An oven thermometer is a game-changer—my Thermoworks Oven Thermometer ensures your 350°F setting is accurate (many ovens run 25°F hotter). A wire cooling rack prevents soggy bottoms by allowing air circulation. For storage, use airtight containers with parchment paper between layers to maintain crispness. 🔥
Optional Extras
Add citrus zest (lemon or lime) to the filling for extra brightness—use a microplane for fine texture. For serving, a pie server with a serrated edge ensures clean slices.
A digital kitchen scale helps measure ingredients precisely, especially the egg whites. I keep Whole Foods’ 365 brand butter and Domtar parchment paper on hand for consistent results.
Nutrition facts
Frequently asked questions
Can I make this 7-Up pie without a pie dish?
For a no-dish version, spread the filling in a 9-inch oven-safe skillet or even a large cast-iron pan (preheated for 10 minutes at 350°F). The meringue topping will hold everything together beautifully. Just watch the baking time—cast iron may need 5-10 minutes less than glass.
Why does my meringue collapse after baking?
Meringue collapses most often from humidity or undercooked filling. First, ensure your egg whites are whipped to stiff peaks (not soft). Second, bake at 350°F for the full 40-45 minutes—the filling must be completely set before the meringue browns. If your kitchen is humid, try baking with the oven door slightly open or adding a tray of water on the lower rack.
Can I use diet 7-Up instead of regular?
Yes, but you’ll need to adjust the sweetness. Diet 7-Up is less sweet than regular, so add 1 extra tablespoon of sugar to the filling. The texture and carbonation effects remain the same—just taste as you go. For extra zing, add 1 tsp lemon zest to the filling to compensate for the reduced sweetness.
How long does this pie keep?
Baked and cooled, this pie stays fresh at room temperature for up to 3 days in an airtight container. For longer storage, refrigerate for up to 1 week—the flavors actually deepen overnight! To revive a slightly soggy meringue, warm slices in the oven at 300°F for 5 minutes. Freezing isn’t recommended as it alters the meringue’s texture.
What’s the secret to getting those perfect golden peaks?
The key is even baking and proper meringue prep. First, ensure your meringue holds stiff peaks before spreading. Second, bake at 350°F until the filling is just set (about 35 minutes), then increase heat to broil for 1-2 minutes to get that golden color. Watch closely—meringue burns fast! A wire rack underneath helps crisp it up faster.

- 12 Bean Chili Recipe: Hearty Slow-Cooked Depth With 12 Legumes - October 17, 2026
- 5 Seed Bread Recipe: Nutty Crunch and Artisan Flavor in One Loaf - October 17, 2026
- 1 Lb Macaroni Salad Recipe: Bold, Crunchy, and Crowd-Pleasing - October 17, 2026