
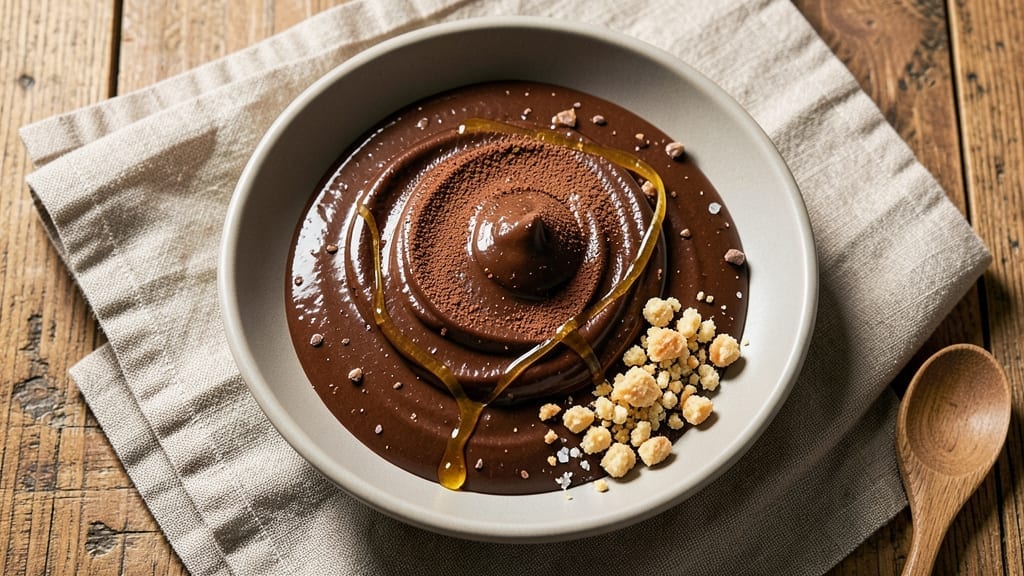
A 70 percent dark chocolate recipe delivers bold, intense flavor that satisfies even the most discerning chocolate lovers. The deep cocoa notes and subtle bitterness create a sophisticated treat that stands out from milky alternatives.
This recipe transforms simple ingredients into luxurious bite-sized truffles with a velvety texture and a satisfying snap.
The secret lies in balancing richness with structure—using high-quality dark chocolate ensures depth, while a touch of coconut oil creates the perfect mouthfeel. These treats require minimal effort but yield restaurant-quality results, perfect for gifting or indulging.
The process is straightforward, with precise measurements and clear steps to guarantee success every time.
What you’ll achieve is a batch of intensely flavorful truffles with a glossy finish and a satisfying crunch. The dark chocolate’s complexity shines through, offering a sophisticated yet approachable dessert. Whether rolled in cocoa powder, crushed nuts, or flaky sea salt, these treats elevate any occasion.
Pair them with a cup of espresso for a perfect balance of flavors, or serve as a standalone indulgence. The recipe scales easily, making it ideal for parties or personal treats. Here’s how to craft these luxurious bites with confidence and precision.
Ingredients for 70 dark chocolate
Luxurious, velvety truffles with a sophisticated snap—these ingredients transform into restaurant-quality bites.
| Ingredient | Amount | Notes |
|---|---|---|
| 70 Percent Dark Chocolate 🍫 | 12 oz | High-quality, finely chopped |
| Unsweetened Coconut Oil 🥥 | ½ cup | Refined for neutral flavor |
| Vanilla Extract 🌿 | 1 tbsp | Pure Madagascar vanilla |
| Pinch of Salt 🧂 | ¼ tsp | Fine sea salt |
| Unsweetened Cocoa Powder 🍫 | ¼ cup | Dutch-processed for smoothness |
| Almond Flour 🌰 | ¼ cup | For texture and crunch |
| Crushed Hazelnuts 🌰 | ½ cup | Toasted for extra flavor |
| Flaky Sea Salt 🧂 | 2 tbsp | For finishing touch |
| Powdered Sugar 🍚 | 2 tbsp | Optional for glossy finish |
| Coconut Flakes 🥥 | ¼ cup | Toasted for garnish |
| Espresso Powder ☕ | 1 tsp | Enhances chocolate depth |
The 70 percent dark chocolate is non-negotiable here—Valrhona or Callebaut are my go-tos, but any high-quality brand with at least 70 percent cocoa works. Look for bars with a vibrant, glossy appearance and no artificial additives. Unsweetened coconut oil keeps these truffles rich yet light, so grab refined coconut oil from Trader Joe’s or Whole Foods—it has a neutral flavor that won’t overpower the chocolate. The vanilla extract should be pure Madagascar; imitation won’t give you that deep, floral complexity. And trust me on the pinch of salt—it balances the bitterness beautifully.
No vanilla extract? A teaspoon of vanilla bean paste works in a pinch, or even a scraped vanilla bean pod. Running low on cocoa powder? Dutch-processed cocoa powder is key—natural cocoa will make your truffles taste bitter. The almond flour adds a subtle crunch, but if you’re avoiding nuts, oat flour works too. For the crushed hazelnuts, toast them first—350°F for 10 minutes—to deepen their flavor. Swap the espresso powder for instant coffee granules if you prefer, but the powder enhances the chocolate’s depth without altering texture.
Store the finished truffles in an airtight container between layers of parchment paper—they’ll keep for 2 weeks at room temperature. For longer storage, freeze them for up to 3 months—just let them thaw at room temperature before serving. These are perfect for gifting: roll them in extra cocoa powder or flaky sea salt for a luxurious presentation. And if you make a double batch, freeze half—you’ll thank yourself later.
Why You’ll Love This Recipe
- Three-Ingredient Magic: I swear, this recipe is the closest thing to a dessert hack I’ve ever used. Melt the chocolate with coconut oil, stir in vanilla, and boom—you’ve got a base for everything without hunting for obscure ingredients.
- Rich Without Sugar Crash: That 70% dark chocolate isn’t just bitter—it’s deep, with a satisfying bite that lingers. The cocoa powder boosts the intensity, and the salt? It’s the secret weapon that makes every bite feel like a grown-up treat.
- Endless Reinvention: Need a quick truffle filling? Done. A decadent sauce for fruit? Check. Even a last-minute gift wrap? Just shape it into little balls. Honestly, I’ve used this base for three different desserts this week, and it never gets old.
- Pantry Staple Power: Between us, this combo costs less than half of what store-bought chocolate truffles do. And the leftovers? They keep for weeks in the fridge, so you’re never scrambling for a last-minute sweet fix.
Step-by-step instructions for rich and intense bite-sized treats
Here’s how to craft decadent, sophisticated chocolate treats that balance deep cocoa richness with nutty complexity.
Create the Chocolate Ganache Base
Place the 12 oz 70 percent dark chocolate in a heatproof bowl and set it over a saucepan filled with 1 inch of simmering water (double boiler method). Stir occasionally until the chocolate melts completely and becomes smooth. Remove from heat and immediately whisk in the 0.5 cup unsweetened coconut oil and 1 tbsp vanilla extract until fully incorporated. The mixture should be glossy and fluid.
Here’s the thing—this ganache needs to be perfectly smooth. If you see any streaks of unmelted chocolate, return the bowl to the double boiler for 30 seconds and whisk again. The ganache should coat the back of a spoon and hold its shape when drizzled, but still be pourable. Add the 1 tsp espresso powder and whisk vigorously until fully dissolved. This subtle coffee note will deepen the chocolate’s complexity without overpowering it.
Incorporate Dry Ingredients for Structure
In a separate bowl, sift together the 0.25 cup unsweetened cocoa powder, 0.25 cup almond flour, and 0.25 tsp pinch of salt. Whisk these dry ingredients until completely combined and free of any lumps. This powder blend will provide the perfect texture contrast to the rich ganache—adding both structure and depth of flavor.
With the ganache still warm (but not hot), gradually pour the dry mixture into the chocolate bowl while whisking continuously. You’ll notice the mixture will thicken noticeably as the almond flour absorbs the fat. Keep whisking until you achieve a thick, spreadable consistency—similar to cookie dough but with a glossy sheen. The ganache should hold its shape when dropped from a spoon but still be workable. If it’s too thick, add 1 teaspoon of coconut oil at a time until you reach the ideal texture.
Fold in Nutty Crunch and Final Seasoning
Using a rubber spatula, gently fold in the 0.5 cup crushed hazelnuts and 0.25 cup coconut flakes, being careful not to overmix. You want to distribute these ingredients evenly throughout the mixture while preserving their individual textures. The hazelnuts should remain distinct pieces rather than becoming completely coated in chocolate. Sprinkle the 2 tbsp flaky sea salt over the mixture and fold it in last—this will create those magical salty-sweet pockets throughout each treat.
Taste a small spoonful at this stage. You should detect layers of deep chocolate, nutty hazelnut, and subtle coffee notes, with a clean finish from the salt. If the flavor feels too intense, you can add the 2 tbsp powdered sugar now to mellow the bitterness slightly. Cover the bowl and refrigerate for 30 minutes to firm up—the colder temperature makes the mixture easier to handle and ensures clean cuts when portioning.
Shape and Set the Bite-Sized Treats
Line a baking sheet with parchment paper and use a 1 tablespoon scoop (or small cookie scoop) to portion the chilled mixture into 24 uniform balls. Place them 2 inches apart on the prepared sheet—they’ll spread slightly as they set. For extra precision, you can gently roll each ball between your palms to create perfectly round shapes before placing them on the sheet.
Refrigerate the shaped treats for 1 hour until firm to the touch. This step is crucial—rushing will result in messy, uneven bites. The treats should hold their shape when gently pressed but still be soft enough to cut cleanly. For a professional finish, use a sharp knife dipped in warm water between each cut to create clean edges. The final treats should have a glossy sheen from the coconut oil and visible flecks of hazelnut and coconut throughout.
Final Touches and Serving
Once completely set, transfer the treats to an airtight container and refrigerate for up to 1 week or freeze for 2 months. The flavors will continue to develop and meld beautifully over time. When ready to serve, let them come to room temperature for 10 minutes before enjoying—this allows the chocolate to soften slightly and release its full aromatic profile.
For an elevated presentation, dust the tops with additional powdered sugar or sprinkle with extra flaky sea salt just before serving. These treats are best enjoyed at room temperature, where you’ll experience the perfect balance of crisp edges, creamy centers, and that satisfying crunch from the nuts. Each bite delivers the intense richness of 70 percent dark chocolate with sophisticated layers of flavor that make these far more than simple chocolate candies.
Pro Tips For Making 70 Dark Chocolate
- Temper the Chocolate: If you’re melting 70% dark chocolate over heat, stop when it’s just liquid—then let it sit for 30 seconds off the stove. I learned this the hard way: pushing it further turns that rich, deep flavor into bitter ashes. A quick stir and a moment of patience keeps it smooth and luxurious.
- Use Solid Coconut Oil: Scoop the unsweetened coconut oil straight from the fridge in small chunks—it melts faster and avoids greasy clumps. I used to melt it first, and the texture always ended up too soft. Cold chunks blend seamlessly into the chocolate without altering the recipe’s balance.
- Salt Last, Not First: Add that pinch of salt after combining everything else—it’s the final touch that brightens the bitterness. I used to toss it in early, and the flavor got muddled. A quick sprinkle at the end makes all the difference, like a whisper of contrast in a rich conversation.
- Whisk Like You Mean It: When mixing cocoa powder and melted chocolate, use a fork or whisk in quick, sharp strokes—don’t just stir. I skipped this once and ended up with streaks of powder. A few vigorous swirls ensures everything dissolves into a velvety, uniform paste.
Pro cooking tips for perfect results
Precision Temperature Control
Working with 70 percent dark chocolate demands careful temperature management—never exceed 110°F when melting. I use a double boiler (heatproof bowl over simmering water) to avoid scorching, stirring constantly until the chocolate reaches 105°F.
If it overheats, whisk in 1 tsp coconut oil to stabilize it. For the espresso powder, dissolve it in 1 tsp hot water first to prevent clumping—this ensures even distribution throughout the ganache. 🌡️
Ganache Consistency Secrets
The ideal ganache should be thick yet pourable, like heavy cream. If it seizes up, return it to the double boiler for 20 seconds and whisk vigorously. For extra shine, add 1 tsp powdered sugar while warm—this enhances gloss without altering flavor.
I test consistency by dripping a small amount onto parchment: it should hold its shape but still spread slightly when touched. This balance ensures clean cuts when portioning later. ✨
Texture Mastery with Dry Ingredients
When folding in almond flour and cocoa powder, work quickly—they absorb moisture fast. Use a rubber spatula to scrape the bowl’s edges thoroughly, ensuring no dry pockets remain. For a smoother texture, pulse the almond flour in a food processor for 10 seconds before mixing.
The goal is a fudgy yet crumbly consistency that holds shape when rolled but melts luxuriously in the mouth. 💫
Perfect Portioning Techniques
Use a 1-tablespoon scoop (or #24 round scoop) for uniform bites. For extra precision, chill the mixture for 30 minutes before scooping—this prevents sticking. To create perfectly round shapes, roll each scoop between your palms while applying light pressure.
Place treats 2 inches apart on parchment—they’ll spread slightly as they firm up. A damp knife (wiped clean between cuts) ensures clean edges when slicing. 🔥
Flavor Layering Tips
The espresso powder should be added last to the ganache—this preserves its aromatic oils. For deeper flavor, toast the crushed hazelnuts at 350°F for 8 minutes before folding them in. The flaky sea salt should be sprinkled over the mixture and folded in gently to create pockets of intensity.
Taste as you go: the salt should enhance, not overpower, the chocolate’s bitterness. 💡
Storage and Reheating Hacks
Store treats in an airtight container between layers of parchment to prevent sticking. For short-term storage (up to 1 week), keep them at room temperature. To reheat, place in a single layer on a baking sheet and warm in the microwave for 10 seconds at 50% power.
For a smoother finish, let them sit at room temperature for 15 minutes before serving—this softens the chocolate slightly for optimal texture. ❄️
Nutrition facts
Frequently asked questions
Can I substitute coconut oil with butter?
No, this recipe relies on coconut oil for its neutral flavor and vegan-friendly properties. Butter would introduce dairy and alter the texture, making the treats denser. For a dairy-free alternative, use refined coconut oil or avocado oil—both maintain the same smooth consistency.
How do I adjust the recipe for a nut-free version?
Simply omit the crushed hazelnuts and replace them with 0.5 cup toasted coconut flakes or 0.5 cup oat flour for texture. The almond flour can also be swapped for oat flour to keep it completely nut-free while maintaining structure.
What if my ganache turns grainy?
Graininess usually means the chocolate overheated or absorbed moisture. Fix it by placing the bowl over simmering water for 20 seconds while whisking, then adding 1 tsp coconut oil to restore smoothness. Work quickly to prevent seizing. For prevention, ensure all ingredients are dry and use a double boiler for melting.
Can I make these treats ahead of time?
Shape the treats 1 day in advance and store them in an airtight container at room temperature. They’ll keep for 1 week or up to 2 months in the freezer. Let them sit at room temperature for 10 minutes before serving to soften slightly.
Why does my chocolate taste bitter?
The 70 percent cacao chocolate is intentionally rich and slightly bitter—this is normal! To balance it, add the 2 tbsp powdered sugar during mixing or dust the finished treats with extra sugar. A pinch of salt also enhances sweetness by contrast. If it’s still too intense, try a slightly lower cacao percentage (like 60%) next time.

- 12 Bean Chili Recipe: Hearty Slow-Cooked Depth With 12 Legumes - October 17, 2026
- 5 Seed Bread Recipe: Nutty Crunch and Artisan Flavor in One Loaf - October 17, 2026
- 1 Lb Macaroni Salad Recipe: Bold, Crunchy, and Crowd-Pleasing - October 17, 2026