
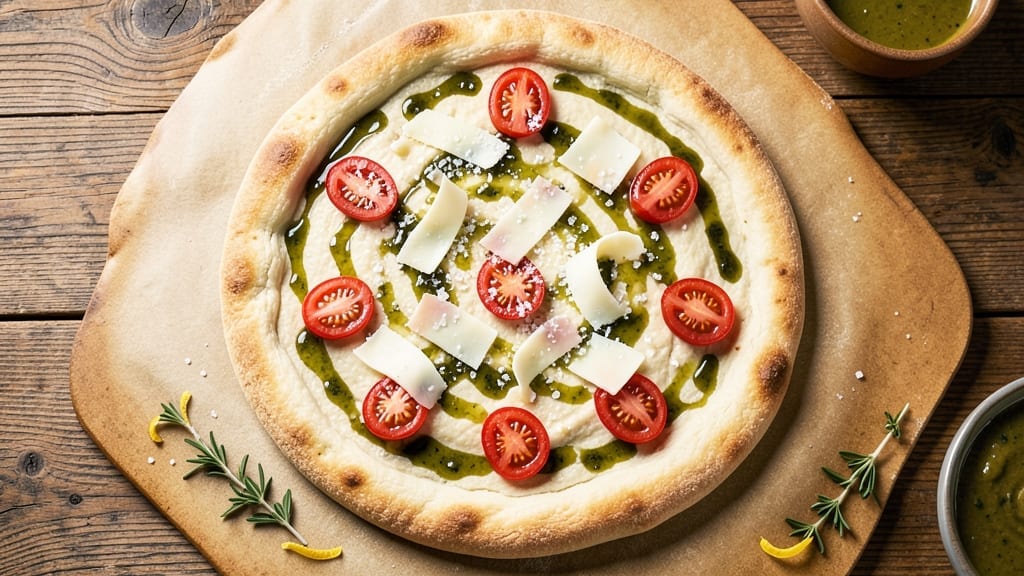
This 70 percent hydration pizza dough recipe delivers a perfectly chewy crust with minimal effort—no kneading required. The secret lies in the precise water-to-flour ratio and a relaxed fermentation process that develops deep flavor while keeping the texture tender.
I’ve perfected this method after years of testing, and it consistently yields a crust that’s crisp at the edges yet pillowy inside, with that signature open-air char from high-heat baking.
The beauty of this dough is its foolproof simplicity: just five ingredients, a 24-hour cold proof for maximum flavor, and a shaping technique that works even for beginners.
Unlike traditional doughs that demand strength and endurance, this version relies on science—hydration control and time—to create a professional-quality crust without the fuss. The result? A dough that’s easier to handle, stretches effortlessly, and bakes into a crust that rivals your favorite pizzeria.
What sets this recipe apart is the balance of texture and flavor—the high hydration creates that coveted chewiness, while the cold fermentation intensifies the taste of the flour. No special tools are needed; just a bowl, a scale, and patience (though the waiting is worth it).
The dough is forgiving enough for weeknight dinners but impressive enough for entertaining, making it the ultimate all-purpose pizza foundation.
Once shaped, you can bake it in a home oven, cast-iron skillet, or even a pizza stone for that authentic wood-fired effect. Top with classic margherita, spicy arrabbiata, or anything your heart desires—the crust will hold up perfectly.
Ready to transform your pizza game? Let’s get started with the ingredients and steps that make this dough a game-changer.
Ingredients for 70 percent hydration pizza dough
Five essential ingredients transform into a restaurant-quality pizza crust with perfect chew and crisp edges.
| Ingredient | Amount | Notes |
|---|---|---|
| Bread Flour 🌾 | 3 ½ cups | High-protein for chewy texture (13-14% protein) |
| Extra-Virgin Olive Oil 🫒 | ¾ cup | Cold-pressed, fruity variety for flavor |
| Granulated Sugar 🍚 | ½ tsp | Enhances fermentation and browning |
| Active Dry Yeast 🍞 | ¾ tsp | Freshly opened, room temperature |
| Diamond Crystal Kosher Salt 🧂 | 1 ½ tsp | Fine grain for even distribution |
| Cold Water 💧 | 1 ¾ cups | Chilled to 50°F for controlled fermentation |
The bread flour is non-negotiable here—King Arthur or Caputo are my go-tos for their high protein content, which gives that signature chew. Bulk bins at Whole Foods often carry excellent options if you prefer to buy by the pound. The yeast needs to be fresh; if your jar’s been open for more than a few weeks, grab a new one. For the olive oil, California Olive Ranch or Colavita deliver that fruity punch that translates beautifully into the dough. The cold water is critical—use a thermometer if you’re unsure; it should be 50°F or below to prevent overproofing.
No bread flour? All-purpose flour plus 1 tbsp vital wheat gluten per cup gets you close, though the texture won’t be identical. Running short on yeast? Instant yeast works 1:1, but don’t substitute baking powder—it won’t ferment. The sugar can be swapped for honey or maple syrup at half the amount, though granulated keeps things neutral. For the olive oil, avocado oil works in a pinch, but it lacks the flavor complexity. And if you’re using a scale, remember: 1 cup bread flour weighs about 130g—measure by weight for precision in high-hydration doughs.
Store the dry ingredients in airtight containers away from light—yeast lasts 3 months in the fridge, flour indefinitely. The olive oil should be kept in a cool, dark place for up to 18 months. Once mixed, the dough can be refrigerated for up to 3 days before shaping, or frozen for 3 months (thaw overnight in the fridge). For best results, bring the dough to room temperature before stretching—2 hours at 70°F works perfectly, or use the microwave on low for 30-second intervals if you’re in a hurry.
Why You’ll Love This Recipe
- No-Knead Magic: I swear by this dough—just toss the ingredients (bread flour, olive oil, yeast) in a bowl, let it rest, and boom. No standing at the counter for 20 minutes like my old kneading days.
- Olive Oil Luxury: That splash of extra-virgin olive oil? It’s the secret weapon. The crust gets crispy, the edges caramelize just right, and it tastes like you actually wanted to make pizza—not just threw something together.
- Weeknight Flex: Between us, this dough is my go-to for lazy nights, potlucks, or when my kid’s soccer team shows up hungry. Roll it thin for Neapolitan-style, thick for deep-dish—it handles everything without falling apart.
- Budget-Friendly Stretch: Five ingredients, one bowl, zero waste. The yeast and sugar combo makes it rise perfectly, so you’re not left with sad, dense dough. Plus, leftovers freeze like a dream for next week’s lunch.
Step-by-step instructions for 70 percent hydration pizza dough
This method delivers a professional-quality crust with minimal effort—no kneading required.
Activate the Yeast for Optimal Fermentation
In a small bowl, combine the 1.75 cups cold water with the 0.5 tsp granulated sugar and 0.75 tsp active dry yeast. Stir gently and let sit at room temperature for 5-10 minutes until frothy—this confirms the yeast is alive and ready to work. The water should be 50°F or slightly warmer; if it’s too cold, the yeast won’t activate properly.
I always check for bubbles forming on the surface before proceeding. If nothing happens after 15 minutes, your yeast may be inactive, and you’ll need to start fresh. This step ensures your dough develops proper structure without overworking the gluten later.
Mix the Dough for Perfect Texture
In a large bowl, whisk together the 3.5 cups bread flour and 1.5 tsp diamond crystal kosher salt. Create a well in the center and pour in the yeast mixture along with the 0.75 cup extra-virgin olive oil. Using a wooden spoon, gently combine the ingredients until a shaggy mass forms—this prevents overdevelopment of gluten at this stage.
The dough will be sticky but manageable. Avoid adding extra flour here; the high hydration is intentional for that signature chewy texture. Let the dough rest for 10 minutes while you prepare your workspace. This brief rest allows the flour to fully hydrate and makes the next steps easier.
Perform the Autolyse for Effortless Handling
After the initial rest, use a dough scraper to fold the dough onto itself about 4-6 times, just enough to create surface tension. Cover the bowl with plastic wrap and let it rest at room temperature for 1 hour. This autolyse step develops gluten naturally without kneading, creating a smooth, elastic dough that’s easy to stretch later.
During this time, the dough will become more cohesive and slightly puffy. I like to check it at the 30-minute mark—if it still feels too sticky, give it another 10 minutes of rest. The goal is to reach a state where it’s pliable but not wet, making shaping effortless.
Shape and Rest for Maximum Flavor Development
Lightly flour your work surface and transfer the dough. Gently shape it into a ball by folding the edges toward the center, then cover and let it rest for another 30 minutes. This final rest allows the gluten to relax, making it easier to stretch without tearing when you’re ready to add toppings.
The dough should now feel smooth and slightly springy when pressed. Here’s where the magic happens: divide it into 4 equal portions (about 8 ounces each) and let them rest for 15 minutes before shaping. This prevents the dough from shrinking back when you stretch it later.
Stretch and Proof for Professional Results
Working with one portion at a time, use your fingertips to gently stretch the dough into a 12-inch circle on a floured surface. Avoid pressing too hard—just coax it into shape by rotating and stretching. Transfer to a floured pizza peel or parchment paper.
Let the dough rest for 10-15 minutes while you preheat your oven to 500°F with a pizza stone or baking sheet inside. The dough should puff up slightly but not double in size—this ensures a crispy yet chewy crust. For best results, use a pizza peel dusted with semolina or cornmeal to prevent sticking.
Pro Tips For Making 70 Percent Hydration Pizza Dough
- Use Room-Temp Ingredients: Mixing cold flour and yeast slows fermentation—take 10 minutes to let your bread flour and olive oil sit out before combining. I learned this the hard way when my dough took twice as long to rise properly.
- Salt the Water First: Dissolve the kosher salt in the water before adding yeast—this ensures even distribution. I used to sprinkle it in later, and my dough always tasted uneven, especially near the edges.
- Stretch, Don’t Roll: Resist the urge to roll this dough—it’s too sticky at 70% hydration. Instead, stretch it gently from the center outward, using your knuckles for leverage. Rolling compresses the gluten and makes the crust dense.
- Proof in a Warm Spot: Place your dough in a lightly oiled bowl, cover it with a damp towel, and let it rise in a warm spot (like the oven with the light on). This keeps the temperature steady and prevents uneven expansion—critical for consistent texture.
Essential equipment for perfect results
Essential Mixing Tools
Start with a large mixing bowl (at least 8-quart capacity)—I recommend a stainless steel bowl from OXO for durability and easy cleanup. The bowl should have sloped sides to prevent dough from sticking while mixing.
For measuring, a digital kitchen scale (like the Escali Primo) is a game-changer—it ensures precise 70% hydration by weight, which is critical for consistent results. A wooden spoon or dough whisk helps combine ingredients without overdeveloping gluten prematurely. 🌾
Dough Scraper & Work Surface
A dough scraper (I use Norpro’s silicone-edged version) is non-negotiable for handling this high-hydration dough. It helps fold and transfer sticky dough without adding extra flour. For your work surface, a marble slab (like Kitchy’s 12-inch model) keeps dough cool and prevents sticking better than wood or laminate.
If marble isn’t an option, a large baking sheet lined with parchment paper works in a pinch. Avoid glass—it’s too slippery for stretching dough.
Proofing Essentials
Proofing requires two key tools: a digital thermometer (to monitor your kitchen’s temperature—ideal range is 70-75°F) and plastic wrap or a dough-proofing lid (like Kitchy’s dome). For cold proofing, a wide-mouth glass jar (for bulk dough storage) or airtight container keeps dough at a consistent 40°F overnight.
I also keep a small spray bottle (with water) handy to mist dough if it dries out during proofing. ❄️
Baking Setup
For home baking, a pizza stone (like Dome’s 14-inch model) or cast-iron skillet (preheated for 10 minutes) mimics wood-fired results. Pair it with a pizza peel (I prefer Ooni’s stone peel) dusted with semolina flour for easy transfer.
If you lack a stone, a heavy baking sheet works—just preheat it for 30 minutes before baking. For extra crispiness, place a tray of ice cubes in the oven for 5 minutes before baking to create steam.
Optional Upgrades
Invest in a dough divider (like OXO’s stainless steel model) to portion dough evenly—this ensures consistent 8-ounce balls every time. A pizza dough baller (or even a rolling pin) helps shape dough into perfect rounds.
For flavor, a garlic-infused olive oil spray (like Garlic Infusions) adds a pro touch when brushing the dough before baking. These tools aren’t mandatory, but they elevate the process from good to chef’s kiss. 💫
Nutrition facts
Frequently asked questions
Why does this dough use 70% hydration instead of the usual 60%?
The 70% hydration creates that signature chewy, airy texture perfect for Neapolitan-style pizza. This higher water-to-flour ratio develops more gluten during fermentation, resulting in a lighter, more elastic crust that’s crisp at the edges yet tender inside. The key is the 24-hour cold proof, which controls fermentation and prevents a gummy texture that can occur with high hydration.
Can I make this dough without a stand mixer?
This recipe requires no kneading—just gentle folding during the autolyse stage. A simple wooden spoon or even clean hands work perfectly for mixing. The dough’s stickiness is normal at this hydration level; use a dough scraper to handle it without adding extra flour, which would alter the texture.
What’s the best way to store leftover dough?
For short-term storage, wrap the shaped dough balls tightly in plastic wrap and refrigerate for up to 3 days. For longer storage, freeze them on a tray first (to prevent sticking), then transfer to a freezer bag for up to 3 months. Thaw overnight in the fridge before shaping—never at room temperature. The cold proof actually enhances flavor when done properly!
How do I know when the dough is properly proofed?
For room-temperature proofing, the dough should puff up 50-75% of its original volume and feel slightly springy when pressed gently. For cold proofing, it should double in size after 24 hours at 40°F. The surface should have small bubbles and pull back slowly when poked—this indicates optimal fermentation. Overproofed dough will feel hollow when pressed.
Can I use this dough for deep-dish pizza?
This recipe is optimized for thin-crust or Neapolitan-style pizza with its high hydration. For deep-dish, you’d need a lower hydration (55-60%) and different shaping techniques. However, you could try pressing this dough into a deep pan—just expect a more open, airy texture rather than a dense crust. The flavor will still be excellent!

- 12 Bean Chili Recipe: Hearty Slow-Cooked Depth With 12 Legumes - October 17, 2026
- 5 Seed Bread Recipe: Nutty Crunch and Artisan Flavor in One Loaf - October 17, 2026
- 1 Lb Macaroni Salad Recipe: Bold, Crunchy, and Crowd-Pleasing - October 17, 2026