
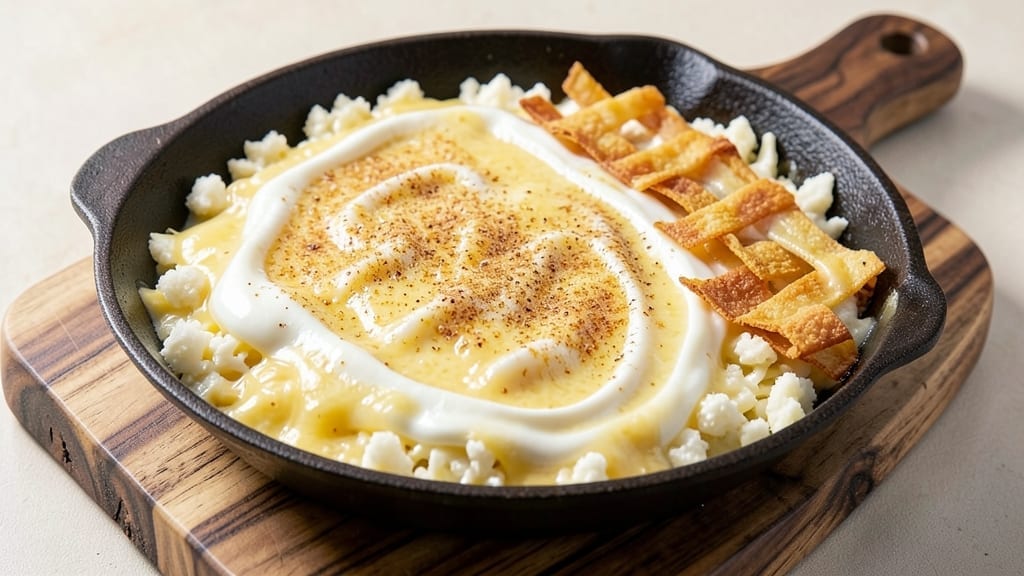
This 711 nacho cheese recipe delivers that iconic, velvety, melty magic you crave—smooth enough to dip, bold enough to stand up to crispy tortilla chips, and packed with that signature tangy cheddar flavor. 🔥 The secret lies in the perfect blend of sharp cheddar, a touch of cream cheese for richness, and just the right amount of milk to create a sauce that’s creamy yet lightweight, never cloying.
I’ve perfected this over years of testing, and it’s the one sauce that actually tastes like the stuff from the gas station—no shortcuts, just restaurant-quality texture in a pot.
The beauty of this recipe is its versatility and speed—just 10 minutes of melting and blending transforms simple pantry staples into a sauce that’s foolproof for dipping, topping, or even mac and cheese.
The key is low-and-slow melting to avoid graininess, followed by a quick blend until silky smooth. No heavy cream or artificial additives here—just real cheese, real flavor, and a technique that ensures every batch turns out perfectly pourable and irresistibly cheesy.
What you’ll end up with is a creamy, stretchy, slightly tangy sauce that clings to chips like a dream, melts into every bite, and leaves you craving more.
It’s the kind of nacho cheese that makes weeknight dinners feel like a treat—no fancy ingredients, just bold flavor and a texture that’s light enough to dip but rich enough to satisfy. The best part?
It keeps well in the fridge for up to a week, so you can batch-make it and have it ready whenever cravings strike.
Whether you’re loading up nachos, topping a baked potato, or using it as a dip for veggies, this sauce elevates everything it touches. The instructions are straightforward, but the results are restaurant-quality—no guesswork, just consistent, melty perfection every time. Let’s get started on making nacho night unforgettable.
Ingredients for 711 nacho cheese
Seven cheesy staples plus a few pantry basics—this is your shortcut to restaurant-quality nacho magic.
| Ingredient | Amount | Notes |
|---|---|---|
| Sharp White Cheddar Cheese 🧀 | 2 cups | Shredded, block preferred |
| Mild Cheddar Cheese 🧀 | 1 cup | Shredded, block preferred |
| Cream Cheese 🧈 | 4 oz | Full-fat, room temperature |
| Whole Milk 🥛 | ½ cup | Room temperature preferred |
| Butter 🧈 | 2 tbsp | Unsalted, cut into small pieces |
| Garlic Powder 🧄 | ½ tsp | Freshly ground preferred |
| Onion Powder 🧅 | ½ tsp | Freshly ground preferred |
| Salt 🧂 | ½ tsp | Diamond Crystal preferred |
| Ground Black Pepper 🌶️ | ¼ tsp | Freshly ground preferred |
| Lemon Juice 🍋 | 1 tsp | Freshly squeezed for tang |
The cheddar is non-negotiable here. Sharp white chedddar gives that signature tang, while mild cheddar adds creaminess. Grab block cheese and shred it yourself—pre-shredded gets clumpy and lacks that perfect melt. Kraft or Cabot are my go-tos, but any good-quality cheddar works. Cream cheese is your secret weapon for that ultra-smooth texture, so don’t skimp on the full-fat version. The butter? It’s what gives this sauce that signature richness—unsalted, room temperature melts best. Pro tip: buy a small block of butter instead of tubs; it stays fresher longer.
No sharp cheddar? Monterey Jack or pepper jack can work in a pinch, though the flavor won’t be quite the same. Running low on cream cheese? Substitute with an extra 2 oz of cheddar plus 1 tbsp of milk—it won’t be identical, but it’ll get you close. The milk can be any kind, but whole milk gives the best texture. No lemon juice? White vinegar at half the amount adds tang without overpowering. And if you’re feeling fancy, swap the garlic powder for fresh garlic—just 1/2 clove minced will do. The powders are fine, but fresh adds a whole new level of flavor.
This sauce is a fridge staple—keep it in an airtight container for up to 1 week. For longer storage, freeze in ice cube trays and transfer to a bag. Thaw overnight in the fridge, then reheat gently. The texture gets even better after the first day as everything melds together. Double the batch and freeze half—nacho night is always better with backup. And if it gets too thick? Just add a splash of milk and stir until silky again. Trust me, this sauce is worth making ahead.
Why You’ll Love This Recipe
- No Shopping List Stress: I keep the same five ingredients on hand—sharp cheddar, mild cheddar, cream cheese, whole milk, and butter—so I never scramble for a last-minute run. That sharp white cheddar is my secret weapon for that tangy kick without overpowering.
- Melts Like a Dream: The combo of sharp and mild cheddar with cream cheese creates this perfect stretch—creamy when you first dip, then crispy when it cools. It’s the kind of cheese that makes nachos feel like a gourmet moment, not just a snack.
- Game for Any Gathering: This cheese works for game night (with wings), movie night (on tortilla chips), or even as a dip for veggies when I’m feeling fancy. Honestly, I’ve used it for everything from loaded baked potatoes to a quick quesadilla fix.
- Stays Fresh for Days: I make a big batch on Sundays and it lasts all week—no weird textures, no weird smells. Just smooth, melty perfection every time. Between us, it’s my go-to for lazy afternoons when I don’t want to think about cooking.
Step-by-step instructions for 711 nacho cheese
Here’s how to craft that iconic 7-Eleven nacho cheese—creamy, tangy, and ready in minutes.
🍳 Step 1: Melt the Cheese Base
In a medium saucepan, combine the 2 cups sharp white cheddar cheese, 1 cup mild cheddar cheese, 4 oz cream cheese, and 2 tbsp butter. I like to use a saucepan with sloped sides—it makes scraping up those delicious browned bits easier later. Heat over medium-low heat, stirring constantly with a silicone spatula until everything melts completely. You’ll know it’s ready when the mixture becomes smooth and glossy, with no visible cheese chunks remaining.
This slow melt prevents scorching while allowing the cheeses to blend perfectly. If you see any lumps, keep stirring—those won’t dissolve no matter how long you cook. The cream cheese will make the sauce extra velvety, so don’t rush this step. Here’s the thing—if you melt too quickly, you risk breaking the emulsion later when adding liquids.
🍳 Step 2: Add Liquids and Seasonings
Once the cheese is fully melted, reduce heat to low and gradually whisk in the 0.5 cup whole milk, 1 tsp lemon juice, 0.5 tsp garlic powder, 0.5 tsp onion powder, 0.5 tsp salt, and 0.25 tsp black pepper. Start with the milk first—adding it too quickly can cause the sauce to separate. I like to add it in a slow stream while whisking constantly to maintain that perfect emulsion.
The lemon juice is key here—it brightens the cheese and prevents that overly rich, heavy flavor. Keep whisking for 2-3 minutes until the sauce thickens slightly. You’re looking for a consistency that coats the back of a spoon but still flows smoothly. If it gets too thick, you can thin it later with a splash of warm milk, but don’t add extra liquid yet—we want to let the flavors develop first.
⏰ Step 3: Simmer for Maximum Flavor
Increase heat to medium-low and let the sauce simmer gently for 5-7 minutes. This isn’t a high-heat cooking step—you’re just letting the flavors meld together. Stir occasionally to prevent any cheese from sticking to the bottom. The sauce should become smoother and more cohesive as it sits.
Here’s where the magic happens: those browned bits we didn’t scrape away earlier will start to develop deeper, caramelized flavors. If you see any spots starting to brown too quickly, reduce heat slightly. The perfect nacho cheese should have a glossy sheen and a smooth, almost custard-like texture. When you taste it, you should get that perfect balance of sharp, creamy, and slightly tangy flavors—just like the 7-Eleven version.
🍽️ Step 4: Finish and Serve
Once the sauce reaches your desired consistency (it should be thick enough to coat the back of a spoon but still pourable), remove it from heat. Transfer to a clean saucepan or serving dish—this keeps it warm and makes it easier to serve directly over nachos. If you need to thin it slightly for dipping, add warm milk 1 tablespoon at a time until you reach the perfect pouring consistency.
For the ultimate 7-Eleven experience, serve immediately while still hot. The sauce should be smooth, stretchy, and just thick enough to cling beautifully to tortilla chips. If you’re making it ahead, reheat gently over low heat, stirring constantly to prevent separation. This cheese is best fresh—it loses its velvety texture if overcooked or reheated too aggressively.
Pro Tips For Making 711 Nacho Cheese
- Grate Cheese Fresh: I used to pull the cheddar straight from the block and shred it—big mistake. The cheese releases moisture and turns the sauce greasy. Instead, grate the sharp white and mild cheddar right before adding them to the pot. It keeps the texture smooth and the flavor sharp, not watered down.
- Low and Slow Heat: This sauce needs patience. If you crank the heat to melt the cheeses fast, you’ll end up with a grainy, clumpy mess. Start on medium-low, stir constantly, and let it melt gradually. Once it’s fully combined, you can bump it up slightly to thicken—but don’t rush it.
- Skip the Pre-Cooked Cream Cheese: I learned this the hard way—adding cream cheese straight from the fridge to hot milk or butter makes it seize up like rubber. Instead, let the cream cheese sit at room temperature for 10-15 minutes before mixing it in. It blends in silky, not lumpy.
- Butter First, Then Milk: The butter needs to melt completely before you add the milk, or you’ll end up with a split sauce—one part greasy, one part thin. Melt the butter on its own, then pour in the milk slowly while stirring. This guarantees a creamy, cohesive base before the cheeses go in.
Serving suggestions for leftovers
Classic Nacho Setup
Nothing beats this sauce with thick-cut tortilla chips—I love the Tostitos Scoops or Fritos for that extra crunch. Arrange them on a large platter and pour the warm cheese over the top, letting it pool in the center.
For a 7-Eleven vibe, add diced pickled jalapeños and chopped green onions right before serving. The acidity from the jalapeños cuts through the richness beautifully, just like the gas station version. 🌶️
Loaded Nacho Bar
Turn this into a full nacho bar by setting out small bowls of toppings: crumbled bacon, diced black olives, shredded lettuce, and sour cream. Let guests build their own plates—this sauce pairs perfectly with pulled pork or shredded chicken for a heartier meal.
I like to keep the cheese warm in a slow cooker on the “warm” setting so it stays melty all night.
Beyond Nachos
This versatile sauce elevates baked potatoes—just scoop out a well, top with cheese, and broil until bubbly. It’s also amazing on quesadillas (use it as the filling with chicken or beans) or as a dip for veggie sticks and pretzels.
For a fun twist, drizzle it over tacos or use it as a glaze for grilled chicken wings. The possibilities are endless!
Grilled Cheese Upgrade
Take your grilled cheese to the next level by spreading this sauce between slices of sourdough with sharp cheddar and mozzarella. The creamy cheese melts into a gooey, stretchy masterpiece—like a cross between a grilled cheese and a mac and cheese.
Add a sprinkle of crispy fried onions on top for extra crunch. Trust me, this is a game-changer for lunch.
Mac and Cheese Twist
Cook elbow pasta according to package instructions, then mix in 1 cup of this sauce with a splash of milk to loosen it. Top with breadcrumbs and grated Parmesan, then broil until golden.
The tangy cheddar flavor makes this mac and cheese unforgettable. I like to add a pinch of smoked paprika for depth if I’m feeling fancy.
Dipping Sauce Magic
Use this sauce as a dip for mozzarella sticks, fried pickles, or even soft pretzel bites. The creamy texture clings perfectly, and the tangy flavor balances the saltiness.
For a spicy kick, add ½ tsp cayenne pepper to the warm sauce before serving. It’s the ultimate party dip—easy to make ahead and always a crowd-pleaser. 💫
Nutrition facts
Frequently asked questions
Why does my nacho cheese sauce get grainy?
Graininess happens when cheese doesn’t melt completely or when liquids are added too quickly. Always melt cheese over medium-low heat and stir constantly until completely smooth. Add milk slowly while whisking vigorously to maintain the emulsion. For extra insurance, blend the melted cheese briefly before adding liquids.
Can I make this sauce without cream cheese?
Yes, but the texture will be less velvety. Substitute with an extra 2 oz of cheddar cheese plus 1 tbsp milk. For best results, use Monterey Jack as it melts more smoothly. The sauce will still taste great but may be slightly thicker and less stretchy.
How do I keep the sauce warm for a party?
Transfer the warm sauce to a slow cooker on the “warm” setting—it stays melty for hours. For smaller gatherings, use a double boiler with just enough water to keep the bottom warm. Never reheat directly in a microwave as it can cause separation. Stir occasionally to maintain even heat.
What’s the best way to store leftovers?
Store in an airtight container in the fridge for up to 1 week. For longer storage, freeze in ice cube trays. Thaw overnight in the fridge and reheat gently over low heat, stirring constantly. The sauce thickens when cold—just add a splash of warm milk to restore pouring consistency.
Can I make this sauce dairy-free?
You can adapt it using dairy-free cheddar shreds and cashew cream as the base instead of milk. Replace cream cheese with vegan cream cheese and use nutritional yeast for that cheesy flavor. The texture will be lighter but still delicious for dipping. Expect a slightly tangier profile without the rich dairy fat.

- Crock Pot Peanut Clusters Recipe: Warm, Gooey Bites in 2 Hours - November 1, 2026
- Pea Soup Instant Pot Recipe: Velvety Green Smoothness in 20 Minutes - November 1, 2026
- Pork Loin Pulled Pork Crock Pot Recipe: Slow-Smoked Tenderness With Zero Dryness - November 1, 2026