
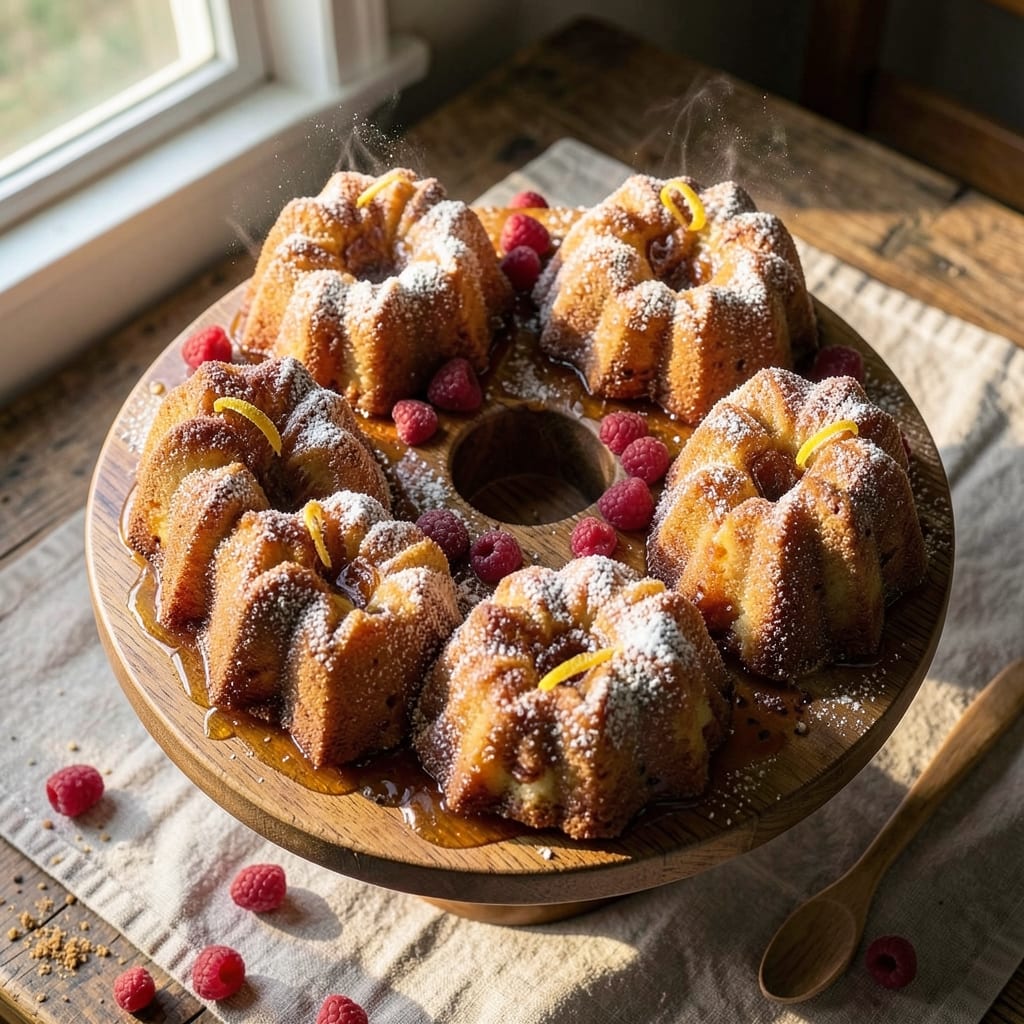
Creating an 8-layered vanilla cake with swirls of creamy cream cheese frosting is the ultimate showstopper dessert that’ll leave everyone asking for seconds. This recipe delivers a perfectly moist, fluffy cake with tender layers and a velvety frosting that’s rich yet light.
The secret lies in precise measurements and gentle folding to maintain that signature airy texture. What sets this cake apart is the foolproof technique for even layers and smooth frosting swirls.
You’ll bake the cake in two batches to ensure perfect rise, then carefully layer it with cream cheese frosting that stays stable even in warm rooms. The result is a stunning, restaurant-quality dessert that’s surprisingly simple to make at home.
By the time you’re done, you’ll have a golden, towering cake with creamy white frosting swirled between each layer. The vanilla flavor shines through while the cream cheese frosting adds a tangy contrast that balances perfectly.
This cake is perfect for celebrations, special occasions, or simply treating yourself to something extraordinary. The best part? This recipe scales beautifully for any occasion—whether you’re feeding a crowd or just want a decadent dessert for two. Let’s get started on creating your dream cake!
Ingredients for 8 cake
Twelve ingredients for a showstopping cake that’ll wow any crowd—moist layers and velvety frosting guaranteed.
| Ingredient | Amount | Notes |
|---|---|---|
| All-Purpose Flour 🌾 | 6 cups | Sifted for lightness and airiness |
| Granulated Sugar 🍚 | 3 ½ cups | Divided for layers and frosting |
| Unsalted Butter 🧈 | 3 cups | Room temperature, softened |
| Large Eggs 🥚 | 12 whole | Room temperature, separated |
| Pure Vanilla Extract 🌿 | 2 tbsp | High-quality bourbon or Madagascar |
| Baking Powder 🍞 | 1 ½ tsp | Freshly measured for lift |
| Salt 🧂 | ½ tsp | Fine sea salt preferred |
| Milk 🥛 | 1 ½ cups | Room temperature, whole preferred |
| Cream Cheese 🧀 | 16 oz | Full-fat, room temperature |
| Heavy Whipping Cream 🥛 | 2 cups | Cold for frosting stability |
| Powdered Sugar 🍚 | 4 cups | Sifted for smooth frosting |
| Vanilla Bean Paste 🌿 | 1 tbsp | For extra vanilla depth |
| Lemon Zest 🍋 | 1 tsp | Brightens the frosting |
The flour and butter are your foundation—King Arthur brand flour (if you can find it) gives the lightest texture, but any all-purpose works. Butter should be room temperature but not melted—press a finger in and it should hold a slight indent. Eggs? Room temperature is non-negotiable—cold eggs cause dense layers. I always grab Land O’Lakes unsalted butter from the store, but any good brand works. For the vanilla, Madagascar bourbon extract has that extra depth, but the cheap stuff is fine if you’re pinching pennies. The key here is precise measurements—use a kitchen scale for the flour if you’re feeling fancy, but a good spoon-and-level method works too.
No cream cheese? Substitute with equal parts softened butter and powdered sugar—it won’t be the same, but it’ll get you close. Running low on powdered sugar? Mix granulated sugar with 1 tbsp cornstarch per cup to mimic the texture. The lemon zest can be skipped if you’re not a fan, but trust me on the vanilla bean paste—it’s worth the splurge for that restaurant-quality flavor. For the milk, whole milk gives richer flavor, but 2% works in a pinch. And if you’re baking for a crowd, double the frosting ingredients—people will expect it!
Butter and cream cheese need to be room temperature before mixing—plan ahead! The cake layers keep well for 3 days at room temperature if wrapped tightly, but the frosting is best used within 2 days. For storage, keep the cake in the fridge if you’re not serving it immediately—the frosting softens in warm rooms. Freezing? Wrap each layer individually in plastic wrap, then the whole cake in foil. Thaw overnight in the fridge before frosting. And if you’re making this ahead? Bake the layers 1-2 days early—they taste even better with time!
Why You’ll Love This Recipe
- Pantry Staples Only: I swear by this recipe because it uses what I always have: flour, sugar, butter, eggs, and vanilla. No specialty items, no last-minute grocery runs—just open the cabinet and start baking.
- Buttery Vanilla Bliss: That rich butter-egg combo? It’s pure comfort. The vanilla ties it all together with a warmth that makes every bite feel like a hug—simple, but somehow ridiculously satisfying.
- Birthday to Brunch: Need a cake for a celebration? A quick breakfast? This recipe handles it all. Layer it, frost it, or serve it plain—it’s the one cake that works for any moment without fuss.
- No-Waste Magic: A single batch feeds a crowd, and leftovers? They’re even better the next day. (Between us, I’ve reheated slices in the microwave and still gotten compliments.) Plus, the ingredients stretch—no food waste here.
Step-by-step instructions for 8 layered vanilla cake with cream cheese frosting
Let’s create a showstopper cake with tender layers and dreamy swirls of frosting.
Prepare the Cake Layers
Preheat your oven to 350°F and grease eight 3-inch round cake pans with butter, then dust with flour. In a large bowl, whisk together 6 cups all-purpose flour, 1.5 tsp baking powder, and 0.5 tsp salt. Set aside.
In a separate bowl, beat 3 cups unsalted butter and 3.5 cups granulated sugar together until light and fluffy, about 3-4 minutes. Add 12 whole room-temperature eggs one at a time, mixing well after each addition. Incorporate 2 tbsp pure vanilla extract and 1.5 cups milk into the wet mixture.
Gradually add the dry ingredients to the wet mixture, mixing on low speed just until combined. Divide the batter evenly among the prepared cake pans, filling each about ⅔ full. Bake for 18-22 minutes or until a toothpick inserted in the center comes out clean. Let the layers cool in the pans for 5 minutes before transferring to a wire rack to cool completely.
Make the Cream Cheese Frosting
In a large mixing bowl, beat 16 oz cream cheese and 3 cups unsalted butter together on medium speed until smooth and creamy, about 2-3 minutes. Gradually add 4 cups powdered sugar, mixing until fully incorporated. Stir in 1 tbsp vanilla bean paste and 1 tsp lemon zest for a bright, aromatic flavor.
In a separate bowl, whip 2 cups heavy whipping cream to stiff peaks. Gently fold the whipped cream into the cream cheese mixture until fully combined. This frosting should be thick but spreadable—if it’s too stiff, add 1-2 tablespoons milk to loosen it.
Assemble the Cake Layers
Once the cake layers are completely cool, place the first layer on a cake stand or plate. Spread a thin layer of frosting over the top, leaving a ½-inch border uncovered. Place the second layer on top and repeat the process. Continue layering all eight layers, ensuring each one is centered and level.
After the final layer is added, apply a thin crumb coat of frosting over the entire cake. Chill in the refrigerator for 15-20 minutes to firm up the crumb coat. This step prevents crumbs from getting into the final layer of frosting.
Frost and Decorate
Remove the cake from the refrigerator and apply the remaining frosting to the top and sides using an offset spatula. For a classic look, spread the frosting evenly, creating smooth sides and a slightly domed top. Use a bench scraper to create clean edges and a polished finish.
To add swirls, dip a spatula in warm water and gently drag it through the frosting in circular motions. For extra flair, pipe additional frosting rosettes or borders around the cake. Let the cake sit at room temperature for 30 minutes before slicing to allow the frosting to set.
Pro Tips For Making 8 Cake
- Cream Butter Slowly: I learned this the hard way—dumping cold butter into sugar and whipping it on high just creates a greasy mess. Instead, beat the butter and sugar together on medium speed until it’s light and fluffy, then gradually increase to high. This takes patience, but it guarantees that air gets trapped properly for a tender crumb.
- Sift the Flour: Skipping this step is how you end up with dense, heavy cake. Sift the flour twice if it’s old or clumpy—once before mixing and again after adding the dry ingredients. (Yes, even if you’re impatient like me.) It cuts out lumps and lightens the texture without extra effort.
- Room-Temp Eggs Matter: Cold eggs won’t emulsify properly, leading to a cake that’s greasy or falls apart. Pop the eggs out of the fridge 30 minutes before you start—just enough time to warm up while you prep the rest. Room-temperature eggs blend smoother and create a stable structure.
- Don’t Overmix: I used to whip the batter until it looked perfect, only to get a tough, chewy cake. Stop mixing as soon as the flour disappears—about 20 seconds after the last dry ingredient is incorporated. Overmixing develops gluten, and that’s how you ruin a light, airy crumb.
Essential equipment for this dish
Cake Pan Essentials
You’ll need eight 3-inch round cake pans—preferably with removable bottoms for easy release. I recommend Wilton Perfect Results pans (non-stick) or USA Pan Classic Round Cake Pans for even baking.
If you don’t have eight pans, bake two batches using 4-inch pans—just adjust baking time to 20-25 minutes for thicker layers. Always grease pans with butter and flour (or baking spray) to prevent sticking. 🧈
Mixer Must-Haves
A stand mixer (like KitchenAid Artisan Series) is ideal for creaming butter and sugar, but a hand mixer works too. For the frosting, a K-beater attachment ensures smooth, lump-free cream cheese.
If mixing by hand, use a large metal bowl—glass can crack under cold cream cheese. I also keep a spatula nearby to scrape down sticky sides. 🔄
Leveling Tools
For perfectly even layers, a cake leveler (or serrated knife) is a game-changer. After baking, trim domed tops to ½-inch thickness for uniform stacking. A cake turntable (like Wilton’s 12-inch) makes frosting and decorating effortless—spin the cake while applying frosting for flawless sides.
No turntable? A plate on a lazy Susan works too. 🎨
Frosting Tools
An offset spatula (I use Michael Baker’s 6-inch) is your best friend for smooth frosting. For swirls, try a spatula with a slight curve or a skewer dipped in warm water.
A bench scraper (like OXO Good Grips) creates clean edges, while a piping bag with star tip adds decorative borders. Keep a small bowl of warm water nearby to dip tools—it prevents frosting from sticking. ✨
Cooling Racks
Never skip wire cooling racks—they prevent soggy bottoms. Use two large racks to cool all eight layers at once. For extra stability, place a baking sheet under the racks to catch crumbs.
Once cooled, store layers in airtight containers at room temp for up to 3 days or freeze for 1 month. 🧊
Nutrition facts
Frequently asked questions
Can I make this cake in fewer layers?
For a smaller gathering, reduce to 4 or 6 layers using 4-inch pans instead. Bake at 350°F for 20-25 minutes per layer to account for the thicker batter. The frosting quantity scales proportionally—use 2 cups frosting per 4 layers or 3 cups per 6 layers. The swirl technique works the same way!
Why does my cream cheese frosting look grainy?
Grainy frosting usually means the cream cheese wasn’t soft enough or you mixed too long. Always use room-temperature cream cheese (press a finger in—it should dent slightly). Beat on medium speed only until smooth, then gradually add powdered sugar. For extra silkiness, sift the sugar first and fold in whipped cream gently. If it’s already grainy, blend with an immersion blender briefly.
How do I prevent the cake from collapsing between layers?
Collapsing happens when layers aren’t fully cooled or frosting is too thick. Let each layer cool completely (at least 2 hours) before assembling. Use a thin layer of frosting (about ¼-inch) between layers—too much adds weight. Chill the cake for 15 minutes after stacking to set the frosting before adding the final layer. A cake turntable helps distribute weight evenly.
Can I substitute vanilla extract for vanilla bean paste?
Yes, but the flavor will be less complex. Use 3 tbsp vanilla extract instead of 1 tbsp vanilla bean paste. For best results, combine 2 tbsp extract + 1 tsp vanilla sugar** (simmer vanilla beans in sugar and cool) to mimic the depth. The lemon zest adds brightness either way—don’t skip it!
How far ahead can I bake the cake layers?
Bake layers 1-2 days ahead and store in an airtight container at room temperature. For longer storage (1 week), wrap each layer individually in plastic and freeze. Thaw overnight in the fridge before frosting. The frosting is best made fresh, but you can prep it 4 hours ahead and refrigerate—bring to room temp before using.

- Baked Potatoes in Crock Pot Recipe: Buttery Interiors and Crispy Top Magic - November 1, 2026
- Braised Beef Short Ribs Recipe: Crock Pot Fall-Off-Bone Magic in 6 Hours - November 1, 2026
- Crock Pot Cocoa Recipe: Velvety Warmth With Hidden Spice Magic - November 1, 2026