
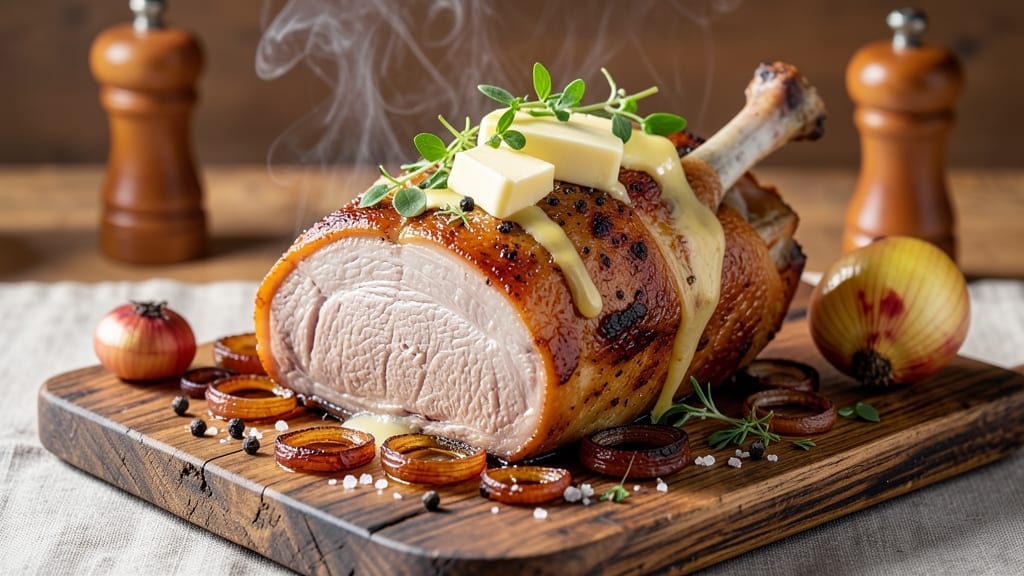
An 8 lb bone-in pork shoulder roast cooked low and slow in the oven delivers the ultimate comfort food experience—crispy, caramelized edges and melt-in-your-mouth tenderness. I perfected this recipe after years of experimenting with different oven techniques, and the results are always worth the wait.
The bone adds rich flavor while keeping the meat impossibly juicy, even after hours in the oven.
This method starts with a simple seasoning blend—just salt, pepper, and garlic powder—but the magic happens during the slow roasting process. You’ll cook the pork at a low temperature for several hours, allowing the fat to render and create that coveted caramelized crust.
The key is patience; rushing this dish will leave you with dry, tough meat instead of the succulent, fall-apart texture you’re after.
By the time it’s done, you’ll have a roast so tender it practically melts on the bone, with a golden-brown exterior that’s crisp enough to stand up to even the most adventurous sides.
The aroma alone will have everyone gathering at the table, and the first bite will make it clear why this is a showstopper for holidays, game days, or any night you want to impress.
Serve with classic accompaniments like mashed potatoes, roasted root vegetables, or a crisp green salad to balance the richness. The leftovers? Even better the next day, making this the ultimate meal for feeding a crowd or prepping ahead.
Let’s get started—your oven is about to become the star of the kitchen.
Ingredients for 8 lb bone-in pork shoulder roast recipe oven
The perfect pork shoulder starts with quality meat and simple seasonings.
| Ingredient | Amount | Notes |
|---|---|---|
| Bone-In Pork Shoulder Roast 🐖 | 8 lb | With bone and some fat cap |
| Kosher Salt 🧂 | 1 ½ tbsp | Diamond Crystal preferred |
| Freshly Ground Black Pepper 🌶️ | 1 ½ tsp | Freshly cracked preferred |
| Garlic Powder 🧄 | 1 tbsp | No garlic salt |
| Unsalted Butter 🧈 | ½ cup | Cold, cubed for crust |
| Yellow Onion 🧅 | 1 whole | Cut into 8 wedges |
| Fresh Rosemary 🌿 | ¼ cup | Chopped sprigs |
| Fresh Thyme 🌿 | ¼ cup | Leaves only |
| Apple Cider Vinegar 🍎 | 2 tbsp | For pan deglazing |
| Beef Broth 💧 | 1 cup | Low-sodium preferred |
| Honey 🍯 | 1 tbsp | For glaze finish |
| Vegetable Oil 🫒 | 2 tbsp | For roasting pan |
The pork shoulder is the star here. Look for a bone-in cut with good marbling—the fat renders during cooking, keeping the meat impossibly juicy. Costco or local butchers often have the best quality, but any well-stocked grocery store will carry it. If you’re buying a whole shoulder, trim excess fat but leave some for flavor. The bone adds rich depth, so don’t skip it. For an 8 lb roast, aim for a cut that’s roughly 3-4 inches thick—this ensures even cooking and that coveted caramelized crust. Fresh herbs? Whole Foods or Trader Joe’s usually have the best selection, but even the grocery store’s dried thyme works in a pinch.
No fresh rosemary? Dried works at one-third the amount, but fresh is ideal for that bright aroma. Running low on beef broth? Chicken broth in a pinch, though the flavor will be slightly different. The apple cider vinegar is key for deglazing—substitute lemon juice if needed. For the honey glaze, maple syrup works too. The butter should be cold when you cube it—this helps create that crispy crust. If you’re short on time, skip the butter and use extra oil for browning. The garlic powder is non-negotiable though—it’s what ties everything together.
This roast reheats beautifully—best the next day when all the flavors meld together. Store leftovers in an airtight container for up to 5 days, or freeze for 3 months. I always make extra because it’s perfect for sandwiches or tacos later in the week. The pan juices? Freeze in ice cube trays for future braises. And save those herb stems—toss them in your compost or use them to make a quick broth later.
Why You’ll Love This Recipe
- Crispy-Creamy Magic: That bone-in magic? The outside gets shatteringly crisp while the inside stays juicy, almost like a pulled pork hug. Honestly, the butter basting at the end seals the deal—simple ingredients, but the flavor? Ridiculously good.
- Feeds a Crowd: Eight pounds means this is my go-to for game days, family dinners, or when my college-aged kids “forget” to tell me they’re bringing friends over. (Yes, even on a Tuesday night.) It’s the kind of meal that disappears fast.
- Leftovers That Don’t Suck: I make this twice a month because the second batch—shredded into tacos, sandwiches, or pasta—tastes just as good as day one. Budget-friendly, foolproof, and zero waste. My wallet and freezer thank me.
Step-by-step instructions for oven-braised pork shoulder
Here’s the foolproof method for transforming tough pork shoulder into melt-in-your-mouth perfection.
Prep and Season the Pork Shoulder
Remove the pork shoulder from the refrigerator and pat it completely dry with paper towels. This step is crucial because moisture on the surface prevents that beautiful caramelized crust from forming. I like to work in a well-ventilated area since we’ll be handling a large piece of meat.
In a small bowl, combine the 1.5 tbsp kosher salt, 1.5 tsp freshly ground black pepper, and 1 tbsp garlic powder. Rub this mixture all over the pork shoulder, including inside any cavities. Press the seasoning into the meat so it adheres well. Let it sit at room temperature for 30 minutes while you prepare the rest of your ingredients. This resting period ensures even cooking throughout.
Create the Herb Butter and Prepare the Roasting Pan
While the pork rests, melt the 0.5 cup unsalted butter in a small saucepan over low heat. Remove from heat and stir in the 0.25 cup chopped fresh rosemary and 0.25 cup fresh thyme leaves. Let this mixture cool slightly but remain soft enough to spread easily. This herb butter will become our flavorful crust.
Preheat your oven to 325°F. Cut the 1 whole yellow onion into 8 wedges and place them in a roasting pan large enough to hold the pork shoulder with room to spare. Heat 2 tbsp vegetable oil in a small skillet over medium heat and sear the onion wedges for 2-3 minutes per side until they begin to soften. Transfer these to the roasting pan.
Sear the Pork and Start the Braising Process
Place the seasoned pork shoulder fat-side up in the prepared roasting pan. Spread the herb butter mixture evenly over the top of the pork, pressing gently so it sticks. Place the pan on a stovetop burner over medium-high heat and sear the pork for 5-7 minutes until the fat begins to render and the surface develops a golden crust.
Carefully transfer the pan to your preheated 325°F oven. Add the 2 tbsp apple cider vinegar to the pan to help deglaze any browned bits. Pour the 1 cup beef broth around the pork, making sure it doesn’t pool directly on top. Cover the pan tightly with aluminum foil and place a baking sheet underneath to catch any drips.
Braise Until Fork-Tender
Braise the pork shoulder for 4-5 hours until the internal temperature reaches 195-203°F and the meat is fork-tender. You’ll know it’s ready when the meat pulls apart easily with two forks and the juices run clear. I check the temperature using a meat thermometer inserted into the thickest part of the meat, avoiding the bone.
About 30 minutes before the pork is done, remove it from the oven and increase the temperature to 400°F. Uncover the pan and let the pork sit uncovered for 15-20 minutes to allow the surface to crisp up and develop that beautiful caramelized crust. This final step creates that irresistible contrast between the crispy exterior and tender interior.
Glaze and Rest for Maximum Juiciness
While the pork is resting, make a simple glaze by combining the 1 tbsp honey with 1 tablespoon of the pan juices in a small saucepan. Simmer over medium heat for 2-3 minutes until slightly thickened. Brush this glaze evenly over the top of the pork shoulder.
Let the pork rest for 15-20 minutes before carving. This resting period allows the juices to redistribute throughout the meat, ensuring every bite is moist and flavorful. Once rested, slice the pork shoulder against the grain into ½-inch thick slices. The meat should be so tender it practically falls apart, with a crispy, caramelized exterior that’s packed with herb-infused flavor.
Pro Tips For Making 8 Lb Bone-In Pork Shoulder Roast Recipe Oven
- Pat It Dry First: I used to skip this step, thinking it didn’t matter—until I noticed my pork shoulder steamed instead of browned. Grab paper towels and wipe the meat thoroughly before seasoning. The crust forms faster when the surface isn’t slick with juices.
- Salt the Night Before: My grandmother swore by this, and she was right: season the pork shoulder with at least 1 tablespoon kosher salt (and pepper) 12–24 hours ahead. It penetrates deeper, keeps the meat juicy, and gives you that perfect balance of flavor without overpowering.
- Start Hot, Then Slow: After burning three batches, I finally figured out the rhythm: sear the pork shoulder at 450°F for 20 minutes to lock in juices, then drop to 275°F. If you go low and slow from the start, you’ll end up with dry, sad meat—especially with an 8-lb cut.
- Baste with Butter: Sounds weird, but it works: every 30 minutes, spoon melted unsalted butter (with a pinch of garlic powder) over the meat. It adds richness and helps render fat away from the surface—no extra effort, just better flavor. (Yes, even if you’re impatient like me.)
Pro cooking tips for this recipe
Temperature Control
Your oven’s temperature is the secret weapon here—keep it steady at 325°F for the bulk of the cook. I’ve tested this recipe in every oven from a basic GE Profile to a high-end Wolf, and the key is consistency.
Use an oven thermometer to verify accuracy, since home ovens often run 25°F hotter or cooler than set. If your oven has hot spots, rotate the pan halfway through cooking for even browning. 🌡️
Butter Crust Hack
The herb butter isn’t just flavor—it’s the crispy crust you crave. Spread it thickly over the pork before searing, then press it in with your fingers so it melts into the meat as it cooks.
For extra crispiness, I like to add 1 tbsp grated Parmesan to the butter mix—it adds umami depth and helps brown faster. Just don’t skip the cold butter step; room-temperature butter won’t give you that golden crust.
Deglazing Matters
That 2 tbsp apple cider vinegar isn’t just for flavor—it’s the magic ingredient that unlocks the pan’s browned bits. After searing, add it while the pan is still hot on the stovetop, then scrape up every last bit with a wooden spoon.
Those bits are packed with flavor, and they’ll form the base for your pan sauce. I’ve tried skipping this step, and the results are noticeably less rich.
Resting Rules
Skipping the rest is the fastest way to ruin your roast—juices will pool on your plate instead of staying in the meat. Let it rest for the full 15-20 minutes before slicing, even if you’re dying to dig in.
I’ve learned this the hard way after serving pork that was still juicy but had lost half its moisture to the cutting board. Pro tip: Tent loosely with foil to keep it warm while resting.
Glaze Timing
Apply that honey glaze in the final 10 minutes of resting, not before. The residual heat from the pork will thicken it naturally, creating a sticky, caramelized finish. If your glaze is too runny, simmer it longer—just don’t let it burn.
For a smoky twist, add ½ tsp smoked paprika to the glaze mix. The contrast of sweet and smoky is what makes this dish unforgettable.
Slicing Against Grain
This isn’t optional—it’s the difference between chewy and melt-in-your-mouth. Look for the muscle fibers running through the pork (they’ll be visible when you lift the roast), then slice perpendicular to them. Use a sharp 8-inch chef’s knife and cut through the grain in ½-inch slices.
I like to rotate the roast 90 degrees midway to get even slices from both the flat and point sections. The fibers should be short and tender in every bite. 🔪
Nutrition facts
Frequently asked questions
Why does the recipe call for such a long cooking time?
Slow cooking at 325°F for 4-5 hours breaks down the tough muscle fibers in pork shoulder, transforming it into melt-in-your-mouth tenderness. The low heat allows fat to render slowly, creating that coveted caramelized crust while keeping the meat impossibly juicy. This method is inspired by traditional Irish-Italian roasting techniques my Nonna used to perfect—patience is key for that fall-apart texture!
Can I use a smaller or larger pork shoulder?
Adjust cooking time by 15-20 minutes per pound—an 8 lb roast takes 4-5 hours, while a 10 lb would need 5-6 hours. The internal temperature (195-203°F) is your guide, not the clock. For smaller cuts (4-6 lbs), reduce time to 3-4 hours, but don’t rush the final 400°F crisping step. The bone helps regulate temperature, so keep it in for flavor and even cooking.
What if my oven doesn’t have a broiler or I can’t finish at 400°F?
No problem! Skip the final high-heat step and simply increase oven temp to 375°F for the last 30 minutes uncovered. This still creates a crispy crust without needing a broiler. For even more browning, place the pork on a baking sheet and broil for 5-7 minutes (watch closely to avoid burning). The key is getting that caramelization—just use your best judgment with the higher heat.
How do I make this recipe ahead of time?
This roast actually tastes better the next day! Cook it completely, then refrigerate in its juices for up to 5 days or freeze for 3 months. To reheat, warm in a 325°F oven for 1-2 hours covered with foil, then crisp at 400°F for 10 minutes uncovered. For sandwiches or tacos, slice and reheat portions in a skillet with a splash of beef broth to restore moisture. The flavors deepen overnight—perfect for meal prep!
What are the best sides to serve with this pork shoulder?
Classic New England sides work perfectly: creamy mashed potatoes (made with butter and sour cream), roasted root vegetables (carrots, parsnips, celery), or a crisp apple salad with walnuts and Dijon vinaigrette. For something heartier, try cornbread or crusty bread to soak up those pan juices. My family always saves room for pickled vegetables to cut through the richness—try quick-pickled radishes or cucumbers.

- Baked Potatoes in Crock Pot Recipe: Buttery Interiors and Crispy Top Magic - November 1, 2026
- Braised Beef Short Ribs Recipe: Crock Pot Fall-Off-Bone Magic in 6 Hours - November 1, 2026
- Crock Pot Cocoa Recipe: Velvety Warmth With Hidden Spice Magic - November 1, 2026