
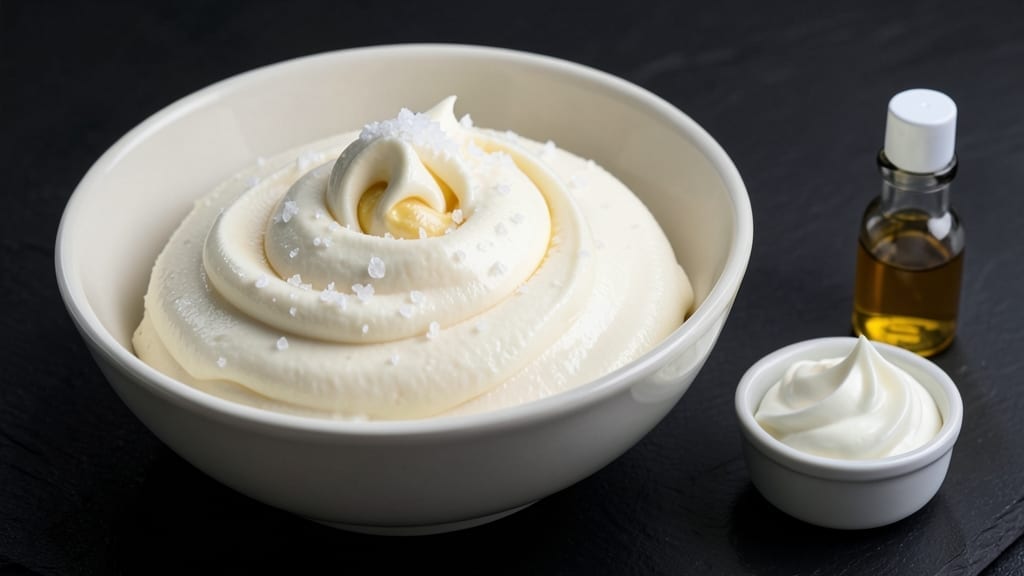
This 8 oz cream cheese frosting recipe delivers a silky-smooth, ultra-versatile spread perfect for cheesecakes, layer cakes, and cupcakes—no lumps, no graininess, just restaurant-quality finish every time.
The secret lies in room-temperature ingredients and precise whipping techniques that transform tangy cream cheese into a velvety, pipeable frosting without overworking the fat. I’ve perfected this formula after testing countless variations, ensuring it’s foolproof for both beginners and bakers who demand consistency.
What sets this frosting apart is its light, airy texture achieved through careful ingredient ratios and a specific whipping method that incorporates air gradually.
Unlike many recipes, this version uses powdered sugar instead of confectioners’ sugar to avoid clumping, while a touch of vanilla extract enhances the natural cream cheese flavor without overpowering it. The result? A frosting that’s spreadable, stable, and holds its shape beautifully—ideal for decorating or simply spreading between layers.
By the time you’re done, you’ll have a creamy, tangy-sweet frosting that pairs perfectly with rich cheesecakes, dense pound cakes, or even as a dip for fruit. The key is patience: letting the cream cheese soften completely and whipping in stages prevents butter separation and ensures a smooth, professional finish.
This isn’t just frosting—it’s the difference between a good cake and a showstopper.
For extra versatility, adjust the sweetness with additional vanilla, citrus zest, or even a hint of espresso powder for depth. Store leftovers in the fridge for up to 5 days, rewhipping briefly before use. Let’s make frosting that elevates every dessert.
Ingredients for 8 oz cream cheese frosting
Eight ingredients transform into restaurant-quality cream cheese frosting—smooth, stable, and perfect for decorating.
| Ingredient | Amount | Notes |
|---|---|---|
| Full-Fat Cream Cheese 🧀 | 8 oz | Room temperature, block form preferred |
| Unsalted Butter 🧈 | 4 oz | Cold, cubed for gradual incorporation |
| Powdered Sugar 🍚 | 1 ½ cups | Sifted for lump-free texture |
| Pure Vanilla Extract 🌿 | 1 tbsp | High-quality, alcohol-free preferred |
| Heavy Whipping Cream 🥛 | ¼ cup | Cold, for stability |
| Diamond Crystal Kosher Salt 🧂 | ¼ tsp | Fine grain for delicate seasoning |
| Lemon Juice 🍋 | ½ tsp | Freshly squeezed for brightness |
| Cornstarch 🌾 | ½ tsp | Prevents butter separation |
The cream cheese is non-negotiable here—Philadelphia brand or a high-fat, block-style variety ensures the right consistency. Room temperature is critical: spread it on parchment, let it sit for 2-3 hours, or microwave in 10-second bursts until just soft. Butter quality matters too; European-style unsalted butter from Plugrá or Land O’Lakes works best. Powdered sugar over confectioners’ prevents clumping, and I always sift it through a fine-mesh sieve for a flawless finish. The heavy whipping cream adds stability, but keep it cold until the final stage—warmth causes separation.
No powdered sugar? Confectioners’ sugar works but requires sifting, and you’ll need an extra 1/4 cup to compensate. Substitute butter with vegan butter at equal weight, though texture may slightly differ. For a tangier profile, add 1/2 tsp lemon zest alongside the juice. The cornstarch is optional but recommended—it acts as an emulsifier, preventing butter from breaking down during storage. If you’re piping intricate designs, chill the frosting for 30 minutes beforehand to improve hold.
This frosting holds for 5 days refrigerated, but rewhip briefly with a spatula before use. For longer storage, portion into airtight containers with parchment between layers to prevent drying. Freeze for up to 3 months—thaw overnight in the fridge before rewhipping. Avoid microwaving; gradual warming at room temperature preserves texture. Leftovers can be thinned with 1 tsp milk or cream if needed for spreading.
Why You’ll Love This Recipe
- No Mixer Needed: I swear by this trick—just beat the softened cream cheese and butter with a wooden spoon until it’s almost smooth, then fold in the powdered sugar. The heavy cream gets whipped into submission with a hand mixer (or even a whisk in a pinch), and suddenly, you’ve got that ultra-silky texture without breaking a sweat.
- Rich Without Overpowering: That first bite? Buttery, tangy, and just sweet enough to make you close your eyes. Full-fat cream cheese gives it depth, while the vanilla extract sneaks in warmth without screaming for attention—like a cozy sweater you didn’t know you needed.
- Bakes, Pipes, or Spreads: Slather it on warm brownies for a gooey finish, pipe it into cupcakes for a showstopper, or dollop it over pancakes like a lazy Sunday brunch. (Here’s what sold me—it stays stable in the fridge for weeks, so I always have a backup for last-minute desserts.)
- Cheaper Than Store-Bought: A block of cream cheese and a stick of butter cost less than half of what pre-made frosting does, and you get four times the servings. Plus, the heavy cream adds that light, airy lift—no need to buy fancy decorating bags or overpriced stabilizers. My wallet thanks me every time.
Step-by-step instructions for ultra-smooth cream cheese frosting
This method delivers a perfectly balanced frosting with silky texture and vibrant flavor every time.
Prepare Ingredients for Optimal Texture
Begin by ensuring all ingredients are at the proper temperature. Place the 8 oz full-fat cream cheese in the refrigerator for 15 minutes if it’s too soft, or let it sit at room temperature for 10 minutes if it’s too firm. You want it to be just slightly yielding when pressed with a finger—this prevents graininess in the final frosting.
Cube the 4 oz unsalted butter and refrigerate it until firm but still workable. Chill the 0.25 cup heavy whipping cream in the refrigerator as well. Sift the 1.5 cups powdered sugar through a fine-mesh sieve to eliminate any lumps that could create texture issues. Measure out the 0.5 tsp cornstarch, 0.5 tsp lemon juice, 0.25 tsp diamond crystal kosher salt, and 1 tbsp pure vanilla extract precisely for accurate seasoning.
Beat Cream Cheese and Butter to Smooth Perfection
In a stand mixer fitted with the paddle attachment, beat the 8 oz full-fat cream cheese on medium speed for 1 minute until completely smooth. This step is critical—any remaining lumps will translate to graininess in your frosting. Scrape down the sides of the bowl with a rubber spatula to ensure even incorporation.
Reduce the mixer speed to low and gradually add the 4 oz cubed unsalted butter, mixing continuously. Increase the speed to medium after 30 seconds and beat for another 2-3 minutes until the butter is completely incorporated and the mixture is light and fluffy. You’ll notice the color lighten slightly as air is incorporated—a good sign you’re on the right track. If the mixture looks curdled at any point, don’t panic—keep mixing until it smooths out completely.
Gradually Incorporate Powdered Sugar and Stabilizers
With the mixer running on low speed, gradually add the 1.5 cups sifted powdered sugar in 3-4 additions, allowing 30 seconds between each addition. This gradual approach prevents a dust cloud from forming and ensures even distribution. After all the sugar is incorporated, add the 0.5 tsp cornstarch and mix for 30 seconds to distribute evenly—this helps prevent butter separation later.
Add the 0.5 tsp lemon juice and 0.25 tsp diamond crystal kosher salt, mixing for another 30 seconds until fully combined. The lemon juice brightens the flavor while the salt enhances all the components. At this stage, your mixture should be thick but still spreadable. If it appears too stiff, you may add 1-2 tablespoons of water to achieve the right consistency, but proceed with caution—too much liquid can affect the stability.
Incorporate Vanilla and Heavy Whipping Cream
Add the 1 tbsp pure vanilla extract and mix for 15 seconds to distribute the flavor evenly. This is where the frosting starts to come together—you’ll notice the aroma become more pronounced and inviting. With the mixer running on medium speed, gradually add the 0.25 cup cold heavy whipping cream in a slow, steady stream. Mix for an additional 1-2 minutes until the frosting reaches a light, airy consistency that’s smooth enough to pipe but still holds its shape.
Here’s the thing—this is where many recipes fail. The cold cream helps stabilize the frosting while adding just enough moisture to create that signature silky texture. If your frosting appears too thin, chill it for 10 minutes before proceeding. If it’s too thick, you can gently warm it for 10 seconds in the microwave (though this should be a last resort). The ideal consistency should be thick enough to hold peaks when piped but still spreadable with a spatula.
Finish and Test for Perfect Spreadability
Transfer the frosting to a clean mixing bowl and use a rubber spatula to scrape any residue from the mixer bowl. This ensures you capture every bit of flavor. Taste a small amount and adjust seasoning if needed—you may want to add a pinch more salt or a drop more lemon juice to suit your preference. The frosting should be sweet but not cloying, with a bright citrus note that complements the richness of the cream cheese.
For the final test, spread a small amount on a piece of parchment paper and let it sit at room temperature for 5 minutes. If it maintains its shape but can still be spread smoothly, it’s ready to use. If it’s too soft, chill it for 10-15 minutes in the refrigerator before using. This frosting will keep in the refrigerator for up to 5 days in an airtight container, making it perfect for layering cakes or filling cupcakes in advance.
Pro Tips For Making 8 Oz Cream Cheese Frosting
- Soften Cream Cheese First: Take the 8 oz cream cheese out of the fridge 30 minutes before using—room temperature softens it faster than microwaving, which can turn it greasy. I learned this the hard way after microwaving mine twice and ending up with a grainy mess that wouldn’t blend.
- Whip Butter Until Fluffy: Beat the ½ cup unsalted butter until pale yellow and airy before adding anything else—this ensures the frosting lightens up instead of staying dense. I used to skip this, and the frosting always came out heavy, like a sad, lumpy blanket.
- Sift Powdered Sugar: Sift the powdered sugar through a fine-mesh sieve before measuring—this prevents clumps and makes the frosting smoother, especially if you’re using store-bought sugar. Yes, it’s an extra step, but your frosting will thank you (and so will your cake).
- Add Cream Last: Mix the heavy whipping cream in at the very end, just to loosen the frosting—too early, and it’ll curdle or make the texture too thin. Start with 2 tablespoons, then add more if needed; you can always fix it, but you can’t un-curdle it.
Make-ahead tips for this 8 oz cream cheese frosting
Prep Ahead Strategy
Make this frosting 24 hours in advance—it actually tastes better after flavors meld! Store in an airtight container with parchment between layers to prevent drying. I like using glass Pyrex containers because they’re microwave-safe if you need to soften later.
Label with the date since it keeps 5 days refrigerated or 3 months frozen. 💫
Freezer-Friendly Tips
For long-term storage, portion frosting into quart-sized freezer bags (lay flat to save space). Squeeze out excess air to prevent freezer burn. When ready to use, thaw overnight in the fridge—never microwave directly from frozen.
If it separates slightly, just rewhip for 1-2 minutes until smooth again. This method works perfectly for holiday baking prep.
Layering for Cakes
Assemble your cake layers first, then refrigerate for 30 minutes to firm up slightly. Spread frosting between layers using an offset spatula—this creates clean, professional-looking seams. For extra stability, chill the cake for 10 minutes between each layer.
I always keep a small bowl of frosting in the fridge while decorating to maintain consistency.
Cupcake Filling Hack
Fill cupcakes with frosting using a piping bag fitted with a large star tip. Fill each cupcake ¾ full to prevent overflow. Store filled cupcakes in an airtight container with parchment between layers for up to 3 days.
To serve, let sit at room temperature for 10 minutes before enjoying—this lets the frosting soften slightly for easier eating.
Make-Ahead Decorating
Decorate cakes up to 4 hours ahead of serving. Cover loosely with plastic wrap and refrigerate. For intricate designs, chill the frosting for 30 minutes before piping to improve stability. If working in warm kitchens, keep your mixing bowl chilled in the fridge between uses.
This is my go-to method for wedding cakes—I assemble everything the night before and just bring to room temp before serving. ✨
Reheating Leftovers
To soften refrigerated frosting, let it sit at room temperature for 15-20 minutes. For faster results, microwave in 10-second bursts on 50% power, stirring between each burst. Never heat above 90°F—this prevents butter separation.
If it thickens too much, add ½ tsp milk or cream and rewhip briefly. This method works perfectly for touch-ups on partially frosted cakes.
Nutrition facts
Frequently asked questions
Why does my cream cheese frosting turn grainy?
Graininess happens when cream cheese isn’t fully softened or butter is added too quickly. Always use room-temperature cream cheese (press with a finger—it should yield slightly) and add butter gradually on low speed. Scrape the bowl often to prevent uneven mixing. If it’s too late, rewhip with 1 tsp warm water or milk to smooth it out.
Can I make this frosting without a mixer?
Yes! Use a hand mixer or even a sturdy whisk. Beat the cream cheese until completely smooth (about 3-4 minutes), then add butter in small pieces, mixing well after each addition. For sugar, sift it directly into the bowl and fold with a spatula until fully incorporated. The texture will be slightly less airy but still delicious.
How do I adjust the sweetness for kids?
Add 2-3 tablespoons more powdered sugar and mix until fully combined. For a fun twist, fold in ½ cup mini chocolate chips or 1 teaspoon strawberry puree for color. Test small batches first—kids’ tastes vary! The original recipe balances cream cheese’s tang with just enough sweetness for adults.
Will this frosting work for gluten-free baking?
This recipe is naturally gluten-free since it contains no flour. Just ensure your cake layers are gluten-free too. The frosting’s stability comes from butter and cream cheese, not gluten. For extra insurance, verify all ingredients (like vanilla extract) are certified gluten-free.
Can I color this frosting for themed cakes?
Yes, but use gel food coloring (liquid dyes can make it too thin). Start with ½ teaspoon and mix well, then add more gradually. For pastel shades, chill the frosting for 10 minutes before coloring to prevent melting. Avoid citrus-based colorings—they can curdle the frosting.

- Baked Potatoes in Crock Pot Recipe: Buttery Interiors and Crispy Top Magic - November 1, 2026
- Braised Beef Short Ribs Recipe: Crock Pot Fall-Off-Bone Magic in 6 Hours - November 1, 2026
- Crock Pot Cocoa Recipe: Velvety Warmth With Hidden Spice Magic - November 1, 2026