
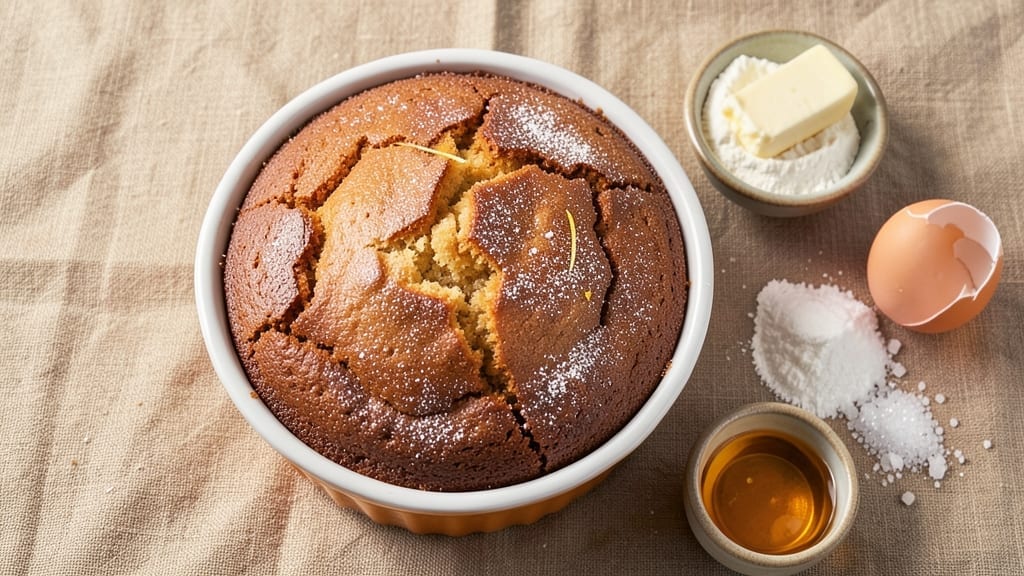
An 8oz vanilla cake that bakes in just 15 minutes is the perfect solution for a single serving of pure indulgence without the fuss of a full sheet pan. This recipe delivers moist, tender layers with a delicate crumb and subtle vanilla flavor—ideal for satisfying a craving without leftovers.
The secret lies in precise measurements and a gentle baking method that ensures even cooking every time. What makes this recipe stand out is its simplicity: 5 basic ingredients, one bowl, and no special equipment required.
Whether you’re baking for one or need a quick dessert for two, this single-serve cake comes together faster than store-bought options and tastes infinitely better. The texture is light yet rich, with a golden top that signals perfect doneness.
By the time you pull it from the oven, you’ll have a warm, fragrant cake that’s ready to be enjoyed straight from the mug or pan.
Top it with a dollop of whipped cream, a sprinkle of powdered sugar, or a drizzle of chocolate ganache for an extra touch of elegance. This is dessert made effortless—no waiting, no mess, just pure satisfaction.
Perfect for a solo treat, a last-minute guest, or a quick pick-me-up, this 8oz vanilla cake proves that great baking doesn’t require complexity. Let’s get baking!
Ingredients for 8oz cake
Five simple ingredients transform into a perfect single-serve cake in minutes.
| Ingredient | Amount | Notes |
|---|---|---|
| All-Purpose Flour 🌾 | ½ cup | Sifted for light texture |
| Granulated Sugar 🍚 | ¼ cup | White or light brown |
| Pure Vanilla Extract 🌿 | 1 tbsp | High-quality, not imitation |
| Unsalted Butter 🧈 | ¼ cup | Cold, cubed for even baking |
| Egg 🥚 | 1 whole | Room temperature preferred |
| Baking Powder 🍞 | ½ tsp | Aluminum-free for best rise |
| Salt 🧂 | ¼ tsp | Fine sea salt preferred |
| Milk 🥛 | ¼ cup | Whole milk for richness |
The butter and flour are your foundation—use cold butter for flaky layers, and sift that flour to avoid dense texture. King Arthur or Gold Medal brands are my go-to for reliable baking performance. The vanilla extract? Nothing imitation here—real vanilla makes all the difference. For the egg, room temperature helps it blend smoothly, but if you’re in a rush, just let it sit out for 10 minutes. The milk adds moisture, so whole milk gives you that rich, tender crumb you’re craving.
No vanilla extract? Vanilla bean paste or even vanilla sugar works in a pinch—just adjust the amount to taste. Swapping white sugar for brown adds depth, but keep it to half the quantity to avoid moisture issues. Butter too hard to cut? Microwave for 10 seconds to soften—just enough to make it workable. The baking powder is crucial here, so check the expiration date—old powder won’t rise. For a dairy-free version, substitute the milk with unsweetened almond milk and use vegan butter, though the texture will be slightly different.
This cake is best enjoyed fresh, but leftovers keep 2 days wrapped at room temperature. For longer storage, slice and freeze portions for up to 1 month—just thaw at room temperature before serving. I always bake mine in a ramikin or small cake pan, but a coffee mug works in a pinch (just grease it well). The secret to perfect doneness? Bake until a toothpick comes out clean—no guessing games here.
Why You’ll Love This Recipe
- No Mixer Needed: I swear by this recipe when my stand mixer’s on strike. Creaming that butter and sugar by hand? Surprisingly satisfying—plus, the vanilla’s rich aroma fills the kitchen instantly.
- Buttery Vanilla Bliss: That single teaspoon of pure vanilla extract? It’s the secret weapon. The cake stays tender but never dry, with a melt-in-your-mouth richness from the butter that makes store-bought boxes look sad.
- Portion Control Perfection: An 8oz cake is my go-to for one serving—no guilt, no leftovers (unless you’re me, sneaking slices later). It’s the ideal size for a quick dessert or even breakfast when paired with jam.
- Pantry Staple Magic: Using flour, sugar, butter, and eggs means I never stress about missing ingredients. It’s my budget-friendly backup when I’m craving something sweet but don’t want to raid the fridge for fancy add-ins.
Step-by-step instructions for single-serve vanilla cake
Here’s how to create a perfect single-serve vanilla cake with tender crumb and rich flavor.
Prep Your Ingredients and Equipment
First, let’s get everything ready. Preheat your oven to 350°F and position a rack in the center. Grease an 8-ounce ramekin or small cake pan thoroughly with butter or nonstick spray—I like to use a pastry brush for even coverage. This ensures easy release later.
While the oven heats, measure all your ingredients precisely. Sift the 0.5 cup all-purpose flour and 0.5 tsp baking powder together in a small bowl to remove lumps. Cut the 0.25 cup unsalted butter into small cubes and let it sit at room temperature for 10 minutes if it’s very cold. Room-temperature butter creates a smoother batter and better texture.
Mix Wet Ingredients for Smooth Batter
In a medium mixing bowl, combine the 0.25 cup granulated sugar, 1 whole egg, and 0.25 cup milk. Whisk vigorously for 1-2 minutes until the mixture is completely smooth and pale yellow. This step ensures even distribution of ingredients and proper aeration for a light cake.
Add the 0.25 cup cubed butter and whisk until fully melted and incorporated. Then stir in the 1 tbsp pure vanilla extract and 0.25 tsp salt. The batter should be smooth with a slightly thick consistency—if it looks too thin, let it sit for 5 minutes to thicken slightly. This resting period helps create a better crumb structure.
Combine Dry Ingredients Gently
Gradually sprinkle the sifted flour mixture over the wet ingredients while gently folding with a rubber spatula. Start at the center and work your way outward to prevent gluten development. Mix just until combined—you should still see small streaks of flour. Overmixing develops gluten, which makes the cake tough instead of tender.
Pour the batter into your prepared ramekin, tapping the pan gently on the counter to remove any air bubbles. Smooth the top with a spatula. Here’s the thing—don’t overfill the pan. Leave about ¼ inch of space at the top to allow for rising. This prevents overflow and ensures even baking.
Bake to Golden Perfection
Place the ramekin in the preheated oven and bake for 15-18 minutes. The cake is done when a toothpick inserted in the center comes out clean and the edges are light golden brown. Don’t open the oven door during baking—this causes the cake to sink. The residual heat helps create that perfect rise.
If you’re worried about the top browning too quickly, tent the ramekin loosely with aluminum foil after 10 minutes. This simple technique helps create an even color while maintaining moisture. When the cake passes the toothpick test, remove it immediately to prevent overbaking.
Cool and Serve with Confidence
Let the cake cool in the pan for 5 minutes before transferring it to a wire rack to cool completely. This brief resting period helps set the structure while preventing a soggy bottom. The cake should have a tender crumb with a slightly domed top—signs of proper baking.
Serve immediately for the warmest experience, or store at room temperature in an airtight container for up to 2 days. For extra decadence, dust with powdered sugar or drizzle with vanilla glaze. This single-serve cake is perfect for satisfying cravings without the commitment of a full cake.
Pro Tips For Making 8oz Cake
- MEASURE FLOUR BY SPOONING: Dump that flour straight from the bag into your measuring cup and pack it down? Stop. Spoon it in lightly, then level with a knife—otherwise, you’re adding 10-15% extra, and your cake will turn out dense. I learned this the hard way when my first batch collapsed like a pancake.
- CREAM BUTTER AND SUGAR UNTIL PALE: That butter-sugar mix should look like wet sand, not butter chunks in a sugar snowstorm. Use a stand mixer and scrape the bowl every 30 seconds—if it’s not pale after 3-4 minutes, you’re not there yet. Pale = proper aeration = light, tender crumb.
- LET EGGS COME TO ROOM TEMP: Cold eggs in warm batter = curdling disaster. Pop them out of the fridge 30 minutes before mixing, or even better, run them under warm water for 10 seconds. Trust me, your cake’s texture will thank you—no one wants a sad, lumpy center.
- BAKE UNTIL TOOTHPICK COMES OUT CLEAN: That cake will look done before it’s actually done. The second you open the oven and see domed edges, resist the urge to pull it. Wait 2-3 minutes, then check with a toothpick—if it’s wet or crumbly, back in it goes. Overbaking is easy; underbaking is a crime.
Flavor customization for this 8oz cake
Classic Vanilla Twist
Start with the base recipe but add ½ tsp cinnamon and ¼ tsp ground nutmeg to the dry ingredients for a warm, spiced vanilla flavor. The spices blend beautifully with the vanilla, creating a cozy, aromatic cake that’s perfect for chilly evenings.
I often pair this with a sprinkle of cinnamon sugar on top right after baking—it adds a delightful crunch and visual appeal. 🌿
Chocolate Lover’s Upgrade
Swap ¼ cup of the granulated sugar for 2 tablespoons of Dutch-process cocoa powder and add 1 tablespoon of melted butter to compensate for the moisture difference. This creates a rich, fudgy vanilla-chocolate hybrid that’s irresistible.
For extra decadence, fold in 2 tablespoons of chocolate chips or a 1-ounce square of dark chocolate, chopped finely, into the batter. A dusting of cocoa powder on top adds a professional touch.
Citrus Zest Brightness
Add 1 teaspoon of lemon zest or orange zest to the batter for a fresh, citrusy twist that cuts through the richness of the vanilla. The zest adds a subtle tang that keeps the cake from feeling too sweet.
I love this variation in the morning—it feels like a little burst of sunshine in every bite. For an extra pop of flavor, drizzle with a simple citrus glaze made from 1 tablespoon powdered sugar + ½ teaspoon lemon juice after baking.
Coffee Mocha Infusion
For a sophisticated twist, replace ¼ cup of the milk with 2 tablespoons of strong brewed coffee or espresso and add 1 teaspoon of instant coffee granules to the dry ingredients. This creates a subtle mocha flavor that pairs beautifully with vanilla.
Top with a sprinkle of cocoa powder or a dollop of whipped cream for a dessert-worthy treat. This version is perfect for coffee lovers who want something a little more complex than plain vanilla.
Nutty Crunch Addition
Fold 2 tablespoons of finely chopped walnuts or pecans into the batter for added texture and depth. The nuts provide a satisfying crunch that contrasts with the tender cake.
For extra richness, toast the nuts in a dry pan for 2-3 minutes before chopping—they’ll release their natural oils and add even more flavor. A sprinkle of toasted nuts on top before baking gives it a beautiful finish. 💫
Seasonal Spice Blend
In the fall, swap the vanilla extract for 1 teaspoon of pumpkin pie spice (a mix of cinnamon, nutmeg, ginger, and cloves) and add ¼ cup of pureed pumpkin to the batter. This creates a cozy, seasonal cake that’s perfect for autumn cravings.
For a winter twist, add ½ teaspoon of cardamom and a pinch of sea salt to the dry ingredients—it’s a sophisticated flavor combo that feels festive. Pair with a dollop of whipped cream or a sprinkle of crushed candy cane for the holidays.
Nutrition facts
Frequently asked questions
Can I make this 8oz cake in a mug instead of a ramekin?
A standard 12-ounce mug works perfectly for this recipe. Grease it thoroughly with butter or nonstick spray, then reduce the baking time by 2-3 minutes since mugs conduct heat differently. The cake will still be moist and tender, but check for doneness at 13-15 minutes instead of 15-18.
Why did my cake sink in the middle?
This usually happens when the oven door is opened too early or the cake isn’t baked long enough. Always let the cake bake undisturbed until a toothpick comes out clean. If your oven runs hot, reduce the temperature to 325°F and bake for 20-22 minutes. Also, make sure your butter is room temperature—not melted!
How can I make this cake gluten-free?
Replace the all-purpose flour with a 1:1 gluten-free baking flour blend (like Bob’s Red Mill) and add ½ teaspoon xanthan gum to the dry ingredients. You may also need to reduce the milk by 1 tablespoon since gluten-free flours absorb more liquid. The texture will be slightly denser but still delicious.
Can I bake this cake ahead of time?
Yes! Bake the cake up to 2 days in advance and store it in an airtight container at room temperature. For longer storage, slice and freeze portions for up to 1 month. Thaw at room temperature before serving—no microwave needed! The flavor actually improves slightly as it sits.
What’s the best way to decorate this single-serve cake?
Keep it simple with a dusting of powdered sugar or a drizzle of melted chocolate. For extra flair, try a dollop of whipped cream with a sprinkle of cinnamon or crushed nuts. If you’re feeling fancy, pipe a quick vanilla glaze (powdered sugar + milk) over the top. Less is more—this cake shines with minimal decoration!

- Baked Potatoes in Crock Pot Recipe: Buttery Interiors and Crispy Top Magic - November 1, 2026
- Braised Beef Short Ribs Recipe: Crock Pot Fall-Off-Bone Magic in 6 Hours - November 1, 2026
- Crock Pot Cocoa Recipe: Velvety Warmth With Hidden Spice Magic - November 1, 2026