
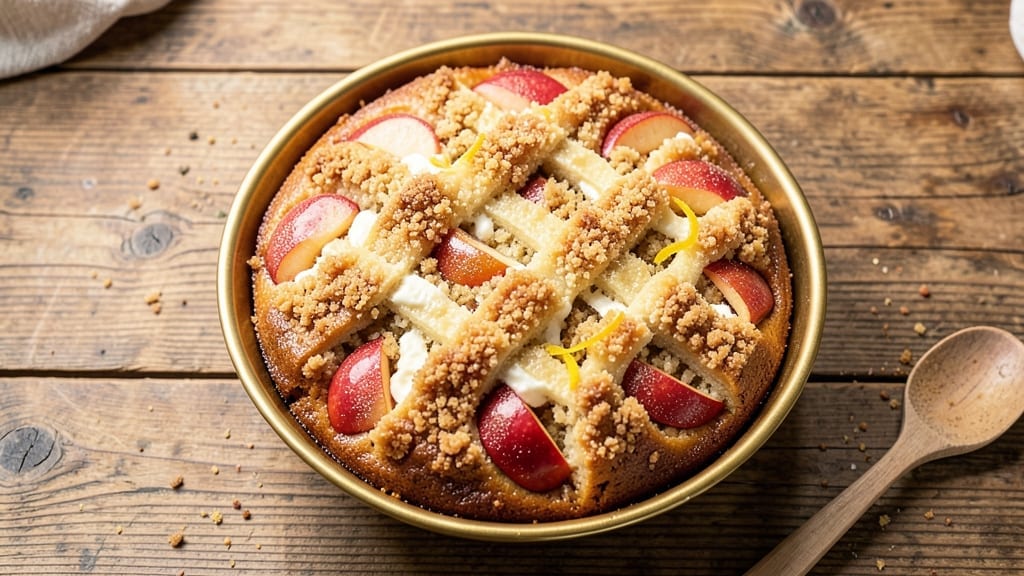
This 9×13 apple cake recipe delivers the perfect balance of moist spiced cake and tender apples, topped with velvety vanilla bean frosting that transforms it into a showstopper dessert.
The secret lies in layering thinly sliced apples between two rich cake layers, ensuring every bite delivers warm cinnamon notes and juicy fruit. I developed this recipe after years of testing—it’s the one that finally earned rave reviews from even the most skeptical dessert lovers.
The cake itself is foolproof, with a tender crumb that stays moist for days, thanks to a blend of all-purpose and cake flour.
Thinly sliced apples (I recommend a mix of tart and sweet varieties) are arranged in a lattice pattern, creating a visually stunning presentation while keeping the cake light. Baking at 350°F for 45-50 minutes ensures a golden crust without drying out the layers.
What sets this apart is the vanilla bean frosting, which adds a luxurious touch without overpowering the apple’s natural sweetness. The frosting is silky, not too sweet, and pairs beautifully with the warm spices in the cake.
Serve it warm with a scoop of vanilla ice cream, or let it cool slightly for the perfect balance of textures.
This recipe scales perfectly for gatherings—whether you’re feeding a crowd or baking for a special occasion. The optional streusel topping (a mix of flour, brown sugar, and butter) adds extra crunch if you prefer texture. Let’s get baking!
Ingredients for 9 x 13 apple cake
Fifteen ingredients. One showstopper cake. Perfect for gatherings or special treats.
| Ingredient | Amount | Notes |
|---|---|---|
| All-Purpose Flour 🌾 | 2 ½ cups | Sifted for light texture |
| Cake Flour 🌾 | ½ cup | For extra tenderness |
| Granulated Sugar 🍚 | 1 ½ cups | White sugar preferred |
| Light Brown Sugar 🍚 | ½ cup | Packed firmly |
| Unsalted Butter 🧈 | 1 cup | Room temperature, full-fat |
| Large Eggs 🥚 | 2 whole | Room temperature |
| Vanilla Extract 🍯 | 2 tsp | Pure vanilla preferred |
| Baking Powder 🧂 | 2 tsp | Aluminum-free preferred |
| Ground Cinnamon 🌶️ | 2 tsp | Freshly ground preferred |
| Ground Nutmeg 🌶️ | ½ tsp | Freshly grated if possible |
| Salt 🧂 | ½ tsp | Fine sea salt preferred |
| Apples (Mixed Varieties) 🍎 | 4 whole | Tart and sweet mix (e.g., Granny Smith, Honeycrisp) |
| Lemon Juice 🍋 | 2 tbsp | Freshly squeezed |
| Heavy Cream 🥛 | 1 cup | Cold for frosting |
| Powdered Sugar 🍚 | 3 cups | Sifted for smooth frosting |
| Vanilla Bean Paste 🍯 | 1 tsp | For real vanilla flavor |
| All-Purpose Flour (Streusel) 🌾 | ½ cup | Optional for topping |
| Light Brown Sugar (Streusel) 🍚 | ¼ cup | Optional for topping |
| Cold Unsalted Butter (Streusel) 🧈 | ¼ cup | Optional for topping |
The apples are the star—mix tart and sweet varieties for the best balance. Granny Smith and Honeycrisp work perfectly, but whatever’s in season will do. I always grab mine at Trader Joe’s or the farmers market (they’re fresher and hold up better). Thinly slice them—about 1/8-inch thick—and toss with lemon juice right before arranging in the cake. The butter matters too—use full-fat, room temperature for that rich, moist crumb. If you’re short on time, the streusel topping adds texture without extra effort—just mix the flour, brown sugar, and cold butter until crumbly.
No vanilla bean paste? Pure vanilla extract plus a scraped vanilla bean works, but it’s not the same. Short on apples? Substitute with dried apples (soaked in warm water) or apple sauce, but reduce other liquids slightly. The cake flour is non-negotiable for that tender crumb—don’t swap it for all-purpose. For the frosting, powdered sugar must be sifted to avoid lumps. And if you’re feeling fancy, add a pinch of salt to the frosting—trust me, it balances the sweetness.
This cake keeps beautifully—3 days at room temperature covered loosely, or 5 days refrigerated. The frosting can be made a day ahead and stored in the fridge, then whipped back to smoothness. For serving, I like to dust the top with a little extra cinnamon or a sprinkle of powdered sugar. Leftovers? Slice and freeze portions for up to 3 months—just thaw at room temperature before serving. The apples stay juicy, and the cake stays moist even after freezing.
Why You’ll Love This Recipe
- One-Bowl Wonder: I swear by this—just toss everything into one bowl, mix, and bake. No fancy techniques, no extra pans, and zero stress. The cake flour keeps it tender, while the all-purpose gives it structure, so it’s foolproof even if I’m distracted.
- Spiced Sugar Magic: That brown sugar and granulated combo? It caramelizes just enough to make every bite taste like autumn. And honestly, the butter—rich, creamy, and unsalted—lets the apples shine without overpowering them.
- Picnic to Potluck: Slice it warm for a picnic, pack it for lunch, or serve it at a gathering. The 9×13 size means I can make one batch and feed a crowd—or save half for tomorrow. (Yes, even on a Tuesday night.)
- Budget-Friendly Stretch: Uses pantry staples, so I’m not breaking the bank. The leftovers? Even better the next day—moist, not dry, and still delicious. Plus, it’s cheaper than buying a pre-made cake, but way more satisfying.
Step-by-step instructions for 9×13 apple cake recipe
Here’s how to bake a tender, spiced apple cake with a velvety vanilla frosting.
Prep and Mix the Dry Ingredients
In a large bowl, whisk together the 2.5 cups All-Purpose Flour and 0.5 cup Cake Flour until completely combined. This ensures an even distribution and prevents lumps in your batter. In a separate bowl, combine the 1.5 cups Granulated Sugar, 0.5 cup Light Brown Sugar, 2 tsp Baking Powder, 2 tsp Ground Cinnamon, 0.5 tsp Ground Nutmeg, and 0.5 tsp Salt. Sift this dry mixture over the flour mixture and whisk again until everything is evenly distributed.
I like to use a whisk for this step because it aerates the dry ingredients slightly, which helps create a lighter cake texture. Make sure there are no flour pockets remaining—this is key for a tender crumb.
Cream the Butter and Mix Wet Ingredients
In a stand mixer fitted with the paddle attachment, beat the 1 cup Unsalted Butter on medium speed until smooth and creamy, about 2-3 minutes. Gradually add the 2 whole Large Eggs, one at a time, mixing well after each addition. Scrape down the sides of the bowl as needed to ensure everything incorporates properly.
Next, add the 2 tsp Vanilla Extract and mix for another 30 seconds until fully combined. The butter should be light and fluffy at this point—this is what creates that perfect tender crumb. If you’re using room-temperature butter, this step should go smoothly without any resistance.
Combine Wet and Dry Ingredients
With the mixer on low speed, gradually add the dry ingredient mixture to the wet ingredients. Mix just until combined—you should still see some flour streaks. This prevents overmixing, which can lead to a tough cake. In a separate bowl, combine the 4 whole Apples (Mixed Varieties), peeled and diced into ¼-inch pieces, with the 2 tbsp Lemon Juice. This prevents the apples from browning and adds a nice bright acidity to balance the sweetness.
Gently fold the apple mixture into the batter using a spatula. Be careful not to overmix—the apples should be evenly distributed throughout the batter. The batter will be thick but still pourable.
Prepare the Streusel Topping (Optional)
If using the optional streusel topping, combine the 0.5 cup All-Purpose Flour (Streusel), 0.25 cup Light Brown Sugar (Streusel), and 0.25 cup Cold Unsalted Butter (Streusel) in a small bowl. Use your fingers or a pastry cutter to work the butter into the flour mixture until it resembles coarse crumbs. This topping adds a delightful crunchy contrast to the soft cake.
Spread half of the batter evenly into a 9×13-inch baking pan lined with parchment paper. Sprinkle the streusel topping evenly over the batter, then top with the remaining batter. This layering creates a beautiful presentation and ensures every bite has that perfect crunchy-to-moist contrast.
Bake and Frost to Perfection
Preheat your oven to 350°F. Bake the cake for 45-50 minutes or until a toothpick inserted into the center comes out clean. The edges should be golden brown, and the top should spring back when gently touched.
Once baked, let the cake cool in the pan for 15 minutes, then transfer it to a wire rack to cool completely. While the cake cools, prepare the frosting by beating the 1 cup Heavy Cream until soft peaks form. Gradually add the 3 cups Powdered Sugar and 1 tsp Vanilla Bean Paste, mixing until smooth and creamy. Spread this frosting evenly over the cooled cake. The frosting should be smooth and glossy, adding a final touch of elegance to your cake.
Pro Tips For Making 9 X 13 Apple Cake
- Preheat and Grease Properly: Your 9×13 pan needs to be hot—350°F for at least 15 minutes—before the batter goes in. Brush the sides with melted butter after preheating (not before), then dust with flour. I learned this the hard way when my cake stuck like glue, and now it slides out clean every time.
- Mix Dry Ingredients First: Whisk the cake flour, all-purpose flour, and sugars together before adding butter. This prevents lumps and ensures even moisture distribution—especially important when using both granulated and brown sugar. Skip this, and you’ll end up with dense patches.
- Don’t Overmix the Batter: Once you add the wet ingredients (butter, eggs, milk), mix just until combined—about 20 strokes. Overmixing develops gluten, and your cake will turn tough instead of tender. I used to beat it like I was punishing it, then realized my grandmother’s method was right: “Gentle hands, sweet cake.”
- Test for Doneness Early: Check your cake at 40 minutes, not the recipe’s suggested time. Insert a toothpick—if it comes out with moist crumbs (not wet batter), it’s done. Ovens vary, and brown sugar can make the edges look done before the center is. Resist the urge to peek too soon, but don’t trust the timer blindly.
Troubleshooting perfect results
Cake Too Dense
If your apple cake turns out dense instead of tender, overmixing the batter is usually the culprit. Mix just until combined—you should still see small flour streaks. Also, ensure your butter is room temperature but not melted.
Cold butter creates pockets of air for a lighter texture. I’ve found that using a stand mixer on low speed for combining wet and dry ingredients helps prevent overdevelopment. 🌟
Apples Too Watery
Excess moisture from apples can make the cake soggy. To fix this, pat the sliced apples dry with a paper towel before adding them to the batter. Also, pre-cook the apples for 5 minutes in a skillet with 1 tbsp sugar and 1 tsp cinnamon to draw out excess liquid.
This step enhances flavor while controlling moisture. I always do this when using very juicy varieties like Honeycrisp.
Frosting Too Thin
If your vanilla frosting spreads too easily or looks runny, you likely added too much heavy cream. The frosting should hold its shape but still be spreadable. For a thicker consistency, reduce the cream by 2 tbsp or add 1 tbsp more powdered sugar.
Chill the bowl and beaters for 10 minutes before whipping to help stabilize the mixture. I keep a small bowl of powdered sugar nearby to adjust as needed.
Uneven Baking
Dark spots or uneven browning often mean the oven isn’t calibrated properly. Rotate your cake pan halfway through baking for even heat distribution. If your oven runs hot, reduce the temperature to 325°F and bake for 5-10 minutes longer.
A thermometer probe helps monitor internal temperature—aim for 200°F at the center. I’ve had great results using a glass baking dish for more even heat circulation.
Cake Sticking to Pan
Greasing the pan isn’t enough—always line it with parchment paper for easy release. For extra insurance, dust the paper with 1 tbsp flour before adding the batter. If the cake still sticks, it might be underbaked.
Let it cool completely in the pan before transferring to a rack. I also recommend using a 9×13-inch pan with high sides to prevent overflow during baking.
Frosting Not Setting
Humidity or warm temperatures can prevent frosting from setting properly. Chill the cake for 30 minutes before frosting to help the glaze adhere. For extra stability, brush the cooled cake with a light corn syrup glaze (1 tbsp corn syrup + 1 tbsp water) before adding the frosting.
This creates a barrier that locks in moisture and improves adhesion. Store the frosted cake in the fridge for 1 hour** before serving for best results.
Nutrition facts
Frequently asked questions
Can I substitute cake flour with all-purpose flour in this recipe?
The recipe calls for 0.5 cup cake flour to create that signature tender crumb. If you’re short on time, you can replace it with 0.5 cup all-purpose flour, but the texture will be slightly denser. For best results, use the cake flour as written—it’s what makes this apple cake so light and moist.
How do I store leftovers to keep the cake fresh?
This cake stays fresh for 3 days at room temperature covered loosely with plastic wrap, or up to 5 days refrigerated. For longer storage, slice and freeze portions for 3 months. Thaw at room temperature before serving—the apples stay juicy and the cake remains tender.
What’s the best way to arrange the apples in the cake?
For a classic look, arrange thinly sliced apples in a lattice pattern over the first cake layer. This creates a beautiful presentation while keeping the cake light. If you prefer simplicity, spread the apples evenly or create a single layer in the center. The key is to use ¼-inch thick slices for even cooking.
Can I make this cake ahead of time?
Bake the cake up to 2 days in advance and store it at room temperature. The frosting can be made 1 day ahead and refrigerated, then whipped back to smoothness before spreading. Refrigerate the frosted cake for 1 hour before serving to let the frosting set properly.
What’s the secret to a perfectly moist apple cake?
The combination of room-temperature butter, cake flour, and lemon juice on the apples keeps this cake moist. Avoid overmixing the batter, and never skip the 15-minute cooling period in the pan before transferring to a rack. These small steps make all the difference!

- 12 Bean Chili Recipe: Hearty Slow-Cooked Depth With 12 Legumes - October 17, 2026
- 5 Seed Bread Recipe: Nutty Crunch and Artisan Flavor in One Loaf - October 17, 2026
- 1 Lb Macaroni Salad Recipe: Bold, Crunchy, and Crowd-Pleasing - October 17, 2026