
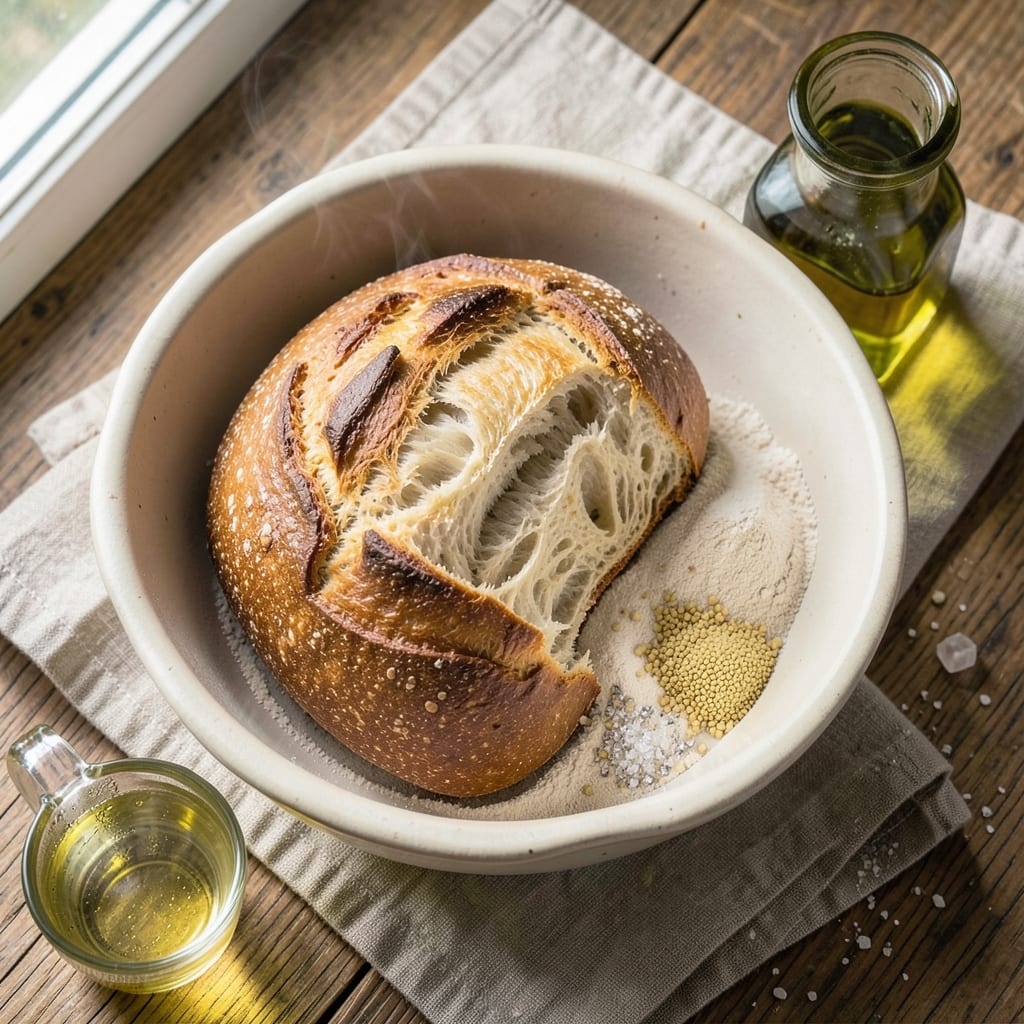
Mastering a 90-minute bread recipe with artisanal texture doesn’t require kneading or baking expertise—just patience and a few key techniques. This no-knead method transforms simple ingredients into a loaf with an open crumb structure and crispy crust, perfect for sandwiches or toast.
The secret lies in a slow rise and precise baking, ensuring professional results without the fuss.
Unlike traditional bread recipes, this approach skips the labor-intensive kneading step while still delivering restaurant-quality texture. You’ll use basic pantry staples—flour, yeast, water, and salt—combined with a 30-minute mix and 60-minute rise, making it ideal for busy weeknights.
The dough’s natural fermentation develops deep flavor, while a steam bath during baking creates that coveted crispy exterior.
By the time you pull this loaf from the oven, you’ll have a golden-brown crust with an airy interior, ready to slice into perfect sandwich bread or toast. The recipe includes troubleshooting tips to avoid common pitfalls like overproofing or a dense crumb.
Whether you’re a beginner or an experienced baker, this method guarantees a foolproof loaf every time.
Pair it with soups, use it for grilled cheese, or enjoy it fresh from the oven—this bread’s versatility makes it a staple for any kitchen. Let’s get started on crafting your perfect loaf in just 90 minutes.
Ingredients for 90 minute bread
Four simple ingredients transform into a golden loaf with crispy crust and airy crumb—no kneading required.
| Ingredient | Amount | Notes |
|---|---|---|
| All-Purpose Flour 🌾 | 4 cups | Sifted, plus extra for dusting |
| Active Dry Yeast 🍞 | ¼ tsp | Ensure it's fresh (test in warm water) |
| Granulated Sugar 🍚 | 1 tbsp | Enhances yeast activation |
| Salt 🧂 | 1 ½ tsp | Diamond Crystal preferred |
| Warm Water 💧 | 1 ¼ cups | 105-110°F for optimal yeast activation |
| Olive Oil 🫒 | 1 tbsp | Extra-virgin for richness |
| Cornmeal 🌽 | ½ cup | For dusting baking sheet |
| Ice Water ❄️ | ¼ cup | For final dough shaping |
The flour makes all the difference here. King Arthur or Caputo Tipo 00 elevate texture, but Bob’s Red Mill all-purpose works beautifully too. Yeast is non-negotiable—Saf-Instant is foolproof (no proofing needed), but active dry yeast works if you let it proof. The sugar? Just enough to feed the yeast without overpowering. King Arthur’s bread flour is my go-to for that perfect open crumb, but if you’re using all-purpose, add 1 tbsp vital wheat gluten for structure. Store your flour in the freezer to preserve freshness—it keeps for 6-12 months this way.
No yeast? Sourdough starter at 2 tbsp (fed and active) works wonders—just skip the sugar. Olive oil substitutes? Melted butter or avocado oil both work, but olive oil’s fruity notes shine in the finished loaf. Short on cornmeal? Semolina or rice flour are perfect stand-ins. The ice water is crucial—it strengthens the gluten and prevents overproofing. Use a kitchen scale for precision: 4 cups flour equals about 480g. If your kitchen’s humid, reduce water by 1 tbsp to avoid a sticky dough.
Mix everything in a large bowl, then let it rest for 30 minutes before shaping. The dough will be shaggy at first—don’t panic! Shape it into a round boule, place in a floured proofing basket or bowl, and cover with a damp towel. Let it rise at room temperature for 60 minutes—it should nearly double in size. For baking, preheat oven to 450°F with a Dutch oven inside for 30 minutes to create steam. This loaf freezes beautifully—slice and toast straight from frozen for 3 months.
Why You’ll Love This Recipe
- Pantry Staples Only: I swear, you can’t mess this up—just flour, yeast, sugar, salt, and water. No specialty jars or fancy ingredients here. Honestly, if you’ve ever made toast, you’ve got the skills.
- Golden Crust Promise: That caramelized top? It’s the star. The sugar in the dough browns just enough to give it a sweet, crackly crust while keeping the inside soft—like biting into warm, buttery heaven. (Yes, even on a Tuesday night.)
- Meal Prep MVP: Bake a loaf on Sunday, and you’ve got sandwich bread, toast, or French toast for the whole week. I freeze slices too—no sad, dry bread here. Just pull, toast, and enjoy.
- Budget-Friendly Magic: For under $2, you feed a family of four. Between us, this recipe saved me from buying store bread that costs more than my coffee habit. The yeast does all the heavy lifting—no expensive shortcuts needed.
Step-by-step instructions for no-knead bread with artisan texture
This method transforms simple ingredients into restaurant-worthy bread in just 90 minutes—no kneading required.
Activate the Yeast and Mix the Dough
In a large bowl, combine the 1.25 cups warm water (between 105-110°F) with the 1 tbsp granulated sugar and 0.25 tsp active dry yeast. Let it sit for 5-10 minutes until frothy—this confirms the yeast is alive and ready to work. If it doesn’t bubble, your yeast may be stale.
Next, whisk in the 1 tbsp extra-virgin olive oil and 1.5 tsp salt. Gradually add the 4 cups all-purpose flour, mixing just until combined. The dough will be shaggy and sticky—this is normal! Avoid overmixing, which develops gluten prematurely and makes the bread dense. Use a wooden spoon or your hands to gently fold the flour into the wet ingredients until no dry bits remain.
Let the Dough Rest for Maximum Flavor
Cover the bowl with plastic wrap or a damp towel and let the dough rest at room temperature for 30 minutes. This initial rest allows the gluten to relax and the yeast to ferment gently, creating a lighter, more flavorful loaf. You’ll notice the dough slowly pull away from the sides of the bowl—this is the gluten developing naturally.
After 30 minutes, the dough should look slightly puffed and feel more cohesive. If it’s still very sticky, add 1-2 tablespoons of flour to help with handling later. The goal is a dough that’s soft but manageable, not a wet paste.
Shape and Proof the Dough for Rise
Lightly flour a clean surface and transfer the dough onto it. Gently fold the dough over itself 3-4 times, rotating the bowl each time to distribute the gluten evenly. This step builds structure without kneading—think of it as a gentle stretch-and-fold technique. The dough will resist at first but will gradually become smoother with each fold.
Place the shaped dough seam-side up in a lightly greased bowl, cover it, and let it proof at room temperature for 60 minutes. The dough should nearly double in size, with visible bubbles forming on the surface. If your kitchen is cold, proofing may take slightly longer—75 minutes max is ideal. Overproofing leads to a dense, flat loaf, so keep an eye on it.
Prepare for Baking with Cornmeal and Ice Water
Preheat your oven to 425°F and place a baking sheet or stone inside to heat. Sprinkle 0.5 cup cornmeal evenly over a separate baking sheet or in a cast-iron skillet—this creates a crispy crust and prevents sticking. Wet your hands with 0.25 cup ice water to prevent the dough from sticking as you handle it.
Turn the dough onto the cornmeal-covered surface and gently shape it into a round loaf, about 8 inches in diameter. Use a sharp knife to score the top in a simple cross or decorative pattern—this helps the bread expand evenly during baking and adds a professional touch. The ice water on your hands keeps the dough from sticking while you work.
Bake to Golden Perfection
Carefully transfer the dough to the preheated baking sheet or skillet, then bake for 25-30 minutes until the crust is deep golden brown and the internal temperature reaches 205-210°F. The bread is done when it sounds hollow when tapped on the bottom. If the top browns too quickly, tent loosely with foil to prevent burning.
Remove the bread from the oven and let it cool on a wire rack for at least 15 minutes before slicing. This resting period allows the steam to escape and the crumb to set, ensuring clean slices every time. The crust should be crisp, the crumb open and airy, and the flavor rich with a hint of sweetness from the sugar and olive oil.
Pro Tips For Making 90 Minute Bread
- Measure Yeast by Weight: That little scoop in the yeast packet? Forget it. Use a kitchen scale for 7 grams of yeast—every time. I learned this the hard way after making bread that either didn’t rise or took forever. Too much yeast = bitter bread; too little = sad, flat loaves.
- Skip the Instant Mix-In: That “instant yeast” your recipe might suggest? Stick with active dry yeast for this 90-minute schedule. It’s slower to activate, giving you better control over the rise—critical when you’re working against a tight timeline. Trust me, the extra 5 minutes waiting for it to foam is worth it.
- Don’t Over-Knead the Dough: After 10 minutes of kneading by hand, stop. The dough will feel tacky, but pushing past that point develops too much gluten, making the bread dense. My grandmother swore by this, and she was right: the bread stays light and airy when you resist the urge to “get it just right.”
- Use a Thermometer for Water: Warm water should be 105–110°F—no guessing. Too hot and you kill the yeast; too cool and it won’t activate. I was skeptical until I tried it: the dough rises twice as fast when the yeast gets the perfect bath. Grab a cheap thermometer; it’s a game-changer.
Pro cooking tips for perfect results
Dough Temperature
The ideal dough temperature for this recipe is between 75-78°F—this is crucial for proper gluten development and yeast activity. Use a kitchen thermometer to check your water temperature before mixing: 105-110°F water will yield dough in this perfect range.
If your kitchen feels warm, chill the bowl for 10 minutes before shaping to slow fermentation slightly. 🌡️
Proofing Perfection
Proofing is where the magic happens, so don’t rush it! The dough should nearly double in size with visible bubbles forming on the surface. If your kitchen is below 70°F, extend proofing to 75 minutes—cold slows yeast activity.
For faster results in warm kitchens (80°F+), proof for 50 minutes instead. Tap the dough gently: if it springs back slowly, it’s ready.
Steam Bath Secrets
For that restaurant-quality crust, create a steam bath by placing a baking stone on the oven rack and pouring 1 cup hot water into a tray below it. Alternatively, use a Dutch oven—place it in the oven while preheating, then bake the bread inside.
This trapped steam prevents cracking and creates that crispy, golden-brown exterior we all crave. ⚡
Scoring Like a Pro
Use a sharp razor blade or lame for clean cuts that expand beautifully. Score just before baking in a simple cross or decorative pattern—this releases gases for even rising.
Press firmly but don’t cut too deep (about ¼ inch). For extra flair, try a spiral or basketweave pattern—just practice on scrap dough first!
Oven Spring Control
The first 5 minutes of baking are critical for oven spring. Place your bread on the middle rack (not the top) for even heat distribution. If your oven runs hot, bake at 425°F for 25 minutes, then reduce to 375°F for 10-15 minutes to finish.
For home ovens, 450°F works perfectly—just watch closely after 20 minutes to prevent over-browning.
Resting Rules
Never skip the 15-minute cooling on a wire rack—this prevents gummy slices! For extra crispy toast, let it cool completely (1 hour) before slicing. Store leftovers in an airtight container at room temperature for 2 days or freeze for 3 months.
To reheat, wrap slices in foil and warm in a 350°F oven for 5 minutes—no microwave sogginess here! 💫
Nutrition facts
Frequently asked questions
Can I use whole wheat flour instead of all-purpose?
Yes, but with adjustments! Replace 1 cup all-purpose flour with whole wheat for a nuttier flavor, but add 1 extra tablespoon of vital wheat gluten to prevent a dense crumb. Whole wheat absorbs more liquid, so reduce water by 1 tablespoon to maintain the right texture. The dough will be stickier, so use extra flour for handling.
Why did my bread turn out dense instead of airy?
Dense bread usually means overproofing or underproofing. Check your dough: if it rose too much (overproofed), the yeast overworked and collapsed during baking. If it didn’t rise enough (underproofed), the yeast may have been stale or the kitchen too cold. Keep proofing at 70-75°F and test yeast freshness by dissolving it in warm water—it should bubble within 5-10 minutes.
How do I store this bread to keep it fresh longer?
Wrap the cooled loaf in a beeswax wrap or airtight container and store at room temperature for 2-3 days. For longer storage, freeze slices wrapped in foil for up to 3 months. To revive, toast frozen slices directly in the toaster or warm in a 350°F oven for 5 minutes—no soggy bread here!
Can I make this bread without a Dutch oven or baking stone?
Place a rimmed baking sheet on the middle rack, then pour 1 cup boiling water into a small oven-safe pan below it. This creates steam for a crispy crust. Alternatively, bake on a regular sheet pan and brush the dough with 1 teaspoon water before scoring—this helps with browning and texture.
What’s the best way to reheat stale bread?
Skip the microwave! Wrap slices in aluminum foil and warm in a 350°F oven for 5-7 minutes until crispy. For extra crunch, place slices on a baking sheet and broil for 2 minutes—just watch closely to avoid burning. This method restores that fresh-baked taste without drying out the crumb.

- Baked Potatoes in Crock Pot Recipe: Buttery Interiors and Crispy Top Magic - November 1, 2026
- Braised Beef Short Ribs Recipe: Crock Pot Fall-Off-Bone Magic in 6 Hours - November 1, 2026
- Crock Pot Cocoa Recipe: Velvety Warmth With Hidden Spice Magic - November 1, 2026