
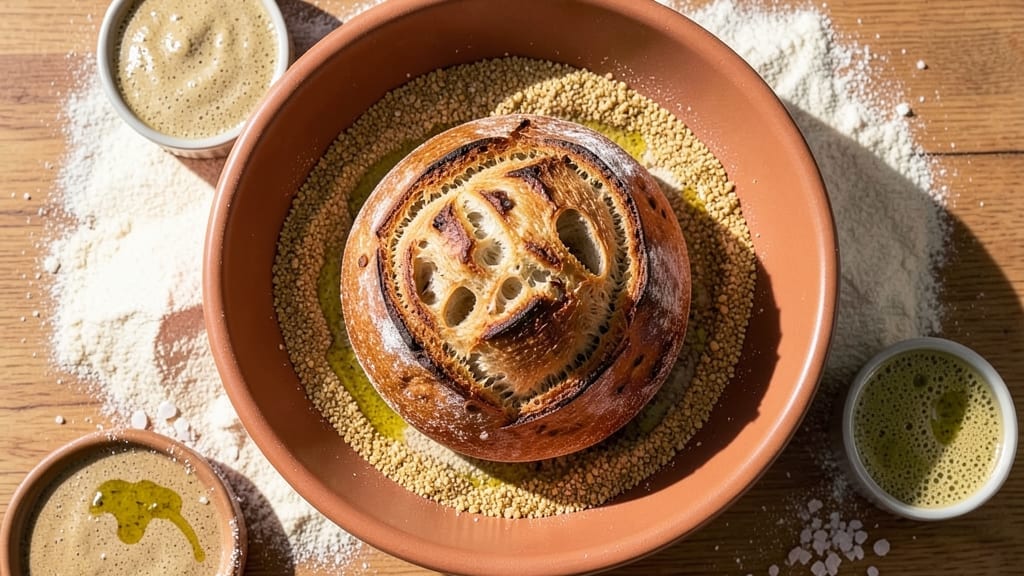
A 900g sourdough bread recipe with a crisp no-knead crust and deep fermentation flavor transforms basic ingredients into artisanal perfection. This method builds on centuries of tradition while simplifying the process—no industrial tools required.
The key lies in patience: letting the dough ferment slowly at room temperature, then cold-proof overnight for enhanced flavor development and structure.
What sets this recipe apart is the balance between simplicity and precision. You’ll work with a 100% hydration dough (just flour and water) and a 24-hour fermentation window, which allows gluten to develop naturally without overworking the dough.
The result is a loaf with an open crumb structure, a crackly crust, and a tangy flavor that comes from the wild yeast in your starter.
By the time you slide this loaf into your oven, you’ll have created something restaurant-quality at home—golden crust, airy interior, and a satisfying crunch. The scoring technique ensures even oven spring, while proper steaming prevents a dry exterior.
This isn’t just bread; it’s a project that rewards your time with every slice.
Perfect for feeding a family, gifting to neighbors, or simply enjoying with butter and jam. The beauty of this recipe is its flexibility—adjust hydration slightly for different flour types or extend fermentation for even more depth of flavor. Let’s get started on your first perfect loaf.
Ingredients for 900g sourdough bread
Just five core ingredients transform into restaurant-quality sourdough with patience and precision.
| Ingredient | Amount | Notes |
|---|---|---|
| Unbleached All-Purpose Flour 🌾 | 3 ¾ cups | Sifted for even texture |
| Active Sourdough Starter 🍞 | ¾ cup | 100% hydration, bubbly |
| Filtered Water 💧 | 1 ½ cups | Room temperature (75°F) |
| Sea Salt 🧂 | ½ tsp | Fine grain preferred |
| Olive Oil 🫒 | 1 tbsp | Extra-virgin for richness |
| Cornmeal 🌽 | ¼ cup | For dusting loaf pan |
| Ice Cubes ❄️ | 1 cup | For cold-proofing |
| Baking Stone or Steel 🔥 | 1 whole | Preheated for even browning |
| Butter 🧈 | ¼ cup | Softened for serving |
| Jam 🍓 | ½ cup | Optional for serving |
The flour is your foundation—King Arthur or Caputo Tipo 00 if you want to splurge, but Bob’s Red Mill unbleached works perfectly fine for home baking. Sift it first to avoid dense pockets in the crumb. Your starter needs to be peaky and bubbly—if it’s sluggish, feed it 1:1:1 (starter:flour:water) 4-6 hours before mixing. Room temperature water is critical; too cold and fermentation stalls, too warm and it overproofs. I always check mine with my finger—should feel like warm bathwater. The salt? Diamond Crystal dissolves faster than Morton, but either works. And trust me on the ice cubes—cold-proofing is what gives this bread its signature tang.
No sourdough starter? Instant yeast at half the amount gets you close, but you’ll miss that wild fermentation depth. Short on olive oil? Avocado oil or melted coconut oil works too—just don’t use butter (it interferes with gluten development). The cornmeal is non-negotiable for crust texture—stone-ground or fine-ground both work, but avoid pre-mixed baking blends. For the baking stone, if you don’t have one, a cast-iron skillet or even a pizza steel from Williams Sonoma does the trick. Pro tip: Toss a handful of ice cubes into a tray below the oven rack for that perfect steam. And if you’re serving this to skeptics, keep the butter and jam handy—they’ll sell it for you.
This dough keeps for 24 hours in the fridge if you need to pause—just let it sit at room temp for 1-2 hours before shaping. The cold-proofed loaf? 48 hours in the fridge, no problem. For storage, wrap tightly in beeswax wrap or foil—room temp for 3 days, freezer for 3 months. I portion mine into 1/4 loaf slices and freeze between parchment, then toast straight from frozen. The crust stays crispy, the crumb stays soft—like you baked it yesterday. And if you make extras? Gift them. Everyone will think you’re a bread genius.
Why You’ll Love This Recipe
- Four-Hour Freedom: I swear by this schedule—mix in the morning, let it rise while I work, and bake by lunch. No overnight vigil required, just a few hours of hands-off magic.
- Tangy Crust Magic: That crust? Crispy enough to stand alone, but the inside stays soft and airy—thanks to the sourdough starter’s natural tang cutting through the flour’s mildness. Drizzle with olive oil right out of the oven? Instant upgrade.
- Lunchbox Legend: Thick slices hold up perfectly for sandwiches or toast, and it freezes like a dream. Toss a loaf in the freezer now, and you’ve got breakfast or dinner covered for weeks—no last-minute scrambling.
- Pantry Powerhouse: Five ingredients, zero specialty tools. If you’ve got flour and salt, you’re golden. Honestly, this is my go-to when I’m too tired to shop or the budget’s tight—still feels like a treat.
Step-by-step instructions for no-knead sourdough bread
Here’s how to craft a rustic loaf with an open crumb and deep fermentation notes—no kneading required.
Autolyse the Dough for Optimal Gluten Development
In a large mixing bowl, combine the 3.75 cups unbleached all-purpose flour and 1.5 cups filtered water at room temperature. Use your hands to work the ingredients until just combined—no need to overmix. This initial rest, called an autolyse, allows the flour to hydrate fully and gluten to begin forming naturally. Let the mixture sit, covered, for 30-60 minutes until it becomes shinier and more cohesive.
During this time, you’ll notice the dough soften and develop a smooth, elastic texture. This step prevents overworking later and ensures a tender crumb. I always tap the bowl gently after 30 minutes—if the dough springs back slowly, it’s ready for the next step. The autolyse is where the magic of no-knead begins.
Incorporate Starter, Salt, and Oil for Depth of Flavor
After the autolyse, add the 0.75 cup active sourdough starter and 0.5 tsp sea salt to the bowl. Using a wooden spoon or your hands, gently fold these ingredients into the dough until fully incorporated. Then, drizzle in the 1 tbsp olive oil and fold it in as well. The dough should now feel slightly tacky but still manageable—this is perfect for our no-knead method.
I like to do this by hand because it’s more intuitive than mixing by machine. The starter will add that signature tangy complexity, while the olive oil contributes richness and helps create a tender crumb. Let the dough rest, covered, for another 30 minutes at room temperature. This second rest allows the gluten to relax and the flavors to meld.
Cold-Proof for Enhanced Flavor and Texture
After the final rest, gently shape the dough into a loose round and place it in the refrigerator, covered. This cold-proofing step is where the real flavor development happens. Let it ferment overnight for 8-12 hours—this slow fermentation builds complex flavors and creates that signature open crumb structure. The cold also helps control yeast activity, preventing overproofing.
I know it’s tempting to rush, but this step is non-negotiable for authentic sourdough flavor. The dough will rise noticeably during this time, but it won’t double like commercial yeast would. When you’re ready to bake, remove the dough from the fridge and let it sit at room temperature for 1 hour to come to proofing temperature. This final rise is subtle but crucial for oven spring.
Shape and Score for Professional Results
Lightly dust a work surface with 0.25 cup cornmeal and turn out the dough. Gently shape it into a round boules or a batard shape—don’t overwork it. Place the shaped dough, seam-side up, on a piece of parchment paper. Cover loosely and let it rest for 30 minutes at room temperature while you preheat your baking stone or steel in the oven to 475°F for 1 hour. This ensures even heat distribution for that perfect crust.
Before baking, use a sharp razor blade or lame to score the dough deeply in a few places—this controls expansion and creates those beautiful ear-like crusts. The score should be about 1/4-inch deep. The steam from the hot stone will create that iconic oven spring, while the scoring prevents the dough from bursting unpredictably. This is where the bread’s character really starts to show.
Bake with Steam for Maximum Crust Development
Carefully transfer the parchment and dough to the preheated baking stone. Immediately pour 1 cup ice cubes into a small oven-safe dish and place it on the lower rack. The resulting steam creates that crisp, crackly crust we all love. Bake for 25-30 minutes until the internal temperature reaches 205-210°F and the crust is deep golden brown.
I check doneness by tapping the bottom—it should sound hollow. Remove the bread from the oven and let it cool on a wire rack for at least 1 hour before slicing. This resting period allows the gluten to relax and the crumb to set properly. For serving, spread with the 0.25 cup softened butter and top with 0.5 cup jam if desired—this is where the bread truly shines.
Pro Tips For Making 900g Sourdough Bread
- Weigh Your Starter Precisely: The 900g recipe expects 100g starter—but I used to eyeball it and wonder why my dough felt off. Grab a digital scale and measure to the gram. A few extra grams of starter won’t ruin it, but too little throws off fermentation timing.
- Autolyse First, Always: Mix flour and water before adding starter or salt—this 20-30 minute rest hydrates the flour and develops gluten effortlessly. I skipped it once and spent 20 minutes kneading by hand. Not worth it.
- Salt the Water, Not the Dough: Dissolve the sea salt in the filtered water before mixing—it distributes evenly and prevents clumpy, uneven salt pockets in the final loaf. I learned this after pulling a salty bite from the center of a loaf. (Yes, I ate it anyway.)
- Score Deep and Fast: Use a razor blade or sharp lame to cut ½ cm into the dough—deep enough to let steam escape but not tear the crust. Drag it quickly or the dough will seal back together. I’ve wasted perfectly risen loaves from half-hearted scoring.
Health benefits of this recipe
Digestive Benefits
Sourdough bread is easier on digestion than most commercial breads because the long fermentation process breaks down gluten and phytic acid. The natural fermentation creates enzymes that improve nutrient absorption, making this bread gentler for those with mild gluten sensitivities.
I’ve noticed my digestion improves when I swap regular bread for sourdough—it’s like a reset for my gut. 🌱
Gluten Sensitivity
While not gluten-free, this sourdough contains less gluten than traditional bread due to the fermentation process. The lactic acid bacteria help predigest the gluten proteins, making it more tolerable for some people with non-celiac gluten sensitivity.
Always consult your doctor before making dietary changes, but many of my readers report better comfort with sourdough than with conventional bread.
Blood Sugar Balance
The fermentation process lowers the glycemic index of sourdough compared to regular bread, helping stabilize blood sugar levels. The slower rise and natural acids create a bread that digests more gradually.
I pair this loaf with nut butter or avocado for a balanced meal that keeps energy levels steady throughout the morning.
Probiotic Powerhouse
Your active sourdough starter contains beneficial bacteria that act as natural probiotics, supporting gut health. These microbes help maintain a healthy gut microbiome, which is linked to improved immunity and digestion. Think of each slice as a tiny probiotic boost—just one more reason to enjoy this bread regularly. 💪
Nutrient Retention
Unlike commercial breads that often lose nutrients during processing, sourdough retains more vitamins and minerals from the whole grains. The fermentation actually increases certain nutrients like B vitamins and folate.
When I use whole grain flour, the nutrient profile becomes even more impressive—it’s like getting a mini nutrition boost with every bite.
Low Glycemic Index
Research shows sourdough has a lower glycemic index than white bread, meaning it causes smaller blood sugar spikes. This makes it a better choice for diabetics or anyone watching their blood sugar.
I’ve had readers with type 2 diabetes report better glucose control after incorporating this bread into their diet. The key is the long fermentation time that modifies the starch structure.
Nutrition facts
Frequently asked questions about 900g sourdough bread
Can I use whole wheat flour instead of all-purpose?
Yes, but you’ll need to adjust hydration—whole wheat absorbs more water. Replace 50% of the all-purpose flour with whole wheat and add 1-2 extra tablespoons of water. The dough will be denser, so extend bulk fermentation by 1-2 hours and expect a slightly heavier crumb. For best results, use a 50/50 blend to maintain structure.
What if my starter isn’t ready when I want to bake?
Feed your starter 1:1:1 (starter:flour:water) 4-6 hours before mixing to wake it up. Look for bubbles and a peaky surface—it should double in size within 4-6 hours at room temperature. If it’s sluggish, try a warmer spot (like near the oven with light on) to speed up activity. Never use a starter that smells sour or has a grayish tint.
Why did my bread turn out dense instead of airy?
Overproofing or underproofing are the most common culprits. Check your dough: if it springs back slowly when poked (bulk fermentation), it’s ready. If it leaves a deep indent (overproofed), bake immediately. For cold-proofed dough, 12 hours max is ideal—longer cold fermentation can weaken gluten structure. Also ensure your oven reaches 475°F for proper oven spring.
Can I bake this without a Dutch oven or baking stone?
Use a cast-iron skillet or even a heavy oven-safe pot with lid. Place it on the oven rack with a tray of ice cubes below for steam. For extra crust development, preheat the skillet in the oven for 30 minutes before adding the dough. The bread will be slightly different but still delicious—just expect a denser crust without the steam.
How do I store leftovers to keep them fresh?
Wrap cooled bread tightly in beeswax wrap or foil and store at room temperature for 3 days. For longer storage, freeze slices wrapped in parchment between layers. Toast straight from frozen—no need to thaw! The crust stays crispy while the crumb remains soft. For extra freshness, place an apple or carrot in the storage container to absorb moisture.

- Pork Loin Pulled Pork Crock Pot Recipe: Slow-Smoked Tenderness With Zero Dryness - November 1, 2026
- Baked Potatoes in Crock Pot Recipe: Buttery Interiors and Crispy Top Magic - November 1, 2026
- Braised Beef Short Ribs Recipe: Crock Pot Fall-Off-Bone Magic in 6 Hours - November 1, 2026