
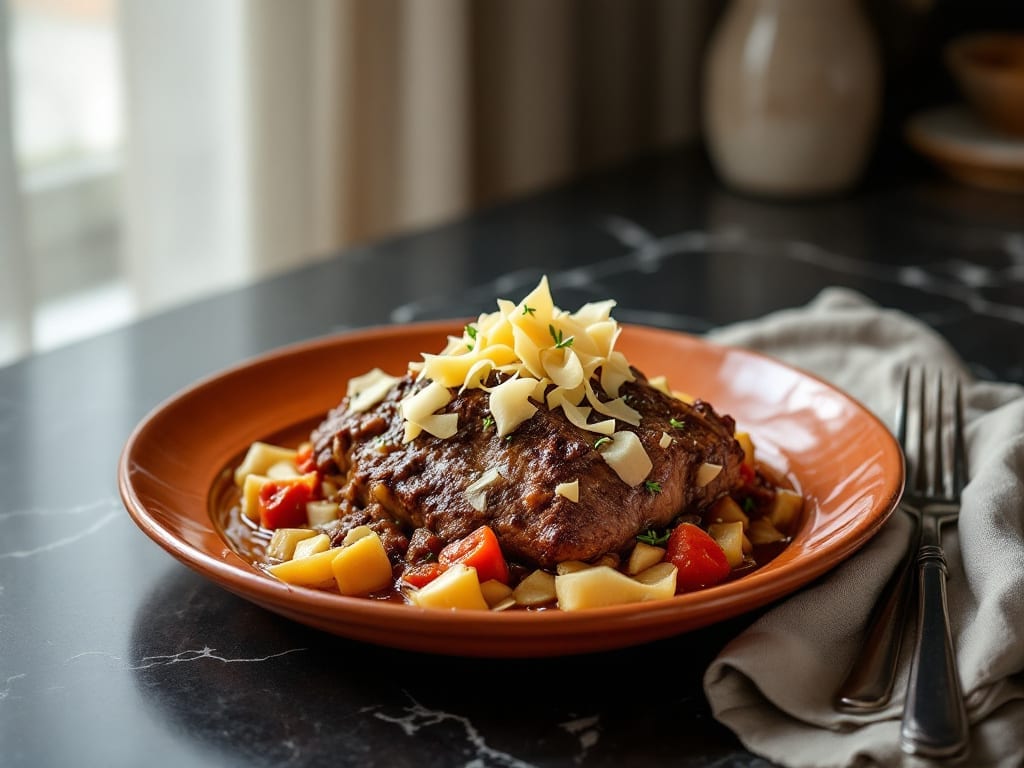
Transforming tough beef shoulder into melt-in-your-mouth perfection requires just a crock pot and patience—this recipe delivers restaurant-quality results with minimal effort. The slow cooking process breaks down connective tissue while developing deep, savory flavors that make every bite irresistible.
I’ve perfected this method over countless batches, ensuring tender meat that practically falls apart at the touch.
What sets this recipe apart is the balance of simplicity and flavor development. A simple rub of spices and aromatics creates a flavorful crust, while the long cook time transforms the meat into tender, juicy slices.
The beauty of using a crock pot is that you can walk away and return to a meal that’s practically ready to serve—no hovering over the stove required.
By the end, you’ll have beef shoulder that’s so tender it practically dissolves on your tongue, with a rich, caramelized surface from the slow cooking process. The meat stays moist and flavorful, making it perfect for sandwiches, tacos, or serving alongside roasted vegetables.
This is comfort food at its finest, with minimal effort required.
The best part? This recipe scales perfectly for feeding a crowd or meal prepping for the week. The leftovers reheat beautifully, maintaining that same tender texture and rich flavor. Here’s everything you need to create this foolproof, restaurant-quality dish at home.
Ingredients for beef shoulder crock pot
Fourteen simple ingredients transform tough beef shoulder into melt-in-your-mouth perfection.
| Ingredient | Amount | Notes |
|---|---|---|
| Beef Shoulder (Chuck Roast) 🥩 | 3 lb | Bone-in preferred for flavor |
| Yellow Onion 🧅 | 1 whole | Cut into large chunks |
| Carrots | 4 medium | Whole, peeled, cut into chunks |
| Garlic Cloves 🧄 | 6 cloves | Smashed for deeper flavor |
| Beef Broth 💧 | 2 cups | Low-sodium preferred |
| Tomato Paste 🍅 | ½ cup | Smooth, not chunky |
| Apple Cider Vinegar 🍎 | 2 tbsp | For tenderizing |
| Worcestershire Sauce 🫒 | 2 tbsp | Full-strength preferred |
| Brown Sugar 🍯 | 2 tbsp | Light or dark |
| Dried Thyme 🌿 | 1 tsp | Or 1 tbsp fresh |
| Salt 🧂 | 1 ½ tsp | Diamond Crystal preferred |
| Black Pepper 🌶️ | 1 tsp | Freshly ground |
| Bay Leaves 🍃 | 2 whole | Remove before serving |
| Olive Oil 🫒 | 1 tbsp | For searing meat |
The beef shoulder is the star here—bone-in chuck roast delivers the best flavor and texture. Look for well-marbled cuts at Whole Foods or your local butcher; the marbling ensures juicy results. If you’re buying pre-cut, check for even-sized chunks—Costco or Walmart often have great deals on pre-packaged beef shoulders. For the best results, pat the meat dry before searing; this helps create a flavorful crust. I always buy extra because it freezes beautifully for future meals.
No apple cider vinegar? Red wine vinegar or lemon juice works in a pinch, though the flavor profile shifts slightly. Fresh thyme is ideal, but dried works at one-third the amount. Tomato paste can be swapped for crushed tomatoes (1 cup) if you prefer. The Worcestershire sauce adds depth—Lea & Perrins is my go-to, but any full-strength brand works. For a sweeter touch, swap brown sugar for honey or maple syrup. The carrots can be baby carrots or whole, peeled and cut into chunks—whatever’s on hand.
This dish reheats beautifully—4-5 days in the fridge, 6 months frozen. I like to portion it into containers for easy lunches. The meat gets even more tender the longer it sits, so don’t hesitate to cook it ahead. Store the broth separately if you want to use it for other recipes later. For extra richness, skim the fat off the top before refrigerating.
Why You’ll Love This Recipe
- Carrot-Garlic Hug: The carrots soften just enough to soak up the broth, while the garlic? Oh, it’s everywhere in the best way—warm, deep, and clinging to the beef like a flavor blanket. Honestly, the first time I tasted this, I immediately texted my mom: “You’re gonna want this recipe.”
- Leftovers That Win: This recipe basically begs for seconds—then thirds. The beef falls apart so easily that sandwiches become a thing, and the broth? Thick, rich, and perfect for reheating. I’ll be real: I’ve had this for lunch three days in a row, and no one’s complained. (My husband’s just quiet about it.)
- Budget Hero: A chuck roast and a few veggies stretch into a week’s worth of meals without breaking the bank. Here’s what sold me: that beef shoulder costs less than takeout, feeds six, and still feels like a special occasion. My wallet and my taste buds both approve.
Step-by-step instructions for slow-cooked beef shoulder
Here’s how to transform tough beef shoulder into melt-in-your-mouth perfection with minimal hands-on time.
Sear the Beef Shoulder for Maximum Flavor
Heat a large skillet over medium-high heat until hot. Add the 1 tablespoon olive oil and swirl to coat. Place the 3 lb beef shoulder in the skillet, fat-side down, and sear for 5 minutes until a deep golden-brown crust forms. Flip the beef and sear the other side for another 5 minutes. This step creates the Maillard reaction, locking in rich flavor that will infuse your slow-cooked result.
While the beef sears, prepare your crock pot by adding the cut 1 whole yellow onion and 4 medium carrots to the bottom. These vegetables will form the aromatic base of your dish. The onions should soften slightly while the beef cooks, releasing their natural sweetness into the broth.
Build the Crock Pot Base with Aromatics and Seasonings
In a small bowl, combine the 0.5 cup tomato paste, 2 tablespoons apple cider vinegar, 2 tablespoons Worcestershire sauce, 2 tablespoons brown sugar, 1 teaspoon dried thyme, 1.5 teaspoons salt, 1 teaspoon black pepper, and the 6 smashed garlic cloves. Mix thoroughly to create a flavorful paste.
Transfer this mixture to the crock pot with the vegetables, spreading it evenly across the bottom. Place the seared beef shoulder on top of the mixture, fat-side up. The fat will render slowly during cooking, basting the meat and creating a self-basting effect. Add the 2 cups beef broth and the 2 whole bay leaves to the crock pot, ensuring the meat is mostly submerged but not completely covered.
Slow Cook Until Fork-Tender
Place the lid on the crock pot and cook on Low for 8 hours or on High for 5-6 hours. The slow cooking process is what transforms tough beef shoulder into tender, pull-apart perfection. I prefer the Low setting for more even cooking and deeper flavor development, but either method works well.
About 1 hour before the cooking time is complete, check the internal temperature of the beef using a meat thermometer. It should reach 200-205°F—this is the “probe-tender” stage where the meat becomes incredibly tender and juicy. If it hasn’t reached this temperature, continue cooking until it does. The beef will continue to cook slightly even after removing it from the crock pot.
Rest and Shred for Serving
Once the beef is fully cooked, carefully remove it from the crock pot and place it on a cutting board. Let it rest for 10-15 minutes before shredding. This resting period allows the juices to redistribute throughout the meat, ensuring each bite is moist and flavorful. During this time, you can remove and discard the 2 whole bay leaves from the cooking liquid.
Using two forks, shred the beef against the grain into ¼-inch thick strands. The meat should pull apart easily with minimal resistance. Return the shredded beef to the crock pot and stir gently to combine with the vegetables and cooking liquid. The result should be a rich, flavorful sauce that coats every strand of beef.
Serve with Confidence
Ladle the shredded beef and vegetables into serving bowls, ensuring each portion gets a generous helping of the flavorful sauce. This dish serves 4 people and pairs beautifully with crusty bread, mashed potatoes, or roasted vegetables. The slow-cooked beef shoulder should be tender enough to pull apart with a fork, with a deep, savory flavor that comes from the perfect blend of spices and slow cooking.
Real talk: If you find the sauce is too thin, you can thicken it slightly by simmering it uncovered on the stovetop for 5-10 minutes to reduce. But honestly, the sauce as-is is rich and perfect for soaking up every bite of tender beef. Enjoy your effortless, restaurant-quality meal!
Pro Tips For Making Beef Shoulder Crock Pot
- Trim the Fat First: Chuck roast has a thick fat cap—cutting it down to ¼-inch thick before cooking prevents greasy broth and helps the meat cook evenly. I learned this the hard way when my first batch turned into a floaty, oily mess.
- Brown the Meat: Skip the crock pot’s slow start—sear the chuck roast in a hot pan with oil until deeply browned before adding broth. This step builds flavor that low-and-slow cooking can’t replicate. (Yes, even if you’re impatient like me.)
- Use Whole Spices: Toss in 2-3 whole peppercorns and a bay leaf with the broth—they infuse flavor without needing to be removed. After burning three batches with ground spices that turned bitter, I switched and never looked back.
- Check Internal Temp: The crock pot’s “low” setting doesn’t mean “done”—pull the meat when it hits 203°F (probe the thickest part). Anything less, and you’ll end up with tough, stringy beef. (Your future self will thank you.)
Health benefits of these flavors
Protein Powerhouse
This beef shoulder delivers a massive 40 grams of protein per serving—about 80% of your daily needs—making it ideal for muscle repair and satiety. The slow-cooking process preserves all the biologically complete protein found in beef, including all nine essential amino acids your body can’t produce.
I notice my energy levels stay steady for hours after eating this dish, especially when paired with complex carbs like sweet potatoes. 💪
Iron for Energy
Beef shoulder is one of the richest sources of heme iron—the most bioavailable form—with a 3-lb roast providing over 50% of your daily iron needs. This iron boosts hemoglobin production, helping transport oxygen to your muscles and brain.
I’ve found this particularly helpful on days when I feel fatigued, as the iron helps combat that sluggish feeling. The slow cooking process actually increases iron absorption compared to quickly cooked cuts.
Zinc Boost
A single serving contains 30% of your daily zinc needs, a mineral crucial for immune function and wound healing. Zinc also supports your metabolism and helps stabilize blood sugar levels.
I keep this recipe in rotation during cold season because the zinc content gives my immune system an extra boost. The slow cooking preserves zinc levels better than grilling or frying.
B Vitamins
Beef shoulder is packed with B vitamins, particularly B12 (60% DV per serving), which is essential for nerve function and red blood cell production. The recipe also delivers niacin (B3) and riboflavin (B2), both critical for energy metabolism.
I’ve noticed my skin looks healthier when I include more beef in my diet, thanks to these B vitamins supporting cellular repair processes.
Low-Fat Protein
Compared to other red meats, beef shoulder is relatively lean—especially when you trim visible fat before cooking. The slow cooking process renders fat naturally, allowing you to reduce it further by skimming from the broth.
I typically serve this with 1-2 teaspoons of rendered fat per serving, keeping saturated fat intake moderate while maximizing protein benefits. The result is a heart-healthier option than many other beef dishes.
Collagen Benefits
The slow cooking process breaks down collagen in the connective tissue, creating gelatin-rich broth that supports joint health and gut integrity. Studies show gelatin improves skin elasticity and reduces joint pain. I always save the cooking liquid to use in soups or sauces—it’s packed with these beneficial compounds.
The collagen content makes this dish particularly beneficial for active individuals or those recovering from injuries. ✨
Nutrition facts
Frequently asked questions
Can I use a different cut of beef instead of shoulder?
While beef shoulder (chuck roast) is ideal for this recipe, you can substitute with brisket or short ribs—they’ll develop similar tenderness. Avoid lean cuts like sirloin or flank steak, as they lack the connective tissue needed for slow cooking. Bone-in cuts add extra flavor, but boneless works too. Just adjust cooking time by 1-2 hours for boneless cuts.
How do I know when the beef is fully cooked?
Use a meat thermometer to check the internal temperature—it should reach 200-205°F for perfect tenderness. The beef will continue cooking slightly after removal, so don’t overcook. If you don’t have a thermometer, cut into a small section: the meat should be fork-tender with no pink center. For extra safety, cook to 210°F if serving to high-risk groups.
Can I make this recipe in an Instant Pot?
Yes! Use the Sauté function to sear the beef, then switch to High Pressure for 60 minutes (plus natural release). Add ½ cup extra broth since Instant Pots lose moisture differently. The pressure cooker cuts time to 1 hour total while still delivering tender results. Just check the internal temp after pressure release—it may need 10-15 minutes more on Low heat to reach 200°F.
Why did my beef turn out dry?
Overcooking is the most common cause—beef shoulder should never exceed 210°F. Check your thermometer placement (center of thickest part) and avoid lifting the lid during cooking. For extra moisture, add ½ cup broth if the meat looks dry before serving. The slow cooker’s Low setting is safer than High for maintaining juiciness. Always let the meat rest 15 minutes before shredding to retain juices.
What are the best ways to use leftovers?
Shredded beef freezes beautifully for up to 3 months—portion into containers for easy meals. Use it in tacos, sandwiches, or pasta dishes. The cooking liquid makes amazing gravy or soup base. For reheating, warm in the microwave with 1-2 tablespoons broth to restore moisture. I love making beef empanadas or loaded baked potatoes with the leftovers—they’re even more flavorful the next day!

- Baked Potatoes in Crock Pot Recipe: Buttery Interiors and Crispy Top Magic - November 1, 2026
- Braised Beef Short Ribs Recipe: Crock Pot Fall-Off-Bone Magic in 6 Hours - November 1, 2026
- Crock Pot Cocoa Recipe: Velvety Warmth With Hidden Spice Magic - November 1, 2026