
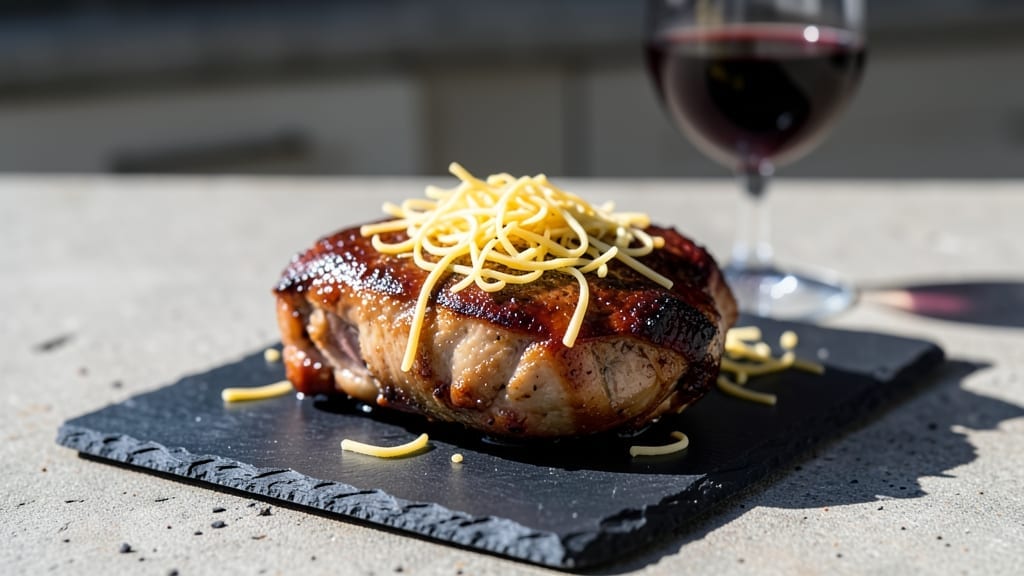
Transforming a tough cut of Boston butt into tender, melt-in-your-mouth pulled pork takes just one hour in an Instant Pot—no slow cooker required. I learned this technique after years of trial and error, and it delivers restaurant-quality results without the hours of waiting.
The secret lies in proper seasoning, precise pressure cooking, and letting the meat rest before shredding.
This method preserves moisture and breaks down the connective tissue perfectly, ensuring every bite is succulent. You’ll start with a simple rub of spices and brown the meat before pressure cooking, which builds deep flavor.
The Instant Pot handles the rest, transforming tough pork into tender, shreddable perfection with minimal effort.
By the end, you’ll have pulled pork so tender it practically falls apart at the touch, ready to be piled onto buns or served over rice. The rich, smoky aroma alone will have everyone asking for seconds.
Whether you’re feeding a crowd or meal prepping for the week, this recipe delivers foolproof results every time.
Pair it with classic sides like coleslaw, pickles, and crusty buns for a complete meal. The beauty of this method is its versatility—use it for sandwiches, tacos, or even loaded nachos. Let’s get started on creating your most tender pulled pork yet.
Ingredients for boston butt instant pot
Six spices, one hour, restaurant-quality pulled pork. No slow cooker needed.
| Ingredient | Amount | Notes |
|---|---|---|
| Boston Butt Pork Shoulder 🥩 | 5 lb | Bone-in for best flavor |
| Yellow Onion 🧅 | 1 whole | Large, sliced into wedges |
| Garlic Cloves 🧄 | 6 cloves | Fresh, peeled and smashed |
| Apple Cider Vinegar 🍎 | ¼ cup | For tangy depth (optional) |
| Brown Sugar 🍚 | ½ cup | Packed, for caramelization |
| Smoked Paprika 🌶️ | 2 tbsp | For that smoky aroma |
| Ground Black Pepper 🌶️ | 1 ½ tbsp | Freshly cracked preferred |
| Kosher Salt 🧂 | 2 tbsp | Diamond Crystal preferred |
| Chicken Broth 💧 | 1 ½ cups | Low-sodium preferred |
| Olive Oil 🫒 | 2 tbsp | For searing meat |
| Fresh Thyme Leaves 🌿 | ¼ cup | Or 1 tbsp dried thyme |
| Bay Leaf 🍃 | 2 whole | Remove before serving |
| Apple Juice 🍏 | ½ cup | Sweetens without overpowering |
The Boston butt is non-negotiable here—it’s the only cut that delivers that signature pulled pork texture. Costco sells it pre-cut and vacuum-sealed, which saves time, but if you’re buying from a butcher, ask for a well-marbled piece. The fat keeps the meat moist during cooking. For the spices, Penzeys or bulk bins at natural markets have the best quality, but the grocery store stuff works too if it’s fresh. I always grab extra smoked paprika—it’s what gives that authentic barbecue vibe. The key is balancing sweet and smoky, so don’t skip the brown sugar or apple juice.
No apple cider vinegar? Substitute lemon juice or even a splash of beer—just don’t skip the acidity. Fresh thyme is ideal, but dried works at one-third the amount. If you’re making this ahead, the meat actually tastes better the next day. The chicken broth can be swapped for beef broth, but low-sodium is critical—you don’t want to overpower the pork. For the apple juice, any kind works, but unsweetened is best so you control the sweetness. And trust me on the bay leaves—they disappear during cooking but add subtle depth.
This reheats beautifully—just add a splash of broth or apple juice to keep it moist. Keeps for 5 days in the fridge or 3 months frozen. I portion mine into containers with a little extra broth so it stays juicy. For serving, pile it high on buns with pickles and coleslaw—the tang cuts through the richness. Leftovers? Shred it again and toss with BBQ sauce for tacos. Worth making extra.
Why You’ll Love This Recipe
- Set-and-Forget Magic: Honestly, I dump everything in—pork, onions, garlic, vinegar, sugar—and walk away. The Instant Pot does the rest while I fold laundry or scroll through my phone. No babysitting required.
- Sweet-Savory Balance: That caramelized brown sugar glaze with apple cider vinegar? It’s the perfect tangy-sweet hug for the pork. The garlic cloves? They melt into the meat, leaving you with layers of flavor that’ll have you licking the plate.
- Game for Any Gathering: Between us, this feeds a crowd but costs less than half of takeout. Serve it at a potluck, game day, or just because—it’s the kind of dish that makes people ask for seconds before dessert even comes out.
- Leftovers That Don’t Suck: I make this on Sunday and eat it all week. The meat stays juicy, the sauce thickens just enough, and reheating it? Zero effort. My kids actually beg for it the next day—yes, even on a Tuesday night.
Step-by-step instructions for pressure-cooked Boston butt
Here’s how to transform a tough pork shoulder into melt-in-your-mouth perfection using your Instant Pot.
Sear the Pork Shoulder for Maximum Flavor
Set your Instant Pot to the “Sauté” function and add the 2 tablespoons olive oil. Once hot, carefully place the 5 lb Boston Butt Pork Shoulder fat-side down in the pot. Press down gently with a spatula to ensure full contact with the hot surface. Let it sear undisturbed for 8-10 minutes until the fat becomes golden brown and crispy in spots.
Flip the pork shoulder and sear the other side for another 5-7 minutes. This step creates a flavorful crust that locks in juices during cooking. While the meat is searing, add the 1 whole Yellow Onion sliced into wedges to the pot and let them caramelize slightly for 3-4 minutes until softened and lightly browned.
Build the Flavor Base with Aromatics and Seasonings
Remove the pork shoulder and onions from the pot and set them aside. In the same pot, add the 6 cloves Garlic Cloves (peeled and smashed), 2 whole Bay Leaf, 0.25 cup Fresh Thyme Leaves, 2 tablespoons Smoked Paprika, 1.5 tablespoons Ground Black Pepper, 2 tablespoons Kosher Salt, 0.5 cup Brown Sugar, and 0.25 cup Apple Cider Vinegar. Stir everything together for 1 minute until the spices are fragrant and the sugar begins to dissolve.
Return the pork shoulder and onions to the pot, making sure the meat is coated with the seasoning mixture. Pour in the 1.5 cups Chicken Broth and 0.5 cup Apple Juice, then give everything a gentle stir. The liquid should cover about two-thirds of the meat. If it looks too thin, you can add a splash of water (though this shouldn’t be necessary with the quantities provided).
Pressure Cook to Perfect Tenderness
Secure the lid on your Instant Pot and set the valve to “Sealing”. Select the “High Pressure” setting and cook for 60 minutes. This is where the magic happens—the high pressure breaks down the tough connective tissue, transforming it into silky, pull-apart meat. During this time, resist the urge to check on your food; opening the pot releases pressure and extends cooking time.
When the cooking time is complete, allow the pressure to release naturally for 10 minutes before using the quick-release function. This gradual release helps maintain the meat’s moisture. Once the pressure is fully released, carefully remove the lid (the steam will be intense—use caution). The pork shoulder should be fork-tender and easily pull apart.
Rest and Shred for Maximum Juiciness
Use two forks to shred the pork shoulder directly in the pot, discarding the bay leaves. The meat should come apart with minimal effort, revealing juicy, flavorful strands. If the cooking liquid appears too thin, you can reduce it slightly by simmering on “Sauté” for 2-3 minutes until it thickens to a glossy sauce. This step ensures every bite is moist and packed with flavor.
Let the shredded pork rest in the pot for 5 minutes before serving. This resting period allows the juices to redistribute throughout the meat, guaranteeing that each serving is succulent and full of flavor. Serve the pork over mashed potatoes, in sandwiches, or alongside your favorite sides. The result is a restaurant-quality pulled pork that’s ready in under an hour!
Pro Tips For Making Boston Butt Instant Pot
- Sear the Butt First: I learned this the hard way—skipping the sear means flavorless shreds. Use 2 tablespoons of oil in your Instant Pot, set it to “Sauté,” and brown the pork on all sides until deep golden. That crust locks in moisture and adds depth the vinegar and sugar can’t match.
- Slice the Onion Thin: Thick onion chunks turn mushy and cloying. Instead, slice them paper-thin—about 1/8-inch—and they’ll melt into the sauce without overpowering. No mandoline? Stack slices and slice through with a sharp knife. (Yes, it’s tedious, but it works.)
- Don’t Skip the Natural Release: After cooking, let the pressure release naturally for 10 minutes—no quick-release shortcuts. The residual heat finishes cooking the meat evenly and keeps it from drying out. I know you’re eager, but rushing this step turns tender pork into sad, stringy shreds.
- Deglaze with Vinegar Early: Dump the apple cider vinegar in with the onions and garlic before adding the pork. The acid breaks down the meat’s surface proteins right away, making it tender faster. Skip this, and you’re left scraping burnt bits off the bottom later—trust me, it’s not worth it.
Storing and reheating your leftovers
Fridge Storage
Let your pulled pork cool to room temperature for no more than 2 hours before storing. Transfer it to an airtight container—I use glass Pyrex with snap-on lids—and refrigerate at 40°F or below.
It keeps beautifully for up to 5 days, with flavors actually deepening as the spices meld. I like to portion it into quart-sized containers with a splash of the cooking liquid to keep everything moist. 💫
Freezer Prep
For longer storage, freeze your pulled pork in gallon-sized freezer bags or airtight containers. Leave 1 inch of headspace to prevent expansion cracks. I label each bag with the date—it stays good for 3 months without losing quality.
When ready to use, thaw overnight in the fridge or use the defrost setting on your microwave for quicker results.
Reheating Perfection
For stovetop reheating, transfer portions to a skillet with 2 tablespoons apple juice or broth per cup of pork. Heat over medium-low for 8-10 minutes, stirring occasionally, until steaming hot.
This method prevents drying out. For microwave reheating, cover with a damp paper towel and heat in 1-minute intervals on 50% power until reaching 165°F.
Meal Prep Magic
Double the recipe and store half for easy weeknight meals. I assemble sandwiches with toasted buns, pickles, and coleslaw the night before—just reheat the pork separately. For tacos, keep the pork in a container and warm it in a skillet with 1 tablespoon BBQ sauce before serving.
The key is always adding a little liquid when reheating to maintain moisture. 🔥
Leftovers Reinvented
Turn leftover pulled pork into loaded nachos by layering tortilla chips with cheese, pork, and jalapeños. Or mix it with 1 cup cooked rice, ½ cup salsa, and ¼ cup sour cream for a quick bowl.
The beauty of this recipe is its versatility—never let leftovers go to waste!
Nutrition facts
Frequently asked questions
Can I use a smaller cut of pork shoulder instead of a 5 lb Boston butt?
The recipe is designed for a 5 lb cut to ensure optimal tenderness. For a 3-4 lb shoulder, reduce cooking time to 45-50 minutes on high pressure. Smaller cuts may dry out faster, so monitor closely. For 6+ lbs, add 15 minutes to cooking time and increase broth by ½ cup to prevent drying.
Why does my pulled pork turn out dry even after following the recipe?
Dryness usually happens from one of three issues: overcooking, quick-release instead of natural release, or not enough liquid. Always use the 10-minute natural release and ensure the meat is covered with 2/3 liquid. For extra moisture, add ¼ cup apple juice when reheating. The fat cap on the pork helps too—never trim it before cooking!
Can I make this recipe in a regular slow cooker instead?
Use the same ingredients but cook on low for 8 hours or high for 4-5 hours. The Instant Pot’s pressure cooks it faster, but slow cookers work perfectly. For extra flavor, sear the meat in a skillet first and transfer it to the slow cooker with the onions. The key difference is time—no pressure means longer cooking to tenderize the meat.
What’s the best way to shred the pork without it turning into mush?
Use two forks (not a knife) to pull the meat apart in strands—this keeps it tender but intact. Work gently in the direction of the grain. For extra texture, leave some slightly larger chunks. If the meat feels too tough, it likely needs more cooking time. The 5-minute rest after shredding is crucial—it lets the juices redistribute for perfect pull-apart texture.
How can I make this recipe spicier or smokier?
For more heat, add 1 tbsp cayenne pepper or 1 tsp chili powder with the other spices. For smokier flavor, increase smoked paprika to 3 tbsp or add ½ tsp liquid smoke to the cooking liquid. For a deep smoky aroma, char the onions and garlic in the Instant Pot before adding other ingredients. Always taste as you go—start with half the amount and adjust!

- Baked Potatoes in Crock Pot Recipe: Buttery Interiors and Crispy Top Magic - November 1, 2026
- Braised Beef Short Ribs Recipe: Crock Pot Fall-Off-Bone Magic in 6 Hours - November 1, 2026
- Crock Pot Cocoa Recipe: Velvety Warmth With Hidden Spice Magic - November 1, 2026