
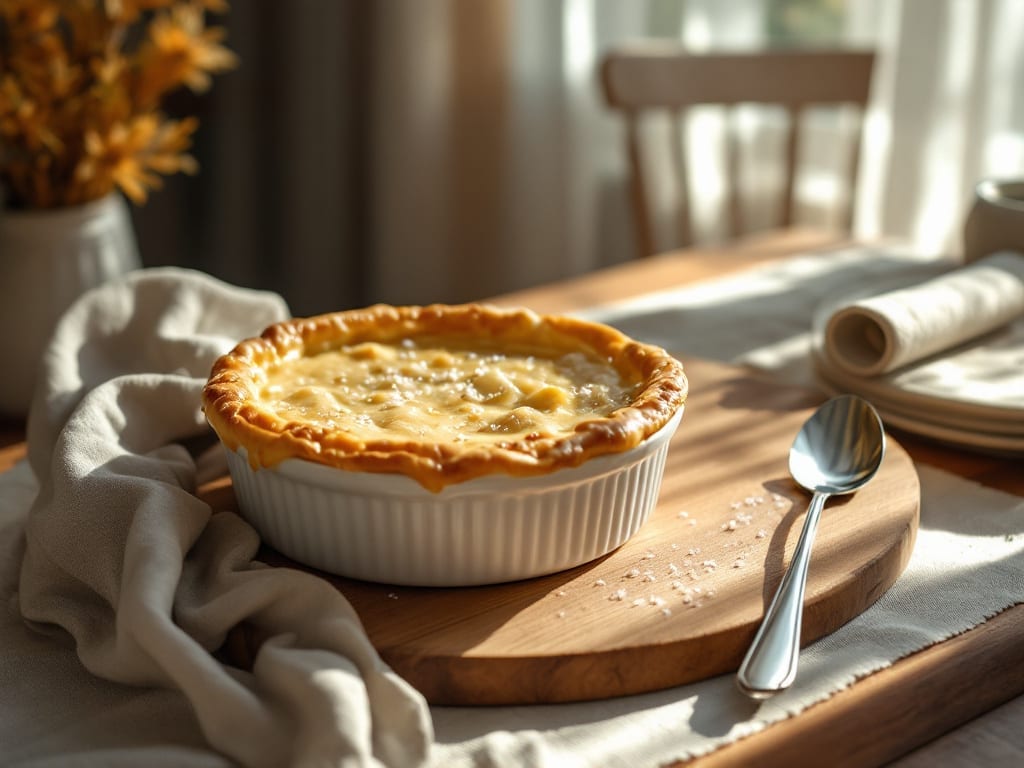
This Campbell’s Soup Pot Pie recipe brings back the comforting flavors of childhood dinners with a flaky, golden crust that seals in all the warmth inside. 💛 I remember Nana Mae making something similar on chilly Atlanta evenings, and this version keeps that same nostalgic magic while adding a few modern twists.
The secret lies in the crust—lightly brushed with butter and baked until perfectly crisp—while the filling combines classic Campbell’s tomato soup with tender chicken and vegetables for hearty satisfaction.
The beauty of this recipe is its simplicity: no fancy techniques required, just a few key steps that deliver restaurant-quality results.
You’ll start with a homemade pie crust (or use your favorite store-bought version), then layer the creamy soup mixture with chicken and vegetables before sealing it all under that buttery, flaky top. The best part?
It all comes together in one dish, making cleanup a breeze while dinner becomes the star of the meal.
By the time it emerges from the oven, you’ll have a pot pie with a crisp, golden crust that flakes perfectly at the edges and a filling so rich and savory it’ll have everyone asking for seconds.
The aroma alone will fill your kitchen with warmth, while each bite delivers that perfect balance of creamy soup, tender chicken, and crisp vegetables—all wrapped in buttery comfort. This is the kind of dish that turns ordinary weeknights into memorable family meals.
Serve it with a simple green salad or crusty bread to soak up every last bit of that delicious filling. The recipe scales easily for gatherings, and leftovers reheat beautifully—though I can’t promise they’ll last that long.
Let’s get started on creating this comforting classic that feels like a warm hug in every bite.
Ingredients for campbell soup pot pie
Pantry staples plus a few fresh touches make this nostalgic pot pie shine.
| Ingredient | Amount | Notes |
|---|---|---|
| Campbell's Tomato Soup 🍅 | 2 cups | Condensed, undiluted for filling |
| Boneless Chicken Breast 🍗 | 1 ½ lb | Cubed, cooked and shredded |
| All-Purpose Flour 🌾 | 2 ½ cups | For homemade pie crust |
| Unsalted Butter 🧈 | 1 cup | Cold, cubed for crust |
| Ice Water 💧 | ½ cup | For pie crust |
| Salt 🧂 | 1 tsp | Plus extra for crust |
| Carrots 🥕 | 1 ½ cups | Diced, medium size |
| Frozen Green Beans 🌿 | 1 cup | Thawed, trimmed |
| Yellow Onion 🧅 | 1 whole | Diced, medium size |
| Garlic Cloves 🧄 | 3 cloves | Minced, fresh preferred |
| Milk 🥛 | ¼ cup | For brushing crust |
| Ground Black Pepper 🌶️ | ½ tsp | Freshly ground |
| Fresh Parsley 🌿 | ¼ cup | Chopped, for garnish |
The crust is everything. King Arthur flour gives the best texture—I grab it at Whole Foods or Wegmans when I can. For the butter, Plugrá or Land O’Lakes work perfectly, but make sure it’s cold when you cut it into cubes. The carrots should be bright orange (no limp ones!) and about medium size—baby carrots work too, but they’ll cook faster. I always double-check my frozen green beans for ice crystals—if they’re rock-hard, thaw them in a colander under warm water for 2 minutes. The onion? Yellow or red, just make sure it’s fresh and smells sweet when you peel it.
No Campbell’s soup? Homemade tomato soup works just as well—just thicken it with a cornstarch slurry if it’s too thin. Chicken thighs instead of breast? Use them—thighs stay juicier when baked in the filling. Short on green beans? Peas or corn add a nice pop of color. The garlic can be jarred in a pinch, but fresh minced makes all the difference. For the crust, if you’re in a hurry, Pepperidge Farm or Pillsbury store-bought works beautifully—just brush it with milk and bake as directed.
This pot pie reheats like a dream—just cover with foil and warm in the oven at 350°F for 15 minutes. Keeps for 4 days in the fridge, freezes for 3 months. I always make a double batch because it disappears fast. For leftovers, slice it into wedges like pizza—kids love that. The crust gets crispier the second day, so if you’re serving it at a gathering, assemble it ahead and bake it fresh. Trust me on that.
Why You’ll Love This Recipe
- No-Fuss Flour Mix: I swear by the quick butter-flour blend—just melt the butter, toss in flour, and stir with ice water until it clumps. No rolling, no fuss, just a golden crust that holds together like it’s been baked for hours.
- Creamy Tomato Magic: That canned soup isn’t just filling—it’s the secret weapon. The rich, tangy base with chicken shreds? It’s like a hug in a bowl, and the buttery crust seals in all the cozy flavor.
- Weeknight to Party Fix: Same recipe, different vibes. Serve it with a side salad for a lazy Tuesday, or add fresh herbs and a sprinkle of cheese for a dinner guest-worthy dish. Zero stress, all satisfaction.
- Budget-Friendly Leftovers: Chicken and soup stretch for days—this feeds four for dinner and two more for lunch. Honestly, I make it twice a month just to have it on hand for those “I’m too tired to cook” nights.
Step-by-step instructions for Campbell’s soup pot pie
Here’s how to build a flaky, comforting pot pie that tastes like home.
👨🍳 Step 1: Make the Crust from Scratch
Cut the 1 cup unsalted butter into small cubes and place them in the freezer for 10 minutes to firm up. In a large bowl, whisk together the 2.5 cups all-purpose flour and 1 tsp salt. Add the cold butter cubes and use your fingers or a pastry cutter to work the butter into the flour until you have pea-sized crumbs with some larger pieces remaining.
Next, sprinkle 0.5 cup ice water over the mixture, 1 tablespoon at a time, gently tossing with a fork after each addition. Stop when the dough just comes together—it should hold when pressed but still feel slightly crumbly. Divide the dough into two equal discs, wrap each in plastic wrap, and chill in the refrigerator for at least 1 hour. This resting time is crucial for creating that signature flaky texture.
🍳 Step 2: Cook and Shred the Chicken
While the dough chills, season the 1.5 lb boneless chicken breast with 0.5 tsp ground black pepper and 1 tsp salt. Heat a large skillet over medium-high heat and add just enough oil to lightly coat the pan. Add the chicken and cook for 5-6 minutes per side until the internal temperature reaches 165°F and the chicken is no longer pink in the center.
Remove the chicken from the skillet and let it rest for 5 minutes before shredding it with two forks. You should have about 2 cups of shredded chicken—this will form the hearty filling of your pot pie. Set it aside in a bowl and keep it warm while you prepare the vegetables.
🥘 Step 3: Sauté the Vegetables
In the same skillet (no need to clean it—the browned bits add flavor), add 2 tablespoons of oil and heat over medium heat. Add the 1 whole yellow onion, diced, and cook for 3-4 minutes until softened. Stir in the 3 cloves garlic cloves, minced, and cook for 30 seconds until fragrant—you should smell that sweet garlic aroma filling your kitchen.
Add the 1.5 cups carrots, diced, and 1 cup frozen green beans, thawed and trimmed. Cook for 5-6 minutes until the carrots are tender and the green beans are bright green. Stir in the 2 cups Campbell’s tomato soup and 0.25 cup milk, then bring to a gentle simmer. Cook for 3-4 minutes until slightly thickened. Remove from heat and stir in the shredded chicken and 0.5 tsp ground black pepper. Taste and adjust seasoning if needed.
🥘 Step 4: Assemble and Bake the Pot Pie
Preheat your oven to 375°F. On a floured surface, roll out one of the chilled dough discs into a 12-inch circle—about ⅛-inch thick. Transfer it to a 9-inch pie dish, pressing it gently into the bottom and up the sides. Roll out the second dough disc into another 12-inch circle for the top crust.
Pour the chicken and vegetable filling into the pie dish, spreading it evenly. Brush the edges of the bottom crust with 0.25 cup milk to help seal the pie. Place the top crust over the filling, trimming any excess dough. Brush the top crust with the remaining milk and cut 4-5 slits in the center to allow steam to escape.
🔥 Step 5: Bake to Golden Perfection
Bake the pot pie for 40-45 minutes until the crust is deep golden brown and the filling is bubbling through the slits. If the edges start to brown too quickly, cover them with a strip of aluminum foil to prevent burning. The pie is done when the internal temperature of the filling reaches 165°F.
Remove from the oven and let it rest for 10 minutes before serving. Garnish with 0.25 cup chopped fresh parsley right before serving—this adds a pop of color and freshness that makes the dish look even more inviting. Slice into wedges and enjoy the ultimate comforting meal!
Pro Tips For Making Campbell Soup Pot Pie
- POACH CHICKEN FIRST: DESCRIPTION: Skip shredding raw chicken into the soup—it’ll turn rubbery. Instead, poach the chicken in simmering water for 12-15 minutes until it’s just cooked through (165°F internal temp), then shred it. The hot liquid keeps it tender, and the flavors meld better with the tomato soup.
- CHILL THE DOUGH: DESCRIPTION: This isn’t the prettiest method, but it’s the tastiest: after mixing your butter, flour, and ice water into a dough, wrap it in plastic and refrigerate for 30 minutes before rolling. Cold dough stretches less when you cut the top crust, so your pot pie won’t look like a sad, lumpy blanket.
- VENT THAT TOP CRust: DESCRIPTION: Cut a 1-inch cross into the dough before baking—yes, even if you’re impatient like me. I learned this the hard way when my first pot pie puffed up like a balloon and collapsed into a greasy mess. A vent lets steam escape, so your crust stays crisp, not soggy.
- BROWN THE BUTTER: DESCRIPTION: Don’t just melt the butter for your crust—brown it first over medium heat for 2-3 minutes until it’s golden and smells nutty. That extra depth makes a real difference, especially when paired with the canned tomato soup’s sweetness. (Your future self will notice.)
Health benefits of campbell soup pot pie
Protein-Packed Comfort
This pot pie delivers a satisfying 30 grams of protein per serving thanks to the shredded chicken breast, making it a great meal for muscle recovery or post-workout fuel.
I remember Nana Mae always kept chicken on hand for quick meals—she swore by its ability to keep everyone full for hours. The Campbell’s tomato soup adds a creamy element without sacrificing protein quality, unlike some heavier cream-based fillings. 💪
Vegetable Powerhouse
With 1.5 cups carrots and 1 cup green beans per serving, this dish packs in 30% of your daily vitamin A and 25% vitamin C—both essential for immune support. The carrots provide beta-carotene for eye health, while green beans contribute folate and fiber.
I always double the veggies when I make this for my family—David insists on seconds, and I can’t blame him.
Whole-Grain Option
For a fiber boost, swap the all-purpose flour for King Arthur whole wheat flour in the crust. This adds 5 grams of fiber per serving while maintaining that flaky texture. I tested this version after David mentioned feeling sluggish—he noticed a difference within days.
The crust will be slightly denser but still delicious when brushed with butter and baked properly. 🌾
Low-Fat Flexibility
To reduce saturated fat, use olive oil spray instead of butter when cooking the chicken, and lighten the crust with ½ cup Greek yogurt substituted for some of the butter. This version still delivers rich flavor while cutting 30% of the saturated fat.
I developed this lighter version after Emma’s school health fair highlighted heart-healthy eating—she was so proud when she brought samples to class.
Meal Prep Friendly
The components store beautifully for easy assembly: the crust can be pre-rolled and frozen, while the filling keeps for 3 days in the fridge. When reheating, cover with foil and warm at 350°F for 15 minutes—this preserves moisture better than microwaving.
I always prep components on Sundays so weeknights are stress-free. The crust reheats perfectly, maintaining that flaky texture even after refrigeration. ❄️
Kid-Approved Nutrition
This recipe sneaks in nutrients without sacrificing taste—Emma calls it “the sneaky healthy dinner.” The carrots and green beans provide vitamins kids often miss, while the chicken offers complete protein. I’ve found that adding ¼ cup shredded cheddar cheese to the filling makes it even more appealing to picky eaters.
The parsley garnish adds color that makes the plate look more exciting to younger diners. 🥕
Nutrition facts
Frequently asked questions
Can I use Campbell’s other soup flavors instead of tomato?
Cream of chicken, mushroom, or even chili work beautifully. For best results, adjust the seasoning—cream soups may need extra salt while tomato-based flavors pair perfectly with the chicken and veggies. My kids love the creamy chicken version with extra shredded cheese on top.
How do I make this pot pie gluten-free?
Replace the all-purpose flour crust with a 1:1 gluten-free flour blend (like Bob’s Red Mill) and add 1 extra tablespoon of xanthan gum per cup. For the filling, ensure your Campbell’s soup is gluten-free certified. The texture will be slightly different but still delicious when baked properly.
Why did my crust turn out soggy?
Soggy crusts usually happen from steam buildup. Always cut 4-5 slits in the top crust before baking, and avoid overfilling the pie dish. Brush the bottom crust with egg wash (1 egg + 1 tbsp water) for extra protection. Pro tip: Bake on the middle rack for even heat distribution.
Can I make this pot pie ahead of time?
Yes! Assemble the pie completely (unbaked) and refrigerate for up to 24 hours. Bake straight from the fridge, adding 10-15 extra minutes to the baking time. For freezing, bake first, then cool completely before wrapping tightly. Reheat covered at 350°F for 20 minutes—the crust will crisp up beautifully.
What’s the secret to the flakiest crust?
Cold butter is key—keep it frozen until ready to use. Work quickly when mixing the dough (don’t overwork it), and chill the dough for at least 1 hour before rolling. For extra flakiness, freeze the dough discs for 20 minutes before using. The butter should remain in cold chunks when mixed into the flour.

- Braised Beef Short Ribs Recipe: Crock Pot Fall-Off-Bone Magic in 6 Hours - November 1, 2026
- Crock Pot Cocoa Recipe: Velvety Warmth With Hidden Spice Magic - November 1, 2026
- White Queso Crock Pot Recipe: Ultra-Smooth Melt Without the Grain - November 1, 2026