
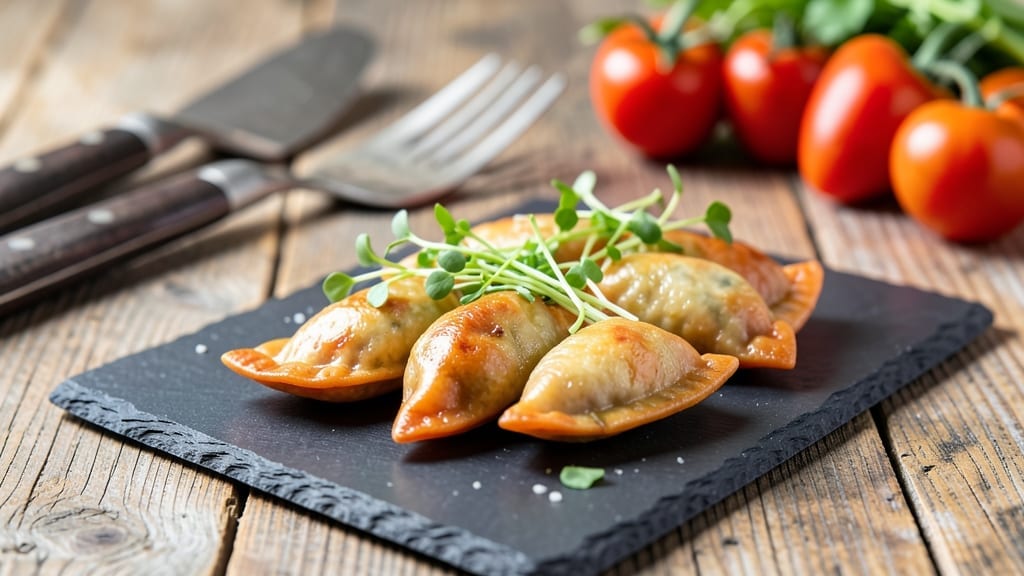
This gluten-free pot stickers recipe delivers the same crispy edges and silky filling you love—without the gluten. After years of perfecting gluten-free adaptations, I’ve developed a foolproof method that uses a simple dough blend and traditional pan-frying techniques to create restaurant-quality results at home.
The key to success lies in the dough—it combines gluten-free flour with xanthan gum for structure, while a touch of cornstarch ensures that signature crispy texture when pan-fried.
The filling, whether classic pork or hearty vegetables, stays tender and flavorful thanks to a precise cooking technique that prevents overfilling the wrappers.
By the time you flip those golden-brown pot stickers, you’ll have a plate of crispy-edged dumplings with juicy, flavorful fillings that hold together perfectly. The aroma alone will have everyone at the table asking for seconds, and the gluten-free adaptation means no one has to miss out.
Serve with a simple dipping sauce of soy sauce, rice vinegar, and a touch of honey for the ultimate comfort food experience. This recipe proves gluten-free cooking can be just as satisfying as traditional versions—let’s get started!
Ingredients for gluten free pot stickers
Simple gluten-free blend meets traditional flavors—crispy edges, silky filling guaranteed.
| Ingredient | Amount | Notes |
|---|---|---|
| Gluten-Free All-Purpose Flour Blend 🌾 | 1 ½ cups | Bob's Red Mill 1:1 preferred |
| Xanthan Gum 🧂 | ¼ tsp | Essential for dough elasticity |
| Cornstarch 🍚 | ¼ cup | For crispy texture (not powdered sugar) |
| Cold Water 💧 | ¾ cup | Chilled for easier handling |
| Ground Pork 🥩 | 1 lb | 80% lean or leaner for juiciness |
| Garlic Cloves 🧄 | 4 cloves | Minced, fresh preferred |
| Green Onions 🧅 | ¼ cup | Finely chopped, including tops |
| Ginger Root 🌿 | 1 tbsp | Freshly grated, not powdered |
| Soy Sauce 🍶 | 2 tbsp | Low-sodium preferred |
| Sesame Oil 🫒 | 1 tsp | Toasted, for aroma |
| Vegetable Oil 🫒 | ½ cup | High smoke point for frying |
| Neutral Oil Spray 🫒 | 1 tbsp | For pan coating |
| Diamond Crystal Kosher Salt 🧂 | ½ tsp | For seasoning filling |
| Black Pepper 🌶️ | ¼ tsp | Freshly cracked |
| Dipping Sauce Soy Sauce 🍶 | ¼ cup | For serving (separate) |
| Rice Vinegar 🥬 | 1 tbsp | For dipping sauce |
| Honey 🍯 | 1 tsp | For dipping sauce sweetness |
The gluten-free flour blend is everything here. Bob’s Red Mill 1:1 works best—it mimics traditional flour behavior without gums. If you’re using another brand, check the xanthan gum content (some blends include it already). Costco or Whole Foods carry this reliably, but any bulk section will do. The xanthan gum is non-negotiable—it’s what gives these stickers that chewy center. Cornstarch? That’s your crispy edge secret. Don’t substitute with flour or arrowroot—it’s all about the starch-to-protein ratio. Chill your water before mixing (I mean cold, not fridge-cold—ice water works).
Pork filling can be swapped for shrimp or mushrooms, but texture changes. Ground turkey works too, but it dries out faster. Fresh ginger and garlic are worth the effort—powdered versions taste like dust. No sesame oil? Toasted peanut oil or even a pinch of ground sesame seeds will add depth. The dipping sauce is flexible: swap honey for maple syrup or add a dash of sriracha if you like heat. For extra crispiness, double the cornstarch in the dough—but don’t overfill the wrappers. They’ll burst if you pack too much.
Dough keeps 2 days wrapped in plastic in the fridge, but it’s best used fresh. Filling can be prepped ahead and stored 1 day in the fridge. For freezing, shape the filled dumplings on a tray first, then transfer to a bag—this prevents sticking. Reheat from frozen in a skillet with a splash of water. The dipping sauce? Make it fresh or store it 1 week in the fridge. Trust me, homemade tastes better than any store-bought version.
Why You’ll Love This Recipe
- No Fuss Dough: I mix the gluten-free blend with cold water and xanthan gum—no kneading, no waiting. The dough comes together in minutes, and honestly? It’s more forgiving than regular pot sticker dough.
- Porky Perfection: That ground pork filling with ginger and garlic? It’s ridiculously flavorful, and the cornstarch keeps it juicy while the dough stays tender. The crispy edges when pan-fried? Chef’s kiss.
- Meal Prep Hero: Make a big batch on Sunday, freeze them, and reheat in seconds—no soggy wrappers. I keep them in my freezer for lazy nights or when friends drop by unexpectedly.
- Budget-Friendly Crunch: Uses affordable staples (ground pork, cornstarch) and stretches far. My daughter calls them “dollar dumplings,” but they’re my secret weapon for quick, satisfying meals.
Step-by-step instructions for gluten-free pot stickers
Here’s how to make golden, crispy pot stickers with a silky filling—no gluten in sight.
Prepare the Filling with Perfect Seasoning
In a medium bowl, combine the 1 lb ground pork, 4 cloves garlic cloves (minced), 0.25 cup green onions (finely chopped), 1 tbsp ginger root (freshly grated), 2 tbsp soy sauce, 0.5 tsp diamond crystal kosher salt, and 0.25 tsp black pepper. Mix thoroughly with your hands or a fork until the ingredients are evenly distributed.
Here’s the thing—don’t overwork the pork. You want it to stay tender, not turn into a paste. The filling should hold its shape when packed into the wrappers but still feel slightly loose. If it feels too dry, add 1 tsp cold water to help bind it together.
Let the filling sit at room temperature for 10 minutes while you prepare the dough. This ensures even cooking and prevents the filling from releasing too much moisture during frying, which can make the wrappers soggy.
Make the Dough with Crispy Potential
In a large mixing bowl, whisk together the 1.5 cups gluten-free all-purpose flour blend, 0.25 tsp xanthan gum, and 0.25 cup cornstarch. The xanthan gum is non-negotiable here—it mimics the elasticity of gluten, which is what makes these wrappers hold together without falling apart.
Create a well in the center and pour in the 0.75 cup cold water. Using a fork or chopsticks, gradually incorporate the water into the dry ingredients until a shaggy dough forms. The dough will be sticky, but that’s exactly what we want for those crispy edges.
Transfer the dough to a clean surface and knead gently for 2-3 minutes until smooth. If it feels too sticky, wet your hands slightly to prevent sticking. Wrap the dough in plastic wrap and let it rest for 30 minutes at room temperature. This resting period relaxes the gluten-free flour and makes rolling out the wrappers much easier.
Roll and Assemble the Stickers
Divide the rested dough into 8 equal pieces (about 2 ounces each). Roll each piece into a thin circle on a lightly floured surface, about 4-5 inches in diameter. The thinner you roll them, the crispier they’ll be—aim for 1/16-inch thickness if possible. If the dough tears, don’t panic. Just patch it up with a little extra dough and water.
Place 1 tablespoon of the pork filling in the center of each dough circle. Fold the dough over the filling, pressing the edges firmly to seal. Use a fork to crimp the edges tightly—this prevents leaks during frying. You’ll end up with 4 pot stickers (since each piece makes 2). Place the assembled stickers on a plate and cover with a damp towel to prevent drying while you fry.
Fry to Golden Perfection
Heat 0.25 inch of vegetable oil in a large skillet over medium heat until it reaches 350°F. You’ll need a deep enough pan to fry the stickers without crowding—this ensures even cooking and prevents soggy bottoms. If your oil isn’t hot enough, the stickers will absorb oil instead of crisping up.
Carefully place 2-3 stickers in the hot oil (don’t overcrowd) and fry for 2-3 minutes per side until they turn a deep golden brown. The edges should be crispy, and the filling should be cooked through. Use a slotted spoon to flip them gently—press down lightly to ensure even contact with the oil.
Transfer the fried stickers to a paper towel-lined plate to drain excess oil. Repeat with the remaining stickers, maintaining the 350°F oil temperature between batches. If the oil temperature drops below 340°F, let it reheat before frying the next batch.
Make the Dipping Sauce and Serve
While the stickers are still hot, whisk together the 0.25 cup dipping sauce soy sauce, 1 tbsp rice vinegar, and 1 tsp honey in a small bowl. Taste and adjust the balance of sweet, tangy, and salty to your preference. The sauce should coat the back of a spoon but still be pourable.
Serve the pot stickers immediately with the dipping sauce on the side. The contrast of the crispy, golden wrappers with the silky pork filling and tangy sauce is what makes these stickers irresistible. For extra flair, sprinkle a pinch of sesame oil over the top just before serving—it adds a nutty aroma that ties everything together.
Pro Tips For Making Gluten Free Pot Stickers
- CHILL THE DOUGH: I learned this the hard way—gluten-free dough behaves like a diva. After kneading your GF blend with xanthan gum, pop it in the fridge for 30 minutes. The cold slows down the cornstarch’s tendency to gum up when cooking, so your wrappers stay pliable and won’t stick like glue to your fingers.
- SKIM THE PORK FAT: That extra pork fat makes the filling rich, but too much turns your pot stickers into greasy messes. After cooking the ground pork, drain it on a paper towel-lined plate, pressing gently to remove excess moisture and fat. Your filling will stay cohesive, and the wrappers won’t turn soggy when pan-frying.
- PRESS HARD, SEAL TIGHT: Gluten-free dough tears easily, but don’t skip pressing the edges firmly when sealing the pot stickers. Use your thumb to create a thin, even rim—this prevents leaks during frying. If the dough cracks, patch it with a little cold water and re-seal. (Yes, it looks messy, but it works.)
- FREEZE HALF THE BATCH: Made too many? Freeze half the uncooked pot stickers on a parchment-lined tray before frying. Once solid, transfer them to a bag and cook straight from frozen—no thawing needed. They’ll crisp up just like fresh, and you’ll save yourself the hassle of last-minute prep when cravings hit. (Your future self will high-five you.)
Pro cooking tips for this dish
Dough Resting Matters
The 30-minute rest for your gluten-free dough isn’t optional—it’s where the magic happens. Gluten-free flours behave differently than wheat flour, and resting allows the xanthan gum to fully hydrate and distribute evenly.
I’ve seen beginners skip this step and end up with wrappers that tear when rolling or leak during frying. If you’re short on time, rest the dough for at least 15 minutes, but don’t rush it. 💡
Filling Prep Secrets
Your filling’s moisture level is critical—too wet and your wrappers will burst; too dry and they’ll be tough. After mixing, press the filling between your fingers. It should hold together but still feel slightly crumbly. If it’s too loose, add ½ tsp cold water at a time until it binds.
Pro tip: Use a measuring spoon for the filling—1 tablespoon per sticker is perfect. Overfilling is the #1 reason gluten-free pot stickers fail. 🥩
Oil Temperature Control
Your oil needs to stay between 340-350°F—any lower and you’ll get greasy stickers; any higher and they’ll burn before cooking through. Use an instant-read thermometer (I recommend Thermoworks Thermapen) to monitor temperature.
If your oil drops below 340°F between batches, remove the pan from heat for 1-2 minutes to let it recover. Never add cold oil while frying—this causes temperature fluctuations that ruin texture. ⚡
Sealing Like a Pro
The way you seal your pot stickers determines whether they hold together during frying. Press the edges with your fingers first to create a tight seal, then use a fork to crimp them tightly. I like to make a crescent pattern around the edges for extra security.
If you see any gaps, seal them immediately with a tiny bit of water. The fork crimping also creates those beautiful decorative pleats that make restaurant-quality pot stickers look even better. 🌟
Batch Frying Strategy
Never fry more than 2-3 stickers at a time—crowding lowers oil temperature and steams the bottoms instead of crisping them. Use a slotted spoon to carefully transfer them to a wire rack set over a baking sheet. This allows excess oil to drip away while keeping them warm.
I like to work in batches of 4 stickers total (2 per side) to maintain consistent oil temperature. If your kitchen gets smoky, crack a window—ventilation helps with those frying aromas! 🌡️
Dough Rescue Tips
Gluten-free dough can get sticky, but don’t panic. If your dough tears while rolling, patch it with a tiny bit of water and extra dough. For extra crispiness, dust your rolling surface with cornstarch instead of flour—the higher starch content prevents sticking and promotes browning.
If your dough feels too dry, add ½ tsp water at a time until it becomes pliable. Remember, gluten-free dough is more forgiving than wheat dough—it won’t overwork like traditional pastry. 💪
Nutrition facts
Frequently asked questions
Can I make these gluten-free pot stickers ahead of time?
You can prep the filling 1 day in advance and store it in the fridge. For the dough, shape the filled wrappers on a tray, freeze them uncovered for 1 hour, then transfer to a bag. Fry from frozen—just add 30 seconds per side to the cooking time. The dough itself keeps 2 days wrapped in plastic in the fridge, but fresh is always best for crispiness.
What if my gluten-free dough tears when rolling?
Don’t stress! Patch tears with a tiny bit of water and extra dough. For extra crispiness, dust your surface with cornstarch instead of flour—the higher starch content prevents sticking. If the dough feels too dry, add ½ tsp water at a time until pliable. Gluten-free dough is more forgiving than traditional pastry, so embrace the imperfections!
Can I use a different protein for the filling?
Swap pork for shrimp, mushrooms, or ground turkey. For shrimp, chop it finely and add ½ tsp cornstarch to bind it. Vegetable versions work well too—just ensure your filling holds its shape. Adjust seasoning to taste, but avoid overmixing to keep the texture tender.
Why are my pot stickers soggy instead of crispy?
Soggy stickers usually mean one of two things: oil temperature too low (340°F minimum) or overcrowding the pan. Fry 2-3 at a time and maintain oil heat with a thermometer. Another culprit? Overfilling—stick to 1 tablespoon per sticker. If your wrappers feel too wet, let them rest 5 minutes uncovered before frying.
Do I need xanthan gum for this recipe?
Yes, xanthan gum is essential—it mimics gluten’s elasticity. If your flour blend already includes it (check the label), reduce to ¼ tsp. Without it, your wrappers will tear easily and lack structure. For a 1:1 gluten-free flour without xanthan gum, add ½ tsp total. Never skip it!

- Baked Potatoes in Crock Pot Recipe: Buttery Interiors and Crispy Top Magic - November 1, 2026
- Braised Beef Short Ribs Recipe: Crock Pot Fall-Off-Bone Magic in 6 Hours - November 1, 2026
- Crock Pot Cocoa Recipe: Velvety Warmth With Hidden Spice Magic - November 1, 2026