
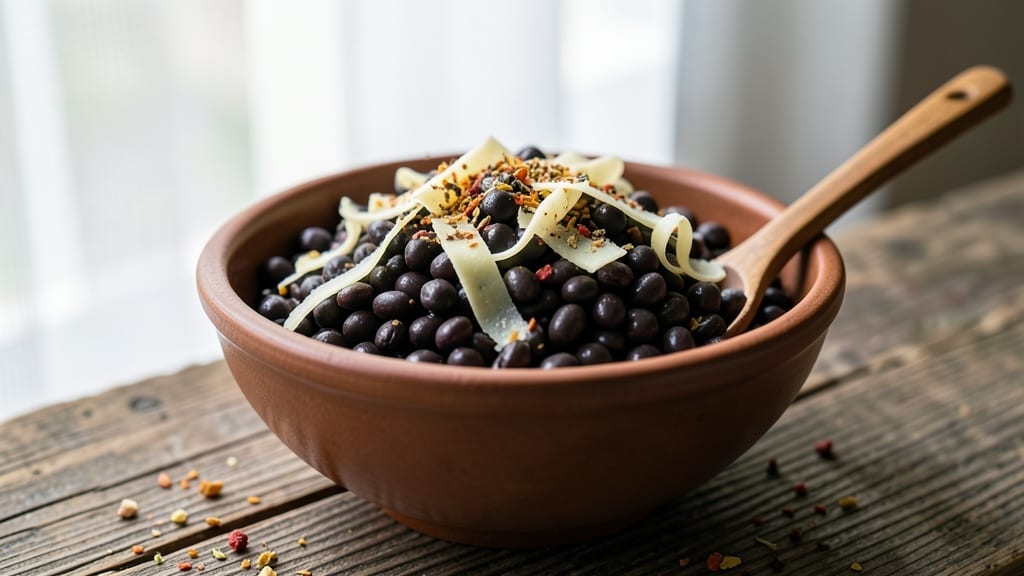
This insta-Pot black-eyed peas recipe turns simple legumes into a rich, spiced side that tastes slow-cooked—all with just a fraction of the time. The secret lies in layering Southern flavors like smoked paprika, garlic, and a touch of liquid smoke while letting the Instant Pot do all the work.
I developed this version after struggling to replicate my grandmother’s slow-cooked black-eyed peas, and it delivers the same rich, hearty results in under 45 minutes.
The beauty of this method is how the Instant Pot handles both the soaking and cooking phases efficiently, ensuring tender peas with deep, smoky flavor. We start by sautéing onions and garlic to build a flavorful base, then add spices and liquid smoke for that signature Southern aroma.
The peas cook under pressure until perfectly tender, absorbing all those aromatic flavors without losing their natural texture.
What you’ll end up with is a pot of velvety black-eyed peas with just the right balance of smokiness and warmth—ideal for serving alongside grilled meats, cornbread, or even as a standalone vegan main.
The natural release method ensures the peas stay tender, and the spices meld together for a cohesive, restaurant-quality side dish that’s surprisingly simple to make.
This recipe works equally well for meal prep or last-minute gatherings, making it a versatile addition to any kitchen. The one-pot approach means minimal cleanup, and the flavors only deepen as it sits, so you can prepare it ahead of time without worrying about soggy results.
Let’s get started on this flavor-packed, time-saving dish.
Ingredients for insta pot black eyed peas
Pantry staples plus a few key spices for smoky, restaurant-quality flavor.
| Ingredient | Amount | Notes |
|---|---|---|
| Dried Black-Eyed Peas 🌱 | 1 ½ cups | Rinsed thoroughly before cooking |
| Yellow Onion 🧅 | 1 whole | Diced into small pieces |
| Garlic Cloves 🧄 | 4 cloves | Minced for deep flavor |
| Smoked Paprika 🌶️ | 1 tbsp | For signature smoky aroma |
| Ground Cumin 🌿 | 1 tsp | Toasted for richer taste |
| Dried Thyme 🍃 | 1 tsp | Or 0.5 tsp fresh thyme |
| Liquid Smoke 💨 | ½ tsp | For authentic Southern flavor |
| Vegetable Broth 💧 | 2 cups | Low-sodium preferred |
| Extra-Virgin Olive Oil 🫒 | 1 tbsp | For sautéing onions |
| Apple Cider Vinegar 🍎 | 1 tbsp | Brightens the flavor |
| Salt 🧂 | 1 tsp | Adjust to taste |
| Black Pepper 🌶️ | ½ tsp | Freshly ground preferred |
| Fresh Parsley 🌿 | ¼ cup | Chopped for garnish |
The black-eyed peas are the star, so pick a high-quality dried variety—avoid those with tiny splits or debris. Bob’s Red Mill or Trader Joe’s carry good options, but any bulk bin at a natural foods store works too. Smoked paprika and liquid smoke are non-negotiable for that authentic Southern taste—Penzeys has great options if you want to splurge. The vegetable broth should be low-sodium; Imagine or Pacific Foods are solid choices. Fresh parsley adds brightness, but dried works in a pinch (use half the amount).
No smoked paprika? Substitute with 0.25 tsp cayenne plus 0.5 tsp regular paprika for heat. Short on thyme? Dried oregano at half the amount gives a similar earthiness. Liquid smoke is tricky to replace—smoked salt at double the amount is the closest you’ll get. The apple cider vinegar can be swapped for white vinegar, but it loses some depth. For extra richness, stir in 1 tbsp nutritional yeast at the end (it adds a cheesy note that pairs perfectly).
These peas taste even better the next day—make a double batch for meal prep. Store in an airtight container in the fridge for 4-5 days or freeze for up to 3 months. The flavors meld beautifully when reheated gently with a splash of water. Garnish with fresh parsley right before serving to keep it vibrant.
Why You’ll Love This Recipe
- Smoky Depth Magic: That smoked paprika and cumin combo? It’s the secret weapon here. The peas soak up the warmth like a sponge, giving you a flavor that’s earthy, slightly sweet, and just a little bit smoky—no fancy spices needed.
- Lunchbox Hero: Between us, this is my go-to for meal prep. The peas hold up perfectly for days, and I pack them cold or reheated for lunches that actually taste like dinner. My kids even ask for seconds—(yes, even on a Tuesday).
- Budget Stretch: Dried black-eyed peas are one of the cheapest pantry staples out there, and this recipe stretches them into a full, satisfying meal. I make a big batch, freeze half, and still have leftovers that taste fresh. My wallet and my freezer both thank me.
Step-by-step instructions for insta pot black eyed peas
This one-pot method delivers smoky, flavorful black-eyed peas with minimal cleanup.
Sauté the Aromatics
Set your Insta Pot to the “Sauté” function and add the 1 tablespoon extra-virgin olive oil. Let it heat for about 30 seconds until shimmering. Add the 1 whole yellow onion, diced into small pieces, and cook for 3-4 minutes until softened and translucent.
Here’s where the magic starts—add the 4 cloves garlic cloves, minced, and cook for another 30 seconds until fragrant. You’ll notice the kitchen smells amazing at this point, but don’t walk away. Garlic burns fast, and you want it golden, not bitter.
Add the Spices and Peas
Reduce the heat to “Low” and stir in the 1 tablespoon smoked paprika, 1 teaspoon ground cumin, 1 teaspoon dried thyme, and 0.5 teaspoon liquid smoke. Let the spices toast for 30 seconds until you can smell that deep, smoky aroma filling the air.
Add the 1.5 cups dried black-eyed peas, rinsed thoroughly, and stir to coat them evenly in the spice mixture. This step ensures every pea absorbs those rich flavors. Give it a quick stir to distribute everything evenly before moving to the next phase.
Pressure Cook to Perfection
Pour in the 2 cups vegetable broth, then add the 1 tablespoon apple cider vinegar, 1 teaspoon salt, and 0.5 teaspoon black pepper. Secure the lid, set the valve to “Sealing,” and cook on High Pressure for 20 minutes.
This is where the real transformation happens. The peas will absorb all those smoky spices and become tender yet hold their shape. Once the cooking time is up, let the pressure release naturally for 10 minutes before quick-releasing any remaining pressure. Natural release helps the peas stay intact.
Finish and Garnish
Open the lid and stir the peas gently. They should be tender but still have a slight bite—this is perfect. If they’re too firm, you can cook them an additional 3-5 minutes on the “Sauté” function with a splash of water if needed.
Taste and adjust the seasoning if necessary. Then, stir in the 0.25 cup fresh parsley, chopped, for a bright finish. The parsley adds freshness that balances the smoky depth of the other flavors. Serve warm with cornbread or over rice for a complete meal.
Pro Tips For Making Insta Pot Black Eyed Peas
- SOAK THE PEAS: Dried black-eyed peas cook faster and stay firmer if you soak them overnight—just toss them in water, cover, and let them sit. I used to skip this, and the results were always mushy, even with pressure cooking. Save yourself 30 minutes by doing this step, or at least a quick 2-hour soak if you’re in a hurry.
- SAUTÉ THE AROMATICS FIRST: Don’t just dump everything in raw—brown the onion and garlic in the Instant Pot for 2-3 minutes before adding liquid. This builds flavor depth that skipping would leave behind. The slight char on the onion? That’s where the soul of the dish lives.
- AVOID OVERFILLING THE POT: Fill the Instant Pot no more than halfway with liquid—black-eyed peas expand like crazy. I learned this after a disaster where the peas turned to paste and the pot released a sad, sad beep. Aim for 3 cups of broth or water per cup of dried peas, and you’ll get perfectly tender, separate beans.
- UPGRADE WITH A SPLASH OF ACID: Add 1 tablespoon of apple cider vinegar or lemon juice at the end—it brightens the flavors and cuts through the richness of the smoked paprika. Sounds small, but it makes the dish taste restaurant-worthy. (Yes, even if you’re serving it to your picky uncle.)
Make-ahead tips for this recipe
Prep Ahead for Meal Prep
Black-eyed peas are one of the few dishes that actually taste better the next day, so I always make a double batch when prepping for the week. After cooking, let them cool completely, then store in a quart-sized glass container with a tight seal.
The flavors meld beautifully overnight, and you’ll get that restaurant-quality depth. Label with the date—these keep in the fridge for 4-5 days or freeze for 3 months. 💪
Freezing for Long-Term Storage
For freezing, use silicone molds or freezer-safe bags—both work great. Portion into 1-cup servings for easy grab-and-go meals. Squeeze out excess air before sealing to prevent freezer burn. When ready to eat, thaw overnight in the fridge, then reheat gently on the stovetop with 2 tablespoons water to restore moisture.
Never microwave directly from frozen—it makes them mushy. ❄️
Reheating Like a Pro
Stovetop reheating is key for texture. Transfer peas to a pot with ¼ cup fresh vegetable broth and simmer on low heat for 5-7 minutes, stirring occasionally. Avoid high heat—it breaks down the peas and makes them gummy.
If they’re too thick, add a splash more broth. Taste and adjust salt—reheated dishes often need a pinch more. 🔥
Batch Cooking for Events
For gatherings, cook 3-4 servings at once and store in individual ramekins covered with foil. Reheat in a 350°F oven for 15 minutes—this keeps them warm and maintains texture.
Garnish with fresh parsley right before serving to keep everything vibrant. These peas pair perfectly with smoked meats, cornbread, or collard greens for a full Southern spread. 🎉
Spice Boost for Leftovers
Tired of the same flavors after a few days? Revive leftovers by stirring in ½ teaspoon smoked paprika and ½ teaspoon apple cider vinegar before reheating.
For extra richness, top with avocado slices or a drizzle of hot honey. These simple tweaks transform tired peas into something exciting again. 💡
Portion Control Tips
Use ice cube trays to portion peas for single servings—great for lunches or snacks. Once frozen, pop them out and store in a ziplock bag. When ready to eat, microwave for 30 seconds with a damp paper towel covering (this keeps them from drying out).
Perfect for quick, no-fuss meals when you’re short on time. ✨
Nutrition facts
Frequently asked questions
Do I need to soak black-eyed peas before using the Instant Pot?
No soaking required! This recipe is designed for dried black-eyed peas without pre-soaking. The Instant Pot’s high-pressure cooking breaks down the peas’ tough outer skin, resulting in tender, flavorful results. Just rinse them thoroughly before adding to the pot.
Can I use canned black-eyed peas instead of dried?
Yes, but with adjustments. Use 1 (15 oz) can drained and rinse well. Reduce the cooking time to just 3-5 minutes on sauté mode to warm through—canned peas are already pre-cooked. They’ll absorb flavors differently, so taste and adjust seasoning before serving.
What’s the best way to store leftovers?
Store in an airtight container in the fridge for 4-5 days or freeze for 3 months. For freezing, portion into 1-cup servings with a splash of broth to prevent drying. Thaw overnight in the fridge before reheating gently on the stovetop with extra broth to restore moisture.
How do I adjust the spice level?
For milder flavor, reduce smoked paprika to ½ teaspoon and omit cayenne. For extra heat, add ¼ teaspoon cayenne or a pinch of red pepper flakes. Remember to taste before serving—you can always adjust!
Why did my peas turn out mushy?
Overcooking is the most common cause. Stick to the 20-minute high-pressure time and always do a 10-minute natural release. Avoid quick-releasing completely. If they’re still too firm after cooking, they’re undercooked—try adding ¼ cup water and cooking 3 more minutes on sauté mode.

- Baked Potatoes in Crock Pot Recipe: Buttery Interiors and Crispy Top Magic - November 1, 2026
- Braised Beef Short Ribs Recipe: Crock Pot Fall-Off-Bone Magic in 6 Hours - November 1, 2026
- Crock Pot Cocoa Recipe: Velvety Warmth With Hidden Spice Magic - November 1, 2026