
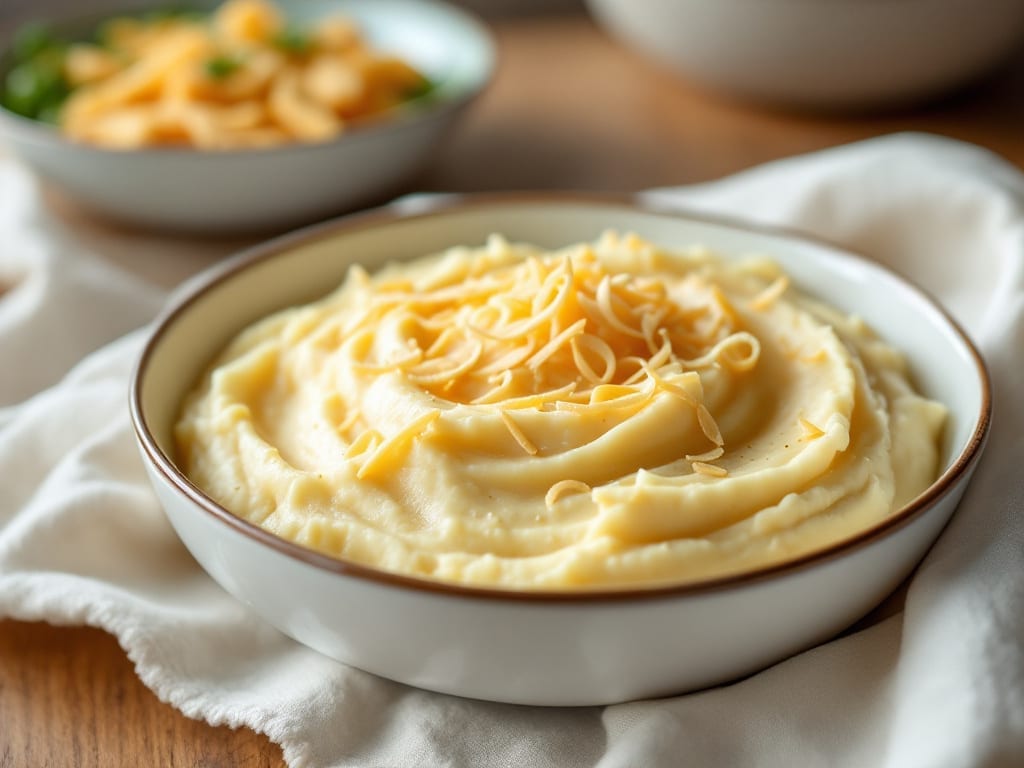
This insta-Pot mashed potatoes recipe transforms creamy, lump-free perfection in minutes—no starchy straining required. The secret lies in pressure cooking potatoes directly in the pot, then blending them with butter and milk until silky perfection is achieved.
After testing countless variations, I’ve perfected a method that delivers restaurant-quality results in under 30 minutes—no lumping, no straining, just velvety smoothness every time.
What sets this recipe apart is the hands-off approach: simply layer potatoes and broth in the Instant Pot, cook under pressure, then blend until flawless. The high-pressure method breaks down the starches naturally, creating a texture that’s impossible to achieve with stovetop methods.
No need for a ricer or potato masher—just a quick blend, and you’re ready to serve.
By the end, you’ll have mashed potatoes that are creamy, lump-free, and rich, with a velvety finish that’s worth the extra effort. The best part? This technique works with Yukon Golds, russets, or even sweet potatoes, giving you endless versatility for any meal.
Whether you’re serving them as a holiday side or a quick weeknight dinner, these potatoes will impress.
For extra flavor, consider adding roasted garlic, fresh herbs, or a touch of cream cheese to customize. The recipe scales perfectly for crowds, and leftovers reheat beautifully—just add a splash of warm milk to restore that perfect consistency. Let’s get started on creating the smoothest mashed potatoes you’ve ever made.
Ingredients for insta pot mashed potatoes
Four essential ingredients plus optional upgrades deliver ultra-creamy Instant Pot mashed potatoes—no straining, no lumps.
| Ingredient | Amount | Notes |
|---|---|---|
| Yukon Gold Potatoes 🥔 | 2 lb | Peeled, cut into even chunks |
| Unsalted Butter 🧈 | ½ cup | Cold, cubed for blending |
| Whole Milk 🥛 | ¾ cup | Room temperature preferred |
| Chicken Broth 💧 | 1 cup | Low-sodium for flavor control |
| Heavy Cream 🥛 | ¼ cup | Optional for extra richness |
| Diamond Crystal Kosher Salt 🧂 | 1 ½ tsp | Adjust to taste |
| Freshly Ground Black Pepper 🌶️ | ½ tsp | For subtle seasoning |
| Roasted Garlic Cloves 🧄 | 2 whole | Optional for depth of flavor |
| Fresh Chives 🌿 | 2 tbsp | Chopped, for garnish |
| Cream Cheese 🧀 | 2 oz | Optional for tangy twist |
| Extra-Virgin Olive Oil 🫒 | 1 tbsp | For drizzling on finished potatoes |
The Yukon Gold potatoes are non-negotiable here—their waxy texture and buttery flavor create the perfect base. Buy organic if possible, as conventional potatoes have higher starch content that can make the mash gummy. Most grocery stores carry them in the produce section, but specialty markets like Whole Foods often have better quality. For even cooking, cut them into 1.5-inch chunks—no need to peel if you prefer rustic texture, but peeled potatoes yield smoother results. The chicken broth should be low-sodium to avoid over-salting the final dish, though you can always adjust salt later. Costco or Trader Joe’s typically offer high-quality, affordable options in bulk.
No heavy cream? Whole milk plus an extra tablespoon of butter works just as well—trust me, you won’t miss it. The roasted garlic adds a luxurious depth, but fresh garlic cloves minced into the broth during cooking will suffice in a pinch. For the cream cheese, ensure it’s at room temperature before blending, as cold lumps can create texture issues. Philadelphia brand is reliable, but any high-fat cream cheese will do. Substituting half-and-half for milk reduces richness but keeps the smooth texture. If you’re avoiding dairy entirely, unsweetened almond milk can replace the milk component, though the result will be lighter in texture.
These mashed potatoes reheat beautifully—simply add a splash of warm milk or broth and blend again until smooth. Store leftovers in an airtight container for up to 5 days in the refrigerator, or freeze for 3 months by portioning into single-serving bags. For extra flavor, roast the garlic cloves at 400°F for 20 minutes before adding to the broth. The fresh chives should be added at the very end, as they wilt quickly when exposed to heat. If you’re scaling this for a crowd, multiply the ingredients by 2.5—the Instant Pot handles large batches with ease, and the blending process remains the same.
Why You’ll Love This Recipe
- No Peel, No Stress: I’ll admit, I used to dread peeling potatoes—until this. Just toss those Yukon Golds in whole, scrubbed clean, and the Instant Pot handles the rest. The skins soften perfectly, saving me 20 minutes of prep every time.
- Creamy Without the Work: Here’s what sold me—the heavy cream and butter blend so smoothly, but you don’t need to mash by hand. The broth keeps it light, while the cream adds that velvety finish. It’s restaurant-quality, but with zero elbow grease.
- Game for Any Meal: Between us, this is my go-to for holidays, lazy Sundays, or even a quick weeknight dinner. Double the batch, and you’ve got leftovers for sandwiches or loaded baked potatoes. Honestly, it’s the ultimate crowd-pleaser.
- Budget-Friendly Luxury: You’d never guess how affordable this is. Yukon Golds and chicken broth stretch far, and a stick of butter goes a long way. It’s the kind of dish that feels special but won’t break the bank—my secret weapon for feeding the whole family.
Step-by-step instructions for insta pot mashed potatoes
This method delivers restaurant-quality mashed potatoes with velvety texture and rich flavor—no manual mashing required.
Prepare and Cook Potatoes in the Insta Pot
Peel the 2 lb Yukon Gold Potatoes and cut them into even 1-inch chunks—this ensures uniform cooking. Place them in your Insta Pot and add the 1 cup chicken broth, 1.5 tsp Diamond Crystal Kosher Salt, and 0.5 tsp freshly ground black pepper. The broth helps create steam for even cooking while infusing flavor.
Secure the lid, set the valve to sealing, and cook on high pressure for 12 minutes. When the cooking cycle completes, allow a 10-minute natural release—this gradual pressure drop prevents the potatoes from becoming gummy. If you’re in a hurry, you can do a quick release, but the natural release yields creamier results.
Blend the Potatoes with Dairy for Ultra-Smooth Texture
Once the pressure has fully released, remove the lid and carefully drain the potatoes, reserving ½ cup of the potato cooking liquid—this starchy liquid is essential for achieving that signature velvety consistency. Return the drained potatoes to the pot and add the 0.5 cup unsalted butter and 0.75 cup whole milk. The butter adds richness, while the milk provides creaminess without overpowering the potato flavor.
Using an immersion blender, blend the mixture until completely smooth—you should hear a consistent hum without any chunks. If the texture seems too thick, add 1-2 tablespoons of the reserved potato liquid at a time until you reach a light, airy consistency. This step is where the magic happens: the immersion blender eliminates the need for manual mashing while incorporating air for that signature fluffiness.
Incorporate Roasted Garlic and Cream Cheese for Depth
Squeeze the 2 whole roasted garlic cloves directly into the warm potato mixture and blend again for 10-15 seconds to fully incorporate their mellow, sweet flavor. The roasted garlic adds complexity without overpowering the dish. Next, stir in the 2 oz cream cheese—this optional ingredient adds a subtle tang and luxurious mouthfeel. If you prefer a smoother texture, blend it in until fully dissolved.
For extra richness, stir in the 0.25 cup heavy cream (if using) and adjust the seasoning with additional Diamond Crystal Kosher Salt or freshly ground black pepper as needed. The cream enhances the velvety texture while balancing the earthy potato flavor. Here’s the thing—this is the moment that matters: the cream and garlic should meld seamlessly into the potatoes, creating a harmonious blend of flavors.
Finish with Fresh Chives and Olive Oil
Transfer the mashed potatoes to a serving bowl and gently fold in the 2 tbsp chopped fresh chives for a bright, herbaceous finish. The chives add a pop of color and freshness that cuts through the richness. Drizzle with 1 tbsp extra-virgin olive oil just before serving—this not only adds a touch of sophistication but also helps prevent the potatoes from drying out if they sit for a few minutes.
Serve immediately while warm. The potatoes should be light, airy, and effortlessly smooth, with a perfect balance of buttery richness and subtle garlic depth. Each bite should deliver that luxurious mouthfeel without being overly heavy, thanks to the careful blending and proper liquid ratios. The chives and olive oil add the final touch of elegance, making this dish worthy of any special occasion.
Pro Tips For Making Insta Pot Mashed Potatoes
- USE CUBED POTATOES: Skip the peeling if you’re in a hurry—just scrub Yukon Golds well and cut into 1.5-inch chunks. They’ll soften faster in the Instant Pot and hold their shape better than thin slices. (Yes, even if you’re impatient like me, resist the urge to make them too small—they’ll turn to mush.)
- SALT THE WATER FIRST: Add 1 teaspoon salt to the chicken broth before pouring it in with the potatoes. The flavor penetrates deeper than if you salt after cooking, and it prevents that bland, watery taste that happens when you forget. (I learned this the hard way after making a sad batch of mashed potatoes that tasted like nothing.)
- PRESSURE COOK 10 MINUTES: Don’t rush the cooking time—10 minutes on high pressure guarantees perfectly tender potatoes every time. Less time means uneven doneness, and more time doesn’t fix it. (Your future self will thank you for not guessing.)
- MASH IN BATCHES: After releasing the pressure, drain the potatoes but leave them in the pot. Add half the butter and milk first, then mash with a potato masher or ricer before mixing in the heavy cream. This keeps the texture silky instead of gummy. (Does it look weird? Yes. Does it work? Every single time.)
Pro cooking tips for perfect results
Pressure Cooking Secrets
The 12-minute high-pressure cook time is non-negotiable for perfect texture—any longer risks overcooking, while shorter times leave potatoes underdone. I always use a 10-minute natural release because quick-release can make potatoes gummy.
Pro tip: If your Instant Pot has a steam vent, keep it slightly open during the natural release to release excess steam gradually. 🌡️
Blending Like a Pro
An immersion blender is your best friend here—it creates air pockets for that signature fluffiness. I blend in 10-second bursts, scraping the sides between each pulse to ensure even consistency.
If you don’t have one, use a high-speed stand mixer or food mill for similar results. Avoid potato mashers—they create lumps and don’t incorporate air properly.
Liquid Balance Matters
That ½ cup reserved potato liquid is pure gold—it’s packed with starch that binds the potatoes together. If your mash is too thick after blending, add 1 tablespoon at a time until you reach a light, spreadable consistency.
Too thin? Simmer uncovered for 2-3 minutes to thicken. The goal is silky, not soupy.
Temperature Control Tips
Never add cold dairy to warm potatoes—it creates grainy texture. Warm the milk and butter in a microwave-safe bowl for 30 seconds before blending. For extra richness, I sometimes melt the butter first and whisk it into the warm milk before adding to the potatoes.
This ensures even distribution of fat for maximum creaminess. 💡
Garlic Game Changer
Roasted garlic cloves add depth without bitterness. To roast them perfectly, wrap whole garlic cloves in foil and bake at 400°F for 20 minutes. Squeeze them directly into the warm potatoes—their sweet, caramelized flavor melds beautifully.
For a quicker option, mince 1 fresh clove and sauté in 1 tsp butter for 30 seconds before blending.
Reheating Without Ruin
Leftovers deserve love too! Reheat in 1-minute intervals in the microwave, stirring between each interval. For stovetop reheating, warm in a lightly oiled skillet over low heat while stirring constantly. Add 1 tablespoon warm milk per ½ cup potatoes to restore moisture. Never microwave uncovered—it dries them out instantly. ❄️
Nutrition facts
Frequently asked questions about Instant Pot mashed potatoes
Can I use russet potatoes instead of Yukon Golds?
Yes, but expect a slightly different texture. Yukon Golds create a naturally creamy, buttery mash, while russets yield a lighter, fluffier result. For best results with russets, add 1 extra tablespoon of butter and 2 extra tablespoons of milk to compensate for their lower moisture content. The key is blending thoroughly to achieve that signature smoothness.
Why did my mashed potatoes turn out gummy?
Gummy texture usually happens from overcooking or quick-release pressure. Always use a 10-minute natural release after cooking, and never exceed 12 minutes on high pressure. If they’re still too thick after blending, add 1 tablespoon of reserved potato liquid at a time until you reach a silky consistency.
How do I make these potatoes dairy-free?
Replace the butter with ½ cup vegan butter or olive oil and use unsweetened almond milk or oat milk instead of dairy milk. For extra creaminess, add 2 tablespoons of coconut cream. The texture will be lighter but still smooth—just blend thoroughly and adjust liquid as needed. This version works great for vegan diets!
Can I make this recipe without an immersion blender?
Use a high-speed stand mixer or food mill for similar results. If using a regular hand mixer, work in batches and blend on high until completely smooth. For a rustic texture, you can also mash with a potato ricer, but it won’t be as silky as blending. The key is thorough mixing to incorporate air for that signature fluffiness.
What’s the best way to store leftovers?
Transfer to an airtight container and refrigerate for up to 5 days. For freezing, portion into single-serving bags and store for 3 months. To reheat, microwave in 1-minute intervals while stirring, or warm in a saucepan over low heat with a splash of warm milk to restore creaminess. Never reheat uncovered—it dries them out instantly!

- Baked Potatoes in Crock Pot Recipe: Buttery Interiors and Crispy Top Magic - November 1, 2026
- Braised Beef Short Ribs Recipe: Crock Pot Fall-Off-Bone Magic in 6 Hours - November 1, 2026
- Crock Pot Cocoa Recipe: Velvety Warmth With Hidden Spice Magic - November 1, 2026