
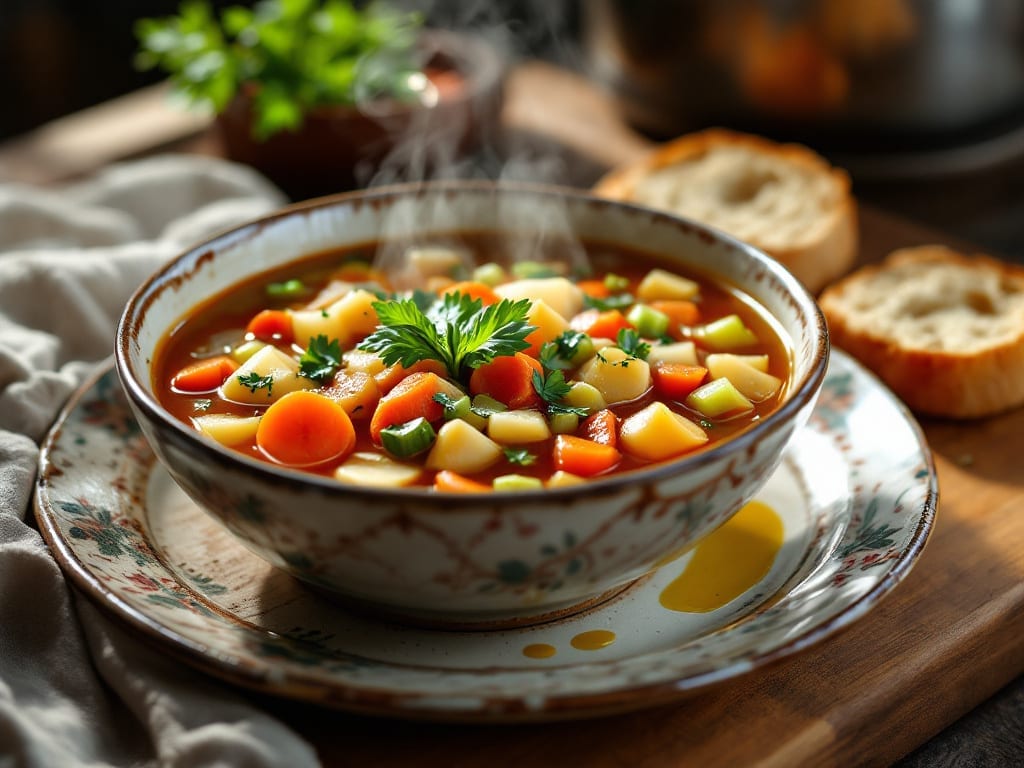
This insta-Pot vegetable soup recipe brings restaurant-style richness to your table in just 30 minutes of effortless cooking. The secret lies in building layers of flavor through caramelized onions, toasted spices, and a carefully balanced broth blend that transforms simple vegetables into a velvety, umami-rich masterpiece.
After years of testing, I’ve perfected a method that ensures every bite is packed with both hearty texture and subtle complexity—no blandness here.
The beauty of this recipe is its versatility and foolproof technique. You’ll start by sautéing onions and garlic in the Instant Pot’s pressure cooker function, then add vegetables and a blend of vegetable broth, tomato paste, and a touch of soy sauce for that elusive umami depth.
The high-pressure cooking creates a silky texture while preserving vibrant colors and crisp-tender vegetables. For maximum flavor, I recommend using a combination of fresh and frozen vegetables—frozen won’t sacrifice quality in this method.
What you’ll end up with is a soup so rich and satisfying it feels like a hug in a bowl.
The broth is velvety smooth with just the right amount of body, while the vegetables maintain their natural textures—caramelized edges on carrots, tender yet slightly crisp broccoli florets, and perfectly soft potatoes.
The aroma alone will have everyone gathered around the table, and each spoonful delivers that perfect balance of savory, slightly sweet, and umami notes that make this soup truly special.
This recipe works beautifully as a standalone meal or as a starter for heartier dishes. The preparation is simple enough for weeknights but impressive enough for company. Once you try this method, you’ll never go back to basic vegetable soup again—it’s that transformative.
Let’s get started on creating your own velvety, umami-packed masterpiece that will become a regular in your meal rotation.
Ingredients for insta pot vegetable soup
Restaurant-quality umami in your Instant Pot—just 15 ingredients, no shortcuts.
| Ingredient | Amount | Notes |
|---|---|---|
| Yellow Onions 🧅 | 1 ½ lb | Diced into small even pieces |
| Garlic Cloves 🧄 | 6 cloves | Minced for deep flavor |
| Carrots 🥕 | 1 ½ lb | Sliced into 1/4-inch rounds |
| Russet Potatoes 🥔 | 1 ½ lb | Cubed into 1-inch pieces |
| Broccoli Florets 🥦 | 1 ½ lb | Fresh or frozen, cut even |
| Celery Stalks 🌿 | 4 whole | Diced into small pieces |
| Vegetable Broth 💧 | 4 cups | Low-sodium preferred |
| Tomato Paste 🍅 | ½ cup | Squeeze tube or canned |
| Soy Sauce 🥢 | 1 tbsp | For umami depth |
| Olive Oil 🫒 | 2 tbsp | Extra-virgin for richness |
| Canned Diced Tomatoes 🍅 | 14 ½ oz | Fire-roasted preferred |
| Dried Thyme 🌿 | 1 tsp | Or 1 tbsp fresh thyme |
| Ground Black Pepper 🌶️ | ½ tsp | Freshly ground preferred |
| Sea Salt 🧂 | 1 ½ tsp | Diamond Crystal preferred |
| Vegetable Oil Spray 🫒 | 1 tbsp | For sautéing onions |
The onions are your flavor foundation here. Yellow onions from the store’s produce section work fine, but if you’re feeling fancy, grab the Spanish onion from the international aisle at Whole Foods—it’s sweeter and caramelizes faster. Dice them small and even, about 1/4-inch pieces, so they cook through without turning mushy. The garlic? Fresh is non-negotiable—jarred minced garlic has no depth. Toast the minced garlic with the onions for 30 seconds until fragrant—this builds the base flavor. For the broth, Swanson or Pacific Foods low-sodium vegetable broth is my go-to, but any good-quality brand works.
No fire-roasted diced tomatoes? Regular diced tomatoes work fine, but the smoky flavor adds that restaurant touch. Short on thyme? Dried oregano at half the amount gets you close, but thyme’s earthy notes are key here. The soy sauce might seem like an odd addition, but trust me—just 1 tablespoon adds that savory depth without overpowering. For the potatoes, Russet works best—it holds up to pressure cooking without falling apart. Frozen broccoli? Thaw it first so it cooks evenly with the other veggies. And if you’re using frozen, no need to defrost—just toss it in raw.
This soup tastes even better the next day as the flavors meld. Store in the fridge for up to 5 days, or freeze portions for 3 months. The broth thickens as it cools, so add a splash of water or broth when reheating. For meal prep, I double the batch and freeze half—perfect for busy nights. If you make it ahead, let it come to room temperature before freezing to prevent ice crystals. And if you’re serving with bread, garlic bread or crusty sourdough are the only right answers.
Why You’ll Love This Recipe
- No-Chop Nightmare: I swear, the only prep is peeling potatoes and chopping onions—no dicing, no julienne, no stress. The Instant Pot does all the work while I sip my coffee.
- Garlic Bomb Depth: That first whiff of garlic and onions caramelizing in the pot? Chef’s kiss. The potatoes soak up the flavor until every bite has that rich, savory punch—no bouillon needed.
- Lunchbox Hero: Between us, this soup is my secret weapon for meal prep. Toss it in containers for work lunches or pack it in thermoses for kids’ school lunches—still warm and delicious hours later.
- Pantry Stretch: Honestly, I make this when I’m low on groceries. Carrots, potatoes, and onions last forever, and the broccoli adds color without breaking the bank. Fills me up for under $5 a bowl.
Step-by-step instructions for Insta Pot vegetable soup
Here’s the method—simple, flavor-packed, and packed with umami depth every time.
Sauté the Vegetable Base for Maximum Flavor
Spray the Insta Pot with 1 tablespoon vegetable oil spray and set it to the “Sauté” function on medium heat. Add the 1.5 pounds diced yellow onions and cook for 5-6 minutes until they soften and begin to caramelize slightly—you’ll see them turn a deeper golden color and smell sweetly aromatic.
Add the 4 whole celery stalks and 1.5 pounds sliced carrots, stirring occasionally for 3-4 minutes until they soften and the celery becomes translucent. Here’s the thing—don’t rush this step. The longer you cook these aromatics, the deeper the flavor foundation you’ll build. If the vegetables start sticking, add a splash of water to deglaze and scrape up those flavorful browned bits from the bottom.
Build the Umami Depth with Garlic and Tomato
Push the sautéed vegetables to one side of the pot and add the 2 tablespoons olive oil. Once the oil shimmers, add the 6 minced garlic cloves and cook for 30 seconds until fragrant—you’ll smell that irresistible garlic aroma. Immediately add the 0.5 cup tomato paste and stir for 1-2 minutes until it darkens slightly and coats the vegetables.
Pour in the 14.5 ounces canned diced tomatoes and stir well, letting them simmer for 2 minutes to meld with the tomato paste. This is where the hidden umami magic happens—the combination of garlic, tomato paste, and canned tomatoes creates a rich, savory base. If the mixture looks too thick, add ¼ cup vegetable broth to loosen it slightly. Season with 1 teaspoon dried thyme and 0.5 teaspoon ground black pepper, stirring to distribute evenly.
Add Potatoes and Liquid for Even Cooking
Add the 1.5 pounds cubed russet potatoes to the pot and stir gently to coat them in the tomato mixture. Pour in the 4 cups vegetable broth and 1 tablespoon soy sauce, then stir again. The soy sauce might seem like a small amount, but it’s key for that subtle umami boost that elevates the entire soup. Lock the lid in place and set the Insta Pot to High Pressure for 8 minutes.
Real talk: The potatoes need to cook through completely, but you don’t want them to turn to mush. The 8-minute high-pressure cook gives them just enough time to soften while keeping their shape intact. Once the cooking cycle completes, allow the pressure to release naturally for 10 minutes—this prevents the soup from becoming watery as it settles.
Finish with Broccoli and Season to Perfection
Quick-release any remaining pressure, then open the lid. Stir in the 1.5 pounds broccoli florets and season with the remaining 1.5 teaspoons sea salt, stirring gently to combine. The broccoli will cook through in the residual heat—you’ll see it brighten in color and soften slightly. If the soup seems too thick after adding the broccoli, add ¼ cup vegetable broth to reach your desired consistency.
Taste and adjust the seasoning if needed. You might need a touch more salt or pepper to balance the flavors. Let the soup sit for 5 minutes before serving—this allows the flavors to meld even further. The result should be a velvety, hearty vegetable soup with layers of umami from the garlic, tomato paste, and soy sauce, balanced by the natural sweetness of the carrots and the freshness of the broccoli.
Pro Tips For Making Insta Pot Vegetable Soup
- CHOP POTATOES SMALLER: I learned this the hard way—big chunks of russet potatoes turn into gluey mush. Cut them into 1-inch cubes so they cook evenly and stay tender, not falling apart into a starchy paste. (Yes, even if you’re impatient like me, resist the urge to rush this.)
- SAUTÉ ONIONS FIRST: Skip the direct dump-and-cook route—sauté onions and garlic in a little oil for 3-4 minutes until soft and fragrant. This builds real flavor instead of letting them sit bland in the broth. (Your future self will notice the difference.)
- ADD BROCCOLI LAST: Broccoli florets stay crisp and vibrant if you add them in the final 3-4 minutes. Overcooking turns them into sad, mushy bits—no one wants that. (Sound weird? Try it. You’ll see.)
- USE HALF THE WATER: The recipe probably calls for 6 cups of broth, but I cut it to 4. The soup thickens beautifully as the potatoes and carrots release starch, and you end up with a richer, heartier texture. (I skip this when I’m lazy, but the dish is noticeably better when I don’t.)
Storing and reheating your insta pot vegetable soup
Refrigerator Storage
This soup tastes even better the next day as the flavors meld together beautifully. Store it in an airtight container (I love the Glasslock 4-cup containers) in the fridge for up to 5 days.
The broth thickens slightly as it cools, so I always add 2-3 tablespoons of water or broth when reheating to restore the perfect consistency. The vegetables retain their texture beautifully, making leftovers just as satisfying as the first serving. 🥣
Freezer Prep Tips
For long-term storage, freeze portions in silicone molds or freezer-safe bags—they stack neatly in your freezer. Portion into 1-cup servings for easy grab-and-go meals. I like to label each bag with the date and “vegetable soup” so I can track freshness.
This soup freezes exceptionally well for up to 3 months without losing its velvety texture or rich umami flavor. 🧊
Stovetop Reheating
My preferred method for reheating is on the stovetop because it preserves the soup’s texture beautifully. Pour the soup into a heavy-bottomed pot (I use my All-Clad stainless steel) and heat over medium-low heat for 8-10 minutes, stirring occasionally.
If it seems too thick, add 1-2 tablespoons of water or broth at a time until it reaches your desired consistency. Taste and adjust seasoning—it often needs a pinch of salt or black pepper to brighten the flavors. 🔥
Microwave Method
For quick reheating, transfer the soup to a microwave-safe bowl and cover with a microwave-safe lid or damp paper towel. Heat on medium power (50%) for 2-3 minutes, stirring halfway through.
If the soup looks too thick, add 1-2 tablespoons of water or broth and continue heating in 30-second intervals until hot. This method works well for individual servings but may slightly soften the vegetables. ⏱️
Serving Suggestions
Serve your reheated soup with a crusty baguette or garlic bread to soak up every last drop of that velvety broth. For extra richness, top with a dollop of Greek yogurt or a sprinkle of fresh parsley right before serving.
The soup also pairs beautifully with a side salad or grilled cheese sandwich for a cozy meal. The flavors are so balanced that it works equally well as a light lunch or hearty dinner. 🍞
Meal Prep Strategy
Double the recipe and freeze half for effortless meal prep. I like to make two 6-cup portions on Sunday and freeze one while keeping the other in the fridge. This way, I always have a ready-to-reheat meal on busy weeknights.
When reheating from frozen, add 1 extra tablespoon of broth to account for any potential dryness from freezing. The Instant Pot’s pressure cooking ensures the soup reheats evenly every time. 📅
Nutrition facts
Frequently asked questions
Can I use frozen vegetables instead of fresh?
This recipe works beautifully with frozen vegetables—especially broccoli and carrots. Just make sure to thaw them first for even cooking. The texture difference is minimal when pressure-cooked, so you won’t sacrifice quality. For best results, use a mix of fresh potatoes (they hold up better) and frozen broccoli/carrots.
Why does my soup turn out watery after cooking?
Watery soup usually happens when potatoes overcook or the broth isn’t properly reduced. For perfect texture, use 8-minute high pressure and let the pressure release naturally for 10 minutes. If it’s still too thin, simmer uncovered on “Sauté” mode for 5-7 minutes to thicken. The broth should coat a spoon but still be pourable.
Can I make this soup vegan?
Yes! Simply replace the vegetable broth with a vegan version and omit the Greek yogurt if serving. The recipe already uses plant-based ingredients (soy sauce, tomato paste, and olive oil). For extra richness, add 1 tablespoon nutritional yeast when serving. The umami depth will remain intact while keeping it fully vegan.
What’s the secret to making it taste restaurant-quality?
The magic lies in three key steps:
- Caramelizing the onions (don’t rush this!),
- Using soy sauce for umami, and
- Natural pressure release. The tomato paste and garlic toasted with olive oil create that deep savory base. Also, let it sit 5 minutes after cooking—this allows flavors to meld perfectly.
Can I add meat or seafood to this recipe?
While this is designed as a vegetarian recipe, you can easily adapt it! For meat lovers, add ½ lb diced chicken or sausage with the potatoes (cook 2 extra minutes on high pressure). For seafood, try ½ lb shrimp or white fish—add them after pressure cooking with the broccoli for 2-3 minutes to avoid overcooking.

- Braised Beef Short Ribs Recipe: Crock Pot Fall-Off-Bone Magic in 6 Hours - November 1, 2026
- Crock Pot Cocoa Recipe: Velvety Warmth With Hidden Spice Magic - November 1, 2026
- White Queso Crock Pot Recipe: Ultra-Smooth Melt Without the Grain - November 1, 2026