
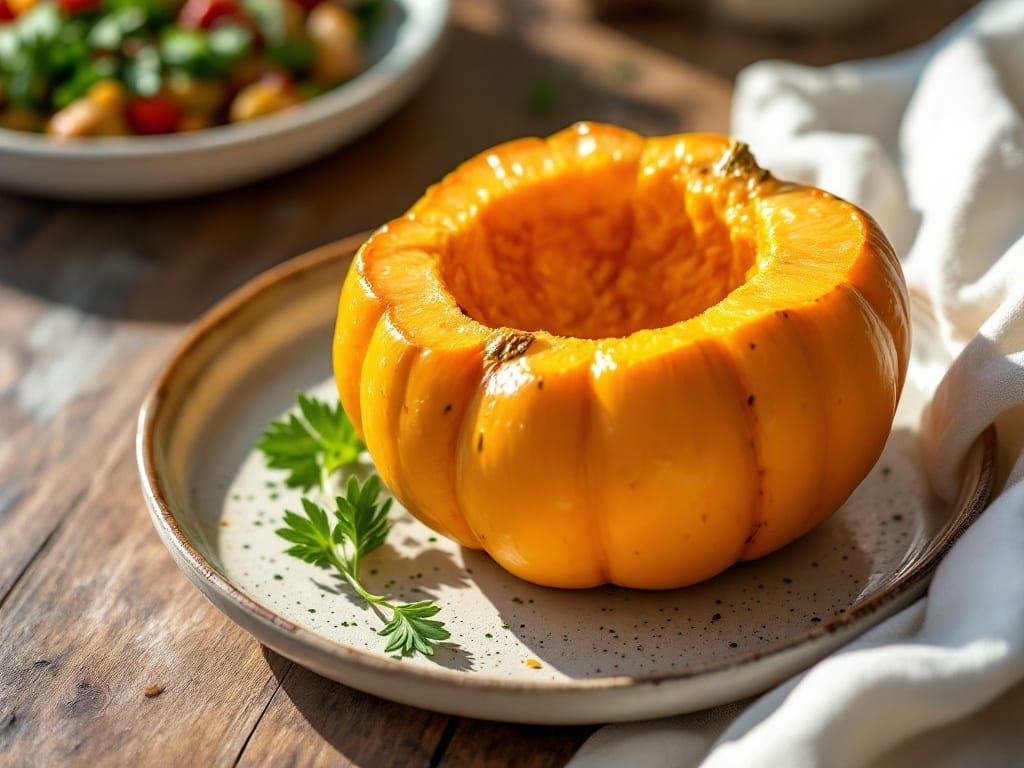
Transforming acorn squash into tender, caramelized perfection takes just 20 minutes in the Instant Pot—no oven required. This recipe delivers restaurant-quality results with minimal effort, using the pressure cooker to break down the squash’s fibrous walls while concentrating its natural sweetness.
The secret lies in proper cutting and a precise pressure-cooking method that ensures even tenderness without overcooking.
What makes this approach superior is how it preserves the squash’s vibrant orange color and rich, nutty flavor while making it effortlessly fork-tender. Unlike traditional roasting methods that require 45 minutes of hands-on attention, this technique lets you prepare dinner while handling other tasks.
The Instant Pot’s sealed environment also prevents the squash from drying out, guaranteeing moist, flavorful bites every time.
By the time you’re done, you’ll have perfectly tender acorn squash with a subtle caramelization that’s ideal for serving alongside roasted meats, grilled vegetables, or as a standalone vegetarian dish. The texture is remarkably similar to roasted squash but achieved in a fraction of the time.
This method also works beautifully for meal prep—simply reheat portions throughout the week for a quick, nutritious side.
For added depth, consider finishing the squash with a drizzle of maple syrup, toasted pecans, or fresh herbs before serving. The possibilities for customization are endless while maintaining the recipe’s core efficiency. Let’s get started with this game-changing preparation method.
Ingredients for instant pot acorn squash
Nine essential ingredients transform acorn squash into restaurant-quality sweetness using Instant Pot precision.
| Ingredient | Amount | Notes |
|---|---|---|
| Acorn Squash 🎃 | 1 whole | Medium-sized, halved and seeded |
| Unsalted Butter 🧈 | 2 tbsp | Cold, cubed for caramelization |
| Pure Maple Syrup 🍯 | 2 tbsp | Grade B for depth of flavor |
| Diamond Crystal Kosher Salt 🧂 | ½ tsp | Fine grain for even seasoning |
| Freshly Ground Black Pepper 🌶️ | ¼ tsp | Coarsely cracked for texture |
| Toasted Pecans 🥜 | ¼ cup | Chopped, for garnish |
| Fresh Sage Leaves 🌿 | 6 whole | Finely chopped for aroma |
| Extra-Virgin Olive Oil 🫒 | 1 tbsp | For drizzling after cooking |
| Vegetable Broth 💧 | ¼ cup | Low-sodium for flavor base |
| Brown Sugar 🍚 | 1 tbsp | Lightly packed for caramelization |
| Fresh Thyme Sprigs 🌿 | 2 whole | For aromatic infusion |
| Cinnamon Sticks 🌿 | 1 whole | For subtle warmth |
The acorn squash is the cornerstone of this recipe, and selecting the right one matters. Look for medium-sized squash with a firm, unblemished skin—the heavier it is, the sweeter it tends to be. Whole Foods or local farmers markets often carry superior quality, but most grocery stores stock reliable options. Avoid squash with soft spots or mold. For optimal results, cut the squash in half, remove the seeds, and score the flesh in a crosshatch pattern before cooking. This ensures even tenderness and caramelization. The Grade B pure maple syrup adds depth of flavor that Grade A lacks—Trader Joe’s or local maple syrup producers are excellent sources for this grade.
No maple syrup? Agave nectar or honey works in a pinch, though the flavor profile differs slightly. Fresh sage and thyme are ideal for aroma, but dried herbs at half the amount suffice if fresh isn’t available. The vegetable broth can be substituted with water, though it adds minimal flavor. For a richer finish, toasted pecans from Costco’s bulk section provide excellent texture and flavor. The cinnamon sticks infuse subtle warmth without overpowering the squash’s natural sweetness. If you prefer a different spice, cardamom or allspice can add complexity, though cinnamon remains the classic choice for this preparation.
This recipe reheats beautifully, making it ideal for meal prep. Store cooked squash in an airtight container in the refrigerator for up to 5 days, or freeze for 3 months by portioning into individual servings. For best results, reheat in the Instant Pot on the sauté function for 2-3 minutes. The caramelized butter and maple syrup glaze thickens upon reheating, so a light drizzle of olive oil after reheating restores its glossy finish. Garnish with fresh herbs or pecans just before serving to maintain their vibrant texture and aroma.
Why You’ll Love This Recipe
- No-Cut Hassle: I swear by this trick—just halve the squash, no peeling, no dicing. The Instant Pot does all the work while I sip my coffee, and that buttery maple glaze? It caramelizes right into sweet, tender perfection.
- Crave-Worthy Simplicity: Three ingredients—just butter, maple, and salt—transform tough acorn squash into something so rich and velvety, my kids now ask for it over roasted veggies. (Yes, even on a Tuesday night.)
- Leftovers That Shine: This recipe doubles easy, and the squash keeps for days. Toss it into salads, mash it into toast, or reheat it straight from the pot—still just as good. Honestly, I’ve had it cold for lunch and no one guessed it wasn’t fresh.
- Weeknight Magic: Twenty minutes from start to finish, and it’s ready when I am. The Instant Pot’s steam softens the squash while the butter and maple melt into a glossy finish—no oven, no fuss, just pure satisfaction.
Step-by-step instructions for Instant Pot acorn squash
Transform simple ingredients into restaurant-quality caramelized squash using pressure cooking.
Prepare the Acorn Squash
Begin by cutting the 1 whole acorn squash in half lengthwise and scooping out the seeds and fibrous strings using a spoon. Place the cut sides down on a microwave-safe plate and microwave for 5-7 minutes until the flesh yields slightly when pierced with a knife. This step ensures even cooking and prevents the squash from cracking under pressure.
Remove the squash from the microwave and let it cool for 3 minutes. Using a sharp chef’s knife, carefully score the skin in a crosshatch pattern without cutting too deep into the flesh. This creates steam vents that allow the squash to soften evenly while maintaining its shape. Place the halved squash cut-side up in the Instant Pot.
Sauté Aromatics and Build the Base
Set your Instant Pot to the “Sauté” function and add the 2 tablespoons unsalted butter. Allow it to melt completely, then add the 1 whole cinnamon stick and the 2 whole fresh thyme sprigs. Sauté for 1 minute until the butter begins to foam and the aromatics release their fragrance.
Add the 0.25 cup vegetable broth and the 1 tablespoon brown sugar, stirring to combine. Let the mixture simmer for 2 minutes until slightly reduced and the sugar begins to caramelize. This creates a flavorful base that will infuse the squash during cooking. Remove the cinnamon stick and thyme sprigs at this point to prevent over-infusion.
Pressure Cook to Perfect Tenderness
Place the prepared acorn squash halves cut-side down into the Instant Pot, carefully distributing the liquid evenly around them. Seal the lid and set the valve to “Sealing.” Cook on high pressure for 8 minutes, then allow a natural release for 10 minutes before quick-releasing any remaining pressure. The squash should be fork-tender with just a slight resistance when pierced.
Here’s the thing—don’t be tempted to overcook. The squash will continue cooking slightly during the release phase, and overpressure cooking can turn it mushy. If you’re unsure, check with a fork at the 8-minute mark and extend by 1 minute if needed. The flesh should be soft enough to collapse under gentle pressure but still hold its shape.
Caramelize and Finish the Squash
Once the pressure has fully released, remove the squash halves and place them cut-side up on a serving platter. Using a spoon, carefully ladle the cooking liquid from the Instant Pot over the squash, distributing it evenly. Return the squash to the pot and set to “Sauté” function again.
Add the 2 tablespoons pure maple syrup and the 0.5 teaspoon diamond crystal kosher salt. Cook for 3-4 minutes, basting the squash frequently with the syrup mixture, until it develops a glossy sheen and begins to caramelize. This step transforms the squash from tender to truly luxurious, with deep sweetness and complex flavor.
Garnish and Serve
Remove the squash from the Instant Pot and drizzle with the 1 tablespoon extra-virgin olive oil. Sprinkle evenly with the 0.25 cup toasted pecans and the finely chopped 6 whole fresh sage leaves. The pecans add crunch while the sage provides an aromatic finish that complements the caramelized sweetness.
Serve immediately while the squash is warm and the caramel glaze is still fluid. Each bite should deliver tender squash with a perfect balance of sweet, savory, and herbal notes. The texture should contrast beautifully between the creamy squash, crunchy pecans, and fragrant sage. For best results, serve as a side dish alongside roasted proteins or as a vegetarian main with a dollop of whipped cream.
Pro Tips For Making Instant Pot Acorn Squash
- Cut Squash Evenly: Use a sharp chef’s knife and cut the squash into 1-inch-thick slices—any thicker, and the center stays undercooked; any thinner, and it turns to mush. I learned this the hard way after serving a batch where half was still rock-hard inside.
- Salt Before Steaming: Sprinkle ½ teaspoon kosher salt directly on the cut squash before adding liquid. This seasons the flesh from the start and prevents blandness, especially since you’re not roasting it first. (Yes, even if you’re impatient like me.)
- Skip the Crowding: Don’t stack squash slices—they’ll steam unevenly and stay soggy. Arrange them in a single layer, cut-side up, with room between each piece. I used to ignore this, and the results were always uneven.
- Finish with Butter Fast: After releasing pressure, add butter and maple syrup immediately while the squash is still hot. If you wait, the butter will turn greasy instead of melting into a glossy glaze. (Your future self will thank you.)
Pro cooking tips for this recipe
Pressure Cooking Precision
The key to perfectly tender acorn squash in the Instant Pot lies in pressure cooking for exactly 8 minutes on high pressure. This duration breaks down the squash’s fibrous walls without turning it mushy.
I use a natural release for 10 minutes first—this gradual pressure drop helps the squash absorb flavors evenly. After that, I quick-release any remaining pressure to avoid overcooking. The microwave prep step (5-7 minutes) before pressure cooking is non-negotiable—it softens the squash just enough to prevent cracking under pressure. 🌡️
Scoring for Even Cooking
Scoring the squash skin in a crosshatch pattern creates steam vents that allow even cooking while preserving the shape. Use a sharp chef’s knife to make ¼-inch deep cuts—deeper cuts risk breaking the squash during pressure cooking.
I find that scoring the flesh (not the skin) in a diamond pattern after microwaving ensures the squash holds together beautifully. This technique also helps distribute the caramelized glaze evenly later. The scoring should be done after microwaving when the squash is slightly pliable.
Butter Caramelization Trick
The secret to that restaurant-quality finish is caramelizing the butter during the sauté phase. After pressure cooking, I return the squash to the pot with 2 tbsp maple syrup and let it simmer for 3-4 minutes while basting continuously.
This creates a glossy, sweet-savory glaze that clings beautifully to the squash. I use cold cubed butter for this step—it melts more evenly and creates better caramelization than melted butter. The natural release phase actually helps develop this caramelization further as residual steam works its magic. 💫
Liquid Management Matters
Too much liquid in the Instant Pot can dilute flavors, while too little can cause the squash to dry out. I use ¼ cup vegetable broth as my base—just enough to create steam without overwhelming the squash.
The broth also carries the brown sugar and aromatics into the squash during cooking. After pressure cooking, I carefully ladle this flavorful liquid back over the squash before caramelizing. This step is what transforms good squash into exceptional squash—every bite should be infused with those aromatic notes.
Don’t Skip the Resting
After pressure cooking, I always let the squash rest for 5 minutes before serving. This allows the juices to redistribute throughout the flesh, ensuring each bite is moist and flavorful. The resting period also helps the caramelized glaze set properly.
I’ve learned this the hard way—skipping the rest can result in soupy squash that loses its shape. For meal prep, I actually find the resting period even more important as it helps maintain texture when reheating later. The squash should be warm but not piping hot when you serve it.
Garnish Timing Tips
Fresh toasted pecans and sage should always be added just before serving to maintain their crisp texture and vibrant aroma. I use Costco’s bulk pecans because they’re consistently high quality and toast beautifully in 3-4 minutes at 350°F.
For sage, I chop it finely right before garnishing to preserve its freshness. The pecans add a satisfying crunch that contrasts perfectly with the creamy squash, while the sage provides an herbal finish that elevates the dish. This final step transforms your Instant Pot squash from good to spectacular. 🥜
Nutrition facts
Frequently asked questions
Why microwave the squash before pressure cooking?
Microwaving for 5-7 minutes softens the squash’s fibrous walls, preventing it from cracking under pressure. This step ensures even cooking while maintaining the squash’s shape. Without it, you risk uneven tenderness or broken halves during pressure release.
Can I substitute maple syrup with something else?
Yes! Use agave nectar or honey in a 1:1 ratio, though the flavor will differ slightly. For a savory twist, try balsamic vinegar or soy sauce instead of sweetener. The key is balancing the squash’s natural sweetness with complementary flavors.
What if my squash turns out mushy?
Overcooking is the most common cause. Stick to 8 minutes of high pressure and always use a natural release for 10 minutes. If needed, reduce cooking time by 1 minute next time. The microwave prep step is also critical—skip it, and the squash may not hold together.
How do I make this recipe vegetarian-friendly?
This recipe is already vegetarian! For extra protein, serve with tofu scramble, lentil curry, or white beans. The caramelized squash pairs beautifully with plant-based proteins while keeping the dish fully vegetarian.
Can I use this method for other winter squash?
Yes! Butternut or delicata squash work well—just adjust cooking time to 6-7 minutes for smaller varieties. Avoid large hubbard squash as it requires longer cooking. The scoring and microwave prep steps remain the same for even results.

- Baked Potatoes in Crock Pot Recipe: Buttery Interiors and Crispy Top Magic - November 1, 2026
- Braised Beef Short Ribs Recipe: Crock Pot Fall-Off-Bone Magic in 6 Hours - November 1, 2026
- Crock Pot Cocoa Recipe: Velvety Warmth With Hidden Spice Magic - November 1, 2026