
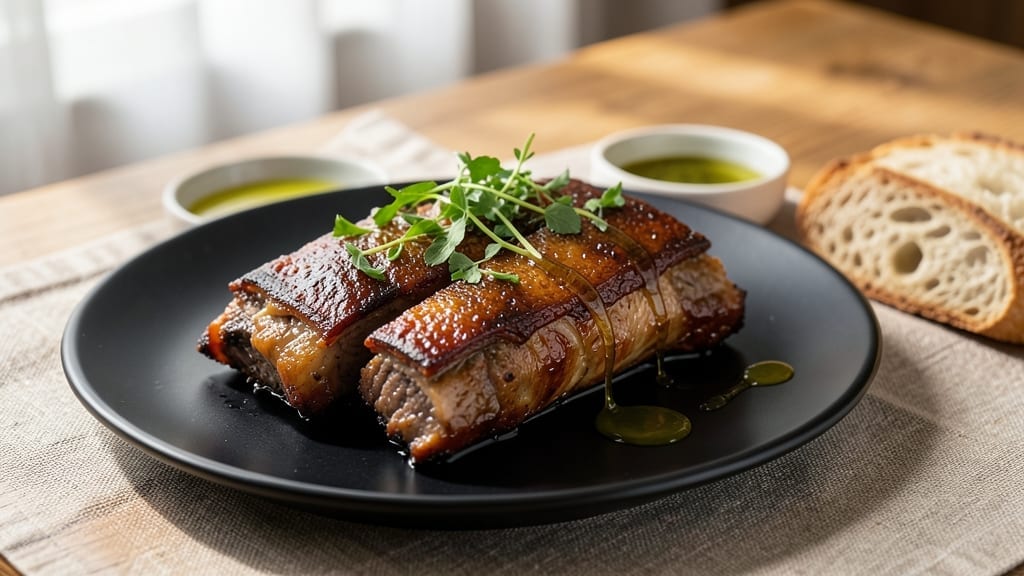
Transforming tough beef ribs into fall-off-the-bone tender perfection takes just 2 hours in your Instant Pot—no slow cooker required. This method preserves all the rich, smoky flavor while delivering restaurant-quality results at home.
The secret lies in precise timing, proper liquid ratios, and a technique that ensures even cooking throughout the meat.
What sets this recipe apart is the foolproof approach that eliminates guesswork. You’ll start with a quick sear to build flavor, then pressure cook the ribs until they’re so tender they practically melt in your mouth.
The key is using the right amount of liquid—just enough to create steam without diluting the flavor—and letting the ribs rest before serving. This ensures every bite is juicy and perfectly tender.
By the time you’re done, you’ll have ribs that are restaurant-quality—caramelized edges, tender meat that pulls apart easily, and a rich, savory sauce that clings to every bite. The aroma alone will have everyone gathering around the table, and the results will impress even the most skeptical meat lovers.
This is the kind of dish that turns a simple weeknight into a special occasion.
Serve with classic sides like coleslaw, cornbread, or roasted vegetables to complete the meal. The beauty of this recipe is its versatility—it works for family dinners, game day gatherings, or when you just want to treat yourself to something extraordinary.
Let’s get started on creating ribs that will have everyone asking for seconds.
Ingredients for instant pot beef ribs
Short list of quality ingredients for ribs that melt in your mouth.
| Ingredient | Amount | Notes |
|---|---|---|
| Beef Ribs 🥩 | 3 lb | Bone-in, meaty cuts preferred |
| Yellow Onion 🧅 | 1 whole | Large, sliced into half-moons |
| Garlic Cloves 🧄 | 6 cloves | Fresh, peeled and smashed |
| Beef Broth 💧 | 1 ½ cups | Low-sodium preferred |
| Apple Cider Vinegar 🍎 | ¼ cup | For tenderizing |
| Brown Sugar 🍚 | ½ cup | Packed, light or dark |
| Smoked Paprika 🌶️ | 2 tbsp | For smoky depth |
| Ground Black Pepper 🌶️ | 1 tbsp | Freshly cracked |
| Kosher Salt 🧂 | 1 ½ tbsp | For seasoning |
| Olive Oil 🫒 | 2 tbsp | For searing |
| Fresh Rosemary 🌿 | ¼ cup | Chopped, for aroma |
| Fresh Thyme 🌿 | ¼ cup | Leaves only |
| Honey 🍯 | ¼ cup | For glaze |
The ribs are the star, so pick meaty cuts with good marbling—ask the butcher for the best sections. Costco or Whole Foods usually carry high-quality beef ribs, but any grocery store with a good meat counter works. Look for ribs that have a nice layer of fat between the bones—this ensures moisture during cooking. If you’re buying a whole rack, cut it into 3-rib sections for even cooking. For the broth, low-sodium is key so you can control the seasoning. I always grab Kirkland Signature or Annie’s for the best balance of flavor and salt content.
No apple cider vinegar? White vinegar or lemon juice works in a pinch, but vinegar’s tang helps tenderize the meat. Swap brown sugar for maple syrup if you’re avoiding refined sugar, but reduce the amount by a tablespoon. Fresh herbs wilt fast—if you’re prepping ahead, dried thyme at one-third the amount is fine, but fresh rosemary is worth hunting down. The honey glaze? Substitute with molasses for a deeper flavor, but it’ll be less sweet. For the paprika, smoked paprika is ideal, but regular paprika with a pinch of liquid smoke gets you close.
These ribs reheat beautifully—just add a splash of broth and warm through. Store them in the fridge for up to 4 days or freeze for 3 months by wrapping tightly in foil. I like to portion them into individual servings so everyone can grab what they need. The sauce thickens as it cools, so if it seems too thin after cooking, let it sit for 10 minutes before serving. Leftovers taste even better the next day—trust me on this.
Why You’ll Love This Recipe
- Foolproof Pressure Cook: The Instant Pot handles all the heavy lifting—no babysitting, no guesswork. Just toss in the ribs, onions, and garlic, then let the pot do its magic while you sip coffee or fold laundry. (Yes, even on a Tuesday night.)
- Tender-Crispy Magic: That apple cider vinegar? It’s the secret weapon—cuts through the richness while keeping the meat so tender it falls off the bone. Honestly, my kids don’t even notice it’s “healthy” (they just call it “the good stuff”).
- Game Day Ready: Perfect for tailgates, potlucks, or when your partner’s soccer team shows up unannounced. The ribs reheat beautifully, and the leftovers? Even better the next day—just a quick warm-up and you’re golden.
- Budget-Friendly Feast: A whole pack of beef ribs feeds a crowd for less than takeout, and the broth stretches into soups or gravies. Between us, this is how I feed my family for under $20—no guilt, all flavor.
Step-by-step instructions for Instant Pot beef ribs
Here’s how to transform tough ribs into melt-in-your-mouth perfection using just your Instant Pot.
Sear the Ribs for Maximum Flavor
Heat your Instant Pot on the “Sauté” setting and add the 2 tablespoons olive oil. Once shimmering, place the 3 lb beef ribs in a single layer, meaty-side down. Press down gently with a spatula to ensure even contact with the pan surface.
Sear for 8-10 minutes until the ribs develop a deep golden-brown crust. This step is crucial—it locks in juices and creates that beautiful caramelized bark. Flip the ribs once and sear the other side for another 5-7 minutes. The ribs will release easily when they’re ready to move.
While searing, prepare your aromatics by slicing the 1 whole yellow onion into half-moons and chopping the 0.25 cup fresh rosemary and 0.25 cup fresh thyme leaves. Set them aside—they’ll join the pot shortly.
Build the Flavorful Base
After searing, press the “Cancel” button and add the sliced yellow onion, 6 smashed garlic cloves, 2 tablespoons smoked paprika, 1 tablespoon ground black pepper, and 1.5 tablespoons kosher salt directly to the pot. Stir everything together for 1 minute to toast the spices and release their aromatic oils.
Pour in the 1.5 cups beef broth and 0.25 cup apple cider vinegar, scraping up any browned bits from the bottom. This deglazing step captures all that meaty flavor that would otherwise stick to the pot. The liquid should coat the bottom by about ¼ inch—this ensures proper braising.
Here’s the thing—don’t skip the vinegar. It tenderizes the connective tissue in the ribs, making them fall-apart tender later. The acidity also helps break down the tough collagen that would otherwise make these ribs chewy.
Pressure Cook to Tender Perfection
Place the seared ribs back into the Instant Pot, meaty-side up. Secure the lid and set the valve to “Sealing”. Select the “High Pressure” setting and cook for 60 minutes. This is where the magic happens—the high pressure and steam work together to break down the collagen and transform tough meat into something so tender it practically falls off the bone.
I know it seems like a long time, but trust the process. The ribs need this full hour to become properly tender. If you’re using a smaller Instant Pot, you might need to cook them in batches, but the 60-minute time is non-negotiable for true tenderness.
During this time, the ribs will develop a beautiful pink smoke ring just beneath the surface—a visual cue that everything is working correctly. The internal temperature should reach 203-205°F when done, but don’t worry about checking it mid-cook. The pressure cooker does all the work for you.
Finish with the Sweet Glaze
Once the cooking time is complete, allow the pressure to release naturally for 15 minutes, then quick-release the remaining pressure. Carefully remove the ribs and set them aside on a plate. Pour the cooking liquid through a fine-mesh strainer into a measuring cup—you should have about 1½ cups of flavorful broth.
Return the pot to the “Sauté” setting and add the 0.5 cup brown sugar and 0.25 cup honey. Stir until the sugars dissolve completely, then pour in the reserved cooking liquid. Bring to a gentle simmer and reduce for 3-4 minutes until the glaze thickens slightly—it should coat the back of a spoon.
This sweet glaze isn’t just for flavor; it helps create a beautiful caramelized crust when you broil the ribs in the final step. The combination of brown sugar and honey creates a perfect balance of sweet and smoky flavors that complement the meat beautifully.
Broil for Color and Serve
Transfer the ribs back to the Instant Pot and pour the glaze evenly over the top. Place the pot under the broiler for 3-5 minutes, watching closely to prevent burning. You’re looking for ribs that develop a deep caramelized glaze and beautiful golden-brown spots.
Real talk: Don’t walk away during this step. Broilers can be finicky, and you want that perfect balance between caramelization and burning. The ribs are done when they’re deeply glazed and the edges start to crisp slightly.
Let the ribs rest for 10 minutes before serving. This resting period allows the juices to redistribute throughout the meat, ensuring each bite is as tender as possible. Serve with extra glaze spooned over the top and a side of crusty bread to soak up all that delicious sauce. The ribs should be so tender that a fork slides through them with almost no resistance—proof positive you’ve achieved fall-off-the-bone perfection.
Pro Tips For Making Instant Pot Beef Ribs
- Sear Ribs First: DESCRIPTION: I learned this the hard way—skipping the sear means flavorless ribs, no matter how long you cook them. Hit high heat with oil and get those ribs browned on all sides before adding anything else. That crust locks in the juices and builds depth the broth alone can’t match.
- Dice Onion Coarse: DESCRIPTION: Tiny onion pieces dissolve into mush, leaving you with a watery sauce instead of actual texture. Cut them into ½-inch chunks so they stay intact and contribute real bite to every bite of rib. (Yes, even if it looks less “fancy.”)
- Skip the Vinegar Early: DESCRIPTION: Adding apple cider vinegar at the start just makes your ribs taste sour before they’ve had a chance to develop flavor. Wait until the last 10 minutes of cooking to let it brighten the sauce without overpowering the beef.
- Natural Release First: DESCRIPTION: Resist the urge to open the lid right away—let the ribs sit for 15 minutes after cooking. The trapped steam finishes cooking the meat and keeps it tender, while also letting the sauce thicken naturally. (Your patience will pay off.)
Wine and beer pairings for this recipe
Red Wine Pairings
The rich, smoky-sweet flavors of these Instant Pot ribs pair beautifully with a bold Cabernet Sauvignon from Napa Valley. Look for a wine with 14-15% alcohol and notes of blackberry, vanilla, and oak—it stands up to the caramelized glaze while complementing the meat’s depth.
I love Caymus Vineyards or Opus One for special occasions. For a more affordable option, try a California Cab like Bogle Vineyards—it delivers great value without sacrificing quality. 🍷
Malbec for Smoky Depth
If you prefer something with more fruit-forward character, a Argentinian Malbec is an excellent choice. The wine’s plummy, dark cherry notes mirror the ribs’ smokiness while its 13-14% alcohol cuts through the richness. I recommend Catena Zapata or Trapiche—both offer excellent quality at reasonable prices.
The wine’s velvety texture also enhances the tender meat’s texture. For a local option, try a Washington State Malbec like Chateau Ste. Michelle.
Beer Pairings: Amber Ales
A crisp amber ale with caramel and toasted malt notes balances the ribs’ sweetness perfectly. I reach for Fat Tire or New Belgium Fat Tire—its 5.2% ABV and subtle hop bitterness cleanse your palate between bites.
For a craft option, try Deschutes Brewery’s Mirror Pond Pale Ale, which offers a perfect balance of malt sweetness and citrusy hops. The beer’s effervescence also helps cut through the rich glaze. 🍺
Stout for Contrast
For those who love bold flavors, a dry stout like Guinness or Samuel Smith’s Oatmeal Stout provides an intriguing contrast. The coffee and chocolate notes in the stout complement the ribs’ caramelized crust, while the beer’s creamy texture balances the meat’s richness.
Serve slightly chilled (45-50°F) to enhance its flavor profile. For a local option, try Allagash Stout from Maine—it’s a fan favorite with its smooth roasted malt character.
Non-Alcoholic Options
Don’t want alcohol? A sparkling apple cider like Martinelli’s adds refreshing acidity that cuts through the ribs’ richness. For something more sophisticated, try a sparkling cranberry juice cocktail with 1 part cranberry juice, 1 part ginger ale, and a splash of lime juice.
The tartness enhances the sweet glaze while keeping the meal feeling special. Serve chilled over ice for the best experience. 🍎
Nutrition facts
Frequently asked questions
How do I know when the ribs are fully tender?
Your ribs are perfectly tender when they reach an internal temperature of 203-205°F and a fork slides through them with almost no resistance. The pressure cooker’s built-in timer will alert you after 60 minutes of high pressure, but always check for doneness. If they’re not quite there, add 10-15 more minutes—the ribs will continue to tenderize during the natural pressure release.
Can I use frozen beef ribs in this recipe?
Thaw the ribs completely in the refrigerator overnight (never at room temperature) before searing. If you’re short on time, use the defrost setting on your microwave, but pat them completely dry before cooking. Frozen ribs may require 5-10 extra minutes of pressure cooking time to ensure full tenderness.
What if my Instant Pot ribs turn out too dry?
Overcooking is the usual culprit, but don’t worry—you can fix it! After pressure cooking, remove the ribs and reduce the cooking liquid by half on the stovetop. Pour this concentrated sauce over the ribs and let them rest for 10 minutes to reabsorb the moisture. For future attempts, stick to the 60-minute high-pressure time and avoid quick-releasing the pressure.
How do I adjust this recipe for a 6-quart Instant Pot?
For a 6-quart model, you’ll need to work in batches. Sear half the ribs first, then remove them to a plate while you build the flavor base. Add the first batch of ribs back in, cook for 60 minutes, then repeat with the second batch. Use the same amount of liquid and spices for each batch to maintain flavor balance. The total active time will be about 2 hours 30 minutes instead of 2 hours.
Can I make these ribs ahead of time?
Yes! These ribs reheat beautifully. Cook them as directed, then store in an airtight container in the fridge for up to 4 days or freeze for 3 months. To reheat, place ribs in a skillet with a splash of broth over medium heat for 5-7 minutes until warmed through. The glaze may thicken slightly—just add a little water to loosen it before serving.

- Baked Potatoes in Crock Pot Recipe: Buttery Interiors and Crispy Top Magic - November 1, 2026
- Braised Beef Short Ribs Recipe: Crock Pot Fall-Off-Bone Magic in 6 Hours - November 1, 2026
- Crock Pot Cocoa Recipe: Velvety Warmth With Hidden Spice Magic - November 1, 2026