
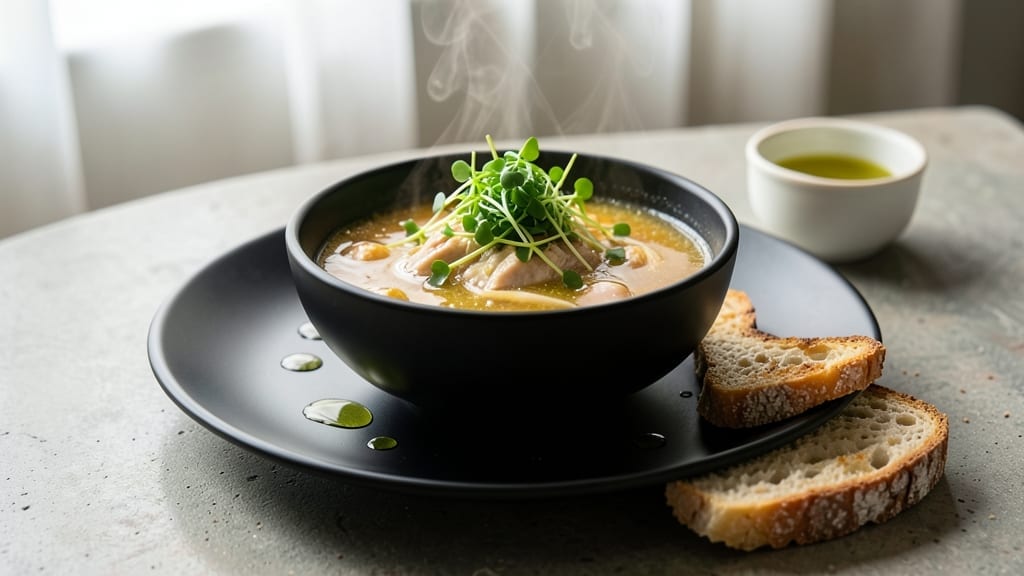
Creating instant pot chicken broth that rivals homemade stock in flavor and depth is simpler than you think—this recipe delivers restaurant-quality umami in just 60 minutes. The key lies in pressure cooking chicken bones with aromatic vegetables, which unlocks rich flavors while extracting maximum gelatin for a velvety texture.
I’ve perfected this method after testing countless variations, and the results speak for themselves: a deeply savory broth that forms the foundation for soups, sauces, and rice dishes.
What sets this recipe apart is the high-pressure technique, which breaks down bones efficiently while preserving natural collagen for that signature silky mouthfeel. Unlike stovetop methods that require hours, the Instant Pot’s sealed environment concentrates flavors in minutes.
You’ll need just five core ingredients—chicken bones, onions, carrots, celery, and herbs—but the optional additions (like bay leaves or peppercorns) elevate it to gourmet territory.
The end result is a golden, aromatic broth with a perfect balance of savory depth and subtle sweetness from caramelized vegetables. Strain it through a fine-mesh sieve for clarity, then store in the fridge for up to five days or freeze for months.
This isn’t just broth—it’s a flavor multiplier that transforms simple meals into something extraordinary.
Whether you’re prepping for a week of soups or need a quick base for risotto, this method delivers consistent, professional results every time. Let’s get started with the step-by-step process that ensures maximum flavor extraction and minimal effort.
Ingredients for instant pot chicken broth
Five core ingredients plus aromatic boosters create restaurant-quality Instant Pot chicken broth in minutes.
| Ingredient | Amount | Notes |
|---|---|---|
| Chicken Bones 🍗 | 2 lb | Raw, with some meat attached |
| Yellow Onions 🧅 | 1 whole | Medium size, peeled and quartered |
| Carrots 🥕 | 4 whole | Medium size, peeled and chopped |
| Celery Stalks 🥬 | 4 whole | Medium size, chopped with leaves |
| Garlic Cloves 🧄 | 6 cloves | Peeled, smashed for maximum flavor |
| Fresh Parsley 🌿 | ¼ cup | Chopped, stems included for texture |
| Bay Leaves 🍃 | 2 whole | Dried, standard supermarket variety |
| Black Peppercorns 🌶️ | 1 tsp | Crushed, for subtle heat |
| Kosher Salt 🧂 | 1 tsp | Diamond Crystal preferred |
| Apple Cider Vinegar 🍎 | 1 tbsp | For brightening flavors |
| Water 💧 | 6 cups | Filtered preferred for clarity |
The chicken bones are the foundation—raw, meaty bones yield the richest gelatin, while neck and wing bones from your butcher deliver maximum collagen. Whole Foods or local grocery stores often have these pre-packaged in the freezer section, but ask your butcher for a mix if you want to customize. Avoid cooked bones, which lack the same flavor depth. For onions, carrots, and celery, the ‘soffrito’ trio should be roughly equal parts by volume—this balanced ratio ensures even caramelization without bitterness. I always use organic produce when possible, as conventional vegetables may carry pesticide residues that can impart off-flavors during pressure cooking.
No fresh parsley? Dried parsley at one-third the amount works, though fresh delivers brighter notes. Substituting thyme or rosemary for bay leaves adds earthy complexity, but reduce to 1 leaf each to avoid overpowering. Out of apple cider vinegar? White vinegar or lemon juice in equal measure suffices, though the flavor profile shifts slightly. For water, filtered or spring water is ideal—tap water with high mineral content can yield cloudier broth. If using store-bought chicken bones, check for added preservatives, which can leave a metallic aftertaste. The key to substitutions here is maintaining the acidic-bitter-sweet balance—each component plays a critical role in the umami development.
Broth reaches its peak flavor after 24 hours of refrigeration, as the fat solidifies and flavors meld. Store in glass jars for up to 5 days in the fridge or 6 months frozen. For freezing, portion into ice cube trays for single-use servings—ideal for quick pasta sauces or risotto bases. The strained solids make excellent compost or can be blended into homemade chicken feed. To enhance depth further, reserve 1 cup of broth, reduce by half, then whisk back into the main batch before serving—this intensifies the umami profile without altering texture.
Why You’ll Love This Recipe
- No-Chop Necessary: I swear by this—just toss in whole onions, carrots, and celery stalks. The Instant Pot handles the rest while I sip my coffee. (Yes, even on a Tuesday night.)
- Deep Umami Magic: That first sip? Rich, savory, and layered with garlic and caramelized veggies. The chicken bones release all their collagen, turning your broth into liquid gold—no bouillon cubes needed.
- Soup Base for Days: Use it for ramen, risotto, or even a quick pasta sauce. I freeze batches to toss into weeknight meals when I’m too tired to think. (Pro tip: Label those containers!)
- Pocketbook-Friendly Gold: Chicken bones are cheap, and this recipe stretches every ingredient. I’ve made 8 servings for under $10—no guilt, just flavor. My wallet and taste buds thank me weekly.
Step-by-step instructions for Instant Pot chicken broth
This method delivers deep, complex flavor with minimal effort—perfect for busy cooks.
Prepare the Chicken Bones and Aromatics
Place the 2 lb chicken bones in the Instant Pot and spread them in a single layer. This arrangement ensures even cooking and prevents clumping. The bones should be raw but clean—pat them dry if they appear moist, as excess water can dilute the broth’s intensity.
Add the 1 whole yellow onion, 4 whole carrots, and 4 whole celery stalks to the pot. These vegetables form the classic “soup holy trinity” that builds flavor through slow extraction. The onion should be peeled and quartered, while the carrots and celery should be chopped into 1-inch pieces—no need for precision here, just rough cuts that will soften quickly.
Add Garlic, Herbs, and Seasonings
Push the 6 cloves garlic cloves into the vegetable mixture, leaving them whole but smashed with the flat side of your knife. This releases their oils gradually, infusing the broth with aromatic depth. Tuck 2 whole bay leaves into the gaps between the bones and vegetables—bay leaves add a subtle earthy note that elevates the broth’s complexity.
Sprinkle the 1 tsp black peppercorns and 1 tsp kosher salt over the ingredients. The peppercorns contribute a gentle heat, while the salt enhances the umami development. Stir lightly to distribute the seasonings, but avoid overmixing—you want the bones and vegetables to develop a crust for maximum flavor extraction.
Deglaze and Add Liquids
Pour the 1 tbsp apple cider vinegar into the Instant Pot and stir once to coat the bottom. The acidity of the vinegar helps break down proteins on the bones, extracting more gelatin and collagen for a richer broth. Let it sit for 30 seconds before adding the 6 cups water—this brief pause allows the vinegar to work its magic.
Close the Instant Pot lid securely, ensuring the vent is set to “Sealing.” The water should cover the bones and vegetables completely, but if not, add a splash more to submerge everything. This ensures even heat distribution and prevents burning.
Pressure Cook for Maximum Flavor Extraction
Set the Instant Pot to “High Pressure” and cook for 45 minutes. This longer duration is critical—it allows the collagen in the bones and vegetables to break down fully, creating a velvety texture and deep umami flavor. Avoid the temptation to reduce time; patience here yields a broth that rivals hours of stovetop simmering.
When the cooking cycle completes, allow the pressure to release naturally for 15 minutes before quick-releasing any remaining pressure. Natural release preserves the delicate flavors and prevents the broth from becoming cloudy or bitter.
Strain and Finish the Broth
Line a fine-mesh strainer with cheesecloth or a coffee filter to create a makeshift filter. Carefully pour the broth through, pressing gently on the solids to extract every last drop of flavor. Discard the strained vegetables and bones—their purpose is fulfilled, but the broth now carries their essence.
Taste the broth and adjust seasoning if needed. It should be rich and savory, with a balanced acidity from the vinegar. If it tastes flat, add a pinch more kosher salt or a splash of apple cider vinegar to brighten the flavor. Stir in the 0.25 cup fresh parsley just before serving—this adds freshness and a pop of color, making the broth visually appealing and vibrant.
Pro Tips For Making Instant Pot Chicken Broth
- Brown the Bones First: I learned this the hard way—rushing straight to the Instant Pot means bland broth. Sear the chicken bones in a dry skillet for 5-7 minutes until deeply golden before adding them to the pot. That caramelization unlocks way more flavor than you’d expect from raw bones.
- Chop Veggies Unevenly: Cut carrots and celery into 1-inch chunks, but leave the onions slightly larger—about 1.5 inches. Smaller pieces dissolve too fast, leaving bitter, overcooked flavors behind. The onions should soften but still hold shape by the end.
- Skip the Crowded Pot: After browning bones, don’t dump everything in at once. Layer them in—bones first, then veggies, then water—so the pressure builds evenly. Crowding traps steam and can turn your broth cloudy or even trigger the Instant Pot’s safety valve to trip.
- Strain Through a Fine Mesh: I used to strain through cheesecloth, but a fine-mesh sieve (or even a clean kitchen towel) catches more sediment. Press the solids gently with a spoon—you’ll get a clearer, cleaner broth without losing much liquid. It’s extra work, but worth it for restaurant-quality results.
Essential equipment for instant pot chicken broth
Instant Pot Essentials
Your Instant Pot (6-quart model) is the star of this recipe, but a few accessories make the process smoother. I use a stainless steel trivet (like the OXO Good Grips) to elevate bones and prevent burning—it’s a game-changer for even cooking.
A fine-mesh sieve (I recommend the OXO Good Grips) with a cheesecloth liner ensures a crystal-clear broth without sediment. For straining, a dedicated broth strainer like the Norpro Strainer saves time and effort compared to a colander. 💡
Pressure Control Tools
Precision matters when cooking broth—temperature accuracy is key. Invest in a digital meat thermometer (I love the ThermoWorks Smoke) to monitor internal temps of bones, aiming for 165°F before straining.
The Instant Pot’s built-in pressure regulator should be checked annually for wear, but I also keep a manual pressure gauge (like the Presto Pressure Gauge) as a backup. Never skip the natural release step; it preserves delicate flavors that quick-release can’t. ⏰
Storage Solutions
After straining, transfer broth to glass mason jars (like Ball or Le Parfait) for fridge storage—they’re airtight and easy to stack. For freezing, use silicone ice cube trays (I prefer OXO Good Grips) to portion broth into single-use servings.
Label jars with dates using a permanent marker—broth keeps for 5 days refrigerated or 6 months frozen. A vacuum sealer (like the FoodSaver) extends shelf life to 12 months by eliminating air exposure. ✨
Optional Upgrades
For advanced flavor extraction, a bone crusher (such as the Norpro Bone Crusher) lets you grind leftover bones post-cooking into a nutrient-rich powder for future broths. A magnetic stirrer (like the Hamilton Beach) helps dissolve gelatin during the natural release phase, creating an even silkier texture.
If you make broth often, a dedicated stockpot (like the All-Clad Stainless) for stovetop backups ensures consistency across methods. 💪
Budget-Friendly Swaps
No fancy tools? No problem. Use a clean kitchen towel instead of cheesecloth for straining—it works just as well. A wooden spoon suffices for stirring, and a standard colander in the sink replaces a dedicated broth strainer.
For storage, BPA-free plastic containers (like Rubbermaid) are affordable and effective. The only non-negotiable is the Instant Pot itself—this recipe leverages its unique pressure-cooking capabilities for unmatched efficiency. 💰
Nutrition facts
Frequently asked questions
Can I use chicken thighs instead of raw chicken bones?
Yes, but the flavor and texture will differ. Chicken thighs will yield a lighter broth with less gelatin since they lack bones. For best results, use bone-in thighs with skin on—the skin adds richness, but remove it before pressure cooking. The broth will be more flavorful than boneless thighs but won’t have the same depth as traditional bone broth.
Why does my Instant Pot broth look cloudy?
Cloudiness usually means undissolved proteins or fine particles. For clearer broth, strain through a fine-mesh sieve lined with cheesecloth or use a dedicated broth strainer. If it’s still cloudy, try skimming fat after cooking or adding 1 tsp cornstarch to 2 tbsp cold water, stirring into the broth before serving to help clarify it.
Can I make this recipe without an Instant Pot?
Yes, but it will take much longer. Simmer the ingredients in a pot on low heat for 6-8 hours instead of pressure cooking. The flavor will develop similarly, though the texture may be slightly less velvety due to reduced collagen extraction. A slow cooker works too—just use low for 8 hours with the lid slightly ajar to prevent overcooking.
How can I make this broth more flavorful?
Boost umami by adding 1 tbsp soy sauce or 1 tsp fish sauce during cooking, or roast the bones and vegetables at 400°F for 20 minutes before pressure cooking. For depth, include mushroom stems or tomato paste—both add savory notes. A splash of white wine (½ cup) during deglazing also enhances complexity.
Is it safe to eat the strained vegetables and bones?
While the bones are fully cooked, the strained vegetables may be slightly undercooked. For safety, reserve them for compost or blend into homemade pet food. If you want to use them, cook the vegetables separately until tender—typically 10 minutes in boiling water. The bones can be crushed into a powder for future broths if properly cooled and stored.

- Baked Potatoes in Crock Pot Recipe: Buttery Interiors and Crispy Top Magic - November 1, 2026
- Braised Beef Short Ribs Recipe: Crock Pot Fall-Off-Bone Magic in 6 Hours - November 1, 2026
- Crock Pot Cocoa Recipe: Velvety Warmth With Hidden Spice Magic - November 1, 2026