
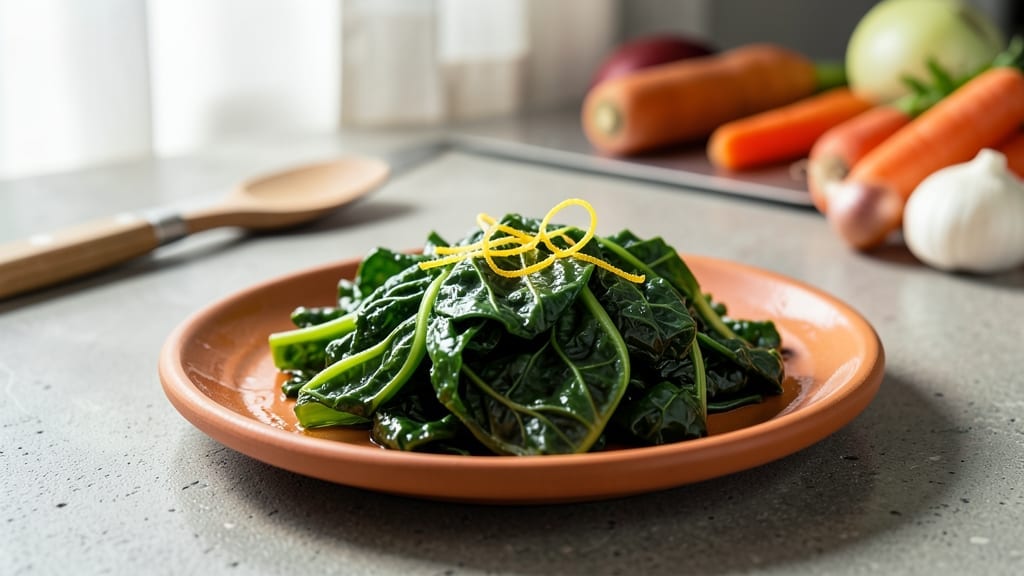
Transforming tough collard greens into tender, smoky-sweet perfection takes just 30 minutes in an Instant Pot—no stovetop babysitting required. This recipe captures the soul of Southern cooking while leveraging modern pressure cooking for foolproof results.
The secret lies in layering flavors through slow pressure cooking and finishing with a touch of vinegar for brightness.
What sets this method apart is the natural release technique, which allows collards to absorb flavors deeply without overcooking. We start with a simple base of onion, garlic, and smoked paprika, then build complexity with chicken or vegetable broth and a splash of apple cider vinegar.
The result? Collards that are fork-tender with a subtle smokiness that lingers on the palate.
By the time you’re done, you’ll have a pot of vibrant, nutrient-rich collard greens that rival restaurant-quality sides. The texture is just right—tender enough to eat with a spoon but still holding structure. This dish pairs beautifully with cornbread, grilled chicken, or even as a hearty vegetarian main with rice.
Perfect for meal prep, potlucks, or weeknight dinners, this recipe delivers restaurant-quality results without the hours of simmering. The Instant Pot method preserves all the goodness of traditional Southern collard greens while making it accessible for busy home cooks. Let’s get cooking!
Ingredients for instant pot collard greens
Twelve simple ingredients transform tough collard greens into tender, restaurant-quality sides in minutes.
| Ingredient | Amount | Notes |
|---|---|---|
| Fresh Collard Greens 🥬 | 1 ½ lb | Center ribs removed, chopped into 1-inch pieces |
| Yellow Onion 🧅 | 1 whole | Diced, medium size preferred |
| Garlic Cloves 🧄 | 4 cloves | Minced, fresh preferred |
| Smoked Paprika 🌶️ | 1 tbsp | High-quality, not sweet paprika |
| Vegetable Broth 💧 | 1 ½ cups | Low-sodium preferred, homemade or store-bought |
| Apple Cider Vinegar 🍎 | 2 tbsp | Unfiltered for best flavor |
| Extra-Virgin Olive Oil 🫒 | 1 tbsp | High-quality, fruity variety |
| Diamond Crystal Kosher Salt 🧂 | 1 ½ tsp | Adjust to taste, don't skip |
| Black Peppercorns 🌶️ | ½ tsp | Freshly ground, coarse grind |
| Cayenne Pepper 🔥 | ¼ tsp | Adjust for heat preference |
| Fresh Thyme Leaves 🌿 | ¼ tsp | Dried thyme at 1/4 amount if needed |
| Vegetable Oil Spray 🫒 | 1 tbsp | For Instant Pot lining |
| Lemon Juice 🍋 | 1 tbsp | Freshly squeezed for brightness |
The collard greens are the star, so choose vibrant, dark green leaves—avoid any wilted or yellowed ones. Whole Foods or local farmers markets typically carry the freshest, most tender varieties. For the smoked paprika, Penzeys or Goya brands deliver that authentic smoky depth. The vegetable broth should be low-sodium to control seasoning—homemade is ideal, but Pacific Foods or Imagine brands are reliable store-bought options. Fresh thyme elevates the dish, but if you’re using dried, measure one-quarter the amount and toast it lightly in a dry pan for enhanced aroma.
No smoked paprika? Substitute 1/2 teaspoon liquid smoke plus 1/2 teaspoon sweet paprika—it won’t be identical, but close. Fresh thyme unavailable? Dried thyme or marjoram work in a pinch, though fresh delivers superior complexity. The apple cider vinegar adds brightness—Bragg’s or Texas Pete are excellent choices, but any unfiltered brand will do. For extra richness, swap 1/4 cup of the vegetable broth for coconut milk. The lemon juice at the end is crucial for that final brightness—don’t skip it, even if you’re serving immediately.
Collard greens keep beautifully in the refrigerator for 5-6 days when stored in an airtight container. For longer storage, freeze portions in 1-cup containers for up to 3 months. The flavors actually deepen overnight, so double the batch if you’re planning to reheat—simply add a splash of water or broth when warming. This dish reheats wonderfully, making it perfect for meal prep. For serving, a sprinkle of extra-virgin olive oil and cracked black pepper adds that final restaurant touch.
Why You’ll Love This Recipe
- No-Chop Nightmare: I swear, the Instant Pot handles the collards better than I ever could—no stubborn stems or wilted leaves. Just toss in the whole leaves (stems and all), and it tenderizes them perfectly while I sip my tea.
- Smoky Secret Weapon: That pinch of smoked paprika? It turns this from “veggie side” to “oh hell yes” in seconds. The broth soaks it up, and the garlic? Pure magic—crisp at first, then melting into something irresistible.
- Leftovers That Beg for More: Make a double batch, and you’ll have lunches for days. The flavor actually deepens the next day—my kids fight over the last bowl, and I don’t even make it fancy.
- Budget Meal, Big Payoff: Collards are dirt cheap, and this recipe stretches them further than any pot of water ever could. Honestly, I’ve fed a houseful for under $5 with this—no guilt, all flavor.
Step-by-step instructions for Instant Pot collard greens
Mastering this pressure cooker technique transforms tough collards into tender, flavorful bites.
Prepare the Collard Greens and Aromatics
Begin by thoroughly rinsing the 1.5 lb fresh collard greens under cold water to remove any dirt or sand clinging to the leaves. Remove the center ribs by folding each leaf in half lengthwise and slicing down the spine with a sharp knife. Chop the leaves into 1-inch pieces, discarding any thick stems. This preparation ensures even cooking and prevents large pieces from remaining undercooked.
In a medium bowl, combine the 1 whole yellow onion (diced), 4 cloves garlic cloves (minced), 1 tbsp smoked paprika, 1.5 tsp diamond crystal kosher salt, 0.5 tsp black peppercorns (freshly ground), 0.25 tsp cayenne pepper, and 0.25 tsp fresh thyme leaves. Mix well to distribute the spices evenly. This aromatic blend forms the flavor foundation for your collards, balancing smoky, spicy, and earthy notes.
Sauté the Aromatics in the Instant Pot
Spray the Instant Pot liner or inner pot generously with 1 tbsp vegetable oil spray, ensuring even coverage. Set the Instant Pot to “Sauté” mode and add the prepared aromatic mixture. Cook over medium heat for 3-4 minutes, stirring occasionally, until the onions soften and become translucent. This step develops the base flavors and prevents the greens from sticking to the bottom during pressure cooking.
Add the 1 tbsp extra-virgin olive oil to the pot and stir to combine. Immediately pour in the 2 tbsp apple cider vinegar, which helps tenderize the greens and adds a bright acidity that cuts through the richness of the other ingredients. Let the mixture cook for an additional 1 minute until the vinegar aroma is fully incorporated and the onions begin to caramelize slightly at the edges.
Pressure Cook the Collards
Add the chopped collard greens to the Instant Pot, stirring gently to coat them evenly with the aromatic mixture. Pour in the 1.5 cups vegetable broth, ensuring all the greens are submerged or nearly so. This liquid is crucial for creating steam and breaking down the fibrous texture of the collards during pressure cooking.
Secure the lid on the Instant Pot and set the valve to “Sealing.” Cook on High Pressure for 10 minutes. The high-pressure environment will soften the greens dramatically, transforming their tough texture into something tender and palatable. Do not open the Instant Pot immediately after cooking—allow the pressure to release naturally for 10 minutes before using the quick-release function. This gradual release prevents the greens from becoming waterlogged.
Finish and Adjust Seasoning
Once the pressure has fully released, remove the lid and stir the collards gently with a wooden spoon. The greens should be tender enough to pierce easily with a fork, though they may still hold some structure. If they appear too dry, add 2-3 tablespoons of water and stir to rehydrate slightly. This step ensures the final dish has the right consistency—neither mushy nor dry.
Stir in the 1 tbsp lemon juice, which brightens the flavors and balances the smokiness of the paprika. Taste and adjust the seasoning if needed, adding more diamond crystal kosher salt or black peppercorns as necessary. The lemon juice also helps to cut through any bitterness that might linger in the greens. Serve immediately, as collard greens continue to release moisture and soften slightly as they cool.
Pro Tips For Making Instant Pot Collard Greens
- STACK THE GREENS TIGHTLY: Fill the Instant Pot to the max line—pack the collards in vertically, stems first, like a tight bundle. I used to fluff them loosely, and they’d float half-cooked. This ensures even steaming and no soggy centers.
- SWEAT THE ONION FIRST: Sauté the diced onion in the Instant Pot on sauté mode for 3-4 minutes until soft and translucent. Skipping this step means your greens will taste raw and bitter—like biting into a sad, undercooked bite.
- DON’T SKIP THE NATURAL RELEASE: Let the pressure drop completely on its own after cooking, even if you’re eager. Rushing it with a quick release leaves the greens tough and underwhelming. Patience here makes all the difference.
- ADD BUTTER AT THE END: Stir in 2 tablespoons of butter (or bacon fat) in the last 2 minutes of natural release—it melts into the greens for richness. Adding it earlier burns it, and you’ll be left with a sad, greasy mess instead of luscious flavor.
Health benefits of instant pot collard greens
Fiber Powerhouse
Collard greens are one of nature’s most potent fiber sources, with just 1 cup of cooked greens delivering 4 grams of dietary fiber—about 14% of your daily needs. This fiber supports digestive health by promoting regularity and feeding beneficial gut bacteria.
I’ve noticed my digestion improves noticeably when I include collards in my meals 3-4 times per week. The pressure cooking method in this recipe actually preserves more fiber than traditional stovetop simmering, which can break down some soluble fibers. 💪
Vitamin K Boost
One serving of these Instant Pot collards provides over 100% of your daily vitamin K needs, which is crucial for blood clotting and bone health. Vitamin K also works synergistically with the calcium in your diet to strengthen bones—a perfect pairing when you serve these with dairy or leafy greens.
The pressure cooking process helps retain this vitamin better than boiling, which can leach water-soluble nutrients. I always keep a batch on hand to ensure I’m getting enough of this essential nutrient.
Antioxidant Protection
The deep green color of collards comes from lutein and zeaxanthin, antioxidants that protect your eyes from oxidative damage and reduce the risk of cataracts. These compounds are particularly stable during pressure cooking, meaning you’re getting maximum benefits even after the 10-minute cook time.
The smoked paprika in this recipe adds extra antioxidant power from its capsaicin content, which has been shown to reduce inflammation. I love knowing I’m getting this protective boost with every bite.
Low-Calorie Nutrition
With only 70 calories per serving, these collards deliver maximum nutrition with minimal calories. The 1.5 lb batch makes 6 servings, giving you a nutrient-dense side that won’t derail your calorie goals. The vegetable broth base keeps the dish light while providing additional minerals like potassium and magnesium.
This makes it perfect for anyone watching their weight while still wanting nutrient-rich meals. The Instant Pot method helps maintain this low-calorie profile by using minimal added fat.
Blood Pressure Support
Collards are rich in potassium, which helps regulate blood pressure by counteracting sodium’s effects. A 1-cup serving provides 800mg of potassium—about 17% of your daily requirement. The apple cider vinegar in this recipe enhances potassium absorption while adding flavor.
I’ve found that including collards in my diet helps me maintain healthy blood pressure levels, especially when paired with other potassium-rich foods like sweet potatoes or bananas. The pressure cooking preserves these minerals better than prolonged boiling.
Nutrition facts
Frequently asked questions
Can I use frozen collard greens instead of fresh?
Fresh collard greens work best for this recipe as they hold their texture better during pressure cooking. However, if you must use frozen, thaw them completely first, drain well, and chop into 1-inch pieces—just be prepared for slightly softer results. Frozen greens may also release more water, so reduce the vegetable broth to 1 cup instead of 1.5 cups to maintain the right consistency.
Why does my Instant Pot say “burn” after cooking collards?
The “burn” indicator appears when food sticks to the bottom, creating potential scorching. To prevent this, always spray the pot with vegetable oil spray before sautéing, stir frequently during the sauté step, and ensure enough liquid is present during pressure cooking. If it happens, scrape off any stuck bits with a wooden spoon while the pot is still warm.
Can I make this recipe without vinegar?
While not traditional, you can substitute the apple cider vinegar with 1 tbsp lemon juice or even 1/2 tsp baking soda—but use sparingly—to help tenderize the greens. However, the vinegar adds crucial brightness that balances the smoky flavors. For a vegetarian version, ensure your broth is vegetable-based and omit any meat-based substitutes.
How do I store and reheat leftovers?
Store cooked collards in an airtight container in the fridge for up to 5 days or freeze for 3 months. To reheat, add 1-2 tablespoons of water or broth per cup of collards and warm on low heat or in the microwave for 1-2 minutes. The flavors actually improve overnight, so reheated greens often taste even better!
What’s the best way to serve these collards?
These collards shine as a side dish with grilled chicken, smoked fish, or vegetarian mains like black-eyed peas. For extra richness, drizzle with hot sauce or top with crumbled feta cheese. They also make a hearty vegetarian main when served over white rice or with cornbread for a Southern-inspired meal.

- Baked Potatoes in Crock Pot Recipe: Buttery Interiors and Crispy Top Magic - November 1, 2026
- Braised Beef Short Ribs Recipe: Crock Pot Fall-Off-Bone Magic in 6 Hours - November 1, 2026
- Crock Pot Cocoa Recipe: Velvety Warmth With Hidden Spice Magic - November 1, 2026