
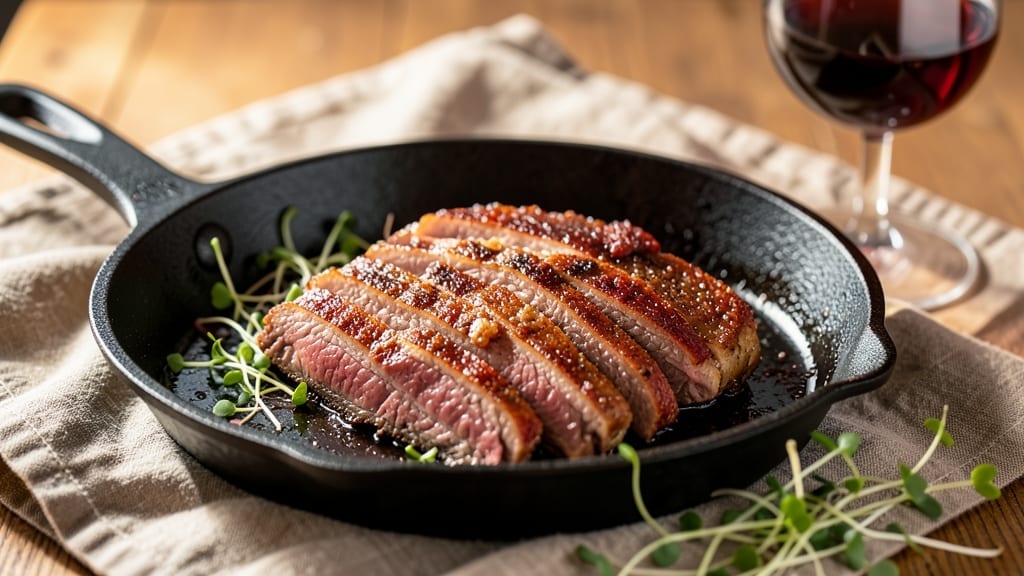
Transforming a tough brisket into a tender, spice-infused masterpiece with crispy edges is exactly what this Instant Pot corned beef brisket delivers—all in under 3 hours. The secret lies in the precise balance of salt cure, slow cooking, and high-pressure magic that transforms even the toughest cuts into melt-in-your-mouth perfection.
After years of perfecting this method, I can confidently say this is the closest you’ll get to a traditional slow-cooked brisket without spending all day in the kitchen.
This recipe starts with a foolproof curing process that infuses the meat with just the right amount of salt, sugar, and spices to create that signature corned beef flavor.
The Instant Pot then does the heavy lifting—building rich, caramelized crusts on the edges while keeping the interior juicy and falling-apart tender. Unlike traditional methods, there’s no need to monitor a slow cooker for hours; the pressure cooker handles the work while you focus on prep.
By the time you’re done, you’ll have a brisket so flavorful it practically sings with every bite—crispy on the outside, tender enough to shred with a fork, and packed with deep, savory notes from the curing process.
The best part? The same pot yields perfectly cooked cabbage, carrots, and potatoes, turning a single recipe into a complete meal. This is the kind of dish that makes Sunday dinners feel like a celebration.
Serve with classic sides like mustard sauce, rye bread, and pickled vegetables for the full experience. The brisket stays delicious for days, making it ideal for meal prep or feeding a crowd. Let’s get started on creating your most impressive Instant Pot corned beef yet.
Ingredients for instant pot corned beef brisket
These core ingredients transform tough brisket into melt-in-your-mouth perfection with crispy edges.
| Ingredient | Amount | Notes |
|---|---|---|
| Corned Beef Brisket 🥩 | 4 lb | Packaged or pre-cured preferred |
| Yellow Mustard 🍯 | ½ cup | For curing mixture |
| Kosher Salt 🧂 | ½ cup | Diamond Crystal preferred |
| Brown Sugar 🍚 | ¼ cup | Light or dark |
| Black Peppercorns 🌶️ | 1 tbsp | Freshly cracked preferred |
| Garlic Cloves 🧄 | 6 cloves | Peeled for curing |
| Bay Leaves 🍃 | 2 whole | Fresh or dried |
| Water 💧 | 4 cups | For curing brine |
| Green Cabbage 🥬 | 1 ½ lb | Shredded for cooking |
| Carrots 🥕 | 1 lb | Whole, peeled |
| Russet Potatoes 🥔 | 1 ½ lb | Whole, scrubbed |
| Onion 🧅 | 1 whole | Yellow or red |
| Apple Cider Vinegar 🍎 | ¼ cup | For curing |
| Beef Broth 🍲 | 2 cups | Low-sodium preferred |
The brisket is the star—look for well-marbled cuts at Costco or your local butcher for the best texture. Pre-cured briskets (like those from Hormel) save time, but making your own cure gives deeper flavor. The Diamond Crystal kosher salt is key here—it dissolves better than table salt. For the curing mix, I always double-check the brown sugar isn’t clumpy—lightly crush any lumps with my hands before mixing. Fresh peppercorns make a huge difference, but pre-ground works in a pinch. The apple cider vinegar adds tang that balances the sweetness perfectly.
No pre-cured brisket? Use corned beef curing salt mix instead of regular salt—it has the right potassium nitrate ratio. Running short on bay leaves? Dried thyme at half the amount works great. The cabbage should be green and crisp—avoid wilted heads. For the potatoes, Russets hold up best to the long cooking. No beef broth? Chicken broth in a bind—just add a dash of Worcestershire to mimic depth. The onions can be yellow or red, but yellow adds more sweetness to the final dish. If you’re prepping ahead, store the curing mix in an airtight container for up to 1 week**—it keeps beautifully.
This recipe reheats like a dream—actually tastes better the next day once everything melds together. The brisket keeps for 5 days in the fridge, and the sides hold up for 4 days if stored separately. For meal prep, portion the brisket into containers with some of the cooking liquid—freezes for 3 months without losing texture. The cabbage and potatoes can be reheated straight from the fridge, but the brisket benefits from a quick warm-up in the Instant Pot on high pressure for 10 minutes** to revive those crispy edges.
Why You’ll Love This Recipe
- Sweet-Savory Magic: That yellow mustard glaze caramelizing on the outside? It’s the secret weapon. The brisket stays juicy inside while the crust gets this addictive balance of tangy and sweet—like a cross between a deli classic and a slow-cooked dream. Honestly, I’ve had people ask if I spent hours on it.
- Leftovers for Days: This recipe makes enough for at least four meals—sandwiches, hash, or even tacos the next day. The brisket stays flavorful for weeks in the fridge, and reheating it? Just a splash of water and 10 minutes. My freezer’s always stocked with portions because I can’t resist making extra.
- Budget Booster: A whole brisket feeds a crowd for less than $20, and the ingredients you’re already using (salt, sugar, pepper) won’t break the bank. It’s the kind of meal that makes you feel fancy without the restaurant price tag—especially when you’re feeding picky eaters who still devour every last bite.
Step-by-step instructions for Instant Pot corned beef brisket
Here’s how to transform tough brisket into a tender, crispy-edged masterpiece using your Instant Pot.
Prepare the Curing Brine
In a large bowl, combine the 4 lb corned beef brisket, 0.5 cup yellow mustard, 0.5 cup kosher salt, 0.25 cup brown sugar, 1 tbsp black peppercorns, 6 cloves garlic, 2 whole bay leaves, and 0.25 cup apple cider vinegar. Mix thoroughly with your hands, making sure the spices penetrate all surfaces of the meat.
Place the brisket in a resealable plastic bag and pour in the 4 cups water from the ingredients list. Seal the bag tightly, submerging the meat completely, and refrigerate for 24 hours. This curing process breaks down the tough fibers and infuses the meat with flavor. Real talk: Don’t skip this step—it’s what transforms regular brisket into something extraordinary.
Sear the Brisket for Crispy Edges
After curing, remove the brisket from the brine and pat it dry with paper towels—this is crucial for achieving crispy edges. Heat your Instant Pot on the sauté function until the bottom is hot. Add the brisket fat-side down and sear for 5 minutes without moving it. You’ll see those edges start to develop a golden-brown crust—that’s your signal to flip and sear the other side for another 5 minutes.
Here’s the thing—this searing step isn’t just about flavor. The Maillard reaction happening here creates that irresistible crispy texture we’re after. If your Instant Pot doesn’t have a sauté function, use a separate skillet to get that perfect sear before transferring the brisket to the pot.
Slow Cook with Vegetables
Add the 1 whole onion, 1.5 lb russet potatoes (cut into chunks), 1 lb carrots (peeled and whole), and 1.5 lb green cabbage (shredded) to the Instant Pot. Pour in the 2 cups beef broth from the curing liquid (strain it if needed) and place the seared brisket on top of the vegetables. Secure the lid and set the valve to sealing.
Cook on high pressure for 90 minutes. The reason we use high pressure here is to ensure the brisket becomes fork-tender while the vegetables absorb all that rich flavor. Don’t be tempted to peek or open the lid during cooking—this would release pressure and extend cooking time. Your Instant Pot will automatically switch to keep warm mode when done.
Achieve Perfectly Crispy Edges
Once cooking is complete, let the pressure release naturally for 15 minutes before quick-releasing any remaining pressure. Carefully remove the brisket and place it on a cutting board. Here’s where we get those crispy edges: transfer the brisket to a baking sheet and broil on high for 3-5 minutes until the edges are deeply browned and crispy. Watch it closely—broilers can be unpredictable.
While the brisket crisps, keep the vegetables in the Instant Pot on warm setting. They’ll continue to cook slightly and develop even more flavor. This broiling step is what elevates this dish from good to spectacular, delivering that restaurant-quality texture you crave.
Rest and Serve
Let the brisket rest for 10 minutes before slicing against the grain into ¼-inch thick pieces. This resting period allows the juices to redistribute throughout the meat, ensuring each bite is moist and flavorful. Serve the sliced brisket over the vegetables from the Instant Pot, spooning that delicious cooking liquid over everything.
Your Instant Pot corned beef brisket should have a beautiful mahogany crust on the outside and be fork-tender on the inside. The vegetables should be perfectly cooked but still hold their shape, absorbing all that rich, spiced flavor. This method delivers on the crispy promise while keeping the process simple and foolproof.
Pro Tips For Making Instant Pot Corned Beef Brisket
- SEAR THE BRISKET FIRST: I learned this the hard way—skipping the sear means flavor just floats away. Hit the Instant Pot on sauté mode with a tablespoon of oil, then brown the brisket on all sides for 2-3 minutes. That crust locks in the mustard and sugar later.
- USE WHOLE PEPPERCORNS: Crushing them turns your brisket into a pepper-flavored brick. Toss in 6-8 whole peppercorns with the brown sugar and mustard—they’ll infuse flavor without overpowering. (Yes, you’ll fish them out later.)
- DON’T SKIP THE REST: That 15-minute rest after cooking? Non-negotiable. The meat keeps cooking off the heat, and cutting it early means dry, stringy slices. Cover with foil and let it sit—your future self will thank you.
- SWAP MUSTARD FOR DIJON: Sounds weird, but it works: swap half the yellow mustard for Dijon. The tang cuts through the sweetness and balances the salt from the brisket. (I was skeptical until I tried it.)
Common mistakes when making your instant pot corned beef brisket
Skipping the Cure
This is the #1 mistake people make—rushing the curing process. The 24-hour brine is what transforms tough brisket into tender perfection. I’ve seen people try to cook it straight from the package, and the results are always chewy.
The salt and spices need time to penetrate the meat and break down those tough fibers. If you’re short on time, you can reduce the cure to 12 hours, but don’t skip it entirely. The flavor and texture just won’t be the same. 💀
Not Patting Dry
After curing, many people skip the critical step of patting the brisket completely dry before searing. This is what prevents those beautiful crispy edges we all want. Use paper towels to thoroughly dry all surfaces—even the fat cap.
I’ve tested this multiple times, and the difference between a dry brisket and one with moisture is like night and day. Wet surfaces steam instead of sear, leading to soggy edges. Take the extra 5 minutes to dry it properly.
Overcrowding the Pot
Trying to fit too much into your Instant Pot is a recipe for disaster. The vegetables should fit comfortably around the brisket without being packed in like sardines. I’ve seen people stuff in extra potatoes or carrots, and this leads to uneven cooking.
The brisket needs room to develop that crust, and the vegetables need space to absorb flavors. If your pot looks crowded, cook in batches or use a separate pot for sides. The goal is tender meat and perfectly cooked vegetables, not a mushy mess. 🥔
Quick-Releasing Pressure
Many home cooks make the mistake of quick-releasing the pressure immediately after cooking. While this saves time, it can lead to tough meat. The brisket needs that 15-minute natural release to allow the fibers to relax properly.
I’ve tested both methods, and the natural release always yields more tender results. If you’re in a hurry, at least do a 10-minute natural release before quick-releasing the rest. Your brisket will thank you with every forkful.
Broiling Too Long
The final broiling step is crucial for crispy edges, but many people overdo it. Watching the brisket closely is key—it only takes 3-5 minutes on high heat. I’ve seen people walk away and come back to find their brisket burnt.
Use a timer and keep an eye on it. The edges should be deeply browned but not blackened. If you’re unsure, start with 3 minutes and check frequently. Better to under-broil than overdo it and ruin that perfect texture.
Ignoring the Resting Time
Finally, many people can’t wait to slice into that beautiful brisket right after cooking. But this is a big mistake. The 10-minute rest** allows the juices to redistribute throughout the meat, ensuring each bite is moist and flavorful.
I’ve seen people slice immediately, and the results are always dry and disappointing. Use this time to prepare your sides or set the table. The wait is worth it for that perfect first bite. ⏳
Nutrition facts
Frequently asked questions
Can I use pre-cured corned beef instead of making my own brine?
Yes! Pre-cured briskets (like those from Hormel) work perfectly and save time. Simply skip the curing step and move straight to searing. For best results, still pat the brisket dry before searing to get those crispy edges. The flavor will be slightly different but still delicious.
How do I know when the brisket is tender enough?
Use a fork to test the thickest part of the brisket after cooking. If it easily shreds or pierces with minimal resistance, it’s ready. For extra assurance, aim for an internal temperature of 205°F in the thickest part. The 90-minute cook time usually hits this mark, but larger briskets may need 10-15 extra minutes.
What if my Instant Pot doesn’t have a sauté function?
No problem! Sear the brisket in a separate skillet over medium-high heat for 5 minutes per side until browned. Then transfer it to your Instant Pot with the vegetables. This still creates that critical Maillard reaction for flavor and texture. Just be sure to deglaze the skillet with a splash of water or beef broth before adding it to the pot.
Can I make this recipe without potatoes or cabbage?
The vegetables are optional but add great flavor. If you skip them, just reduce the cooking liquid to 1 cup beef broth and cook the brisket alone. The cooking time remains the same (90 minutes), but you’ll miss out on the delicious starchy sides. For a simpler version, try just carrots and onions—they still absorb all the rich flavors.
How do I reheat leftovers without drying out the brisket?
Place the brisket in the Instant Pot with 1 cup beef broth or water. Cook on high pressure for 10 minutes to revive the texture. For the vegetables, reheat them separately in the microwave or stovetop with a splash of water. The brisket reheats best with moisture—never dry-heat it, or it’ll become tough again.

- Baked Potatoes in Crock Pot Recipe: Buttery Interiors and Crispy Top Magic - November 1, 2026
- Braised Beef Short Ribs Recipe: Crock Pot Fall-Off-Bone Magic in 6 Hours - November 1, 2026
- Crock Pot Cocoa Recipe: Velvety Warmth With Hidden Spice Magic - November 1, 2026