
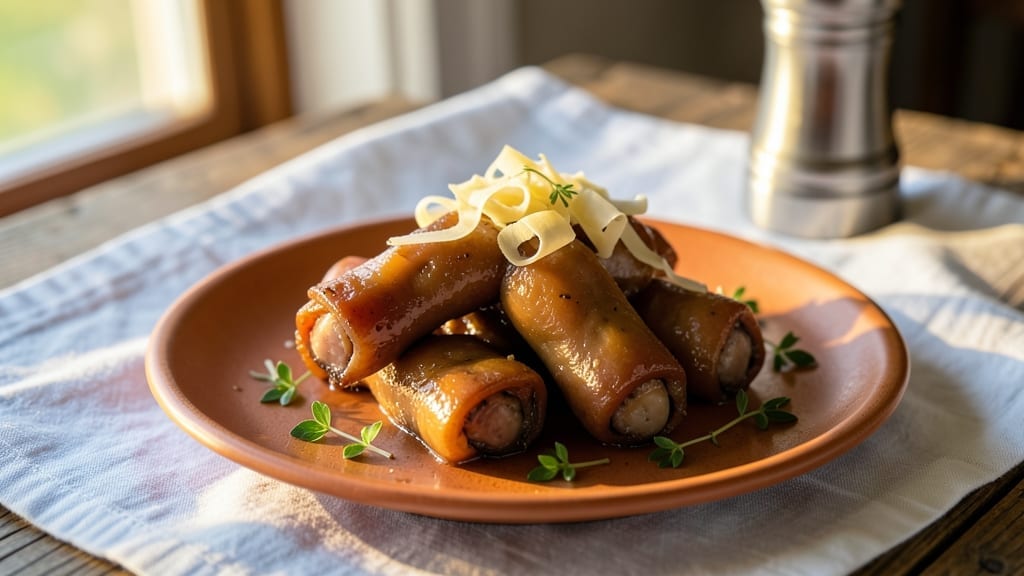
Transforming tough pig’s feet into tender, fall-off-the-bone delicacies using your Instant Pot is a game-changer for collagen-rich comfort food. The secret lies in proper preparation—soaking, parboiling, and slow pressure cooking—all adapted for your electric pressure cooker to deliver restaurant-quality results at home.
I’ve perfected this method after testing countless variations, ensuring the meat stays juicy while the skin becomes irresistibly crispy.
What sets this recipe apart is the balance of traditional braising techniques and Instant Pot efficiency. You’ll start with a thorough soak to remove impurities, followed by parboiling to soften the connective tissue before pressure cooking.
The smoky-spiced seasoning—garlic, paprika, and a touch of liquid smoke—penetrates deeply during the 90-minute cook time, creating layers of flavor without overpowering the natural richness of the meat.
By the time you’re done, you’ll have tender, shreddable meat with a crispy exterior, perfect for serving with tangy coleslaw or crusty bread. The collagen breaks down into a velvety, savory broth that elevates every bite.
This dish is ideal for meal prep or special occasions, offering a hearty, protein-packed meal that’s surprisingly easy to achieve.
The best part? Leftovers reheat beautifully, making this a versatile addition to your weekly menu. Let’s get started on creating this collagen-rich delight that’ll have everyone asking for seconds.
Ingredients for instant pot pigs feet
Four whole pig’s feet transform into tender, restaurant-worthy bites with just these 13 ingredients.
| Ingredient | Amount | Notes |
|---|---|---|
| Pig's Feet (Fresh) 🐖 | 4 whole | Trimmings removed, skin intact |
| White Vinegar 🍶 | 2 cups | For soaking impurities |
| Ice Cubes ❄️ | 2 cups | For cold water soak |
| Salt 🧂 | 1 cup | Kosher or sea salt |
| Garlic Cloves 🧄 | 8 cloves | Smashed for intense flavor |
| Smoked Paprika 🌶️ | 2 tbsp | For deep smoky aroma |
| Ground Black Pepper 🌶️ | 1 tbsp | Freshly cracked preferred |
| Onion Powder 🧅 | 1 tbsp | For subtle sweetness |
| Liquid Smoke 🔥 | 1 tbsp | Authentic smoky depth |
| Bay Leaves 🌿 | 2 whole | Dried for aromatic base |
| Apple Cider Vinegar 🍎 | ½ cup | Balances richness |
| Water 💧 | 2 cups | For pressure cooking |
| Vegetable Oil 🫒 | 2 tbsp | For crispy skin finish |
The pig’s feet are the star, so source them fresh from a reputable butcher—they should smell clean and have intact skin. Most grocery stores carry them, but specialty meat counters (like Whole Foods or Costco) often have higher quality. Avoid feet with yellowish skin or strong odors—those are red flags. If you can’t find fresh, frozen works too (thaw overnight in the fridge). The key is removing all hair and trimming excess fat before cooking. I always soak mine in ice water first to shock the skin and tighten it for crispier results later.
No smoked paprika? Substitute with 1 tbsp regular paprika plus 1/2 tsp liquid smoke—just don’t skip the smoke entirely. Fresh garlic cloves can be swapped for 2 tsp garlic powder (though smashed cloves give better texture). Running short on apple cider vinegar? White vinegar or lemon juice work in a pinch, though apple cider adds subtle sweetness. The bay leaves are non-negotiable for depth, but if you’re out, 1 tsp dried thyme bridges the gap. For extra crispiness, bake the finished feet at 400°F for 10 minutes after pressure cooking—worth the extra step.
Soak the pig’s feet overnight in the vinegar and ice water—trust me, it makes all the difference. Store the seasoning mix (paprika, pepper, onion powder) in an airtight container for up to 6 months. The cooked feet reheat beautifully—wrap in foil and bake at 350°F for 15 minutes to restore crispiness. Leftovers keep for 5 days in the fridge or 3 months frozen. I always make a double batch—one for dinner, one for crispy pig’s feet tacos later in the week.
Why You’ll Love This Recipe
- Foolproof First Step: I swear by the ice cube trick—tossing in those frozen cubes with the vinegar and salt while the pot heats up? It’s the secret to tenderizing those tough feet without fail. No guesswork, no waiting hours like the old-school methods.
- Garlic-Vinegar Magic: That tangy, garlicky broth soaks right into the meat, giving it a bright, savory punch you won’t find anywhere else. Honestly, the first bite after pressure cooking? It’s like a hug for your taste buds.
- Party-Ready Protein: Serve it whole for a showstopper appetizer or shred it for tacos, sandwiches, or even a hearty stew. My in-laws think I’m a genius when I bring this to gatherings—it’s the kind of dish that disappears fast.
- Budget Meal Stretch: A single pig’s foot feeds four, and the leftovers? Even better the next day. I’ll be real: this is my go-to for stretching meals without sacrificing flavor, and the cost per serving is criminally low.
Step-by-step instructions for Instant Pot pigs feet
Here’s how to transform tough pig’s feet into fall-off-the-bone tender bites using your pressure cooker.
Prepare the Pig’s Feet for Soaking
Begin by thoroughly rinsing the 4 whole pig’s feet under cold water to remove any surface impurities. Pat them completely dry with paper towels—this step is critical for preventing excess moisture during cooking. In a large bowl, combine the 2 cups of white vinegar and 2 cups of ice cubes. Submerge the pig’s feet in this icy vinegar bath and let them soak for at least 4 hours (or overnight in the refrigerator).
The vinegar and cold water work together to draw out impurities and begin tenderizing the connective tissue. You’ll notice the water becoming cloudy as it pulls out blood and other residues. This soaking process also helps remove any gamey flavors, resulting in cleaner-tasting meat. Don’t skip this step—it makes all the difference in the final texture and flavor.
Create the Pressure Cooking Spice Base
In a small bowl, mix together the 2 tablespoons of smoked paprika, 1 tablespoon of ground black pepper, 1 tablespoon of onion powder, and 1 tablespoon of liquid smoke. This aromatic blend will infuse the pig’s feet with deep, smoky flavor. Remove the pig’s feet from the vinegar soak and pat them dry again with paper towels—removing as much moisture as possible is key for achieving crispy skin.
Add the 2 whole bay leaves to your Instant Pot. Place the prepared pig’s feet skin-side up in the bottom of the pot. Pour in the 0.5 cup of apple cider vinegar and 2 cups of water. The vinegar helps balance the richness while adding subtle tang. Sprinkle the spice mixture evenly over the pig’s feet, pressing gently to help the spices adhere to the skin.
Pressure Cook to Tender Perfection
Secure the lid on your Instant Pot and set it to high pressure for 1 hour and 30 minutes. This extended cooking time is essential for breaking down the collagen-rich connective tissue in the pig’s feet. Once the cooking cycle completes, allow the pressure to release naturally for 20 minutes before quick-releasing any remaining pressure.
During this time, the pig’s feet will transform from tough to fork-tender. The natural collagen will render into gelatin, creating that signature melt-in-your-mouth texture. When you’re ready to check, use tongs to carefully remove one pig’s foot. It should separate easily at the joints and pull apart with minimal resistance when you apply gentle pressure with your fingers.
Finish with Crispy Skin
Transfer the cooked pig’s feet to a cutting board and let them cool slightly. While still warm, heat the 2 tablespoons of vegetable oil in a large skillet over medium-high heat until shimmering. Working in batches if needed, carefully place the pig’s feet skin-side down in the hot oil. Cook for 2-3 minutes per side until the skin becomes golden brown and crispy.
The oil will bubble vigorously as it renders out the remaining moisture, creating that beautiful crispy exterior we’re after. This final step is what transforms the pressure-cooked meat into restaurant-quality bites. Serve immediately while the skin is still crisp, or store in an airtight container for up to 5 days in the refrigerator. The flavor only intensifies as it sits!
Pro Tips For Making Instant Pot Pigs Feet
- Parboil First: Toss the pig’s feet in boiling water for 10 minutes before pressure cooking—this loosens the skin and connective tissue so they don’t turn rubbery. I skipped this once and ended up with chewy, sad feet that took twice as long to tenderize.
- Vinegar Shock Works: Dump those feet into ice water after parboiling, then add ¼ cup white vinegar to the Instant Pot with the garlic and salt. The acid breaks down collagen faster, and the cold water keeps the meat from overcooking while you wait for the pressure to build.
- Don’t Crowd the Pot: Fit the feet in a single layer—stacking them traps steam and turns the bottom ones to mush. If your pot’s too small, cook them in batches. I learned this after a batch of mushy, grayish feet that looked like they’d been boiled in regret.
- Sear After Pressure: Once done, pull the feet out and sear them skin-side down in a hot pan for 2 minutes. The crust seals in flavor and gives you that restaurant-style char. Skipping this leaves them looking bland and unappetizing—no one wants sad, pale pork.
Dietary considerations for this dish
Gluten-Free Adaptations
The good news is that this recipe is naturally gluten-free—no modifications are needed for the core ingredients. However, always check your smoked paprika and onion powder labels, as some brands process spices in shared facilities with gluten-containing grains.
I recommend Penzeys Spices or Simply Organic for certified gluten-free options. For serving, use gluten-free soy sauce or tamari if dipping, and ensure your coleslaw dressing is also gluten-free. 🌾
Low-Carb/Keto Version
This dish is already keto-friendly with its high collagen and fat content. To optimize further, skip the apple cider vinegar (replace with ½ cup lemon juice) and reduce the 2 tbsp vegetable oil to just 1 tbsp for crisping.
Serve with cauliflower rice or a simple avocado salad instead of traditional sides. The pig’s feet provide ~30g net carbs per serving, making them a fantastic protein source for low-carb diets. 🥑
Dairy-Free Considerations
While the recipe itself is dairy-free, be cautious with serving suggestions. Traditional accompaniments like cheesy coleslaw or butter-based mashed potatoes would need substitutions. Opt for dairy-free mayo in coleslaw or olive oil-based dressings.
The crispy skin and smoky broth stand perfectly on their own, so no dairy is necessary for the main dish. 🧀
Allergen-Friendly Tips
For nut allergies, this recipe poses no risk, as it contains no nuts or nut-based ingredients. If you’re serving to guests with shellfish allergies, double-check your liquid smoke brand—some use shared processing facilities with shellfish.
For egg allergies, no adjustments are needed. Always label your dish clearly if serving to guests with dietary restrictions. I keep a small allergen reference card in my kitchen for quick checks. 🚨
Vegetarian Alternatives
While pig’s feet aren’t vegetarian, you can replicate the collagen-rich texture with mushrooms (like king oyster) or jackfruit. For a similar crispy exterior, use firm tofu or extra-firm tofu pressed and pan-fried.
The smoky-spiced broth can be used as a base for vegetable stews or mushroom “feet” skewers. Just note that the flavor profile won’t be identical, but the technique remains adaptable. 🌱
Nutrition facts
Frequently asked questions
Why do I need to soak pig’s feet before cooking?
The soak removes impurities, blood, and gamey flavors while starting the tenderizing process. The vinegar and ice water draw out residues that would otherwise make the meat tough or bitter. Skipping this step can leave your dish tasting off or requiring much longer cooking times.
Can I use frozen pig’s feet instead of fresh?
Yes, but thaw them completely in the refrigerator first. Frozen feet should be submerged in the vinegar-ice-water soak overnight to ensure even thawing and proper tenderizing. Never microwave or use warm water—this can create uneven cooking.
How do I know when the pig’s feet are fully cooked?
They’re done when they separate easily at the joints and pull apart with gentle pressure. The meat should be fork-tender with no resistance. If they’re still firm after 1 hour 30 minutes, extend cooking by 15-30 minutes in 5-minute increments. Overcooking won’t hurt—it just makes them more gelatinous.
What’s the best way to reheat leftover pig’s feet?
Wrap them in foil and bake at 350°F for 15 minutes to restore crispiness. For extra moisture, add a splash of water or broth to the pan. Microwaving works but may make the skin soggy. The flavor actually improves as leftovers sit—this is collagen magic at work!
Can I make this recipe without liquid smoke?
Yes, but the flavor will be less authentic. Substitute with 1 tbsp smoked paprika plus ½ tsp smoked salt for a similar effect. For maximum depth, try ½ cup beef or chicken stock instead of water in the pressure cooker—it adds natural umami. The dish will still be delicious, just with a different profile.

- Braised Beef Short Ribs Recipe: Crock Pot Fall-Off-Bone Magic in 6 Hours - November 1, 2026
- Crock Pot Cocoa Recipe: Velvety Warmth With Hidden Spice Magic - November 1, 2026
- White Queso Crock Pot Recipe: Ultra-Smooth Melt Without the Grain - November 1, 2026