
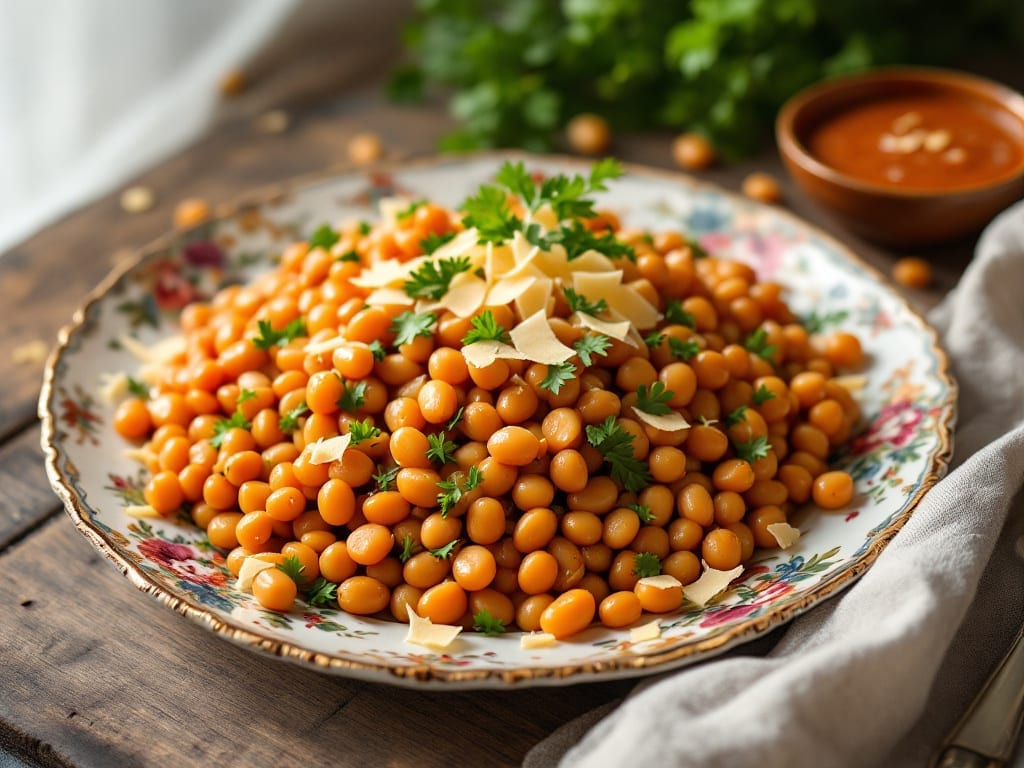
Transforming dried pinto beans into smoky, savory perfection in just 30 minutes is what makes this Instant Pot recipe a game-changer for weeknight meals. The high-pressure cooking method unlocks deep flavor while keeping the beans tender and intact—no soaking required.
I’ve perfected this technique over countless batches, ensuring every pot delivers restaurant-quality results without the wait.
What sets this recipe apart is the smoky depth achieved through a simple blend of spices and aromatics that infuse directly into the beans during pressure cooking.
The natural release method preserves texture, while the optional toppings—like fresh cilantro, lime zest, or avocado—elevate it from side dish to star of the show. It’s the kind of dish that builds character with each bite, making it a staple for vegetarians and meat lovers alike.
The beauty of this method lies in its foolproof simplicity: dump in the ingredients, seal the lid, and let the Instant Pot do the work.
No need to babysit the pot or worry about burning—just 20 minutes of pressure cooking followed by a quick release delivers beans that are creamy yet firm, with flavors that develop even more after resting.
This is comfort food at its finest, ready in a fraction of the time traditional stovetop methods demand.
Store leftovers in the fridge for up to 5 days, or freeze for months, making this recipe ideal for meal prep. Serve alongside grilled meats, in tacos, or as a hearty vegetarian bowl. Here’s everything you need to bring this smoky, savory magic to your table—effortlessly.
Ingredients for instant pot pinto beans
Transform these humble dried beans into smoky, restaurant-worthy perfection with just 13 simple ingredients.
| Ingredient | Amount | Notes |
|---|---|---|
| Dried Pinto Beans 🌱 | 1 ½ cups | No soaking required, rinse before use |
| Vegetable Broth 💧 | 3 cups | Low-sodium preferred for flavor control |
| Onion 🧅 | 1 whole | Yellow or red, chopped |
| Garlic Cloves 🧄 | 4 cloves | Minced for aromatic depth |
| Smoked Paprika 🌶️ | 1 tbsp | Key for authentic smoky flavor |
| Ground Cumin 🌿 | 1 tbsp | Toasted for enhanced aroma |
| Dried Oregano 🍃 | 1 tsp | Mexican oregano preferred |
| Salt 🧂 | 1 ½ tsp | Adjust to taste, kosher preferred |
| Black Pepper 🌶️ | ½ tsp | Freshly ground for best flavor |
| Bay Leaf 🌿 | 1 whole | Remove before serving |
| Lime 🍋 | 1 whole | Juiced, for bright finish |
| Fresh Cilantro 🌿 | ¼ cup | Chopped, optional garnish |
| Avocado Oil 🫒 | 1 tbsp | For high-heat sautéing |
The quality of your dried beans matters—Bob’s Red Mill or Anthony’s Goods are my go-tos for consistent texture. Rinse them briefly before adding to remove any dust or debris, but skip soaking entirely. The smoked paprika is non-negotiable for that authentic smoky depth; Penzeys carries a fantastic variety if you want to splurge. For the aromatics, fresh garlic and onion are ideal, but frozen chopped onions work in a pinch if you’re short on time. The bay leaf adds subtle complexity—don’t skip it, but remember to remove it before serving.
No smoked paprika? Substitute with 1/2 teaspoon liquid smoke plus 1/2 teaspoon regular paprika—it won’t be identical, but it gets you close. Short on cumin? Corriander seeds toasted and ground work surprisingly well. Using low-sodium broth? Add an extra 1/2 teaspoon salt at the end to balance flavors. The lime juice is crucial for brightness—Mexican Key limes from the store add a unique tang, but regular limes work fine. For the cilantro, fresh is best, but if you’re not a fan, skip it entirely—this recipe shines without it.
These beans develop even better flavors after resting for 10-15 minutes off the heat. Store leftovers in an airtight container in the fridge for up to 5 days, or freeze for 3 months for future meal prep. The natural release method preserves their creamy yet firm texture perfectly. For meal prep, portion into containers with a little extra broth to keep them moist. Reheat gently on the stove with a splash of water or broth—microwaving can make them mushy.
Why You’ll Love This Recipe
- No-Fuss Magic: I swear by this recipe when I’m too tired to chop. Just toss in the dried beans, broth, and whole onion—no pre-soaking, no fuss. The Instant Pot does the rest while I make dinner plans or scroll through my phone.
- Smoky Depth in Minutes: That smoked paprika? It’s the secret weapon. One teaspoon turns this into something rich and savory, like a cozy Mexican restaurant’s slow-simmered beans but with half the effort. The garlic cloves get soft and sweet, balancing the earthy pinto beans perfectly.
- Meal Prep MVP: I make a big batch on Sundays and divide it into containers for the week. It keeps well for days—great for lunches, tacos, or even stuffed in burritos. Honestly, it’s my go-to for lazy nights when I can’t be bothered to cook from scratch.
- Budget-Friendly Staple: Dried pinto beans are cheaper than canned, and this recipe stretches them into meals for days. Plus, the vegetable broth keeps it light but flavorful. Between us, this is how I feed my family without breaking the bank.
Step-by-step instructions for instant pot pinto beans
Here’s the method for perfectly tender, flavorful pinto beans every time.
Sauté the Aromatics
Set your Instant Pot to the “Sauté” function and heat the 1 tablespoon avocado oil over medium heat. Add the 1 whole chopped onion and cook for 4-5 minutes until softened and translucent. You’ll notice the onions release moisture as they cook—this is normal and helps build flavor.
Add the 4 cloves minced garlic and cook for 30 seconds until fragrant. Be careful not to let the garlic burn—it should smell sweet and nutty, not bitter. This quick sauté develops the base flavors before adding the beans and broth.
Add Spices and Beans
Stir in the 1 tablespoon smoked paprika, 1 tablespoon ground cumin, and 1 teaspoon dried oregano, mixing for 10-15 seconds until the spices are evenly distributed and aromatic. The spices should coat the onions and garlic, creating a flavorful crust.
Add the 1.5 cups dried pinto beans and stir for 30 seconds to lightly toast them. This step enhances their natural flavor and prevents them from sticking to the bottom of the pot. The beans will darken slightly, which is a good sign—they’re absorbing those smoky, earthy spices.
Pressure Cook the Beans
Pour in the 3 cups vegetable broth, then add the 1.5 teaspoons salt, 0.5 teaspoon black pepper, and 1 whole bay leaf. Stir once to combine, then secure the lid and set the valve to “Sealing.” Cook on High Pressure for 20 minutes—this ensures the beans become tender without losing texture.
Real talk: Don’t skip the 20-minute cook time. Rushing it will leave the beans tough, and no one wants that. Once the cooking cycle completes, let the pressure release naturally for 10 minutes before quick-releasing the remaining pressure. This gradual release prevents the beans from becoming mushy.
Finish and Garnish
Open the Instant Pot and give the beans a quick stir. Remove and discard the bay leaf—it’s served its purpose. The beans should be tender but still hold their shape, with a creamy texture from the broth. If they’re too thick, stir in 1-2 tablespoons of water to reach your desired consistency.
Squeeze the juice from the 1 whole lime over the beans and stir. Add the 0.25 cup chopped fresh cilantro, reserving a few sprigs for garnish. Taste and adjust the seasoning—you might need a pinch more salt or lime juice to balance the flavors. The lime brightens the smoky, earthy notes, making each bite vibrant.
Pro Tips For Making Instant Pot Pinto Beans
- SOAK BEANS 2 HOURS MINIMUM: I learned this the hard way—skipping the soak or rushing it with a quick rinse leaves you with beans that split like overcooked pasta. Even 1 cup of dried pinto beans needs at least 2 hours in water (or overnight if you’re planning ahead), and don’t skip the cold water soak—hot water just steels their skins and ruins the texture.
- SAUTE ONIONS UNTIL GOLDEN: That sad, pale onion at the bottom of your pot? It’s not just sad—it’s flavorless. Cook the diced onion in the Instant Pot on sauté mode until it’s deep golden, almost caramelized, before adding broth. The extra 3-4 minutes make a real difference, especially when paired with the garlic that comes next.
- ADD GARLIC LATE: I was skeptical until I tried it: smashing the garlic cloves into the pot after the onions are already cooking means they infuse their flavor without burning. Toss them in with the smoked paprika during the last 5 minutes of sautéing—this keeps the garlic aromatic and prevents that bitter, charred taste that ruins everything.
- PRESSURE COOK 20 MINUTES FIRST: Your Instant Pot’s manual might say 15 minutes for beans, but I’ve never gotten perfectly tender pinto beans in that time—especially with dried beans. Start with 20 minutes on high pressure, then do a quick taste test. If they’re still tough, add another 5-minute burst. The extra time guarantees they’ll break down just right, not mushy or undercooked.
Storing and reheating your instant pot pinto beans
Fridge Storage Tips
Store your cooked pinto beans in an airtight container with a lid—glass jars or BPA-free plastic containers work best. Let them cool completely before refrigerating to prevent condensation, which can make them soggy. I like using Le Parfait 32-ounce glass containers because they’re stackable and keep flavors sealed in.
These beans stay fresh in the fridge for up to 5 days, with flavors deepening over time. 💫
Freezer Prep Guide
For long-term storage, portion beans into freezer-safe bags or containers, leaving ½-inch headspace for expansion. Press out excess air to avoid freezer burn—use a straw to suck out air before sealing. Label with the date and freeze for up to 3 months.
Thaw overnight in the fridge before reheating for best texture. I freeze extra batches in 1-cup portions for easy meal prep. ❄️
Stovetop Reheating
My preferred method is reheating on the stove to preserve texture. Transfer beans to a pot with 2 tablespoons water or broth per cup of beans, then simmer over low heat for 5-7 minutes, stirring occasionally.
Avoid high heat—it can make them mushy. If they’re too thick, add a splash more liquid. The smoky flavors intensify as they warm up. 🔥
Microwave Method
For quick reheating, transfer beans to a microwave-safe bowl with a splash of water or broth. Cover loosely with a damp paper towel to retain moisture, then heat on 50% power in 1-minute intervals, stirring between each.
Total time should be 2-3 minutes—overheating turns beans gummy. I always check the consistency before serving. ✨
Reviving Dry Beans
If your beans seem dry after reheating, stir in 1-2 tablespoons broth or water and let sit for 5 minutes to reabsorb moisture. For extra richness, add a pat of butter or a drizzle of olive oil while reheating.
The key is gentle heat—never microwave without liquid, or you’ll end up with a sad, rubbery mess. 💡
Meal Prep Hacks
Double the recipe and store half for later—beans taste even better the next day! I prep 2-3 servings on Sundays to use in tacos, bowls, or soups all week. Keep a small jar of lime juice and cilantro in the fridge to revive flavors when reheating.
Pro tip: Add a pinch of baking soda (¼ teaspoon) to the pot while reheating if beans taste bland—it neutralizes acids and brightens flavors instantly. 🌟
Nutrition facts
Frequently asked questions
Do I really need to soak dried pinto beans before pressure cooking?
Not at all! This recipe skips soaking entirely—just rinse the beans briefly before adding them to the pot. The Instant Pot’s high pressure breaks down the beans’ tough skins in 20 minutes, creating tender results without the long soak. This method also preserves more nutrients compared to traditional soaking.
Can I use canned beans instead of dried for this recipe?
but with adjustments. Drain and rinse 3 cups canned pinto beans (about 2 cans), then reduce the broth to 1.5 cups and cook on high pressure for just 5 minutes instead. The beans will be ready immediately—no natural release needed. This cuts prep time by half!
Why do my beans turn out mushy when I quick-release the pressure?
The natural release is crucial—quick-releasing too soon can overcook the beans and make them break down. Always let the pressure release naturally for 10 minutes first, then do a quick release. If they’re still too soft, reduce the cook time by 2-3 minutes next batch. The key is patience!
How can I make these beans extra smoky without liquid smoke?
Toast the spices first! Before adding them to the pot, dry-toast the smoked paprika and cumin in a small pan over low heat for 1 minute until fragrant. This intensifies their smoky aroma. For deeper flavor, add ½ teaspoon chipotle powder or a pinch of cayenne along with the other spices.
What are the best ways to use leftover pinto beans?
These beans shine in tacos, burrito bowls, or quesadillas—just warm them with a splash of broth. Mix into vegetarian chili or salads for protein. For a quick snack, mash with olive oil, lime, and salt for a smoky dip. They also freeze beautifully for future meals!

- Baked Potatoes in Crock Pot Recipe: Buttery Interiors and Crispy Top Magic - November 1, 2026
- Braised Beef Short Ribs Recipe: Crock Pot Fall-Off-Bone Magic in 6 Hours - November 1, 2026
- Crock Pot Cocoa Recipe: Velvety Warmth With Hidden Spice Magic - November 1, 2026