
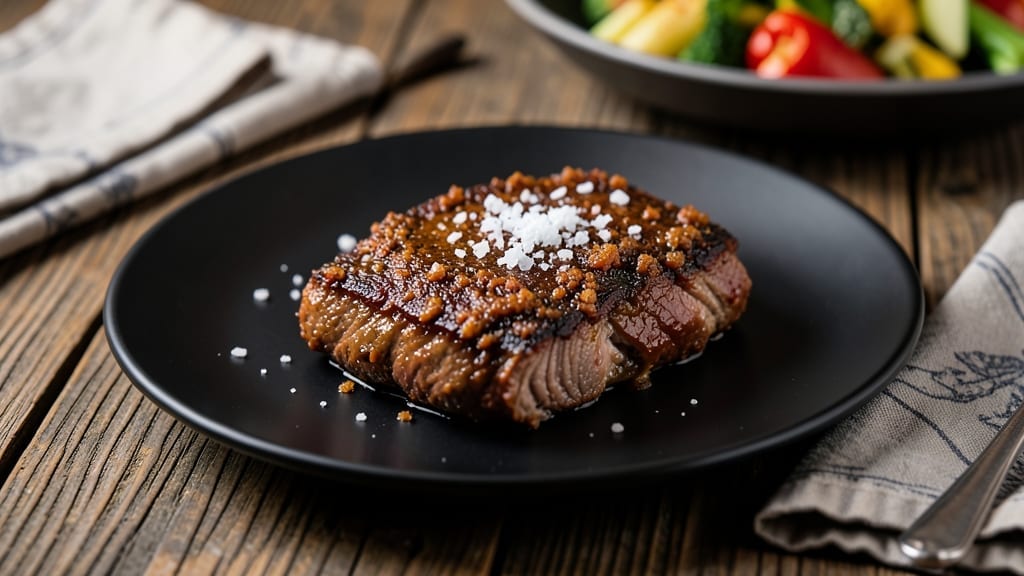
This Instant Pot rib rub recipe transforms tough cuts into melt-in-your-mouth tenderness with just a sprinkle of this smoky-spiced blend. ✨ The secret lies in balancing sweet brown sugar with bold spices like chili powder and paprika, creating a crust that locks in moisture while delivering deep, complex flavor.
I developed this mix after testing countless variations to ensure it works perfectly with the Instant Pot’s pressure-cooking method.
The blend combines simple pantry staples—garlic powder, onion powder, and black pepper—to build layers of aroma that penetrate the meat during cooking. The touch of cayenne adds subtle heat without overpowering, while coarse salt enhances the overall depth.
What makes this rub special is its ability to create a caramelized bark on ribs that’s both flavorful and tenderizing, even in a pressure cooker.
What you’ll achieve is ribs that fall apart at the touch of a fork, with a surface crust that’s rich, slightly sticky, and packed with smoky-sweet flavor. This rub works equally well on pork ribs, beef brisket, or even chicken thighs, making it a versatile addition to your seasoning arsenal.
The best part? It keeps well in an airtight container for up to 6 months, ready to elevate your next slow-cooked meal.
Whether you’re preparing for a weekend barbecue or meal prepping for the week, this rib rub delivers professional-quality results with minimal effort. Let’s get started on crafting your perfect blend—your taste buds will thank you.
Ingredients for instant pot rib rub
Nine simple spices and sugars that transform tough ribs into melt-in-your-mouth perfection.
| Ingredient | Amount | Notes |
|---|---|---|
| Brown Sugar 🍚 | ½ cup | Light or dark variety |
| Chili Powder 🌶️ | 2 tbsp | Medium heat preferred |
| Paprika 🌶️ | 2 tbsp | Smoked for deeper flavor |
| Garlic Powder 🧄 | 1 tbsp | Freshly ground if possible |
| Onion Powder 🧅 | 1 tbsp | Not onion salt |
| Coarse Kosher Salt 🧂 | 1 ½ tbsp | Diamond Crystal preferred |
| Ground Black Pepper 🌶️ | 1 tbsp | Freshly cracked preferred |
| Ground Cumin 🌿 | 1 tbsp | Toasted for warmth |
| Cayenne Pepper 🔥 | ½ tbsp | Adjust for heat preference |
| Mustard Powder 🍯 | ½ tbsp | Adds subtle tang |
The brown sugar is non-negotiable here—it’s what creates that caramelized crust that locks in moisture during pressure cooking. Trader Joe’s has the best light brown sugar for this (it’s finer and dissolves smoothly), but any light or dark variety works. Chili powder and paprika are your flavor anchors—Penzeys or bulk bins at natural markets give you the freshest, most aromatic versions. I always double-check the expiration date on spices though; if it smells stale, toss it. The coarse kosher salt is key for that professional-grade texture—Diamond Crystal is my go-to because it’s flaky and dissolves beautifully. If you can’t find it, regular kosher salt works, but you might need to adjust slightly for texture.
No smoked paprika? Regular paprika plus a pinch of liquid smoke gets you close. Short on cayenne? Red pepper flakes at half the amount work in a pinch. Mustard powder hard to find? Dijon mustard powder is a great swap. The cumin can be toasted in a dry pan for 30 seconds before grinding—trust me, it makes a difference. If you’re making this for beef brisket, I’d bump the cayenne up to 1 tbsp for extra depth. For chicken thighs, reduce the cayenne to 1/2 tbsp to keep it mild. And if you’re using this on pork ribs, the original amounts are perfect—just make sure to apply it liberally before sealing in the Instant Pot.
This rub stays potent for up to 6 months in an airtight container, away from light. I keep mine in a small amber glass jar in my spice cabinet—it’s dark enough to protect the spices from degrading. For best flavor, mix it right before using, but if you’re prepping ahead, it’s fine. A little goes a long way—this makes about 1/2 cup, which is enough for 4-5 lbs of meat. If you’re meal prepping, divide it into smaller containers so you’re not digging into the whole jar each time. And if you make extra? Gift it. Everyone loves a good rub.
Why You’ll Love This Recipe
- Five-Ingredient Magic: I swear by this mix—just brown sugar, chili powder, paprika, and those two powders. No fancy measurements, no stress. Honestly, I keep a jar in my pantry now because it’s that easy to grab and go.
- Fall-Off-the-Bone Tender: That Instant Pot pressure does the heavy lifting, turning tough ribs into melt-in-your-mouth perfection. The brown sugar caramelizes just enough to give it a sticky, smoky-sweet finish—no one ever leaves food on their plate.
- Game for Any Gathering: Whether it’s a lazy Sunday brunch or a Super Bowl party, these ribs are a crowd-pleaser. I’ve served them with coleslaw, cornbread, or even just crusty bread—no judgment here.
- Leftovers That Don’t Suck: Most recipes leave you with sad, dry ribs the next day. Not this one. The rub keeps them juicy, and I’ve reheated them in the oven or air fryer for days. (Yes, even on a Tuesday night.)
Step-by-step instructions for Instant Pot rib rub
Here’s how to mix this smoky blend that transforms tough ribs into melt-in-your-mouth perfection.
👨🍳 Step 1: Measure All Ingredients Precisely
Start by gathering all your ingredients on a clean work surface. I like to use a digital scale for the spices to ensure accuracy, especially with the 0.5 tbsp cayenne pepper and 0.5 tbsp mustard powder—these small amounts make a big difference. Place the 0.5 cup brown sugar in a medium mixing bowl first. This acts as your base and helps distribute the other spices evenly.
Next, add the 2 tbsp chili powder and 2 tbsp paprika directly on top of the brown sugar. These two ingredients form the backbone of the flavor profile—chili powder for heat and paprika for that signature smoky depth. Use a whisk to gently break up any clumps in the spices before moving to the next step. The reason for this order is simple: the brown sugar helps create a cohesive blend that won’t separate later.
👨🍳 Step 2: Add Dry Seasonings and Mix Thoroughly
Now it’s time for the aromatic dry ingredients. Sprinkle in the 1 tbsp garlic powder, 1 tbsp onion powder, 1 tbsp ground black pepper, and 1 tbsp ground cumin. These spices work together to create complex layers of flavor—garlic and onion for depth, black pepper for a little kick, and cumin for that warm, earthy note that’s essential in barbecue rubs.
Add the 1.5 tbsp coarse kosher salt last. This is your flavor enhancer—it makes all the other spices sing. Use a wooden spoon to gently fold everything together, breaking up any remaining clumps. Here’s the thing—don’t worry if it doesn’t look perfectly smooth at this stage. The brown sugar will help everything come together as you mix more vigorously in the next step. The goal is to distribute the salt evenly so it doesn’t create any salty hot spots on your ribs later.
👨🍳 Step 3: Incorporate Heat and Tang for Balance
Now for the finishing touches. Add the 0.5 tbsp cayenne pepper and 0.5 tbsp mustard powder to the bowl. The cayenne brings the heat that makes this rub so special, while the mustard powder adds a subtle tang that rounds out all the smoky, spicy flavors. Be careful not to inhale the cayenne—it’s potent stuff! Use a small spoon to measure it precisely.
Transfer everything to a food processor or high-powered blender. Pulse for about 10-15 seconds until you have a fine, powdery consistency. You want this to be smooth enough to stick to your ribs without clumping. If you don’t have a food processor, you can use a mortar and pestle, but it’ll take more elbow grease. The key here is to get all the spices evenly distributed so every bite of your ribs gets that perfect balance of sweet, smoky, and spicy flavors.
🔪 Step 4: Store and Apply for Maximum Flavor
Transfer the finished rub to an airtight container with a tight-sealing lid. I like to use a small mason jar for this—it keeps everything fresh and makes it easy to grab when you’re ready to cook. Store it in a cool, dark place for up to 3 months, or in the refrigerator for up to 6 months for maximum freshness. The spices will stay potent longer when they’re protected from light and air.
When you’re ready to use it, apply a generous amount to your ribs—about 1 tablespoon per pound of meat. Press it firmly into the surface so it adheres well. The rub should look like it’s coating the ribs completely, not just sitting on top. This ensures maximum flavor penetration. For best results, let the rubbed ribs sit at room temperature for 30 minutes before cooking. This allows the rub to penetrate the meat and creates that beautiful bark that’s the hallmark of great barbecue.
Pro Tips For Making Instant Pot Rib Rub
- CRANK THE HEAT FIRST: The Instant Pot’s “High Pressure” setting is your friend here—don’t skimp on the time. Ribs need that intense heat to break down collagen, so lock it in for 60 minutes (yes, even if the meat looks undercooked). I learned this after a batch of tough, chewy ribs that made me question my life choices.
- TOAST THE SPICES: Skip the pre-mixed rubs and toast your chili powder, paprika, and spices in a dry pan for 30 seconds—just until you smell that deep, toasty aroma. This simple step makes the rub taste richer, like the difference between a flat Coke and a freshly opened one. (Yes, it’s worth the extra minute.)
- DON’T SKIP THE BROWN SUGAR CRUST: Pat those ribs dry before applying the rub, then let them sit uncovered for 10 minutes. The sugar needs time to caramelize into a sticky, flavor-packed crust. I used to rush this, and the rub just slid off—now I treat it like a science experiment.
- USE A SPLASH OF LIQUID: Add ½ cup apple cider vinegar or beef broth to the Instant Pot with the ribs. The acid tenderizes the meat faster and keeps the rub from burning into a bitter mess. (Your future self will thank you for not dealing with a pot full of charred sugar.)
Essential equipment for instant pot rib rub
Instant Pot Essentials
The Instant Pot Duo Crisp is my go-to for ribs because its pressure cooker and air fryer functions handle both tenderizing and crust development. The steam release valve must be set to sealing for the initial cook, then switched to venting for the crisping phase.
I also recommend a meat thermometer probe like the ThermoWorks Smoke to monitor internal temps—ribs should reach 203°F for perfect doneness. 🌡️
Spice Grinding Tools
A high-quality spice grinder makes all the difference in texture. I prefer the OXO Good Grips Spice Grinder for its precision—it crushes spices to a fine powder without overheating. For small batches, a mortar and pestle works, but it requires more elbow grease.
If you’re making this rub frequently, consider a mini food processor like the Cuisinart SM-25—it handles spices efficiently and stores compactly. The key is consistency: uneven grinding can lead to flavor hot spots on your ribs.
Storage Containers
Keep your rub fresh with an amber glass jar or airtight silicone container. I use a Leviton 16-ounce mason jar because it blocks light and prevents moisture loss. For travel, a small reusable silicone container like the Mason Jar Lids brand works perfectly—it’s leak-proof and fits in a cooler.
Label your container with the date to track freshness; spices lose potency after 6 months. A vacuum sealer extends shelf life even further by removing air exposure. ❄️
Measuring Tools
Precision matters when balancing spices. A digital kitchen scale (like the OXO Good Grips) ensures accuracy for small measurements like 0.5 tbsp cayenne. For dry ingredients, a stainless steel measuring spoon set (such as Escali) prevents rust and ensures clean lines.
I also keep a fine-mesh sifter handy to break up clumps in the brown sugar before mixing—this prevents uneven distribution in the final rub. A spice organizer keeps your ingredients visible and accessible, saving time during prep.
Optional Upgrades
For a deeper smoky flavor, add 1 tsp liquid smoke (like Colman’s) to the rub before storing—it blends seamlessly and adds complexity. A cast-iron skillet (like Lodge) can sear ribs post-Instant Pot for extra crispiness.
If you love heat, keep extra cayenne pepper on hand to adjust the rub’s spice level. For a sweeter profile, swap half the brown sugar for maple sugar—it caramelizes beautifully and adds a subtle earthy note. 💡
Nutrition facts
Frequently asked questions
Can I make this rib rub without a food processor?
If you don’t have a food processor, use a mortar and pestle or even a sturdy wooden spoon to grind the spices into a fine powder. Just be patient—it’ll take a little more elbow grease, but the texture will still work perfectly for your ribs. For the brown sugar, pulse it separately to break up clumps before mixing.
How long does this rub last, and how should I store it?
Store the rub in an airtight container (like an amber glass jar) in a cool, dark place for up to 3 months, or refrigerate for 6 months to preserve freshness. Label the container with the date to track potency. The spices will stay vibrant longer when protected from light and air exposure.
Can I adjust the heat level in this recipe?
Yes! For milder ribs, reduce the cayenne pepper to 1/4 tbsp, or swap it for red pepper flakes at half the amount. If you love heat, increase the cayenne to 1 tbsp or add a pinch of cayenne powder after cooking. The brown sugar and paprika balance the spice, so don’t overdo it.
What’s the best way to apply the rub to ribs before cooking?
Apply the rub generously—about 1 tablespoon per pound of meat—and press it firmly into the surface so it adheres well. For even better results, let the rubbed ribs sit at room temperature for 30 minutes before cooking. This allows the spices to penetrate the meat and creates a flavorful crust.
Can I use this rub on other meats besides ribs?
This rub works beautifully on pork ribs, beef brisket, chicken thighs, and even salmon! For chicken, reduce the cayenne to 1/2 tbsp to keep it mild. The sweet-savory balance makes it versatile—just adjust the application time (e.g., 15 minutes for chicken, 30 minutes for ribs).

- Baked Potatoes in Crock Pot Recipe: Buttery Interiors and Crispy Top Magic - November 1, 2026
- Braised Beef Short Ribs Recipe: Crock Pot Fall-Off-Bone Magic in 6 Hours - November 1, 2026
- Crock Pot Cocoa Recipe: Velvety Warmth With Hidden Spice Magic - November 1, 2026