
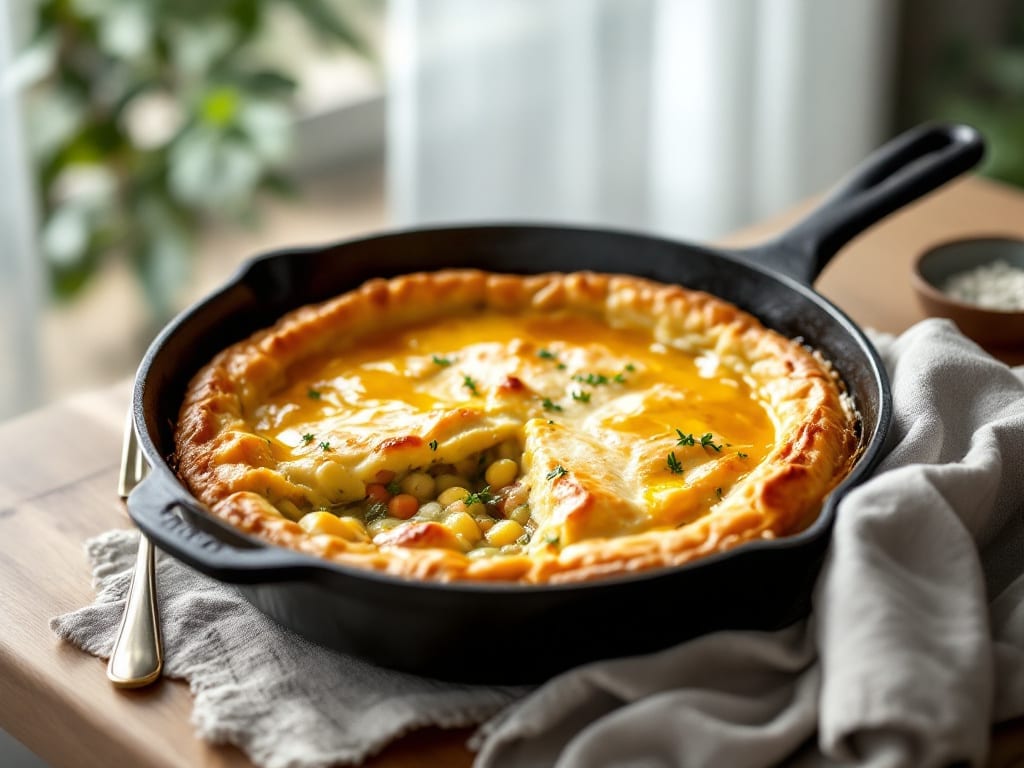
The Pioneer Woman cooks a chicken pot pie recipe that delivers a golden, flaky crust and a rich, velvety filling. This comforting classic brings together tender chicken, creamy vegetables, and a buttery pastry in one dish, making it ideal for family dinners or cozy gatherings.
The secret lies in the precise technique of layering and baking, ensuring every bite delivers both texture and flavor.
What sets this recipe apart is its simplicity—no shortcuts, just a few key ingredients that come together to create restaurant-quality results at home. The filling is built with sautéed onions, carrots, and celery, forming a flavorful base for the chicken and broth.
Meanwhile, the crust gets its signature flakiness from cold butter and a touch of ice water, rolled out just enough to create that perfect golden finish.
By the time it emerges from the oven, you’ll have a pot pie with a crisp, flaky crust that contrasts beautifully with the tender, creamy filling inside. The aroma alone will have everyone gathered around the table, and the first bite will confirm why this dish is a timeless favorite.
It’s hearty enough to satisfy a hungry crowd but simple enough to make on a weeknight.
Serve it warm with a side of green salad or crusty bread to soak up every last drop of that savory filling. This recipe is perfect for meal prep too—leftovers reheat beautifully, making it a go-to for busy families.
Let’s get started on creating your own version of this beloved classic.
Ingredients for pioneer woman cooks chicken pot pie
Golden crust meets velvety filling—just 14 ingredients for this Pioneer Woman classic.
| Ingredient | Amount | Notes |
|---|---|---|
| Boneless Chicken Breast 🍗 | 2 lb | Skinless, cut into bite-sized pieces |
| Yellow Onions 🧅 | 1 ½ cups | Diced, medium dice preferred |
| Carrots 🥕 | 2 medium | Peeled, sliced into thin rounds |
| Celery Stalks 🌿 | 3 whole | Diced, about 1 cup total |
| Unsalted Butter 🧈 | ¾ cup | Cold, cut into small cubes |
| All-Purpose Flour 🌾 | 2 ½ cups | Plus 2 tbsp for rolling |
| Ice Water 💧 | ½ cup | For dough elasticity |
| Chicken Broth 🍲 | 2 cups | Low sodium preferred |
| Heavy Cream 🥛 | ½ cup | Full-fat for richness |
| Salt 🧂 | 1 ½ tsp | Kosher or sea salt |
| Black Pepper 🌶️ | ½ tsp | Freshly ground preferred |
| Fresh Thyme Leaves 🌿 | 1 tbsp | Or 1 tsp dried thyme |
| Garlic Cloves 🧄 | 3 cloves | Minced for filling |
| Egg 🥚 | 1 whole | For egg wash |
The butter and flour ratio determines that signature flakiness. European-style butter from Land O’Lakes or Plugrá works best—higher fat content creates more layers. For the crust, use King Arthur or Gold Medal flour; they have higher protein for better structure. The chicken should be skinless but not lean—look for breasts with just a touch of fat between the muscles. Costco or Whole Foods often carry the best quality, but any supermarket will do. If you can’t find fresh thyme, dried works at one-third the amount.
No heavy cream? Half-and-half plus a splash of milk mimics the texture. Short on chicken broth? Vegetable broth plus 1 tsp soy sauce adds depth. The carrots and celery can be swapped for frozen mixed vegetables if needed—they’ll still soften perfectly. For the crust, if you’re short on ice water, add 1 tbsp of vodka (trust me, it works). The garlic can be jarred minced in a pinch, but fresh is always better. Pre-grated Parmesan? Skip it—it’s sawdust.
This pie reheats beautifully—350°F for 20 minutes until bubbly. For make-ahead prep, assemble the pie unbaked, cover, and refrigerate for up to 24 hours. The crust freezes well too—wrap tightly and bake straight from frozen (add 10 minutes). Store leftovers in the fridge for 4 days or freeze for 3 months. The filling thickens as it sits, so add 1 tbsp broth if reheating.
Why You’ll Love This Recipe
- Sliced in Minutes: I swear, the prep is that easy—just dice the onions, shred the carrots, and chop celery into matchsticks. No fancy knife skills needed, and the chicken cooks fast so you’re not waiting around.
- Butter-Braised Magic: That rich, golden butter searing the chicken and veggies? It turns everything into pure, savory comfort. The onions caramelize just enough to add depth without overpowering the tender chicken.
- Leftovers for Days: Between us, this recipe makes way more than you’ll eat in one sitting—and honestly, the second day is even better. The flavors meld together, and reheating it is a zero-effort win.
- Budget-Friendly Feast: You’re getting a full meal for pennies—chicken breast stretches, veggies bulk it up, and butter adds luxury without breaking the bank. Perfect when you need to feed a crowd without stressing.
Step-by-step instructions for flaky crust chicken pot pie
Here’s the method that delivers that signature flaky crust and velvety filling everyone loves.
Prepare the Chicken and Vegetable Filling
Cut the 2 lb boneless chicken breast into bite-sized pieces and season generously with 1.5 tsp salt and 0.5 tsp black pepper. In a large skillet, melt 0.5 cup unsalted butter over medium-high heat. Add the chicken and cook for 6-8 minutes until the pieces are no longer pink in the center and have developed some golden color.
Remove the chicken from the skillet and set aside. In the same pan, add 1.5 cups diced yellow onions, 2 medium carrots sliced into thin rounds, and 3 whole celery stalks diced. Cook for 5-6 minutes until the vegetables begin to soften and the onions turn translucent. Add the 3 cloves minced garlic and cook for 30 seconds until fragrant.
Return the chicken to the skillet and stir in 2 cups chicken broth, scraping up any browned bits from the bottom. Bring to a gentle simmer and cook for 5 minutes to allow the flavors to meld. Remove from heat and stir in 1 tbsp fresh thyme leaves and 0.5 cup heavy cream. The filling should be thick but not dry—if it’s too thin, simmer for another minute to reduce slightly.
Make the Classic Pot Pie Dough
In a large bowl, combine 2.5 cups all-purpose flour and 1.5 tsp salt. Cut in the remaining 0.25 cup unsalted butter (you’ve already used 0.5 cup) using a pastry cutter or your fingers until the mixture resembles coarse crumbs with pea-sized butter pieces. This cold butter creates the flaky layers.
Add the 0.5 cup ice water gradually, mixing just until the dough comes together. Avoid overworking the dough—knead lightly for 30-45 seconds until it forms a smooth ball. If it’s too sticky, add 1-2 tablespoons more flour; if too dry, add 1 teaspoon more ice water. Wrap the dough in plastic wrap and refrigerate for 30 minutes while you preheat the oven to 375°F.
Here’s the thing—this resting period is crucial. It allows the gluten to relax and the butter to firm up, which prevents shrinking and ensures those beautiful flaky layers when baked. Don’t skip it, even if you’re eager to get cooking.
Assemble and Bake the Pot Pie
Roll out the chilled dough on a lightly floured surface to a 12-inch circle—about ⅛-inch thick. Transfer to a 9-inch pie dish, trimming any excess dough. Brush the bottom crust with the 1 whole egg beaten with 1 tablespoon water for the egg wash. This creates a golden finish and seals the edges.
Pour the chicken and vegetable filling into the prepared crust, mounding it slightly in the center. Roll out the remaining dough to a 10-inch circle (you’ll use the extra for the lattice). Cut the dough into 1-inch strips and arrange them in a lattice pattern over the filling, overlapping the strips by ½ inch for a classic look. Trim any excess dough hanging over the edge.
Brush the lattice crust with the remaining egg wash. Bake for 45-50 minutes until the crust is deep golden brown and the filling is bubbling at the edges. The filling should be set but still slightly jiggly in the center—it’ll continue thickening as it cools. If the edges brown too quickly, tent loosely with foil after 30 minutes.
Rest and Serve for Maximum Flakiness
Remove the pot pie from the oven and let it rest for 15 minutes before serving. This resting period is what makes the crust truly flaky—it allows the steam to redistribute and the layers to separate properly. If you cut into it too soon, you’ll end up with a dense, tough crust instead of that light, shatteringly crisp texture.
Serve warm with a simple green salad or steamed vegetables. Each bite should deliver tender chicken, perfectly cooked vegetables, and that signature flaky crust that’s crisp on the outside and tender on the inside. The filling should be rich and velvety, with just enough creaminess to balance the savory chicken and vegetables. Leftovers keep well in the refrigerator for up to 3 days or can be frozen for 2 months.
Pro Tips For Making Pioneer Woman Cooks Chicken Pot Pie
- Poach Chicken Low & Slow: Skip the boil—simmer the chicken breasts in the broth at 160°F (71°C) for 12-15 minutes until they hit 165°F internally. I learned this the hard way: boiling dries them out, and you’ll end up with rubbery shreds instead of tender, flaky pieces that hold up in the pie. Use a thermometer if you’re unsure; your taste buds will notice the difference.
- Dice Veggies Uniformly: Cut onions, carrots, and celery into ¼-inch cubes—no smaller, no larger. Pioneer Woman’s recipe relies on even cooking, and jagged edges mean some veggies stay crunchy while others turn to mush. A sharp knife and a steady hand make this faster than you’d think (yes, even if you’re impatient like me).
- Sweat Veggies First: Cook the onions, carrots, and celery in butter over medium-low heat for 8-10 minutes until soft and glossy before adding liquid. This builds flavor and prevents the filling from turning watery later. I skip this step sometimes, and the filling always tastes duller—like I forgot the soul of the dish.
- Thicken with Cornstarch: Stir in 1 tablespoon cornstarch mixed with 2 tablespoons cold water at the end of cooking. It’s the non-negotiable step that turns a soupy filling into a rich, velvety base. The recipe might not mention it, but trust me: your pie crust will thank you when it doesn’t leak like a sieve.
Health benefits of these flavors
Protein-Packed Power
This chicken pot pie delivers a whopping 40 grams of high-quality protein per serving—thanks to the tender chicken breast and creamy filling. That’s nearly half your daily protein needs in one dish, making it perfect for post-workout meals or busy weeknights when you need to fuel up.
The chicken provides all nine essential amino acids, supporting muscle repair and keeping you full for hours. 💪
Comfort Food Nutrition
Despite its indulgent reputation, this pot pie balances rich flavors with nutrient-dense ingredients. The carrots and celery contribute vitamin A (for vision and immunity) and vitamin K (for bone health), while the onions add antioxidant quercetin to fight inflammation.
Even the crust gets in on the action—whole wheat flour (if substituted) boosts fiber for digestion.
Creamy Goodness
The heavy cream in the filling adds richness but also delivers vitamin D (for bone health) and conjugated linoleic acid (CLA)—a fatty acid linked to reduced inflammation. For a lighter version, swap half the cream for Greek yogurt (still creamy but with extra protein).
The chicken broth provides electrolytes like sodium and potassium, making this dish surprisingly hydrating too.
Hearty Without the Guilt
This pot pie is a balanced meal in one bowl—protein from chicken, fiber from veggies, and healthy fats from butter and cream. The thyme and garlic add flavor without calories, while the lattice crust (made with minimal butter) keeps portions satisfying.
It’s the kind of dish that feels indulgent but actually nourishes your body. Perfect for family dinners or meal prep!
Meal Prep Friendly
Assemble the pie unbaked and refrigerate for up to 24 hours—the flavors deepen overnight. When reheated, the filling thickens slightly, making leftovers just as comforting as the first serving.
Freeze portions for up to 3 months without losing texture. The high protein and fiber content keeps you full, reducing cravings for less nutritious snacks. 💡
Nutrition facts
Frequently asked questions
Can I make this pot pie ahead of time?
Assemble the pie unbaked and refrigerate for up to 24 hours before baking. For even better flavor development, let it sit overnight. If freezing, assemble the pie (unbaked) and freeze for up to 3 months. Bake straight from frozen, adding 10-15 extra minutes to the baking time.
What if my crust turns out soggy?
A soggy crust usually means the filling was too wet or the crust didn’t bake long enough. To fix it, pre-bake the bottom crust for 8-10 minutes at 375°F before adding filling. Also, ensure your filling has thickened properly before covering with the top crust. For extra insurance, brush the bottom crust with a thin layer of egg wash before adding filling.
Can I substitute ingredients for dietary needs?
For a lighter version, swap half the heavy cream for Greek yogurt or evaporated milk. Use whole wheat flour for the crust to add fiber, or make a gluten-free crust with a 1:1 gluten-free flour blend. For dairy-free, use coconut cream and a dairy-free butter substitute. Always adjust liquid as needed—gluten-free flours often require extra moisture.
How do I make the lattice crust look perfect?
Roll out the dough to a 10-inch circle and cut into 1-inch strips with a sharp knife or pizza cutter. Weave the strips in a classic lattice pattern, overlapping edges by ½ inch for a seamless look. Brush with egg wash for a golden finish. Pro tip: Chill the dough strips for 10 minutes before arranging to prevent shrinking.
Why does my filling taste bland?
Bland filling usually means the vegetables weren’t cooked long enough or the seasoning was insufficient. Always sauté the onions, carrots, and celery until soft (5-6 minutes) to develop natural sweetness. Deglaze the pan with chicken broth to capture flavorful browned bits. Boost seasoning with an extra ½ tsp salt and ¼ tsp black pepper, or add a pinch of smoked paprika for depth.

- Baked Potatoes in Crock Pot Recipe: Buttery Interiors and Crispy Top Magic - November 1, 2026
- Braised Beef Short Ribs Recipe: Crock Pot Fall-Off-Bone Magic in 6 Hours - November 1, 2026
- Crock Pot Cocoa Recipe: Velvety Warmth With Hidden Spice Magic - November 1, 2026