
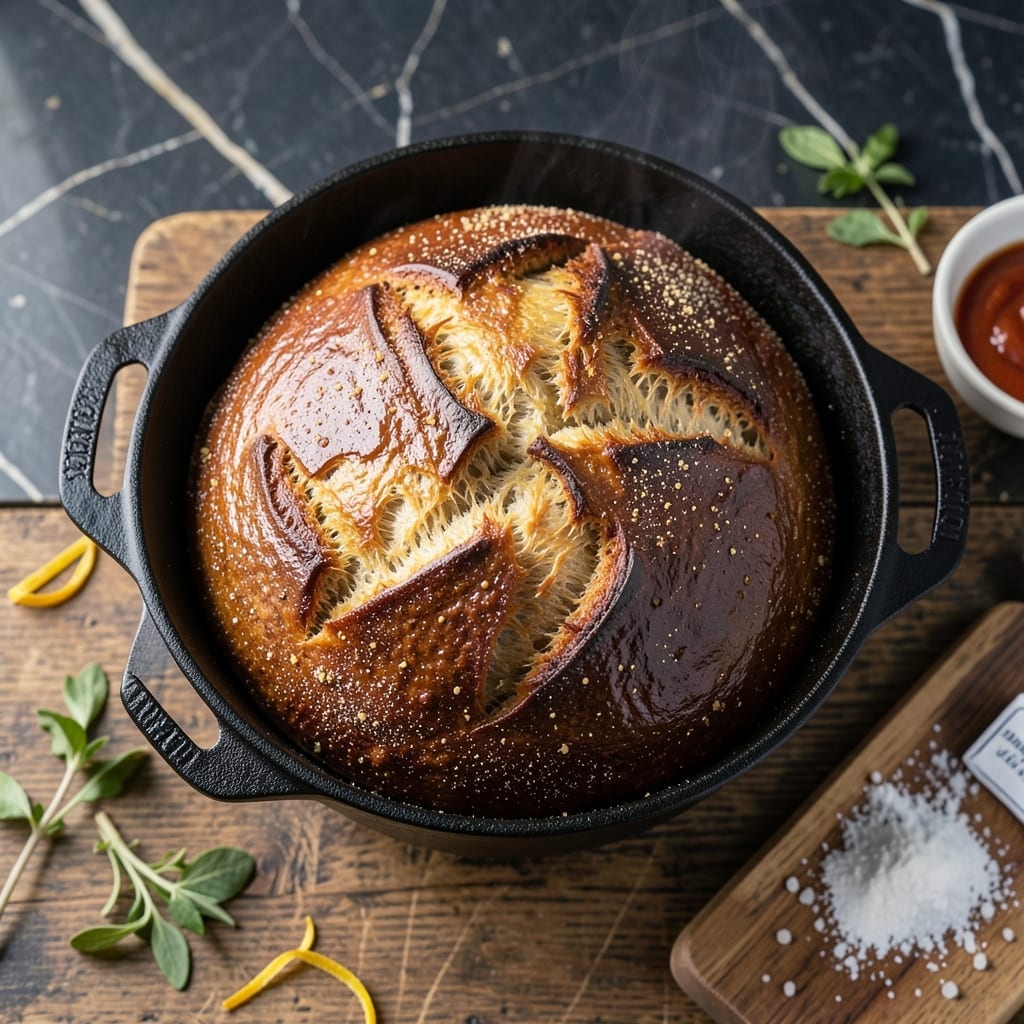
There’s something deeply satisfying about pulling a crusty loaf of homemade bread from the oven, knowing you’ve created something extraordinary with minimal effort.
This no-knead method transforms simple ingredients into an artisan loaf with a shatteringly crisp exterior and airy interior. The Dutch oven traps steam, mimicking professional bakery conditions right in your kitchen.
The process is surprisingly hands-off: mix, rest, shape, and bake. In just 24 hours, with only 5 minutes of active prep, you’ll achieve results that rival any bakery.
Perfect for beginners and seasoned bakers alike, this recipe delivers consistent, impressive results every time. The aroma alone makes the wait worthwhile.
Ingredients for Pot Bread Recipe in Oven
Simple ingredients transform into an artisan loaf with crisp crust and airy crumb.
| Ingredient | Amount | Notes |
|---|---|---|
| Bread Flour 🌾 | 3 ½ cups | All-purpose works in pinch |
| Active Dry Yeast 🍞 | ¼ tsp | Instant yeast also fine |
| Kosher Salt 🧂 | 1 ½ tsp | Diamond Crystal preferred |
| Filtered Water 💧 | 1 ½ cups | Room temperature, about 75°F |
| Cornmeal 🌽 | 2 tbsp | For dusting Dutch oven |
| Olive Oil 🫒 | 1 tsp | For bowl coating |
| Honey 🍯 | 1 tsp | Optional, enhances browning |
| Vital Wheat Gluten 🌾 | 1 tsp | Improves texture, optional |
| Rice Flour 🌾 | 1 tbsp | For dusting, alternative to cornmeal |
| White Vinegar 🍶 | 1 tsp | Balances flavor, optional |
The flour quality is paramount for this no-knead bread. King Arthur Bread Flour delivers consistent results with its higher protein content, creating that perfect chewy interior. Bob’s Red Mill is another excellent choice. For yeast, check the expiration date—freshness is critical. SAF Red Instant Yeast is my go-to for reliability. The Dutch oven must have a tight-fitting lid to trap steam effectively.
No bread flour? Use all-purpose at a 1:1 ratio—the loaf will be slightly less chewy but still delicious. For a tangier flavor, add 1 tablespoon of sourdough starter to the mix. Short on time? Instant yeast can reduce the rise time by half. The cornmeal can be swapped with polenta or semolina for dusting. Skip the honey if you prefer a less sweet crust.
Store flour in an airtight container in a cool, dark place for up to 6 months. Yeast keeps in the freezer for 1 year or in the pantry for 3-4 months. The baked loaf stays fresh at room temperature for 2-3 days, wrapped in a clean kitchen towel.
Why You’ll Love This Recipe
- One Bowl Wonder: I just dump the flour, yeast, salt, and water in a bowl, mix, and let it rise—no fancy steps.
- Crispy Cornmeal Bottom: That sprinkle of cornmeal gives it a nutty crunch that’s honestly impossible to resist.
- Feeds a Crowd: I’ve served this at potlucks and weeknight dinners—always disappears fast.
- Budget Bake: Five simple ingredients, one loaf, and it costs me less than a store-bought baguette.
Step-by-Step Instructions for Pot Bread
This no-knead method delivers an artisan loaf with minimal effort and maximum flavor.
Step 1: Mix and Hydrate the Dough
In a large mixing bowl, whisk together the 3.5 cups Bread Flour, 0.25 tsp Active Dry Yeast, and 1.5 tsp Kosher Salt. I use Diamond Crystal kosher salt for its clean flavor and consistent grain size.
Create a well in the center and add the 1.5 cups Filtered Water, 1 tsp Honey, 1 tsp Vital Wheat Gluten, and 1 tsp White Vinegar. Stir with a wooden spoon until a shaggy dough forms and no dry flour remains. The dough will be sticky and loose—that’s exactly what you want.
Step 2: First Rise and Develop Flavor
Lightly coat the bowl with the 1 tsp Olive Oil to prevent sticking. Cover the bowl tightly with plastic wrap or a damp kitchen towel. Let the dough rise at room temperature for 12-18 hours until it has doubled in size and the surface is dotted with bubbles.
This extended fermentation develops complex flavors and improves the dough’s texture. The longer rise time also makes the dough easier to handle. If your kitchen is cooler, you might need the full 18 hours; if it’s warm, check at 12 hours.
Step 3: Shape and Second Rise
After the first rise, the dough will be extremely sticky. Generously dust a work surface with the 2 tbsp Cornmeal or 1 tbsp Rice Flour—this provides the necessary grip to handle the dough without it sticking to your hands or the counter.
Turn the dough out onto the floured surface and fold the edges toward the center to create a round loaf. Don’t punch down the dough or overwork it—this isn’t traditional bread making. Place the shaped dough seam-side down on a piece of parchment paper.
Let it rest for 15 minutes, then use the parchment to transfer it to a bowl or proofing basket for the second rise. Cover and let rise for 1-2 hours until it has risen by about half and springs back slowly when poked.
Step 4: Preheat and Bake in Dutch Oven
Place your Dutch oven in the oven and preheat to 450°F for at least 30 minutes. This step is crucial—the screaming hot pot creates the steam necessary for that coveted crusty exterior.
Carefully remove the hot Dutch oven from the oven. Using the parchment paper, transfer the risen dough into the pot. Score the top of the dough with a sharp knife or razor in a shallow X pattern. This allows the bread to expand properly during baking.
Bake covered for 30 minutes, then remove the lid and bake for another 15-20 minutes until the loaf is deep golden brown and an instant-read thermometer inserted into the center registers 210°F.
Step 5: Cool Completely Before Slicing
Transfer the baked loaf to a wire rack and let it cool completely for at least 1 hour. I know this is the hardest part, but slicing too soon results in a gummy crumb. The bread continues to cook internally as it cools.
The finished loaf should have a thick, crispy crust that cracks audibly when tapped, with an open, airy crumb inside. The cornmeal or rice flour will have created a beautiful, rustic exterior that sets this pot bread apart from standard loaves.
Pro Tips For Making Pot Bread Recipe In Oven
- Proof the Yeast: I learned this the hard way—always bloom your active dry yeast in warm filtered water (105-110°F) with a pinch of sugar for 5-10 minutes until foamy before mixing. Skipping this risks dense, flat loaves.
- Use Cornmeal Right: Dust your Dutch oven with cornmeal just before adding the dough—about 2 tablespoons is perfect. It prevents sticking and gives that rustic, crisp bottom crust everyone loves.
- Don’t Over-Flour: Resist the urge to add extra bread flour when kneading; the dough should be slightly tacky. Too much flour makes the bread tough—I ruined three loaves before figuring this out.
- Preheat the Pot: Put your Dutch oven in the oven while it preheats to 450°F for at least 30 minutes. A hot pot guarantees a proper rise and that coveted crackly crust—sounds weird, but it works.
Troubleshooting Perfect Results
Dense or Heavy Loaf
If your bread turns out dense, it’s likely from insufficient rising time. Ensure the first rise goes for the full 12-18 hours at room temperature. Also, check your yeast freshness—old yeast loses potency. I once rushed this step and ended up with a brick. 💡
Pale or Soft Crust
A pale crust usually means the Dutch oven wasn’t hot enough. Preheat it at 450°F for at least 30 minutes before baking. If your oven runs cool, extend preheating to 45 minutes. The steam trapped inside is what creates that shatteringly crisp exterior.
Bread Sticks to Pot
Sticking happens when the parchment paper isn’t used or the pot isn’t properly preheated. Always use parchment to lift the dough in and out. Dusting the parchment with cornmeal or rice flour adds extra insurance against sticking.
Flat or Spread-Out Loaf
A flat loaf often results from overproofing during the second rise. Keep an eye on it—it should only rise by about half. If it collapses when poked, it’s overproofed. I set a timer for 1.5 hours to avoid this.
Gummy Interior
Gummy bread is usually from slicing too soon. Let it cool completely for at least 1 hour on a wire rack. This allows the interior to finish setting. Even if it smells incredible, resist the urge to cut early. 🔥
Uneven Baking
If one side browns faster, rotate the Dutch oven halfway through baking. Also, ensure your oven rack is centered. For consistent results, I recommend an oven thermometer to verify the actual temperature matches your settings.
Nutrition Facts
Frequently Asked Questions
Can I use all-purpose flour instead of bread flour?
Yes, you can substitute all-purpose flour in a 1:1 ratio. The loaf will be slightly less chewy but still delicious. For best results, add 1 tsp vital wheat gluten to improve texture.
Why does my bread have a pale crust?
This usually means the Dutch oven wasn’t hot enough. Preheat it at 450°F for at least 30 minutes. The steam trapped inside creates the crisp exterior.
Can I skip the parchment paper?
No, parchment prevents sticking and makes transfer easier. Dust it with cornmeal or rice flour for extra protection. Without it, the dough may stick to the pot.
How do I know when the bread is done?
Use an instant-read thermometer—the center should reach 210°F. The crust should be deep golden brown and sound hollow when tapped.

- 11×15 Sheet Cake Recipe: Triple-Layered Vanilla Bean Bliss - September 25, 2026
- 1 Kg Plum Cake Recipe: Buttery Layers and Spiced Fruit Filling - September 25, 2026
- 5-Star Pork Loin Recipe: Pan-Seared Crust With Juicy Pink Heart - September 25, 2026