
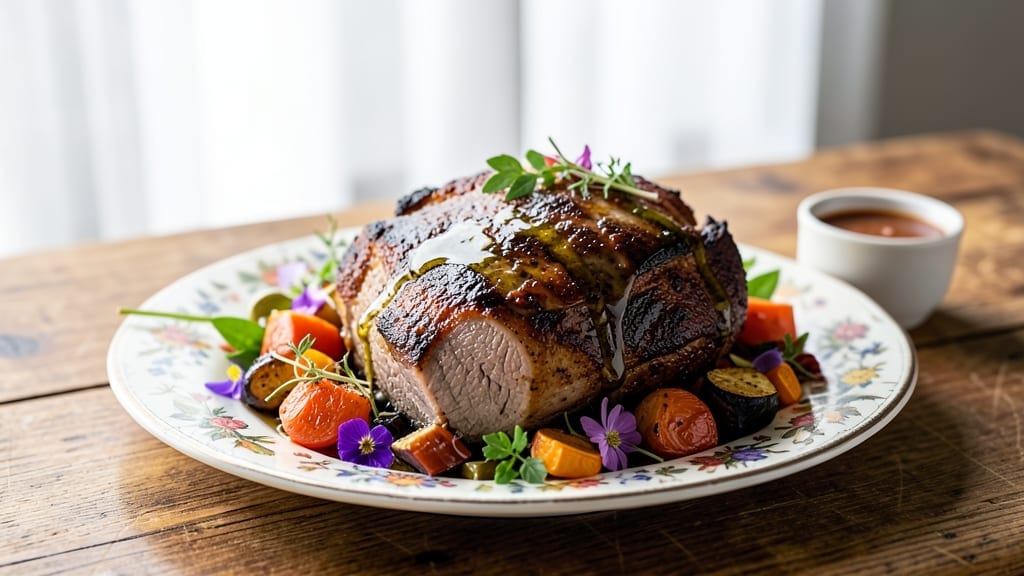
Mastering a That Dude Can Cook pot roast transforms tough beef into melt-in-your-mouth perfection—all thanks to slow braising and a few key techniques. I perfected this recipe during a particularly chilly Portland winter when I needed a dish that could feed the whole family without spending hours in the kitchen.
The secret lies in searing the beef first to lock in flavors, then letting it simmer gently until tender. This method delivers restaurant-quality results with minimal effort, and the rich gravy ties everything together beautifully.
The process starts with a simple sear in a Dutch oven, which builds a flavorful crust on the beef before it’s submerged in liquid. From there, it’s all about patience—low and slow cooking at 300°F for 3 to 4 hours transforms even the toughest cuts into tender, juicy slices.
The aromatics—carrots, onions, and herbs—infuse the beef with deep, savory notes, while the pan juices reduce into a velvety gravy that’s perfect for drizzling over the top. This recipe is foolproof, whether you’re using a traditional Dutch oven or an Instant Pot for a quicker version.
What you’ll end up with is a dish that’s rich, hearty, and deeply satisfying—ideal for a cozy family dinner or a gathering with friends. The beef falls apart easily, the vegetables are tender but still hold their shape, and the gravy adds a luxurious finish.
Serve it with crusty bread to soak up every last drop, or pair it with roasted potatoes and steamed carrots for a complete meal. The result is a dish that feels like a hug on a plate, and it’s sure to become a staple in your recipe rotation.
This pot roast is versatile enough to work for weeknight dinners or special occasions, and the leftovers reheat beautifully for lunches the next day. Whether you’re a seasoned home cook or new to slow cooking, this recipe delivers professional-quality results with minimal fuss.
Let’s get started on creating a dish that’s as comforting as it is impressive.
Ingredients for that dude can cook pot roast
Six ingredients transform tough beef into melt-in-your-mouth perfection for family dinners.
| Ingredient | Amount | Notes |
|---|---|---|
| Beef Chuck Roast 🥩 | 3 lb | 3-4 inches thick, well-marbled |
| Yellow Onion 🧅 | 2 whole | Large, chopped into wedges |
| Carrots 🥕 | 4 whole | Medium, halved lengthwise |
| Garlic Cloves 🧄 | 6 cloves | Peeled, smashed slightly |
| Fresh Thyme 🌿 | ¼ cup | Stems removed, chopped |
| Fresh Rosemary 🌿 | ¼ cup | Needles only, chopped |
| Beef Broth 💧 | 3 cups | Low-sodium preferred |
| Red Wine 🍷 | 1 cup | Dry, bold variety |
| Tomato Paste 🍅 | 2 tbsp | Squeeze tube preferred |
| All-Purpose Flour 🌾 | 2 tbsp | For gravy thickening |
| Olive Oil 🫒 | 2 tbsp | For searing beef |
| Salt 🧂 | 1 ½ tsp | Kosher or sea salt |
| Black Pepper 🌶️ | 1 tsp | Freshly ground |
| Bay Leaves 🌿 | 2 whole | Removed before serving |
The beef is everything here—chuck roast with good marbling is non-negotiable. Costco or local butchers often have it pre-cut, but if you’re buying a whole roast, look for one with visible fat between the muscles. That fat melts into flavor during cooking. I always grab mine from Whole Foods when I can—they source it well and it’s already trimmed to the perfect size. For the aromatics, fresh herbs make a difference, but dried thyme and rosemary work in a pinch. The carrots can be baby carrots if that’s what you’ve got, but whole carrots stay intact better during cooking.
No red wine? Beef broth with a splash of balsamic vinegar works just as well. The tomato paste can be skipped if you’re not a fan, but it adds depth—Trader Joe’s squeeze tubes are perfect for this. For the flour, all-purpose is fine, but if you’ve got bread flour, it’ll give your gravy a slightly thicker texture. The beef broth should be low-sodium unless you’re adding extra salt later. Fresh herbs? Dried at one-third the amount gets you close. Just make sure to toast your spices lightly if you’re using them—30 seconds in a dry pan brings out their flavor.
This dish tastes even better the next day, so make extra. The pot roast keeps for 4-5 days in the fridge, and the leftovers reheat beautifully. For freezing, portion into individual containers—3 months max. The gravy thickens as it cools, so add a splash of broth when reheating. Serve with crusty bread or roasted potatoes to soak up every last drop of that rich sauce. Trust me, the leftovers are worth the effort.
Why You’ll Love This Recipe
- One-Pan Magic: I swear by this—just toss the chuck roast, onions, carrots, and garlic into a Dutch oven with a splash of broth, cover it, and walk away. No flipping, no fussing, no extra pans. The thyme wafts through the whole house while it slow-cooks, and honestly? That’s half the fun.
- Deep, Rich Payoff: The secret’s in the low-and-slow method: tender beef that falls apart with a fork, crispy edges from the caramelized onions, and that earthy thyme cutting through like a whisper. Between us, it’s the kind of dish that makes you sound like a chef just by serving it.
- Leftovers That Win: This isn’t one of those recipes where leftovers are an afterthought. The next day, the meat gets even better—shred it for tacos, toss it in sandwiches, or just reheat it with a sprinkle of fresh thyme. My freezer is always stocked with portions because it’s that reliable.
- Budget-Friendly Feast: A chuck roast stretches to feed four (or five if someone’s extra hungry), and the veggies? You’re not spending a fortune on fancy produce. I’ll be real: it’s the kind of meal that makes grocery night feel like a victory, not a stressor. Plus, the flavor punches way above its price.
Step-by-step instructions for slow-braised pot roast
This method transforms tough chuck roast into melt-in-your-mouth perfection using simple techniques.
Sear the Beef Chuck Roast for Deep Flavor
Heat a large Dutch oven over medium-high heat and add the 2 tablespoons olive oil. Once shimmering, carefully place the 3 lb beef chuck roast in the pot, fat-side down. Let it sear undisturbed for 5-6 minutes until a deep golden-brown crust forms on one side. You’ll see the fat begin to render and the meat release easily from the pan.
Flip the roast and sear the other side for another 5-6 minutes until equally browned. The goal here is to develop that rich, caramelized crust that will carry through the entire braising process. Remove the roast and set it aside on a plate – we’ll come back to it once we’ve built our flavor base.
Build the Flavor Base with Vegetables and Aromatics
In the same Dutch oven, add the chopped 2 whole yellow onion wedges and cook for 3-4 minutes until they begin to soften and turn translucent. Add the halved 4 whole carrots and cook for another 2 minutes, stirring occasionally to prevent burning. The vegetables should release their natural juices and begin to caramelize slightly.
Add the smashed 6 cloves garlic, the chopped 0.25 cup fresh thyme, and the chopped 0.25 cup fresh rosemary. Stir everything together and cook for 1-2 minutes until the garlic becomes fragrant and lightly golden. This aromatic combination forms the flavor foundation for your pot roast.
Deglaze and Create the Braising Liquid
Pour in the 1 cup red wine and scrape up all the browned bits from the bottom of the pot using a wooden spoon. These flavorful bits, called fond, are crucial for developing depth in your sauce. Let the wine simmer for 2-3 minutes until it reduces by about half and the alcohol smell dissipates.
Add the 2 tablespoons tomato paste and stir to combine. This will add a subtle sweetness and help thicken the braising liquid slightly. Sprinkle in the 1.5 teaspoons salt and 1 teaspoon black pepper, then add the 2 whole bay leaves. The liquid should now be rich and aromatic, ready to transform your tough cut of beef.
Braise the Pot Roast to Perfection
Return the seared beef chuck roast to the Dutch oven, placing it back in the liquid. Pour in the 3 cups beef broth, making sure the roast is mostly submerged. The liquid should come about halfway up the sides of the roast. Bring everything to a gentle simmer over medium heat, then reduce the heat to low.
Cover the pot with a tight-fitting lid and let it cook for 3 hours. This slow cooking time is crucial – it allows the collagen in the meat to break down, creating tender, fork-tender beef. After 3 hours, check the internal temperature using a meat thermometer. It should read between 195-205°F for perfect tenderness. If it’s not there yet, continue cooking for another 30-60 minutes.
Finish and Thicken the Gravy
Once the beef is tender, remove it from the pot and place it on a cutting board. Let it rest for 10 minutes before slicing. This resting time allows the juices to redistribute throughout the meat, ensuring each bite is moist and flavorful.
Return the liquid to medium heat and stir in the 2 tablespoons all-purpose flour. Cook for 2-3 minutes, stirring constantly, until the gravy thickens to your desired consistency. Taste and adjust seasoning if needed. The gravy should coat the back of a spoon and have a rich, velvety texture. Serve the sliced pot roast with the gravy spooned over the top and enjoy your restaurant-quality meal.
Pro Tips For Making That Dude Can Cook Pot Roast
- SEAR THE ROAST FIRST: I learned this the hard way—skipping the sear means flavorless gravy. Get that chuck roast screaming hot in a dry pan for 3-4 minutes per side until it’s deep brown. Yes, it’ll look intimidating, but that crust locks in juices and builds the base for the sauce.
- CHOP CARROTS THICK: Thin slices turn to mush. Cut them into 1-inch chunks—they’ll soften perfectly without disappearing. (Bonus: Peel them first, or scrub stubborn dirt off with a brush.) No one wants a pot full of carrot paste.
- DON’T SKIP THE THYME STEM: That woody stem isn’t just for looks—it adds depth. Tuck it into the meat with the sprigs, and remove it after cooking. (I know, it looks weird, but it works.) Fresh thyme’s aroma is the difference between “meh” and “wow.”
- LOW AND SLOW ISN’T SLOW ENOUGH: This isn’t a race, but 325°F isn’t aggressive enough. Aim for 275°F—it might take 4-5 hours, but the meat will shred like butter. (Yes, even if you’re impatient like me.) A meat thermometer at 203°F is non-negotiable.
Perfect pairings for this that dude can cook pot roast
Classic Side Dishes
Nothing complements pot roast like creamy mashed potatoes—I use Yukon Gold potatoes boiled until tender, then mashed with butter, warm milk, and a pinch of salt. The smooth texture soaks up the rich gravy beautifully.
For a rustic touch, try crusty sourdough bread from the Portland farmers market—it’s perfect for mopping up every last drop. 🥔
Roasted root vegetables add color and balance to the dish. Toss parsnips, carrots, and sweet potatoes with olive oil, salt, and thyme, then roast at 400°F for 30 minutes until caramelized. The natural sweetness contrasts the savory beef perfectly. I often serve them alongside the pot roast for a complete meal.
Wine Pairings
A bold Cabernet Sauvignon from Napa Valley is my go-to pairing—its dark fruit and tannins stand up to the richness of the pot roast. Look for a 2018 or newer vintage with at least 14% alcohol for the best balance.
If you prefer something lighter, a Pinot Noir from Oregon’s Willamette Valley offers bright acidity that cuts through the dish’s heartiness. 🍷
For a non-alcoholic option, sparkling apple cider from a local orchard adds a refreshing contrast. The effervescence cleanses your palate between bites, making each forkful of pot roast taste even more vibrant. I’ve even seen some wineries in Ohio craft dry Riesling that pairs surprisingly well with the dish.
Beer Pairings
A dark amber ale like Deschutes Brewery’s Mirror Pond complements the deep flavors of pot roast beautifully. The malt sweetness and caramel notes echo the caramelized onions and beef, while the hop bitterness balances the richness.
For a lighter option, a Belgian witbier with its citrusy notes adds a refreshing twist. 🍺
If you’re a stout lover, try a porter-style beer—the roasted malt flavors harmonize with the caramelized vegetables and gravy. I once paired this dish with a Guinness at a friend’s dinner, and it was a hit. Just avoid overly hoppy IPAs, as they can overpower the dish’s delicate flavors.
Garnish & Finishing Touches
A sprinkle of fresh parsley just before serving adds a pop of color and freshness to the dish. I like to finely chop it and scatter it lightly over the pot roast and mashed potatoes.
For extra flair, a drizzle of truffle oil (just ½ teaspoon) elevates the dish to restaurant-quality elegance. 💫
Don’t forget crusty black pepper from a Tellichery pepper mill—a few grinds right before serving adds a bright, aromatic finish. If you’re feeling adventurous, a pinch of smoked paprika on the gravy adds a subtle smoky depth that pairs wonderfully with the beef.
Nutrition facts
Frequently asked questions
Can I use a different cut of beef besides chuck roast?
While chuck roast is ideal for its marbling and flavor, you can substitute with bottom round or short ribs—just expect slightly different textures. Short ribs will be more tender and rich, while bottom round may need an extra 30-60 minutes of cooking time. Avoid lean cuts like sirloin, as they lack the fat needed for slow braising.
How do I know when the pot roast is done?
Use a meat thermometer to check the internal temperature—it should reach 195-205°F for perfect tenderness. If you don’t have one, cut into the thickest part: the meat should separate easily with a fork and feel fork-tender. Overcooking can dry it out, so resist the urge to check too often.
Can I make this pot roast in an Instant Pot?
Sear the beef first in a skillet, then transfer it to the Instant Pot with all aromatics and liquids. Cook on high pressure for 60 minutes, then let it naturally release for 15 minutes before checking doneness. The Instant Pot version cooks faster but still delivers tender, flavorful beef.
What if my gravy is too thin or too thick?
For thin gravy, simmer it uncovered for 5-10 minutes to reduce. If it’s too thick, whisk in 1-2 tablespoons of warm beef broth until smooth. Avoid adding cold liquid, as it can cause the gravy to seize. Taste and adjust seasoning—sometimes a pinch of salt or a splash of wine balances the texture.
How far ahead can I prep this dish?
You can prep everything up to the braising step 1 day ahead—just refrigerate the seared beef and aromatics in the Dutch oven. When ready to cook, add the broth and braise as directed. For leftovers, store in an airtight container for 4-5 days or freeze for 3 months. Reheat gently in the oven or stovetop with a splash of broth.

- Baked Potatoes in Crock Pot Recipe: Buttery Interiors and Crispy Top Magic - November 1, 2026
- Braised Beef Short Ribs Recipe: Crock Pot Fall-Off-Bone Magic in 6 Hours - November 1, 2026
- Crock Pot Cocoa Recipe: Velvety Warmth With Hidden Spice Magic - November 1, 2026