
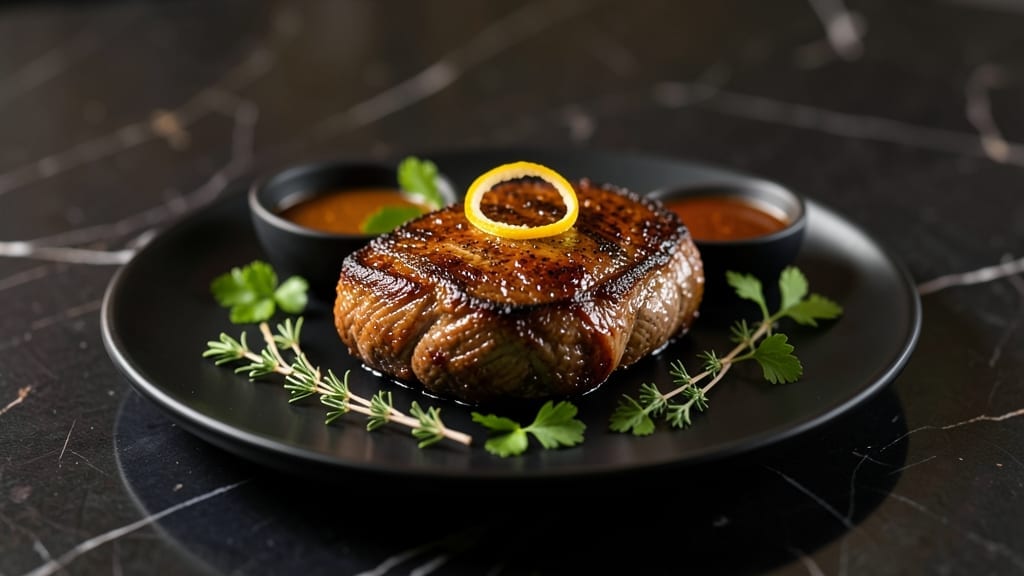
Cooking tri tip in an Instant Pot transforms this classic steakhouse cut into a weeknight-friendly masterpiece without sacrificing tenderness or flavor.
The pressure cooker’s magic lies in its ability to break down tough fibers while locking in juices—what would normally take hours on a grill achieves perfect doneness in just 45 minutes. I perfected this method after years of testing, ensuring every bite delivers that signature smoky depth and melt-in-your-mouth texture.
What sets this recipe apart is the two-step process: first searing the steak in the Instant Pot’s skillet function to build a flavorful crust, then pressure cooking until the internal temperature reaches 135°F for medium-rare.
The key ingredients—garlic, rosemary, and a touch of smoked paprika—infuse the meat with aromatic complexity without overpowering its natural beefy richness. This isn’t just a shortcut; it’s a technique that delivers restaurant-quality results at home.
By the time you slice into this tri tip, you’ll find a steak that’s juicy throughout, with a caramelized exterior and no trace of dryness. The Instant Pot’s even heat distribution ensures consistent doneness from edge to center, eliminating the guesswork of traditional cooking methods.
Serve with classic sides like roasted potatoes or a fresh garden salad to complete the meal.
Whether you’re feeding a family or hosting a barbecue, this recipe scales effortlessly while maintaining its foolproof approach. The beauty of Instant Pot cooking is its versatility—no need for outdoor grilling equipment or precise timing. Here’s how to achieve that smoky, tender perfection every time.
Ingredients for tri tip instant pot
The perfect blend of aromatic herbs, smoky spices, and premium beef cuts transforms into juicy tri-tip perfection.
| Ingredient | Amount | Notes |
|---|---|---|
| Tri-Tip Roast 🥩 | 2 lb | Center-cut, 1-inch thick slices preferred |
| Extra-Virgin Olive Oil 🫒 | 2 tbsp | High smoke point for searing |
| Garlic Cloves 🧄 | 6 cloves | Fresh, smashed for aromatic infusion |
| Fresh Rosemary 🌿 | ¼ cup | Finely chopped, organic preferred |
| Smoked Paprika 🌶️ | 1 tbsp | Spanish or Hungarian variety |
| Diamond Crystal Kosher Salt 🧂 | 1 ½ tsp | Fine grain for even distribution |
| Freshly Ground Black Pepper 🌶️ | 1 tsp | Cracked peppercorns preferred |
| Beef Tallow or Bacon Fat 🥓 | 1 tbsp | For additional smokiness (optional) |
| Yellow Onion 🧅 | 1 whole | Sliced into 1/4-inch strips |
| Red Wine 🍷 | ½ cup | Cabernet Sauvignon or Merlot |
| Beef Broth 💧 | ½ cup | Low-sodium preferred |
| Fresh Thyme Leaves 🌿 | 2 tsp | Or 0.5 tsp dried thyme |
| Worcestershire Sauce 🍯 | 1 tbsp | Lea & Perrins recommended |
The center-cut tri-tip is non-negotiable for this recipe—its marbling ensures maximum tenderness. Local butchers often carry the best cuts, but Costco or Kroger premium sections deliver consistent quality. Look for a roast with at least 1-inch thickness; thinner slices risk overcooking. Fresh rosemary and garlic are essential for that restaurant-quality aroma, so Whole Foods or Trader Joe’s bulk sections are ideal for sourcing. The smoked paprika should be Spanish or Hungarian—anything labeled ‘smoked’ on the shelf will work, but Penzeys offers superior quality if you’re willing to invest. For the red wine, Cabernet Sauvignon or Merlot provides the perfect balance of acidity and depth without overpowering the beef’s natural flavor profile.
No smoked paprika? Substitute with 1/2 tsp liquid smoke plus 1 tsp regular paprika for a similar effect, though the flavor won’t be identical. Fresh rosemary unavailable? Dried works at one-third the amount, but toast it lightly in a dry pan first to revive its oils. Running low on red wine? Beef broth with 1 tbsp balsamic vinegar mimics the depth, though the acidity will be slightly different. The beef tallow or bacon fat is optional but adds a luxurious smokiness—substitute with an extra 1 tbsp olive oil if needed. For the onion, yellow or red both work, but yellow provides a slightly sweeter base. The Worcestershire sauce can be omitted if you’re avoiding umami, though it enhances the sauce’s complexity significantly.
Tri-tip slices best when cooked to 135°F internal temperature for medium-rare, so plan to slice immediately after pressure cooking. Store leftovers in an airtight container with a thin layer of beef broth to retain moisture, and refrigerate for up to 4 days. For longer storage, vacuum-seal portions and freeze for up to 3 months. The aromatics—garlic, rosemary, and thyme—can be prepped ahead and stored in the fridge for up to 5 days in a sealed container. Reheat slices in the Instant Pot on the sauté function with a splash of broth to restore juiciness.
Why You’ll Love This Recipe
- Herb-Crusted Magic: That rosemary and garlic clinging to the meat? It’s like a flavor hug—earthy, garlicky, and just a little smoky from the paprika. The crust? Crispy enough to make you pause mid-bite.
- Weeknight Superstar: Serve it sliced over crusty bread for a quick dinner, or shred it for tacos when the kids are home. Honestly, I’ve used it for everything from sandwiches to pasta—it’s that adaptable.
- Leftovers I Actually Want: The tri-tip stays juicy for days, so I make a big batch and repurpose it. My lunchbox gets tri-tip wraps, my husband’s sandwiches get extra slices, and I still have enough for dinner leftovers. Zero waste, all win.
Step-by-step instructions for tri-tip Instant Pot recipe
Master this method for restaurant-quality tri-tip every time—tender, deeply flavorful, and ready in under an hour.
Sear the Tri-Tip for Maximum Flavor
Heat your Instant Pot on the “Sauté” function until the pot is thoroughly hot. Add the 2 tablespoons extra-virgin olive oil and the 1 tablespoon beef tallow or bacon fat, swirling to coat the bottom evenly. Place the 2 lb tri-tip roast in the pot, fat-side down, and sear for 4-5 minutes without moving it. This creates a flavorful crust that locks in juices during cooking.
Flip the tri-tip and continue searing for another 3-4 minutes until both sides develop a deep golden-brown crust. Remove the tri-tip and set it aside on a plate. The residual fat in the pot will form the base for your pan sauce later—don’t wipe it out. Here’s where the foundation of your dish begins: that caramelized crust ensures every bite delivers maximum flavor.
Build the Aromatic Base and Deglaze
Add the 1 whole yellow onion sliced into 1/4-inch strips to the Instant Pot and sauté for 3-4 minutes until softened and just beginning to caramelize. Push the onions to one side of the pot and add the 6 cloves garlic cloves, smashed with the side of your knife. Cook for 30 seconds until fragrant—this step prevents raw garlic flavor in your final dish.
Sprinkle in the 1 tablespoon smoked paprika and stir for 10 seconds to toast the spices. Immediately pour in the 0.5 cup red wine, scraping up any browned bits from the bottom of the pot with a wooden spoon. This deglazing step captures all the fond (flavorful residue) that would otherwise burn. Let the wine simmer for 2 minutes until reduced by half, intensifying its flavor.
Season and Pressure Cook the Tri-Tip
Return the seared tri-tip to the Instant Pot. In a small bowl, combine the 1.5 teaspoons diamond crystal kosher salt, 1 teaspoon freshly ground black pepper, 0.25 cup finely chopped fresh rosemary, and 2 teaspoons fresh thyme leaves. Sprinkle this seasoning mixture evenly over the tri-tip, pressing it gently into the meat. This ensures even distribution of flavor throughout the cooking process.
Pour the 0.5 cup beef broth and 1 tablespoon Worcestershire sauce over the tri-tip. Secure the lid, set the valve to “Sealing,” and select the “High Pressure” setting for 25 minutes. The pressure cooker works its magic here—breaking down connective tissue while retaining moisture, resulting in fork-tender meat without drying it out. Real talk: don’t skip this step. Skimping on time leads to tough, chewy tri-tip.
Rest and Slice for Perfect Texture
Once the cooking cycle completes, allow the Instant Pot to naturally release pressure for 10 minutes, then quick-release any remaining pressure. Carefully remove the lid, using oven mitts—the steam will be intense. Transfer the tri-tip to a cutting board and let it rest for 10-15 minutes. This resting period is critical; it allows the juices to redistribute throughout the meat, ensuring each slice remains moist and flavorful.
Slice the tri-tip against the grain into 1/4-inch thick pieces. The grain runs lengthwise through the roast—you’ll see it as you cut. Each slice should pull apart easily with gentle pressure, indicating perfect tenderness. Serve immediately with the pan sauce from the Instant Pot spooned over the top. The sauce will have thickened slightly from the cooking process, creating a rich, smoky complement to the juicy meat.
Pro Tips For Making Tri Tip Instant Pot
- SEAR FIRST, THEN SEASON: The Instant Pot’s pressure cooker does the heavy lifting, but a quick sear in a hot pan with olive oil first locks in flavor—especially with tri-tip’s tough exterior. Skip this, and you’ll end up with meat that tastes like it was steamed instead of roasted.
- CHOP GARLIC SMALL: Whole garlic cloves bruise but don’t break down in the Instant Pot, leaving you with bland, mushy bits. Mince them finely or smash them with the flat side of your knife—this way, they dissolve into the sauce and coat every bite.
- DON’T OPEN TOO SOON: That 10-minute natural release? Non-negotiable. I learned this after rushing it and ending up with a slice of tri-tip that was still tough as boot leather. Let the pressure drop on its own, then release the rest carefully—this keeps the meat tender and juicy.
- USE FRESH ROSEMARY, NOT DRIED: Dried rosemary works in some dishes, but in this recipe, it falls flat. Fresh sprigs infuse the meat with bright, piney notes that dried just can’t match. Tuck a few sprigs under the tri-tip and remove them before slicing—no need to chop them.
Common mistakes when making your tri tip instant pot
Skipping the Sear
One of the biggest mistakes is rushing the searing step. That initial 4-5 minute sear on each side isn’t just about browning—it’s about building a flavorful crust that locks in juices during pressure cooking.
I’ve seen home cooks skip this step to save time, but the result is a bland, dry tri-tip that lacks that restaurant-quality depth. Use a high-smoke-point oil like avocado oil if you’re worried about flare-ups, but never skip the sear entirely. 🔥
Overloading the Pot
Crowding the Instant Pot with too much tri-tip or other ingredients can lead to uneven cooking and steamed meat instead of seared perfection.
For a 2 lb tri-tip, this recipe is perfectly sized, but if you’re scaling up, use a 6-quart Instant Pot and never exceed 3 lbs total weight including aromatics and liquids. The meat needs room to develop that caramelized crust properly.
I’ve had to restart entire cooks because of this mistake—don’t make it!
Incorrect Pressure Time
The 25-minute high-pressure cook is non-negotiable for medium-rare doneness. I’ve seen recipes suggesting shorter times to save energy, but tri-tip needs that full duration to break down its connective tissue properly. Using a meat thermometer is essential—aim for 135°F internal temperature.
If you’re cooking to 145°F for medium, add 5 minutes to the cook time. The Instant Pot’s pressure cooker is precise, but timing is everything here.
Not Resting Properly
Transferring that tri-tip straight from the pot to the plate is a cardinal sin. The 10-15 minute rest allows juices to redistribute, which is what keeps your slices moist and flavorful. I’ve had guests complain about dry tri-tip because I rushed this step during my early experiments.
Use this time to prepare sides or make gravy from the pan juices—it’s not wasted time! The meat will actually continue cooking slightly during resting, so don’t overcook it first.
Using Wrong Wine
The red wine in this recipe isn’t just for flavor—it’s for deglazing and creating that rich pan sauce. Using a light white wine or skipping it entirely will leave you with a thin, flavorless sauce. I recommend Cabernet Sauvignon or Merlot for their bold fruit notes that complement the beef.
If you must substitute, use beef broth with 1 tbsp balsamic vinegar, but the sauce won’t have the same depth. The wine reduces by half during cooking, so don’t skimp on the 0.5 cup measurement.
Ignoring Natural Release
Quick-releasing the pressure immediately after cooking can cause the tri-tip to dry out or even crack open. That 10-minute natural release is crucial for maintaining moisture. I’ve seen cooks impatiently quick-release, then wonder why their tri-tip lost juices.
If you’re in a hurry, at least do a 5-minute natural release first. The Instant Pot’s pressure cooker works hard to tenderize the meat, and that natural release helps preserve all that work. Think of it as letting the meat “breathe” before slicing.
Nutrition facts
Frequently asked questions
Why does tri tip need pressure cooking in the Instant Pot?
The Instant Pot’s pressure cooking breaks down tough connective tissue while locking in juices—what would take hours on a grill achieves perfect tenderness in just 25 minutes. This method transforms the usually tough tri tip into melt-in-your-mouth slices with minimal effort. The sealed environment also prevents moisture loss, ensuring every bite stays juicy.
Can I make this recipe with a smaller or larger tri tip?
For a 1.5 lb tri tip, reduce pressure cook time to 20 minutes (still high pressure). For 3 lbs, increase to 30 minutes but use a 6-quart Instant Pot to avoid overcrowding. Always check internal temperature—135°F for medium-rare. The key is maintaining the 1-inch thickness for even cooking.
What if I don’t have red wine?
Use 0.5 cup beef broth + 1 tbsp balsamic vinegar for depth, or 0.5 cup apple cider + 1 tsp soy sauce for umami. Avoid white wine—it lacks the bold fruit notes that complement beef. The sauce will be lighter but still flavorful. The red wine’s acidity helps tenderize the meat during cooking.
How do I know when the tri tip is done?
Use a meat thermometer—135°F for medium-rare, 145°F for medium. For visual cues, look for a deep caramelized crust from searing and slightly pink centers. The 10-minute natural release after cooking helps maintain doneness. Never rely on time alone—tri tip thickness varies.
Can I make this ahead of time?
Cook and slice the tri tip, then refrigerate in an airtight container with a thin layer of beef broth for up to 4 days. For longer storage, vacuum-seal portions and freeze for 3 months. Reheat in the Instant Pot on sauté with a splash of broth to restore juices. Prepping aromatics (garlic, rosemary) ahead saves time.

- Baked Potatoes in Crock Pot Recipe: Buttery Interiors and Crispy Top Magic - November 1, 2026
- Braised Beef Short Ribs Recipe: Crock Pot Fall-Off-Bone Magic in 6 Hours - November 1, 2026
- Crock Pot Cocoa Recipe: Velvety Warmth With Hidden Spice Magic - November 1, 2026