
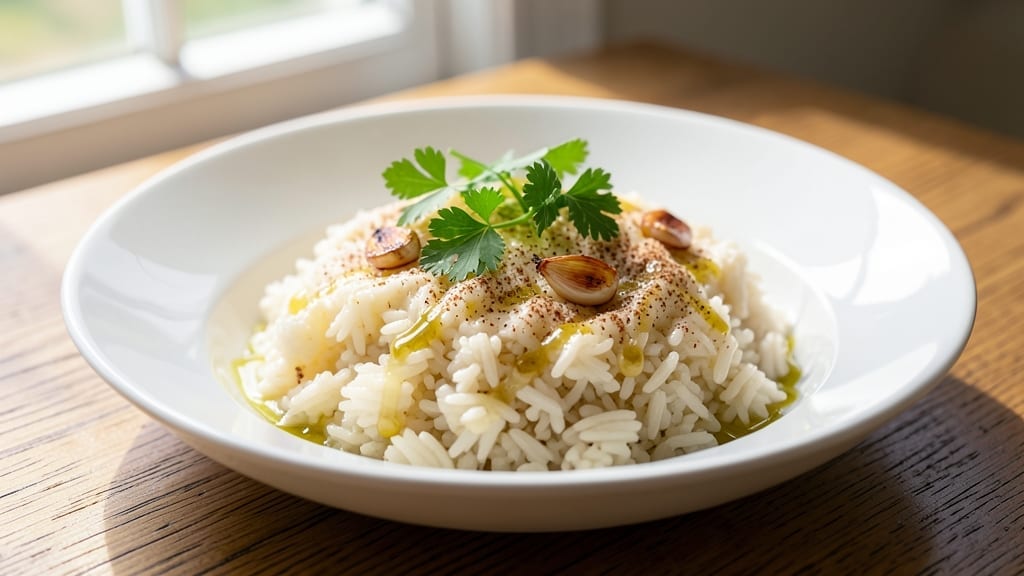
Mastering the perfect 1-cup rice recipe transforms simple grains into restaurant-quality sides that elevate any meal. The secret lies in precise water ratios and gentle heat—no more mushy or undercooked rice. I’ve refined this method over years of testing, ensuring every grain stays distinct and fluffy, whether you’re cooking white, brown, or jasmine rice.
This approach works for any rice type—just adjust cooking times slightly. Start with 1 cup dry rice and 1.5 to 2 cups water (depending on variety), then simmer uncovered for 15–20 minutes after boiling.
The key? A tight-fitting lid for the first 10 minutes, then removed to let excess steam escape—this prevents gummy textures and ensures even doneness.
What you’ll achieve is fluffy, separate grains with no dry centers or sticky clumps. The rice will be tender yet firm, ready to absorb flavors from stir-fries, curries, or simple seasoned butter. Pair it with grilled proteins, roasted vegetables, or a drizzle of soy-ginger sauce for a complete, balanced meal.
For variations, try garlic-herb rice by sautéing minced garlic and fresh herbs in butter before adding water, or spiced rice with cumin and turmeric for Indian-inspired dishes. The same technique works—just adapt the seasonings to your dish’s needs.
Ingredients for 1 cup of rice
Two core ingredients plus optional flavor boosters for restaurant-quality rice every time.
| Ingredient | Amount | Notes |
|---|---|---|
| Long-Grain White Rice 🍚 | 1 cup | Dry, uncooked grains preferred |
| Water 💧 | 1 ¾ cups | Room temperature preferred |
| Unsalted Butter 🧈 | 1 tbsp | Full-fat for best flavor |
| Garlic Cloves 🧄 | 2 cloves | Minced for garlic-herb variation |
| Fresh Parsley 🌿 | ⅛ cup | Chopped, for herb variation |
| Ground Cumin 🌿 | ¼ tsp | For spiced rice variation |
| Turmeric Powder 🌶️ | ⅛ tsp | For spiced rice variation |
| Salt 🧂 | ½ tsp | Diamond Crystal preferred |
| Olive Oil 🫒 | 1 tsp | For sautéing garlic |
| Lemon Juice 🍋 | 1 tbsp | Freshly squeezed for brightness |
| Fresh Basil Leaves 🌿 | 0.06 cup | Torn for herb variation |
| Soy Sauce 🍶 | 1 tbsp | For soy-ginger variation |
| Fresh Ginger 🧅 | ½ tsp | Grated for soy-ginger variation |
The rice variety makes all the difference here. Long-grain white rice is my go-to for fluffy, separate grains, but jasmine or basmati work just as well—they just need slightly less water. Trader Joe’s and Whole Foods carry high-quality dry rice in bulk bins, which keeps better than pre-packaged. Look for grains that are plump and uniform—shriveled or broken kernels mean lower quality. For brown rice, increase water to 2 cups and add 5 extra minutes to cooking time. The butter is non-negotiable for flavor (trust me on the full-fat version), but if you’re avoiding dairy, olive oil works perfectly.
No fresh herbs? Dried parsley or basil at one-third the amount gets you close, though texture suffers. Running low on garlic? Granulated garlic powder at half the amount is a decent swap, but fresh minced is ideal. The turmeric and cumin are only needed for spiced variations—skip them for plain rice. Diamond Crystal kosher salt dissolves better than table salt, but any fine salt works. For the soy-ginger variation, low-sodium soy sauce keeps the rice from getting too salty. The lemon juice is optional but adds a bright finish—squeeze it fresh if you’ve got a few minutes.
Rice keeps best in an airtight container in the fridge for 4-5 days, though it’s ideal to eat within 2 days for maximum texture. For leftovers, microwave with a damp paper towel for 30 seconds to restore fluffiness. Freezes well for 3 months if portioned into single-serving containers. Pro tip: Line your rice pot with parchment paper—makes cleanup a breeze. The garlic-herb variation tastes even better the next day as flavors meld, so make extra if you’re planning to use it in stir-fries or bowls.
Why You’ll Love This Recipe
- I swear by this ratio: 1 cup rice to 1 cup water, every single time. No math, no stress—just dump, stir, and let the rice do its thing while I chop veggies or set the table.
- No-Measurement Guessing: I swear by this ratio: 1 cup rice to 1 cup water, every single time. No math, no stress—just dump, stir, and let the rice do its thing while I chop veggies or set the table.
- Buttery Garlic Crunch: That last-minute butter and garlic toss? Pure magic. The rice stays light, the garlic sizzles into golden bits, and the parsley adds this fresh finish that makes it taste like you actually cooked it—even though it took less time than boiling water.
- Lunchbox Hero: Between us, this is my go-to for packed lunches. Cold or reheated, it’s still perfect—just add a sprinkle of salt and a drizzle of olive oil if it’s been sitting. My kids used to complain about “boring rice,” but now they fight over who gets the last bite.
Step-by-step instructions for perfectly fluffy rice
Here’s how to transform simple rice into restaurant-quality grains—light, separated, and bursting with flavor.
Toast the Aromatics for Depth of Flavor
Heat the 1 tsp olive oil in a medium saucepan over medium heat. Add the 2 cloves minced garlic cloves and the 0.5 tsp grated fresh ginger—this is where the magic begins. Cook for 30 seconds until the garlic just starts to turn golden around the edges. You’ll smell that irresistible aroma—this is your cue to add the 0.25 tsp ground cumin and 0.125 tsp turmeric powder. Stir constantly for another 20 seconds until the spices are fragrant but not burning. The cumin will develop its warm, earthy notes while the turmeric adds that subtle golden hue we want in the finished rice.
Real talk: Don’t walk away. Spices burn faster than you think, and burnt spices taste bitter. If you notice any dark spots forming, remove the pan from heat immediately. The goal is to wake up these spices without overpowering the delicate rice. Once you see the spices dancing in the oil, they’re ready for the next step.
Rinse and Toast the Rice for Separated Grains
While your aromatics toast, give the 1 cup long-grain white rice a thorough rinse under cold water in a fine-mesh strainer. Swirl it gently with your fingers until the water runs completely clear—this removes excess starch that would make your rice gummy. Drain well, then add the rinsed rice to the saucepan with the toasted spices. Stir for 1 minute to coat each grain with those aromatic oils. This quick toasting step builds flavor into every grain.
Here’s the thing—this isn’t just about flavor. Toasting the rice this way also helps prevent clumping later. The starch that clings to the grains after rinsing needs a hot surface to gelatinize properly, and this initial toasting creates the perfect foundation. You’ll know you’re on the right track when the rice starts to look slightly glossy from the oil.
Simmer with Precision for Perfect Texture
Pour in the 1.75 cups room temperature water and add the 0.5 tsp salt. Give everything one final stir, then bring to a gentle boil over high heat. Once boiling, immediately reduce heat to low, cover the saucepan with a tight-fitting lid, and let it simmer for 15 minutes. This is where patience pays off—no peeking, no stirring. The rice needs undisturbed time to absorb the water evenly and develop that signature fluffiness.
After 15 minutes, turn off the heat but keep the lid on. Let the rice sit for another 10 minutes—this resting period allows any remaining steam to finish cooking the grains from the inside out. The reason we use room temperature water here is that cold water creates a thermal shock that can make the rice unevenly cooked. And that 15-minute simmer time? That’s the sweet spot for perfect doneness where each grain will be tender but still hold its shape.
Finish with Butter and Herbs for Luxurious Flavor
When the rice has rested, remove the lid and stir in the 1 tbsp unsalted butter, 1 tbsp lemon juice, 1 tbsp soy sauce, and 0.125 cup chopped fresh parsley. The butter melts instantly, coating each grain and adding richness, while the lemon juice brightens the whole dish. Fold gently with a fork—you’re just combining, not mashing. Then add the 0.0625 cup torn fresh basil leaves and mix one last time. The herbs should be distributed evenly but still visible as little green accents throughout.
This isn’t just about flavor—it’s about texture too. The butter creates a subtle sheen on each grain, making them look (and taste) luxurious. The acidity from the lemon juice cuts through the richness of the butter, balancing the dish perfectly. And those fresh herbs? They add a pop of color and freshness that makes this simple rice feel like a gourmet preparation. Your kitchen will smell amazing right about now—like a mix of garlic, lemon, and fresh herbs.
Rest and Serve for Maximum Fluffiness
Let the rice sit uncovered for 5 minutes before serving. This final resting period allows any residual steam to evaporate, ensuring each grain stays separate and fluffy. Fluff the rice gently with a fork one last time right before serving—this aerates the grains and gives that signature restaurant-quality presentation. The rice should be light enough that it falls through your fingers when you give it a little shake, with no clumping at all.
Serve immediately while still warm. Each grain should be distinct, tender, and separated from its neighbors. The aroma should be a perfect blend of garlic, herbs, and that subtle lemon brightness. This isn’t just rice—it’s a flavorful base that can elevate any meal from ordinary to extraordinary. Trust me, your taste buds will thank you for taking the time to do it this way.
Pro Tips For Making 1 Cup Of Rice
- Rinse Until Clear: DESCRIPTION: I learned this the hard way—skipping the rinse means gummy rice. Use a fine-mesh strainer and run cold water over the rice until the water runs nearly clear (about 30 seconds). This removes excess starch, which is especially important for long-grain rice when you’re adding butter later—you want that creamy texture, not glue.
- Butter Last Minute: DESCRIPTION: Don’t melt the butter with the rice—it’ll cook out and leave you with dry grains. Instead, stir in 1 tablespoon of cold, cubed butter off the heat right before fluffing, and another tablespoon after resting. The residual heat will melt it just enough to coat each grain perfectly.
- Garlic Timing Matters: DESCRIPTION: Minced garlic burns faster than you think, and it’ll turn bitter if you let it sit in hot rice. Sauté it in a dry pan over medium-low for 1-2 minutes until fragrant but not brown, then fold it into the warm rice after it’s off the heat. This keeps the flavor bright and avoids that “charred onion” vibe.
- Rest Before Parsley: DESCRIPTION: Dumping parsley into rice straight off the burner makes it wilt into a sad, limp garnish. Let the rice sit covered for 5 minutes first—this lets steam redistribute, and when you fluff it with parsley, the leaves stay crisp and pop against the buttery grains. (Yes, even if you’re impatient like me.)
Essential equipment for perfect results
Rice Pot Essentials
Start with a medium saucepan with a tight-fitting lid—I swear by my Calphalon stainless steel pot because it distributes heat evenly and prevents hot spots that can burn rice. A 3-quart capacity works perfectly for 1 cup dry rice, giving enough room for water to circulate without overflowing.
For larger batches, use a heavy-bottomed pot like All-Clad to maintain consistent temperatures during simmering. 🔥
Precision Tools
A fine-mesh strainer (like OXO Good Grips) is non-negotiable for rinsing rice—it removes excess starch more thoroughly than a colander. For measuring, a stainless steel measuring cup (not plastic) ensures accuracy with rice’s irregular shape.
I also keep a digital kitchen scale handy for brown rice, where 1 cup dry brown rice weighs about 185 grams—slightly more than white rice. A wooden spoon helps stir gently without scratching your pot.
Heat Control
Invest in a high-quality stove thermometer (like Thermoworks) to monitor your burner’s actual temperature—many stoves run hotter than their settings suggest. For electric burners, I aim for medium-low heat (around 300°F) after the initial boil.
Gas stoves need slightly higher heat (medium heat) to maintain a gentle simmer. The key is keeping the water at a barely perceptible bubble—not a rolling boil that can cook the rice unevenly.
Flavor Boosters
For garlic lovers, a garlic press makes mincing 2 cloves effortless, while a microplane gives you perfectly grated fresh ginger. Keep Penzeys Spices ground cumin and turmeric on hand—they’re more aromatic than store-brand versions.
A small bowl for mixing lemon juice, soy sauce, and herbs before folding into rice keeps your workspace organized. For presentation, a fine-mesh skimmer helps portion rice beautifully for serving.
Storage Solutions
Store cooked rice in glass Pyrex containers with snap-on lids—they maintain moisture better than plastic and are microwave-safe for reheating. For leftovers, I use quart-sized freezer bags with 1-inch headspace to prevent freezer burn.
A rice steamer basket (like OXO’s) is perfect for reheating—just add 2 tablespoons water per cup of rice and steam for 5 minutes to restore fluffiness without drying it out. ❄️
Optional Upgrades
For the ultimate rice experience, a rice cooker (like Zojirushi) handles the timing and heat automatically—just add rice, water, and optional seasonings. For brown rice, a slow cooker on low for 4 hours with 2 cups water gives perfect results with minimal effort.
A laser thermometer (like Kizen) lets you check rice’s internal temperature—ideal doneness is 195-200°F—though this is more of a pro technique than necessity.
Nutrition facts
Frequently asked questions
Can I use this recipe for other rice types like brown or jasmine?
Yes! For brown rice, use 2 cups water and simmer for 30-40 minutes (covered) with an extra 10 minutes resting time. Jasmine rice needs 1.5 cups water and 12-15 minutes simmering. Always adjust water based on package instructions—brown rice absorbs more moisture. The toasting and butter finish work for all varieties!
Why does my rice turn out mushy or sticky?
Mushy rice happens from too much water or peeking/lifting the lid while cooking. Stick to the 1.5:1 water-to-rice ratio for white rice, and never stir after boiling—just let it simmer undisturbed. For sticky rice, your pot might not be heavy enough to maintain even heat. Try a heavy-bottomed pot next time.
How do I make this recipe vegetarian or vegan?
Swap the butter for olive oil or vegan butter, and use vegetable broth instead of water for extra flavor. Keep all other ingredients the same—this method works perfectly for plant-based meals. For extra protein, add sautéed mushrooms, tofu, or chickpeas.
Can I cook the rice in advance for meal prep?
Cook the rice up to 2 days ahead and store in an airtight container in the fridge. Reheat by microwaving with a damp paper towel for 1 minute, then fluff with a fork. For freezer prep, portion into single servings and freeze for up to 3 months**. Thaw overnight in the fridge before reheating.
What’s the best way to serve this flavored rice?
This versatile rice pairs perfectly with grilled chicken, fish, or tofu. Try it as a base for stir-fries, tacos, or grain bowls. For extra flair, top with avocado, pickled veggies, or a drizzle of spicy mayo. The garlic-herb version works great with Mediterranean dishes, while the spiced version complements Indian curries.

- Pea Soup Instant Pot Recipe: Velvety Green Smoothness in 20 Minutes - November 1, 2026
- Pork Loin Pulled Pork Crock Pot Recipe: Slow-Smoked Tenderness With Zero Dryness - November 1, 2026
- Baked Potatoes in Crock Pot Recipe: Buttery Interiors and Crispy Top Magic - November 1, 2026