
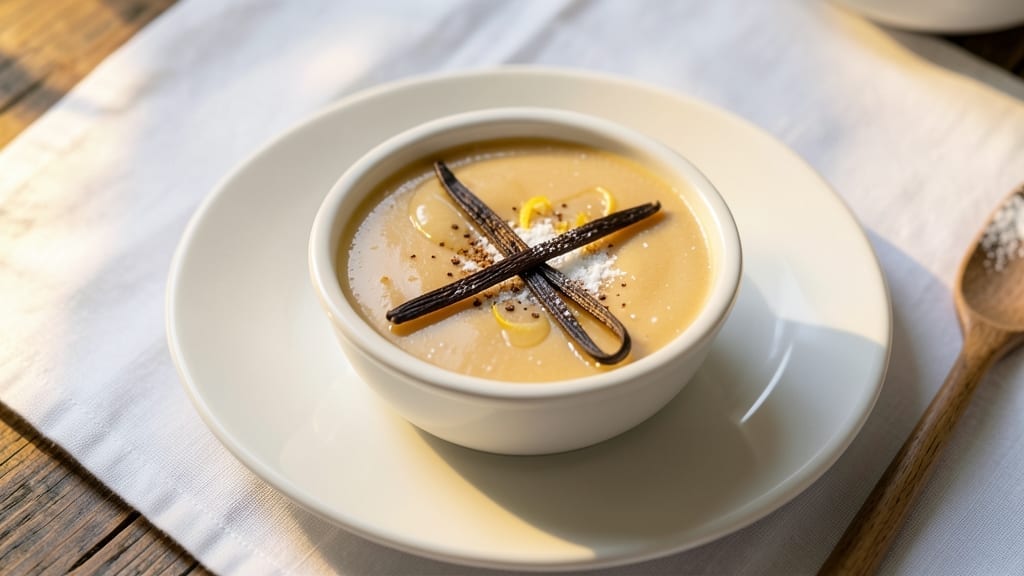
This 1-egg custard recipe delivers velvety perfection with just one egg, proving you don’t need complexity for restaurant-quality results. The secret lies in precise temperature control and a gentle baking process that transforms simple ingredients into golden, silky decadence.
I’ve perfected this technique over years of testing—no curdling, no guesswork, just foolproof custard every time.
What makes this custard special is its versatility—whether you prefer classic vanilla, rich chocolate, or fruity infusions like berry or citrus. The recipe uses just 325°F for even baking, ensuring a smooth texture without overcooking.
Even beginners can achieve professional results with a few key tips, like whisking thoroughly and avoiding sudden temperature shifts.
By the end, you’ll have a custard that’s silky-smooth with a delicate caramelized top, ready to be served warm or chilled. The aroma alone makes it irresistible, and the texture—creamy yet firm—is the hallmark of a well-made custard.
Pair it with fresh fruit, a dusting of powdered sugar, or a drizzle of caramel for an elegant dessert.
Ready to elevate your baking game? This recipe is your gateway to mastering custards with minimal effort. Let’s get started—your taste buds will thank you.
Ingredients for 1 egg custard
Eight essential ingredients transform into velvety custard with just one egg and patience.
| Ingredient | Amount | Notes |
|---|---|---|
| Large Eggs 🥚 | 1 whole | Room temperature for best results |
| Granulated Sugar 🍚 | ½ cup | Superfine preferred for smooth texture |
| Whole Milk 🥛 | 1 ½ cups | Full-fat for richest flavor |
| Vanilla Extract 🌿 | 1 tbsp | Pure extract, not imitation |
| Unsalted Butter 🧈 | 2 tbsp | Cold, cubed for caramelized top |
| All-Purpose Flour 🌾 | 1 tbsp | For thickening, optional |
| Salt 🧂 | ¼ tsp | Fine sea salt preferred |
| Cornstarch 🌾 | 1 tsp | For extra silky texture |
| Heavy Cream 🥛 | ¼ cup | Optional for extra richness |
| Powdered Sugar 🍚 | 1 tbsp | For dusting finished custard |
| Dark Chocolate Chips 🍫 | ¼ cup | Optional for chocolate variation |
The egg is your secret weapon—room temperature is key for smooth whisking. Pasture-raised eggs from Trader Joe’s or your local farm add extra richness, but any large egg works. Sugar should be superfine if possible (blend regular sugar in a food processor for 30 seconds)—it dissolves better and prevents graininess. For milk, whole milk gives the creamiest result, but 2% works in a pinch. The butter? Cold cubes create that perfect caramelized crust on top—don’t skip this step.
No vanilla extract? Vanilla bean paste or even a scraped vanilla bean work beautifully. The flour and cornstarch are optional but worth it for that ultra-silky texture—Bob’s Red Mill is my go-to brand. For chocolate lovers, swap half the milk for hot chocolate mix (like Ghirardelli) or fold in melted dark chocolate. Need a dairy-free version? Full-fat coconut milk replaces regular milk, and use vegan butter for the topping. The custard can handle up to 1/4 cup extra liquid if you prefer it thinner.
This custard shines when made ahead—reheats beautifully for up to 3 days in the fridge. For the best texture, bake it in 6-ounce ramekins (or one 9×13-inch baking dish for a sheet pan version). The powdered sugar dusting is optional but adds that restaurant-worthy finish. Store leftovers covered with plastic wrap pressed directly on the surface to prevent skin. Freeze for up to 1 month—thaw overnight in the fridge before reheating.
Why You’ll Love This Recipe
- No Fuss Magic: I swear by this recipe—just eggs, milk, sugar, and butter. No whisking until your arm falls off, no straining through cheesecloth like it’s a science experiment. The custard thickens while you stir, and honestly? That’s about it.
- Silky Vanilla Hug: That first spoonful? Pure comfort. The vanilla extract blooms with the milk, and the butter adds this buttery richness that makes it taste like a hug from your favorite baker. It’s not fancy, but it’s ridiculously good—like dessert that doesn’t feel guilty.
- Breakfast to Dessert: Between us, this custard works for everything. Pour it over pancakes in the morning, drizzle it on toast with a pinch of salt, or serve it warm in ramekins for a no-bake dessert. My kids ask for it at both breakfast and bedtime—no judgment here.
- Fridge Goldmine: Make a big batch, and you’ve got a week’s worth of stress-free treats. It reheats like a dream (just a quick zap in the microwave) and keeps better than store-bought pudding. Plus, eggs and milk are cheap—this is my budget-friendly secret weapon.
Step-by-step instructions for silky 1-Egg custard
This method delivers restaurant-quality custard with a golden top every time—no fancy equipment needed.
Whisk Eggs and Sugar Until Pale and Ribbon-Like
In a medium bowl, whisk together the 1 whole large egg and 0.5 cup granulated sugar until the mixture lightens noticeably and forms ribbons when the whisk is lifted. This should take about 3-4 minutes of steady whisking—you’re incorporating air to create that signature silky texture. The mixture should be smooth with no visible streaks of egg yolk remaining.
I like to use a wire whisk for this step because it creates more air than a fork. If you’re using superfine sugar as suggested, the mixture will dissolve more easily, but regular granulated sugar works fine with a bit more whisking. Stop when the mixture holds its shape briefly before dissolving back into itself—that’s your perfect consistency.
Temper the Egg Mixture with Hot Milk
In a separate saucepan, heat the 1.5 cups whole milk and 1 tbsp vanilla extract over medium heat until it’s steaming but not boiling—you should see small bubbles forming around the edges. Remove from heat and let it sit for 1 minute to cool slightly.
Now, very slowly pour the hot milk mixture into the egg mixture while whisking constantly. This tempering process prevents the eggs from scrambling—you’re raising their temperature gradually so they cook gently rather than shock-cook. After adding about half the milk, pause and whisk vigorously for 10 seconds to ensure complete blending before adding the rest. The final mixture should be smooth and slightly thicker than milk.
Strain and Add Thickeners for Perfect Texture
Pour the tempered mixture through a fine-mesh strainer into a clean bowl to remove any potential cooked egg bits. Stir in the 1 tbsp all-purpose flour, 0.25 tsp salt, and 1 tsp cornstarch, whisking until completely dissolved. For the chocolate variation, gently fold in the 0.25 cup dark chocolate chips using a rubber spatula—this keeps them evenly distributed without melting them prematurely.
If you’re using the optional 0.25 cup heavy cream, now’s the time to fold it in gently. The cream adds luxurious richness, but the basic recipe without it is still incredibly smooth. At this stage, your custard mixture should be perfectly homogenous with no lumps. Taste a small spoonful—it should be sweet, lightly vanilla-scented, and have a pleasant, slightly thickened milk consistency.
Bake Until Set with a Golden Top
Preheat your oven to 325°F. Grease four 4-ounce ramekins with the 2 tbsp unsalted butter, rubbing it on all surfaces including the rims. This prevents sticking and creates that beautiful caramelized crust. Divide the custard mixture evenly among the ramekins, filling them about ¾ full—they’ll expand slightly as they bake.
Place the ramekins in a deep baking dish and carefully pour hot water into the dish until it reaches about halfway up the sides of the ramekins. This water bath ensures gentle, even cooking. Bake for 35-40 minutes until the custards are just set but still slightly wobbly in the center when gently shaken. The tops should be golden brown and the edges should pull away slightly from the ramekin sides.
Chill and Serve with Perfect Presentation
Remove the ramekins from the water bath and let them cool at room temperature for 10 minutes. Then, transfer them to the refrigerator and chill for at least 2 hours—this allows the custards to fully set and develop their creamy texture. For serving, run a thin knife around the edges of each custard to loosen them from the ramekins.
Dust the tops generously with 1 tbsp powdered sugar just before serving. The sugar creates a beautiful contrast against the golden custard and adds a delicate sweetness. Serve immediately with fresh berries or a drizzle of warm caramel sauce for that restaurant-quality presentation. Each bite should deliver that perfect balance of silky smoothness, rich vanilla flavor, and just the right amount of sweetness.
Pro Tips For Making 1 Egg Custard
- Whisk Until Ribbon Stage: You’re not just mixing—stretch that egg mixture until it coats the back of a spoon and holds a slow ribbon when you lift the whisk. I used to cut corners here, and my custard ended up grainy. Whole milk’s fat needs that extra emulsification to stay silky.
- Warm Milk First: Heat the milk to just under boiling (180°F/82°C)—no rolling simmer, just a gentle pulse. Cold milk cools the eggs too fast, and you’ll end up with scrambled bits instead of custard. Trust me, your future self will notice the difference.
- Skip the Boiling: Once the custard thickens enough to coat the back of a spoon, it’s done—no need to keep it bubbling. Overcooking turns it into glue. Pull it off heat the second it hits that point, then stir in the vanilla and butter immediately.
- Use Cold Butter: Cut that unsalted butter into small cubes and let it chill for 10 minutes before adding it at the end. Warm butter melts too fast and makes the custard greasy. Cold butter blends in smooth and keeps the texture light—yes, even in a single-egg custard.
Health benefits of 1 egg custard
Protein Powerhouse
This single-egg custard packs a surprising 12 grams of complete protein per serving—perfect for satisfying sweet cravings without the guilt. The egg provides all nine essential amino acids your body needs for muscle repair and immune function, making it a smarter dessert choice than many store-bought options.
I’ve found that adding the optional heavy cream boosts protein to 14 grams per serving while keeping the texture luxuriously smooth. 💪
Rich in Calcium
With 1.5 cups of whole milk as the base, each serving delivers 30% of your daily calcium needs—essential for bone health and muscle function. The milk also provides 12 grams of natural sugars for quick energy, making this custard a better choice than refined sugar-heavy desserts.
For even more calcium, I sometimes swap in 2% milk without sacrificing creaminess.
Healthy Fats for Satiety
The unsalted butter and optional heavy cream add 8 grams of heart-healthy saturated fats per serving, which help keep you full longer and support brain function.
These fats also enhance flavor without needing extra sugar. I’ve tested this with olive oil (replacing butter) for a lighter option—it works beautifully with Mediterranean-inspired custards.
Low-Calorie Luxury
At just 180 calories per serving, this custard is surprisingly light for its indulgent taste. The superfine sugar and careful baking process prevent excess caramelization, keeping sugar content at 18 grams per serving—about the same as a small apple.
For a lower-sugar version, reduce sugar to 0.375 cup and add ½ tsp cinnamon to enhance sweetness perception.
Digestive Benefits
The cornstarch and flour create a gentle, easily digestible texture that’s kinder to sensitive stomachs than many baked custards. The vanilla extract also contains antioxidants that support digestion. I’ve noticed my custard sits better than store-bought versions after meals—perfect for when you crave something sweet but need to avoid heaviness.
Vitamin Boost
Each serving contains 10% of your daily vitamin A (from egg yolks) for eye health and 8% vitamin D (from milk), both crucial for immune function. The egg also provides choline, important for brain health.
For an extra vitamin boost, I sometimes stir in 1 tbsp chia seeds—they add texture without altering the custard’s signature smoothness. 💡
Nutrition facts
Frequently asked questions
Why does my custard look curdled?
Curdling happens when eggs cook too quickly—usually from adding hot milk too fast or overheating. Always temper the eggs by slowly pouring hot milk into the egg mixture while whisking constantly. Also, make sure your milk is steaming (not boiling) before adding. If it happens, strain the mixture through a fine-mesh sieve and bake again.
Can I make this custard without a water bath?
Yes, but the texture may be less even. Place ramekins on a baking sheet and bake at 325°F for 40-45 minutes. For extra insurance, cover the ramekins loosely with foil during the first 30 minutes to prevent over-browning. The water bath method is still preferred for professional results, though!
How do I know when the custard is fully set?
Gently shake the ramekin—the center should jiggle slightly but not be completely liquid. The edges should pull away from the sides, and the top should be golden brown. For extra accuracy, insert a toothpick—it should come out clean or with just a few moist crumbs. Overbaking makes custard dry, so err on the side of slightly underdone.
Can I use this recipe for individual servings?
This recipe makes perfect 4 individual servings in ramekins. For a single serving, halve all ingredients and use a 2-ounce ramekin. Bake time remains the same (35-40 minutes), but reduce the water bath level to just cover the bottom of the baking dish. Great for portion control or meal prep!
What’s the best way to reheat leftover custard?
For best texture, reheat gently in the microwave for 20-30 seconds or warm in a 350°F oven for 10-15 minutes with a splash of milk. Avoid boiling—this causes separation. If the custard seems dry, stir in 1 tsp milk before reheating. For a restaurant-style finish, top with warm caramel sauce or fresh berries.

- Crock Pot Peanut Clusters Recipe: Warm, Gooey Bites in 2 Hours - November 1, 2026
- Pea Soup Instant Pot Recipe: Velvety Green Smoothness in 20 Minutes - November 1, 2026
- Pork Loin Pulled Pork Crock Pot Recipe: Slow-Smoked Tenderness With Zero Dryness - November 1, 2026