
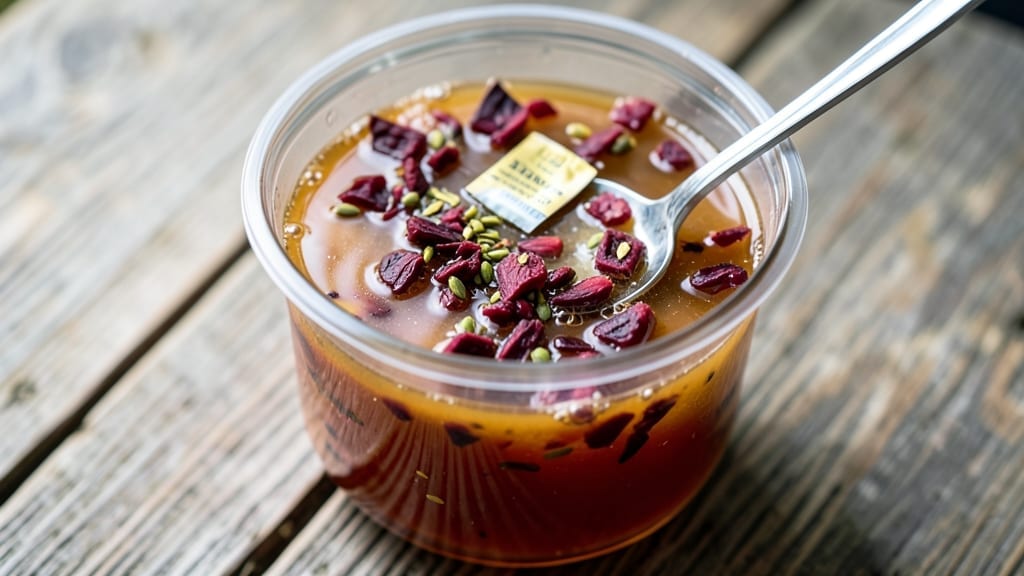
Making 1 gallon of apple mead transforms simple apples into a rich, fermented elixir that captures autumn’s essence—sweet, tangy, and complex. This recipe balances tradition with precision, using a 1:1 honey-to-water ratio and fresh apple juice for depth.
The fermentation process takes 60 days, but the reward is a beverage that rivals commercial meads in flavor and character. Safety is critical here, so we’ll cover proper yeast selection, sanitation, and aging techniques to ensure a smooth, reliable result every time.
The foundation of great mead lies in ingredient quality and preparation. You’ll start with 1 gallon of apple juice (fresh or pasteurized) and 1 gallon of honey, creating a nutrient-rich base for yeast.
Adding apple pomace (the leftover skins and cores) enhances flavor complexity, while champagne yeast ensures consistent fermentation without overpowering the apple’s natural sweetness. The key is patience—allowing the mead to ferment slowly at room temperature before cold-crashing and bottling.
By the time you bottle this mead, you’ll have a beverage with balanced sweetness, bright acidity, and subtle apple notes that develop during aging. The initial fermentation creates effervescence, while the secondary aging in bottles refines the flavors.
Store your mead in a cool, dark place for at least 6 months before drinking, letting the flavors mature into something truly exceptional.
This recipe isn’t just about making mead—it’s about mastering the process safely and predictably. We’ll walk through every step, from sanitizing equipment to monitoring fermentation progress, so you can achieve professional-quality results at home. Ready to begin?
Ingredients for 1 gallon apple mead
Gather these essential ingredients for a rich, fermented apple elixir that captures autumn’s depth.
| Ingredient | Amount | Notes |
|---|---|---|
| Raw Honey 🍯 | 12 cups | Light amber for balanced sweetness |
| Fresh Apple Juice 🍎 | 1 gallon | Unpasteurized for best flavor |
| Apple Pomace 🍏 | 2 cups | Freshly processed skins/cores |
| Champagne Yeast 🍾 | 1 package | Lalvin EC-1118 strain preferred |
| Distilled Water 💧 | 1 gallon | Filtered or spring water |
| Campden Tablets 💊 | 1 tablet | For sterilization (1/4 tsp) |
| Potassium Sorbate 🧪 | ¼ tsp | Preservative for bottling |
| Pectic Enzymes 🧬 | 1 tsp | Clarifies final product |
| Acid Blend 🍋 | 1 tsp | Citric/malic acid mix |
| Priming Sugar 🍬 | 1 cup | For carbonation (added before bottling) |
| Plastic Food-Grade Fermenter 🥫 | 1 gallon | With airlock and lid |
| Glass Swing-Top Bottles 🍷 | 8 bottles | 750ml capacity |
The honey is your flavor foundation—local, raw honey from a trusted apiary adds complexity. Michigan or Vermont sources often have excellent apple-forward profiles, but any light amber works. Apple juice should be unpasteurized for better fermentation—look for organic brands like Odwalla or local cideries. Apple pomace is the secret weapon: freshly processed from a local orchard or juice bar gives the best flavor. For yeast, Lalvin EC-1118 is my go-to for clean fermentation, but Wyeast 2345 also works well. If you can’t find champagne yeast, lager yeast is a decent backup—just expect slightly different flavor notes.
No Campden tablets? Metabisulfite powder at 1/4 tsp works the same way—just dissolve it in a little water first. Running short on pomace? Dried apple pieces steeped in warm water for 12 hours can substitute, though flavor will be milder. The acid blend is crucial for balance—if you’re missing it, lemon juice at half the amount will help. For bottling, plastic swing-top bottles are ideal, but glass bottles with corks work too. Just ensure everything is sanitized properly. The priming sugar is what creates the bubbles—don’t skip it if you want that classic mead fizz.
Store your honey in a cool, dark place—it’ll keep indefinitely. Apple juice should be used within 3 days of opening for best results. The yeast package stays viable for 6 months in the fridge. Once bottled, your mead will continue fermenting slowly—burp bottles weekly for the first month to prevent explosions. After 6 months of aging, it’s ready to drink, but 12 months lets the flavors truly develop. Keep bottles in a cool, dark cellar for optimal aging—direct sunlight ruins the delicate flavors.
Why You’ll Love This Recipe
- Five-Ingredient Magic: I swear, this recipe uses stuff you already have—raw honey, apple juice, even leftover pomace from juicing. No fancy equipment, no stress. Just mix, ferment, and wait.
- Honey-Apple Harmony: That balance of raw honey’s deep sweetness and tart apple juice? It’s like drinking autumn in a glass—smooth, bright, and just a little wild. Champagne yeast gives it a crisp finish that’s anything but cloying.
- Year-Round Flexibility: Make a gallon now, age it, and pull a bottle for Thanksgiving or New Year’s. Or split it between friends—no one expects a homemade mead gift, but they’ll all ask for seconds.
- Zero-Waste Win: Apple pomace? Usually trash. Here, it’s the secret to richer flavor and a smoother ferment. Plus, you’re turning scraps into something worth aging—talk about resourceful.
Step-by-step instructions for fermenting apple mead
Transforming simple ingredients into rich, fermented mead takes patience and precision.
Prepare the Fermentation Base
In the clean, 1 gallon plastic food-grade fermenter, combine the 12 cups raw honey and 1 gallon fresh apple juice. Stir vigorously until the honey dissolves completely, creating a smooth, golden liquid. This mixture should be uniform with no visible honey crystals remaining. I like to use a sanitized spoon to ensure all the honey integrates properly—this prevents fermentation inconsistencies later.
Next, add the 2 cups apple pomace and mix well. The pomace adds depth of apple flavor and natural enzymes that aid fermentation. Let this mixture sit at room temperature for 24 hours. You’ll notice the liquid becomes slightly cloudy as the pomace releases its flavors—this is normal and actually enhances the final product’s complexity.
Sterilize and Add Yeast
Crush the 1 tablet Campden tablets and dissolve it in ½ cup of the distilled water from your 1 gallon distilled water total. Add this sterilizing solution to the fermenter and stir thoroughly. The solution will fizz slightly as it works to eliminate unwanted bacteria. Let it sit for 24 hours at room temperature—this sterilization step is critical for preventing contamination.
After sterilization, pour in the remaining 1 gallon distilled water and add the 1 tsp pectic enzymes and 1 tsp acid blend. Stir gently to combine. The enzymes will help clarify the mead later, while the acid blend balances the sweetness. Now add the 1 package champagne yeast (Lalvin EC-1118 strain). Attach the airlock and seal the fermenter. Place it in a dark, warm spot (70-75°F) where it won’t be disturbed.
Primary Fermentation (2-3 Weeks)
Ferment for 2-3 weeks, checking the airlock daily. You’ll see vigorous bubbling for the first 3-5 days as the yeast consumes sugars—this is when the most dramatic activity occurs. After this initial burst, bubbling will slow but continue steadily. The mead should smell sweet and yeasty, with subtle apple aromas developing.
When bubbling slows significantly (typically 2-3 weeks in), it’s time to test for fermentation completion. Use a hydrometer to check the specific gravity. If it reads 1.000-1.005, fermentation is complete. If not, give it another 3-5 days before proceeding. This step ensures all sugar is converted to alcohol, preventing a sweet final product.
Clarify and Bottle
Once fermentation completes, carefully siphon the mead into a clean container, leaving behind any sediment. Add 0.25 tsp potassium sorbate to prevent future fermentation in the bottles. Stir gently to dissolve. Let the mead sit at room temperature for 1 week to clarify naturally. For faster clarification, you can chill it in the refrigerator for 24 hours, then siphon off the clear liquid.
Using a sanitized siphon, fill the 8 glass swing-top bottles with the clarified mead, leaving 1 inch of headspace at the top. Add 1 cup priming sugar to the fermenter, stir it into ½ cup warm water, then distribute this evenly among all bottles. Seal the bottles tightly and store them in a dark place at room temperature.
Condition and Carbonate (4-6 Weeks)
Let the bottles condition for 4-6 weeks. You’ll hear a soft hissing sound as carbonation builds—this is normal and indicates the priming sugar is fermenting into carbon dioxide. After 2 weeks, check for carbonation by opening one bottle carefully. If it’s slightly fizzy but not overcarbonated, continue conditioning. If it’s too fizzy, refrigerate it immediately to slow carbonation.
Once carbonation reaches your desired level (typically 4-6 weeks), refrigerate the mead for 24 hours to stabilize. Serve chilled in 45-50°F temperatures for the best experience. The final product should be golden with a rich apple aroma, balanced sweetness, and a crisp, effervescent finish. Each bottle will yield about 12 ounces of perfectly fermented apple mead.
Pro Tips For Making 1 Gallon Apple Mead
- STIR AFTER 24 HOURS: Don’t just pitch the yeast and walk away—after the first day, give your must a quick stir to break up any settled pomace or honey clumps. I learned this the hard way when my first batch had a weird, uneven fermentation because the solids sank and created dead zones. A gentle swirl with a sanitized spoon keeps everything mixing naturally.
- USE COLD HONEY: Chill your raw honey in the fridge overnight before adding it to the must—this slows the initial sugar release and prevents a violent kickstart. I used to dump it straight from the jar, and my batches would foam over like a science experiment gone wrong. Cold honey = smoother fermentation.
- SANITIZE THE POMACE: Rinse your apple pomace in a colander under hot (not boiling) water to remove any lingering dirt or pesticide residue before adding it to the fermenter. Sounds obvious, but I skipped this once and ended up with off-flavors that tasted like a cider press left in the rain. Five minutes of rinsing saves weeks of regret.
- FERMENT COOLER THAN YOU THINK: Aim for 68–72°F (20–22°C) during active fermentation—hotter temps risk over-foaming and harsh alcohol flavors, while cooler temps let the champagne yeast work cleanly. I used to let my garage heat up to 75°F, and my mead ended up tasting like solvent. A cheap fermentation chamber or a cooler with a fan makes all the difference.
Storing and reheating this dish
Fermenter Storage
Keep your 1 gallon plastic food-grade fermenter sealed with the airlock during primary fermentation. Store it in a dark, warm spot (ideally 70-75°F) where temperature remains stable. Avoid direct sunlight or drafts, which can cause temperature fluctuations and disrupt fermentation.
I keep mine in a closed pantry with a small LED light—just enough to monitor the airlock without overheating. 🌡️
Bottle Conditioning
Once your mead is bottled, store the 8 glass swing-top bottles in a cool, dark place (like a basement or cellar) for 4-6 weeks of conditioning. Check bottles weekly for carbonation—listen for a soft hiss as CO₂ builds.
If you notice excessive pressure (bottles bulging), move them to the fridge immediately to prevent explosions. I use a wooden crate to organize bottles and protect them from accidental bumps.
Long-Term Aging
After conditioning, transfer bottles to a consistent 50-55°F environment for aging. Mead improves with time—aim for 6-12 months before drinking. Store bottles horizontally (if possible) to keep yeast deposits settled.
I keep mine in a dedicated wine fridge set to 52°F—this preserves flavors and prevents oxidation. Label bottles with the date to track aging progress. ⏳
Serving Temperature
Serve your apple mead chilled at 45-50°F for optimal flavor. Remove bottles from storage 30 minutes before serving to let them stabilize. I like to serve it in tulip-shaped wine glasses to concentrate the apple aromas.
For parties, keep bottles in an ice bucket (not submerged) to maintain temperature without diluting the drink. The effervescence pairs beautifully with sharp cheddar or aged gouda—try it!
Freezing Backup
If you have extra mead, freeze unopened bottles for up to 6 months. Thaw in the fridge overnight before serving—never microwave or use hot water. I freeze a backup bottle each batch as a safety net.
When thawed, the carbonation may soften slightly, but the flavor remains intact. Just give it a gentle stir before serving to redistribute sediments. ❄️
Shelf Life
Properly stored mead lasts 1-2 years beyond bottling, with flavors evolving over time. Check for off smells (vinegar, rotten egg) or excessive sediment—these indicate spoilage. I’ve had bottles last 3 years with no issues, but I recommend drinking within 2 years for peak freshness.
Store bottles upright after the first year to minimize yeast activity. The longer you wait, the more complex the apple notes become! 🍏
Nutrition facts
Frequently asked questions
Can I use store-bought apple cider instead of fresh apple juice?
Yes, but with a few adjustments. Store-bought cider often contains preservatives that can inhibit fermentation. Use unpasteurized, organic cider and add an extra ½ teaspoon of pectic enzymes to compensate for any additives. For best results, look for brands labeled “raw” or “unfiltered” that haven’t been heat-treated.
What if I don’t have champagne yeast? Can I use bread yeast?
Bread yeast will work, but it may produce off-flavors and ferment too aggressively. For a backup, try lager yeast (W-34/70)—it’s more neutral than champagne yeast but still reliable. If you only have active dry bread yeast, use half the recommended amount (½ package) to prevent over-fermentation and potential explosions during bottling.
How do I know when fermentation is truly complete?
Fermentation is done when the airlock stops bubbling for 24 hours straight AND the hydrometer reads 1.000-1.005. For extra certainty, let it sit another 3-5 days—if nothing changes, it’s safe to proceed. A stale or yeasty smell means fermentation is complete, while a sweet aroma indicates residual sugar remains. Always double-check with your hydrometer!
Can I speed up the fermentation process?
Increasing temperature to 78-80°F will speed things up, but risks off-flavors. For a balance, try 75°F with a small aquarium heater (if needed). Never exceed 85°F—this can kill yeast and create vinegar-like flavors. The safest way to hurry is adding ½ teaspoon extra yeast nutrient (like Fermaid O) after the first week of fermentation.
What should I do if my mead smells like vinegar?
Vinegar indicates contamination (usually acetic bacteria). If caught early (first 3 days), dump the batch and sanitize all equipment thoroughly. For later stages, you can try adding ½ cup fresh honey and 1 tsp more yeast to outcompete the bad bacteria—though results may be unpredictable. Prevention is key: always sterilize equipment and use an airlock to keep oxygen out.

- Pea Soup Instant Pot Recipe: Velvety Green Smoothness in 20 Minutes - November 1, 2026
- Pork Loin Pulled Pork Crock Pot Recipe: Slow-Smoked Tenderness With Zero Dryness - November 1, 2026
- Baked Potatoes in Crock Pot Recipe: Buttery Interiors and Crispy Top Magic - November 1, 2026