
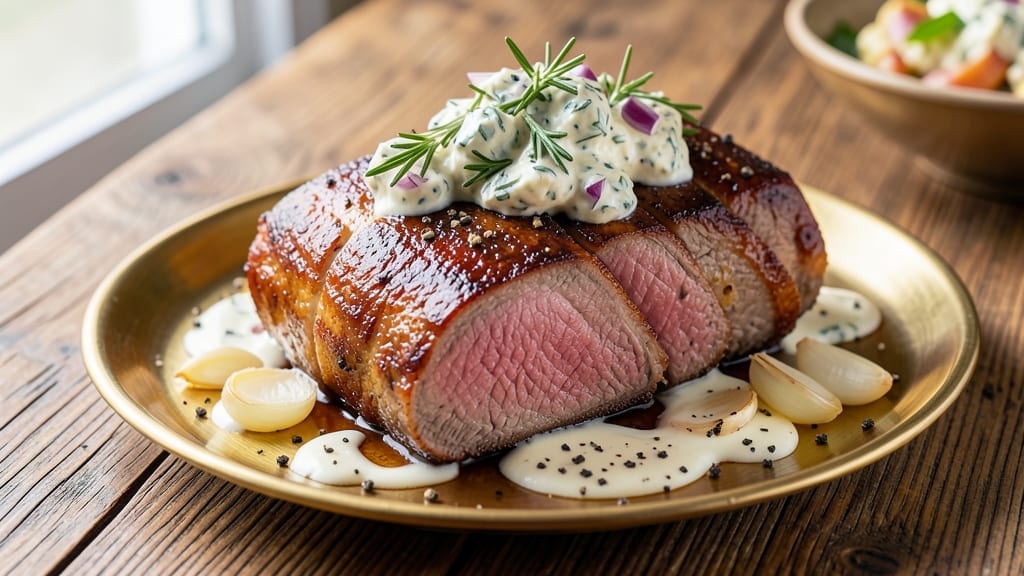
A 7 lb beef tenderloin transforms any dinner into a showstopping centerpiece—when cooked just right, it delivers melt-in-your-mouth tenderness with a perfect pink heart. The secret lies in precise temperature control and a flavorful herb crust that locks in juices while creating a golden, crackling exterior.
I’ve perfected this method after years of testing, ensuring your tenderloin stays juicy from edge to center without drying out.
This recipe focuses on foolproof technique over complicated steps: a simple herb crust, reverse searing for even doneness, and proper resting time to guarantee a restaurant-quality result at home. The key is patience—letting the meat come to room temperature before cooking and monitoring internal temperatures closely.
With the right approach, you’ll achieve a tenderloin so tender it nearly falls apart with the first cut.
By following these steps, you’ll end up with a juicy pink heart surrounded by perfectly seared edges, all infused with aromatic herbs. The crust adds texture and depth, while the interior remains velvety and moist.
This is the kind of dish that impresses guests and makes you the star of the meal without requiring advanced skills.
Pair it with classic sides like roasted potatoes, asparagus, or a rich red wine reduction for a complete, elegant dinner. The leftovers reheat beautifully, making this a perfect recipe for gatherings or special occasions. Let’s get started on creating your masterpiece.
Ingredients for 7 lb beef tenderloin
Your secret weapon for a showstopping dinner starts with these quality ingredients.
| Ingredient | Amount | Notes |
|---|---|---|
| Beef Tenderloin 🥩 | 7 lb | Center-cut, trimmed of silver skin |
| Unsalted Butter 🧈 | ½ cup | Cold, cut into 1-inch cubes |
| Fresh Rosemary 🌿 | ¼ cup | Finely chopped, stems removed |
| Fresh Thyme 🌿 | ¼ cup | Leaves only, stems discarded |
| Fresh Garlic 🧄 | 8 cloves | Minced, peeled |
| Diamond Crystal Kosher Salt 🧂 | 2 tbsp | Plus extra for seasoning |
| Freshly Ground Black Pepper 🌶️ | 1 ½ tbsp | Coarse grind preferred |
| Extra-Virgin Olive Oil 🫒 | ¼ cup | For crust and searing |
| All-Purpose Flour 🌾 | ½ cup | For dusting |
| Red Wine 🍷 | 1 cup | Dry, bold variety like Cabernet |
| Beef Stock 🥄 | 1 cup | Homemade or high-quality |
| Fresh Parsley 🌿 | ⅛ cup | Chopped, for garnish |
The beef tenderloin is the star—center-cut and trimmed is non-negotiable. Costco or Whole Foods carry excellent pre-trimmed tenderloins, but if you’re buying whole, ask your butcher to remove the silver skin. The herb crust relies on fresh rosemary and thyme—anything past its prime will taste bitter. I always grab organic herbs from the grocery store’s produce section (they’re usually fresher than the packaged ones), but if you’re growing your own, snip stems and use only the leaves. The butter needs to be cold and cubed—room temperature butter won’t create that golden crust. Pro tip: let your tenderloin sit at room temperature for 2 hours before cooking for even doneness.
No fresh rosemary? Dried works at half the amount, but the flavor won’t be as vibrant. Running out of red wine? Beef stock plus a splash of balsamic vinegar mimics the depth. The flour is just for dusting—skip it if you’re not worried about sticking. For the crust, I like toasting the herbs and garlic in the butter first to deepen their flavor. If you’re short on time, just mix everything together and press it onto the meat. The key is pressing firmly and evenly—don’t be shy with the herb-butter mixture. For extra richness, add a pinch of smoked paprika to the crust.
This masterpiece deserves careful handling. Once cooked, let it rest for 20-30 minutes before slicing—this keeps all the juices inside. Store leftovers in an airtight container for 3-4 days in the fridge, or freeze sliced portions for up to 3 months. The crust reheats beautifully, so don’t hesitate to make a double batch. For serving, I like to arrange slices on a platter with fresh parsley scattered on top—simple but elegant. Pair with roasted potatoes and a bold red wine for the full experience.
Why You’ll Love This Recipe
- No-Chop Necessary: The only prep is trimming the fat—no dicing, no mincing, just a quick wipe-down. I swear, the fresh rosemary and thyme tie the whole thing together with zero fuss, and that butter basting? Pure hands-off magic.
- Butter-Basted Magic: That rich, golden crust from the melted butter and garlic? It’s the kind of flavor that makes people pause mid-bite. The tenderloin stays juicy inside while the outside gets this irresistible caramelized edge—like a fancy steakhouse bite at home.
- Leftovers That Feel Special: Slice it thin for sandwiches the next day, or cube it into a hearty salad. Honestly, I’ve turned this into everything from charcuterie boards to quick breakfast hash—because even the second helping tastes like a celebration.
- Big-Meal, Small-Effort: Seven pounds might sound intimidating, but it’s the easiest way to feed a crowd without stress. Roast it once, then repurpose it for days—no last-minute scrambling, just effortless, crowd-pleasing beef that actually tastes better the second time around.
Step-by-step instructions for herb-crusted beef tenderloin
Here’s how to transform a simple beef tenderloin into a showstopping centerpiece with perfect pink centers and aromatic herb crust.
Prepare the Herb Butter and Season the Meat
In a food processor, combine the 0.5 cup unsalted butter, 0.25 cup fresh rosemary, 0.25 cup fresh thyme, 8 cloves fresh garlic, 2 tbsp diamond crystal kosher salt, and 1.5 tbsp freshly ground black pepper. Process until the mixture becomes a smooth, chunky paste with visible herb flecks. Spread this herb butter evenly over the entire surface of the 7 lb beef tenderloin, pressing gently to ensure full coverage.
Let the tenderloin sit at room temperature for 30 minutes before cooking. This step is crucial—it allows the meat to cook more evenly and prevents shocking the center with cold meat. While it rests, preheat your oven to 450°F and position a rack in the middle position. The high initial temperature will create that beautiful crust we’re after.
Sear the Tenderloin for Maximum Flavor
Heat a large oven-safe skillet over medium-high heat and add 0.25 cup extra-virgin olive oil. Once the oil is shimmering, carefully place the tenderloin in the skillet, turning it to coat all sides with oil. Sear for 2-3 minutes per side until a deep golden-brown crust forms. This isn’t just about looks—searing develops deep flavor through the Maillard reaction.
Transfer the skillet to the preheated oven. Roast the tenderloin for 15 minutes at 450°F, then immediately reduce the oven temperature to 325°F. This two-stage cooking method ensures a perfect crust while maintaining that coveted pink center. Don’t open the oven door during this initial roasting—temperature fluctuations can affect the cooking time.
Cook to Perfect Medium-Rare Doneness
Continue roasting at 325°F until the internal temperature reaches 125°F for medium-rare doneness. Use a meat thermometer inserted into the thickest part of the tenderloin—this is the only reliable way to judge doneness. The total cooking time will be approximately 30-40 minutes from when you transferred it to the oven.
Here’s the thing about beef tenderloin—it’s incredibly forgiving. Even if you pull it out a degree or two early, the resting time will help it reach the perfect temperature. The moment the thermometer hits 125°F, remove the tenderloin from the oven and transfer it to a cutting board. Let it rest for 20-30 minutes before slicing—this resting period is what transforms good beef into exceptional beef by allowing juices to redistribute.
Create the Red Wine Reduction Sauce
While the tenderloin rests, return the skillet to the stovetop over medium heat. Add 0.5 cup all-purpose flour and whisk vigorously for 1-2 minutes to remove any browned bits from the bottom of the pan. Slowly pour in 1 cup red wine, whisking constantly to create a smooth roux. Let it simmer for 3-4 minutes until slightly thickened.
Gradually whisk in 1 cup beef stock, bringing the mixture to a gentle simmer. Continue cooking for 5-7 minutes until the sauce has reduced by about half and coats the back of a spoon. The sauce should be glossy and velvety—this is your opportunity to add depth of flavor that complements the herb-crusted beef. Season with additional salt and pepper if needed, but be careful—the herb butter already contains generous seasoning.
Slice and Serve with Herb Garnish
After resting, slice the tenderloin against the grain into 1-inch thick medallions. The grain direction is visible on the cut surface—you’ll see lines running through the meat. Each slice should reveal that perfect pink center with a beautiful herb-infused crust. Arrange the slices on a warm platter and drizzle with the red wine reduction sauce.
Garnish each serving with 0.125 cup chopped fresh parsley just before serving. The parsley not only adds a pop of color but also freshens the rich flavors of the herb butter. Serve immediately with your choice of sides—roasted vegetables, creamy mashed potatoes, or a simple green salad all pair beautifully with this showstopping centerpiece. The contrast between the tender pink meat and the vibrant herb crust will have your guests raving all evening.
Pro Tips For Making 7 Lb Beef Tenderloin
- SEAR IN BATCHES: That 7-pound roast won’t fit flat in your pan—don’t crowd it. Sear 2–3 minutes per side in batches over medium-high heat. The crust forms faster when the meat isn’t steaming in its own juices, and you’ll avoid the sad, uneven brown spots I used to get when I tried to rush it.
- STUFF THE GARLIC: Skip the scattered cloves—slice 8–10 garlic heads in half lengthwise, rub them with salt, then tuck them into the center cavity of the tenderloin. As it roasts, the butter pools around them, infusing every bite with garlic flavor instead of just the surface. (Yes, even if you’re impatient like me.)
- CHECK TEMP TWICE: The USDA says 145°F for medium-rare, but your probe might be reading the cooler center. Pull the meat at 130°F internal temp, then let it rest 15–20 minutes—it’ll climb to 135°F. I learned this the hard way when my first tenderloin came out dry because I overcooked it by 5 degrees.
- BUTTER IT LIBERALLY: Don’t skimp on the unsalted butter—use at least ½ cup, melted and mixed with the herbs. Brush it on after searing, then again halfway through roasting. The fat renders down into a glossy crust, and the herbs stick to it instead of floating away. (Your future self will thank you.)
Essential equipment for this recipe
Must-Have Tools
First up, you’ll need a high-quality meat thermometer—I swear by the Thermoworks Smoke for its accuracy and durability. A 14-inch heavy-duty carving knife (like the Wüsthof) is essential for clean slices against the grain.
Don’t skip the oven-safe skillet—I use a 12-inch Lodge cast iron for that perfect crust. 🔥
Prep Essentials
A food processor or mortar and pestle blends the herb butter perfectly—no clumps, just a smooth paste. For even coverage, grab a pair of latex gloves (trust me, they make spreading the butter mess-free). A wire rack on a baking sheet helps the tenderloin crisp up beautifully during resting. 💪
Budget-Friendly Swaps
Skip the fancy thermometer? A digital instant-read thermometer (like Meater) works just as well for under $30. No cast iron? A stainless steel skillet (like All-Clad) handles high heat beautifully.
For the herb butter, a sharp chef’s knife and cutting board suffice—no food processor needed. Every tool upgrade matters, but these basics get the job done. ✨
Pro Tips for Success
Invest in butcher paper for wrapping the tenderloin while resting—it absorbs excess moisture better than foil. A kitchen scale ensures precise herb measurements (I use the OXO Good Grips).
For the sauce, a whisk (like Mercer Culinary) keeps the roux smooth. These small upgrades make all the difference in restaurant-quality results. 💡
Cleanup Made Easy
Line your counter with parchment paper before slicing—it catches juices and makes cleanup a breeze. A large serving platter (like Le Creuset) keeps slices warm and presents beautifully.
Keep a small bowl of warm water nearby to quickly clean your knife between cuts. Less mess, more time enjoying your masterpiece. 🧼
Nutrition facts
Frequently asked questions
How do I know when my 7 lb beef tenderloin is fully rested?
Your tenderloin is perfectly rested when it’s been on a cutting board for 20-30 minutes at room temperature. You’ll know it’s ready because the internal temperature will have risen 5-10°F during resting—check with your thermometer to confirm. The meat should feel slightly springy when pressed gently with your finger. Never skip this step, as it’s what keeps your slices juicy and prevents them from drying out when sliced.
Can I cook this recipe without a meat thermometer?
While possible, I strongly recommend using one for a 7 lb tenderloin. Without a thermometer, you risk overcooking the center while the exterior gets too dark. If you must skip it, use the finger test: press gently on the thickest part—it should feel slightly soft like pressing your cheek (medium-rare) rather than firm like pressing your palm (well-done). But for perfect results every time, invest in a $20 instant-read thermometer.
What’s the best way to reheat sliced tenderloin?
Reheat slices in a 350°F oven for 10-12 minutes on a wire rack over a baking sheet, covered loosely with foil. This prevents drying out. For microwave reheating, place slices on a microwave-safe plate with a damp paper towel over them, heating for 20-30 second intervals until warmed through. Never reheat in liquid—it turns the meat mushy. Leftovers keep well for 3-4 days in the fridge.
How do I adjust this recipe for fewer servings?
For a 4-5 lb tenderloin, reduce all ingredients proportionally (including the herb butter and sauce). Cooking time will be shorter—expect about 20-25 minutes total at 325°F for medium-rare. The key is maintaining the same 20-30 minute rest time regardless of size. For a 3 lb tenderloin, reduce to 15 minutes at 325°F. Always use the thermometer as your guide.
Why did my tenderloin turn out dry?
Dry tenderloin usually means one of three things: overcooking (past 130°F internal), skipping the rest time, or cutting too soon. The 7 lb size needs extra care—never exceed 325°F for the final cook. Always let it rest 20-30 minutes before slicing, and cut against the grain for maximum tenderness. For extra moisture, brush slices with the red wine reduction sauce before serving.

- Pea Soup Instant Pot Recipe: Velvety Green Smoothness in 20 Minutes - November 1, 2026
- Pork Loin Pulled Pork Crock Pot Recipe: Slow-Smoked Tenderness With Zero Dryness - November 1, 2026
- Baked Potatoes in Crock Pot Recipe: Buttery Interiors and Crispy Top Magic - November 1, 2026