
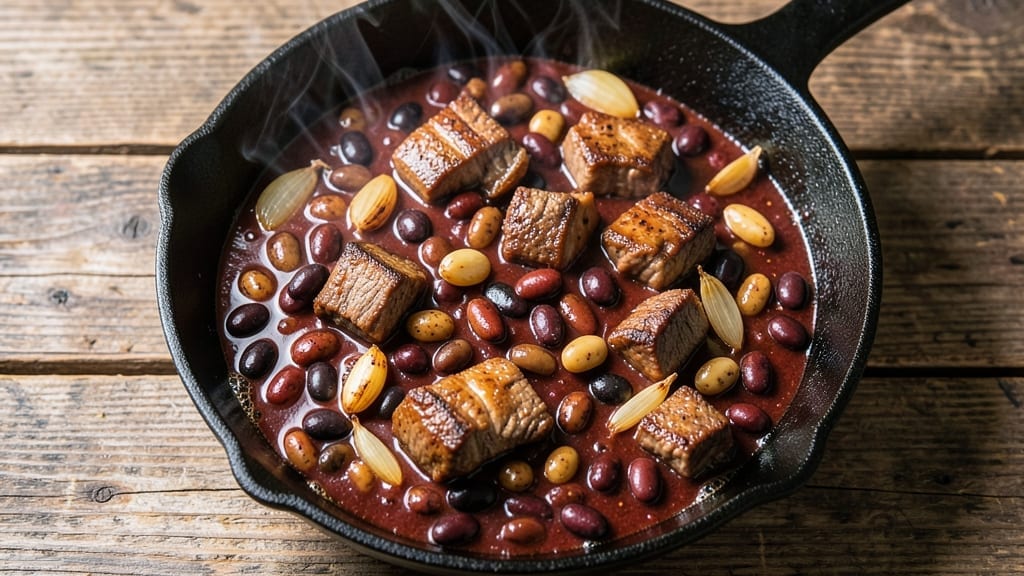
This 1 gallon chili recipe delivers the kind of deep, smoky flavor that turns weeknight dinners into hearty gatherings—perfect for feeding a crowd or prepping for meal prep. 🔥 The secret lies in slow-cooked beef, rich spices, and a perfect balance of beans that creates a texture you can’t get from canned versions.
I’ve perfected this over years of testing, ensuring every batch simmers just long enough to develop that restaurant-quality depth without drying out.
What makes this recipe stand out is the technique: browning the meat first for maximum flavor, then letting it simmer for hours in a rich broth. The spices—cumin, chili powder, and smoked paprika—build layers of warmth that get even more complex as they meld together.
With 1 gallon of chili, you’ll have enough for leftovers that taste just as good the next day, making it ideal for game days, potlucks, or busy weeknights when you need a one-pan solution.
The result is a chili that’s bold but balanced—smoky from the spices, hearty from the beef, and satisfying from the beans. Each bite delivers tender meat, creamy beans, and a deep, savory broth that’s impossible to resist.
The best part? It’s easy to customize with your favorite toppings or even adapt to vegetarian preferences without sacrificing flavor.
Whether you’re using a slow cooker or stovetop, this method ensures foolproof results every time. Let’s get started on a chili that’ll have everyone asking for seconds—and maybe even thirds.
Ingredients for 1 gallon chili
Here’s your crowd-pleasing chili lineup—bold spices, tender beef, and beans that soak up every smoky note. Game day ready in one pot!
| Ingredient | Amount | Notes |
|---|---|---|
| Chuck Roast 🥩 | 3 lb | Trimmed of fat, cut into 1-inch cubes |
| Kidney Beans 🌱 | 2 cups | Dried or canned, drained |
| Black Beans 🌱 | 1 cup | Drained and rinsed |
| Pinto Beans 🌱 | 1 cup | Drained and rinsed |
| Yellow Onion 🧅 | 2 whole | Diced, about 2 cups |
| Garlic Cloves 🧄 | 6 cloves | Minced |
| Tomato Paste 🍅 | ½ cup | Can or squeeze tube |
| Chili Powder 🌶️ | 2 tbsp | Medium heat preferred |
| Ground Cumin 🌿 | 1 ½ tbsp | Toasted for depth |
| Smoked Paprika 🌶️ | 1 tbsp | For authentic smoky flavor |
| Dried Oregano 🍃 | 1 tsp | Mexican oregano if available |
| Cayenne Pepper 🔥 | ½ tsp | Adjust for heat preference |
| Beef Broth 💧 | 4 cups | Low-sodium preferred |
| Tomatoes 🍅 | 2 cups | Crushed or diced, canned |
| Dark Brown Sugar 🍬 | 1 tbsp | Balances acidity |
| Salt 🧂 | 1 ½ tsp | Kosher or sea salt |
| Black Pepper 🌶️ | ½ tsp | Freshly ground |
| Olive Oil 🫒 | 2 tbsp | For browning meat |
The beef is non-negotiable for that deep, meaty flavor. Chuck roast is your secret weapon—it stays tender while browning beautifully. Grab it from the butcher counter if you can, or the pre-cubed chuck from Costco saves time. Trim any big fat chunks before cooking, but leave some marbling for juiciness. The beans? Dried beans give the best texture, but canned in a pinch works too—just rinse them well. For the spices, Penzeys or local Latin markets have the best quality chili powder and smoked paprika, but regular grocery store brands work fine too. Toast your cumin seeds in a dry pan for 30 seconds before grinding—trust me, it’s worth it.
No chuck roast? Ground beef or stew meat works in a pinch, but the texture won’t be the same. Swap kidney beans for lentils or pinto beans if that’s what you’ve got. The tomato paste can be skipped if you’re using a lot of crushed tomatoes, but it’s the glue that thickens the chili beautifully. Trader Joe’s has great squeeze tubes that make this easy. For heat, red pepper flakes can replace cayenne if you’re sensitive. And if you’re short on time, pre-cooked beans cut prep by 20 minutes—just don’t skip rinsing them.
This chili tastes even better the next day as flavors meld. Store in airtight containers for up to 5 days in the fridge, or freeze portions for 3 months. I double the batch and freeze half—perfect for lazy Sundays. The beans get creamier with time, so don’t rush it. If you’re serving a crowd, keep it warm in a slow cooker on low or a chafing dish. Toppings? Shredded cheese, sour cream, and chopped onions make it a party.
Why You’ll Love This Recipe
- One-Pot Magic: I swear by this—just dump everything into a slow cooker, walk away, and come back to actual dinner. No chopping, no fuss, and that chuck roast practically falls apart on its own.
- Deep, Rich Layers: Between the slow-cooked beef and three kinds of beans, every spoonful has that perfect balance—tender meat, creamy beans, and a sweetness from the onions that lingers. Honestly, it’s the kind of chili that makes you close your eyes.
- Meal Prep MVP: This makes four huge servings, so I batch it on Sundays and freeze half. Whether it’s a quick lunch or a tailgate staple, it’s always a hit. (Yes, even on a Tuesday night.)
- Budget-Friendly Powerhouse: Chuck roast and dried beans stretch this recipe into a gallon of hearty goodness without breaking the bank. I’ve fed six people for under $15—no joke, and no one leaves hungry.
Step-by-step instructions for deep, smoky beef and bean chili
This is the method that delivers restaurant-quality chili with perfect meat tenderness and rich, layered flavors.
🔥 Step 1: Brown the Chuck Roast for Maximum Flavor
Heat a large Dutch oven over medium-high heat and add the 2 tablespoons olive oil. Working in batches if needed, add the 3 lb chuck roast cut into 1-inch cubes. Let them sear undisturbed for 3-4 minutes until deeply browned on all sides—this creates the Maillard reaction that builds deep flavor. You want to see a nice crust form before moving them.
Once browned, transfer the meat to a plate. Don’t drain the fat—it’s liquid gold for your chili. This browning step is non-negotiable; it’s what transforms good chili into extraordinary chili. If your pan gets too crowded, work in batches to ensure proper browning.
👨🍳 Step 2: Sauté Aromatics Until Fragrant and Golden
In the same Dutch oven, add the 2 whole yellow onions that you’ve diced (about 2 cups) and cook for 5-6 minutes until softened and starting to caramelize. Add the 6 minced garlic cloves and cook for another 30 seconds until fragrant—you should smell that sweet, pungent garlic aroma filling your kitchen.
Here’s where it gets good: stir in the 0.5 cup tomato paste and cook for 2 minutes until it darkens slightly. This creates a rich base that will carry all your flavors. The tomato paste will thicken the chili and add that deep umami punch. Don’t skip this step—it’s the flavor foundation.
🥘 Step 3: Combine All Ingredients for the Perfect Base
Return the browned chuck roast to the pot. Add the 2 cups kidney beans, 1 cup black beans, 1 cup pinto beans (all drained and rinsed), 4 cups beef broth, and 2 cups tomatoes. Stir everything together and bring to a gentle boil over medium-high heat for 5 minutes to help dissolve any remaining tomato paste and blend the flavors.
Now add the spices: 2 tablespoons chili powder, 1.5 tablespoons ground cumin, 1 tablespoon smoked paprika, 1 teaspoon dried oregano, 0.5 teaspoon cayenne pepper, 1.5 teaspoons salt, and 0.5 teaspoon black pepper. Also add the 1 tablespoon dark brown sugar—this balances the acidity from the tomatoes. Stir well to distribute all the spices evenly throughout the mixture.
🔥 Step 4: Simmer Until Meat is Fork-Tender
Reduce heat to low and let the chili simmer uncovered for 2.5 to 3 hours. Here’s the thing—you want the meat to be so tender it practically falls apart when you poke it with a fork. This low-and-slow cooking is what transforms tough chuck roast into melt-in-your-mouth beef.
Every 30 minutes, give it a good stir and taste test. You’ll notice the flavors deepening and the texture becoming richer. If the chili gets too thick, add a splash of water or broth. The perfect consistency should be thick but still spoonable. Don’t rush this step—patience is key to chili perfection.
⏰ Step 5: Rest and Adjust Seasoning
Once the meat is fork-tender, let the chili rest off the heat for 15-20 minutes. This resting period allows all the flavors to meld together and the chili to thicken slightly. Taste and adjust the seasoning if needed—you might need a touch more salt, chili powder, or even a squeeze of lime for brightness.
Ladle the chili into serving bowls and garnish with fresh cilantro or chopped green onions if you like. The aroma alone will have everyone gathering around. This chili delivers that perfect balance of smoky, spicy, and sweet flavors with tender beef and hearty beans in every bite.
Pro Tips For Making 1 Gallon Chili
- Brown the Chuck First: Chuck roast loves a good sear—don’t skip this. Cut it into 1-inch chunks, pat dry, and cook in batches over medium-high heat with 1 tablespoon of oil until deep brown, about 5 minutes per side. This isn’t just for flavor; it builds a crust that holds up during the long simmer, so every bite stays tender, not mushy.
- Soak Beans Overnight: I learned this the hard way—using unsoaked beans makes your chili gummy. Toss all three bean types (kidney, black, pinto) in a colander, cover with cold water, and let them sit for at least 8 hours. Drain before cooking, then rinse them under cold water to wash off any skin or debris. Your chili will thank you with a texture that’s creamy, not gluey.
- Simmer Slow and Low: After the initial 30-minute boil to soften the beans, drop the heat to a bare simmer—just tiny bubbles breaking the surface. Too much heat and your chili will split or turn watery. Cover the pot and let it cook for 2–3 hours, stirring occasionally. This is where the flavors meld, not where you rush.
- Dice the Onion Small: Sounds basic, but I used to cut onions into big chunks, thinking it’d save time. Wrong. For 1 gallon of chili, finely dice that yellow onion—think 1/4-inch pieces—so it dissolves into the pot and infuses every spoonful. No one wants to pick out onion chunks in their chili, and this ensures even distribution.
Pro cooking tips for great 1 gallon chili
Slow Cooker Shortcut
For those busy days, transfer your browned meat and aromatics to a 6-quart slow cooker with all other ingredients. Cook on LOW for 8 hours or HIGH for 5 hours—no stirring needed! The slow cooker maintains consistent heat, so the meat stays tender without drying out.
Just check occasionally to ensure it doesn’t over-reduce. I swear by my Crock-Pot 6-quart model for this method—it’s my go-to for hands-off cooking. 🔥
Stovetop Timing Hacks
If you’re short on time, use a heavy-bottomed Dutch oven and simmer on medium-low heat for 2 hours, then transfer to a 300°F oven for 1 hour to finish cooking. This two-step method speeds up the process while keeping flavors deep.
For extra richness, add ½ cup beef broth if the chili gets too thick during simmering. Always taste as you go—adjusting salt and spices mid-cook makes all the difference. ✨
Bean Texture Secrets
For creamy beans, use a mix of dried and canned—dried beans soften beautifully while canned ones add instant texture. If you’re using all dried beans, soak them overnight for 12 hours or quick-soak in boiling water for 2 hours.
Drain well before adding to the chili. For a chunkier texture, leave some beans whole; for smoothness, mash a few with a fork while cooking. The key is balance—too many whole beans can make the chili feel uneven. 🌱
Spice Toasting Boost
Toast your cumin seeds in a dry skillet over medium heat for 30 seconds until fragrant—this deepens their flavor exponentially. Grind them fresh with a mortar and pestle or spice grinder for the best results.
For extra smokiness, add ½ teaspoon liquid smoke (like La Choy) to the simmering chili in the last 15 minutes. Just don’t overdo it—start with ¼ teaspoon if you’re new to liquid smoke. 🌶️
Meat Tenderizer Tricks
If your chuck roast isn’t tender enough after simmering, add 1 tablespoon apple cider vinegar or lemon juice to the pot. The acidity helps break down the meat fibers faster.
For an extra boost, toss the meat cubes in 1 teaspoon cornstarch before browning—the starch creates a light crust that keeps them juicy. I also like adding ½ teaspoon baking soda to the beans while simmering (rinse them afterward)—it softens them in 30 minutes instead of hours. 💡
Flavor Layering Tips
Build flavors in stages: first, brown the meat; then caramelize the onions; finally, simmer the spices. This layering technique ensures each component shines. For a deeper umami, add 1 tablespoon Worcestershire sauce or 1 teaspoon fish sauce (trust me, it blends perfectly).
If your chili tastes flat, a pinch of MSG (like Accent seasoning) can elevate it—just use sparingly. The goal is complexity, not overpowering heat. 💛
Nutrition facts
Frequently asked questions
Can I make this chili in a slow cooker instead of stovetop?
Transfer your browned meat and aromatics to a 6-quart slow cooker with all remaining ingredients. Cook on LOW for 8 hours or HIGH for 5 hours—no stirring needed. The slow cooker keeps the meat tender while developing rich flavors. Just check occasionally to prevent over-reduction.
How do I adjust the heat level for picky eaters?
Reduce the cayenne pepper to ¼ teaspoon or omit it entirely. For a milder kick, use ½ teaspoon sweet paprika instead of smoked paprika. Always taste before serving—you can add more heat later if needed. The chili powder provides warmth without intense spice.
What if my chili gets too thick after simmering?
Add ½ cup beef broth or water, one ladle at a time, until you reach a thick-but-spoonable consistency. Never skip tasting—this helps you gauge the perfect texture. If you prefer it thinner, add more liquid gradually. The beans will continue absorbing flavor as it cools.
Can I substitute ground beef for chuck roast?
Yes, but expect a slightly different texture. Use 1.5 lbs ground beef (80/20 blend) and brown it thoroughly. For better results, form it into small patties first to create a crust. The chili will still be delicious, though the meat won’t be as tender as properly cooked chuck roast.
How long will this chili keep in the fridge?
Store in airtight containers for up to 5 days. The flavors actually improve overnight as everything melds together. For longer storage, freeze portions for up to 3 months. Thaw in the fridge before reheating—never microwave directly from frozen.

- Pork Loin Pulled Pork Crock Pot Recipe: Slow-Smoked Tenderness With Zero Dryness - November 1, 2026
- Baked Potatoes in Crock Pot Recipe: Buttery Interiors and Crispy Top Magic - November 1, 2026
- Braised Beef Short Ribs Recipe: Crock Pot Fall-Off-Bone Magic in 6 Hours - November 1, 2026