
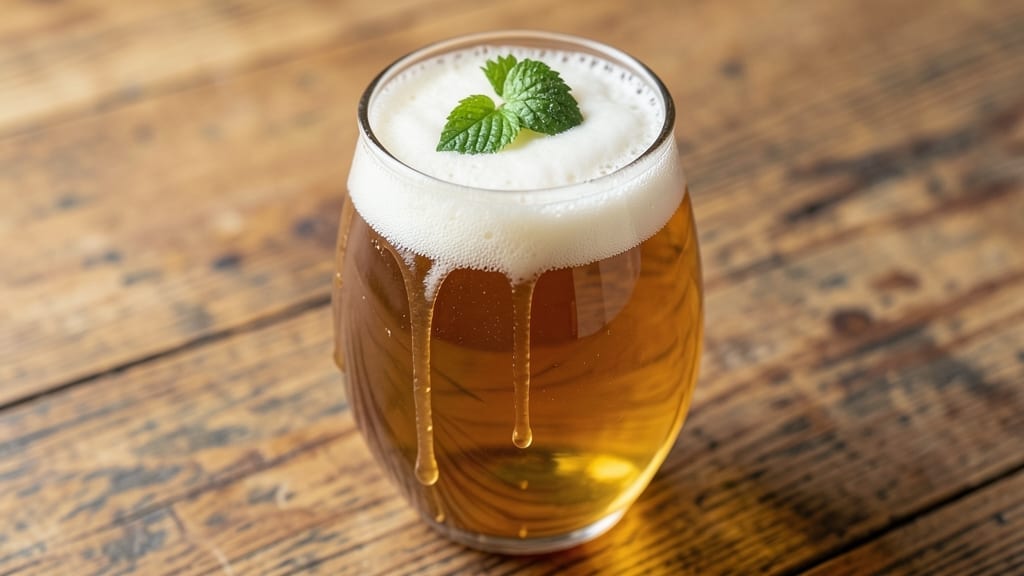
Crafting a 1-gallon cream ale with malty depth and balanced hops transforms a simple brew into a sophisticated drink—whether you’re fermenting a batch for a cocktail mixer or a refreshing homemade ale.
This recipe delivers a smooth, creamy texture with just the right bitterness, perfect for sipping or blending into other beverages. The key lies in precise ingredient ratios and a gentle fermentation process that preserves flavor without overpowering it.
For this recipe, we’ll use a simple yet effective approach: combining malt extract, hops, yeast, and water in carefully measured proportions to achieve that signature cream ale profile. Unlike commercial versions, this method lets you control the sweetness, carbonation, and hoppiness to suit your taste.
The result? A bright, malty ale with a velvety finish that’s far more complex than store-bought options.
What sets this apart is the two-stage fermentation—first to develop flavor, then to carbonate naturally for a crisp, effervescent finish. Whether you’re a homebrewer or a cocktail enthusiast, this recipe scales perfectly for a 1-gallon batch, making it ideal for small gatherings or personal enjoyment.
The process is straightforward, but the reward is a drink that tastes like it came from a craft brewery.
Once fermented, you can serve it chilled as-is or use it as a base for milkshakes, floats, or even a creamy IPA cocktail. The versatility ensures this isn’t just a drink—it’s a foundation for creativity. Ready to brew? Let’s get started with the ingredients and steps.
Ingredients for 1 gallon cream ale
Simple brewing ingredients, precise measurements—everything you need for a velvety 1-gallon cream ale.
| Ingredient | Amount | Notes |
|---|---|---|
| Light Malt Extract 🍺 | 1 ½ lb | Liquid extract for fermentable sugars |
| Extra Light Dry Malt Extract 🌾 | ½ lb | For body and color balance |
| Cascade Hops 🌿 | 1 oz | 60-minute boil for bitterness |
| Centennial Hops 🌿 | ½ oz | 15-minute boil for aroma |
| White Lager Yeast 🍄 | ¼ package | Wyeast 2278 or equivalent |
| Distilled Water 💧 | 1 gallon | Chlorine-free preferred |
| Corn Sugar 🍯 | ½ cup | For priming at bottling |
| Lactose Powder 🥛 | ¼ cup | For creaminess and body |
| Gypsum 🧪 | 1 tsp | Water mineral adjustment |
| Campden Tablets 💊 | 1 tablet | Sanitizes water |
| Priming Sugar 🍬 | ¾ cup | For carbonation |
The malt extract is where the magic happens. Brick or Bairds are solid choices for liquid extract—avoid the cheap stuff. Cascade hops are a must for that classic Pacific Northwest bitterness, but Fuggle or Willamette work too if you want something more traditional. The yeast is non-negotiable: White Lager (Wyeast 2278) gives you that clean, crisp finish. For water, reverse osmosis-filtered is ideal, but tap water works if you add gypsum and Campden tablets to adjust minerals and sanitize. Lactose is key for that signature creaminess—powdered works best since it dissolves easily.
No Cascade hops? Centennial or Columbus are great substitutes—they’ve got that same citrusy punch. Running short on malt extract? Dry malt extract plus extra water can stretch your batch, but expect slightly different mouthfeel. The Campden tablets might be hard to find at regular grocery stores—brew shops or online suppliers are your best bet. For priming, corn sugar is standard, but dextrose or honey work too if you’re feeling adventurous. Just adjust the amount based on your target carbonation level. And if you’re worried about sanitation, star san or potassium metabisulfite are solid backups for the Campden tablets.
Store your malt extract and hops in airtight containers in a cool, dark place—they’ll last for months. The yeast packet? Fridge it immediately after opening—it keeps for up to a year that way. Once you’ve bottled your ale, it’s ready to drink in about 2-3 weeks at room temperature. For best results, store the finished bottles in the fridge—they’ll keep for up to 6 months without losing much flavor. And if you’re making multiple batches, label everything—trust me, you’ll thank yourself later.
Why You’ll Love This Recipe
- Batch Brew Bliss: I’ve made this a dozen times—just boil the extracts, hop it, ferment, and boom. No messy transfers, no tiny batches. That 1-gallon run lets me experiment with yeast and hops without committing to a full 5-gallon project.
- Crisp Yet Creamy Magic: The light and extra-light extracts give it that clean, drinkable base, while Cascade and Centennial add just enough bite to keep it interesting. White Lager yeast does all the heavy lifting—smooth, reliable fermentation that tastes like a pro brewed it.
- Tailgate or Tailgate: Between us, this is my go-to for game days. It’s light enough to sip all day but bold enough to hold its own next to wings. Plus, the 1-gallon size means I can split it between my cooler and a growler—no leftovers going to waste.
- Budget-Friendly Flex: Honestly, the ingredients cost less than takeout beer. Light malt extract is cheap, and I’ve stretched this recipe into a 3-gallon batch before without sacrificing flavor. The yeast? A bag lasts forever. My wallet thanks me every time.
Step-by-step instructions for cream ale fermentation
Here’s how to craft a perfectly balanced cream ale using precise techniques and quality ingredients.
Sanitize and Prepare Your Brewing Equipment
First, sanitize all equipment—fermenter, airlock, bottling bucket, and bottles—using a no-rinse sanitizer. This critical step prevents contamination that could ruin your beer. I use Star San for its effectiveness and ease of use, but any approved sanitizer works.
Next, dissolve the 1 tablet Campden Tablets in ½ cup of the 1 gallon distilled water and let it sit for 24 hours to fully sanitize. Then, add the remaining water along with 1 teaspoon Gypsum to your fermenter. The gypsum helps balance the water’s mineral content, which is especially important for consistent fermentation.
Mix Extracts and Boil for Hop Bitterness
In a separate pot, combine the 1.5 lb Light Malt Extract and 0.5 lb Extra Light Dry Malt Extract with ½ gallon of the sanitized water. Heat this mixture to 160°F while stirring gently to dissolve the extracts completely. You’re aiming for a smooth, homogenous solution—no grainy bits should remain.
Once dissolved, bring the mixture to a rolling boil and add the 1 oz Cascade Hops. Boil for 60 minutes to extract the bitterness. The hop aroma will be intense at first, but focus on the bitterness—this is the foundation of your beer’s balance. After 60 minutes, remove the pot from heat and let it cool to 80°F before proceeding.
Combine with Sanitized Water and Add Lactose
Slowly pour the cooled extract mixture into the fermenter containing the remaining ½ gallon of sanitized water. Stir gently to combine, ensuring the temperature stays within 70-80°F. Add the 0.25 cup Lactose Powder at this stage—this will contribute to the beer’s smooth, creamy mouthfeel and body.
Here’s the thing—lactose is slow to ferment, so it won’t contribute to alcohol production but will add body and sweetness. Stir until fully dissolved, then let the mixture sit for 10 minutes to ensure everything is evenly incorporated. The solution should look clear with no visible particles.
Pitch Yeast and Ferment at Optimal Temperature
Once the wort has cooled to 68-72°F, it’s time to pitch the 0.25 package White Lager Yeast. Sprinkle the yeast over the surface of the wort and gently swirl the fermenter to distribute it evenly. Avoid stirring vigorously—this can introduce too much oxygen and stress the yeast.
Attach the airlock and place the fermenter in a dark, temperature-controlled space. Maintain a consistent 68-72°F for 5-7 days. You’ll notice fermentation activity within 12-24 hours—this is when the yeast starts converting sugars into alcohol and carbon dioxide. Fermentation is complete when the airlock stops bubbling and the specific gravity drops to 1.008-1.010.
Prime and Bottle for Carbonation
After fermentation, transfer the beer to a sanitized bottling bucket. Add the 0.75 cup Priming Sugar and mix thoroughly to dissolve. This sugar will feed the yeast during bottling, creating natural carbonation. If you prefer a smoother finish, you can also add the 0.5 cup Corn Sugar at this stage—it ferments faster and produces a slightly crispier carbonation.
Bottle the beer immediately, filling each bottle to 1 inch from the top to allow for carbonation expansion. Cap tightly and store in a cool, dark place for 2-3 weeks before drinking. The waiting period ensures proper carbonation and flavor development—patience here makes all the difference.
Pro Tips For Making 1 Gallon Cream Ale
- Whirlpool Hops Fast: DESCRIPTION: Dump those Cascade and Centennial hops at 60°F (15°C)—not later. I used to wait until the end, and my bitterness always felt weak. The whirlpool locks in flavor and saves you from chasing a hot wort that kills hop aroma.
- Sanitize Yeast Like a Lab: DESCRIPTION: Rehydrate your White Lager yeast in sterilized water at 70°F (21°C) for 15 minutes—no shortcuts. I once skipped this with a gallon batch and ended up with sluggish fermentation. Use a clean spoon, not your finger, to stir the slurry.
- Skip the Boil Rush: DESCRIPTION: Let your wort boil for 60 minutes minimum—no exceptions. I tried cutting it to 45 once, and the result tasted thin and underdeveloped. That’s the time your malt extract needs to caramelize and your hops to fully contribute.
- Chill Swiftly, Ferment Slowly: DESCRIPTION: Ice your wort down to 68°F (20°C) in 30 minutes or less—then pitch the yeast when it’s still at 68°F. I learned the hard way that letting it sit too long invites contamination. A sanitized fermentation locker or ice bath works best.
Make-ahead tips for this 1 gallon cream ale
Ferment Before You Need It
Brew your 1-gallon cream ale up to 2 weeks ahead—it actually improves with time! The flavors meld beautifully during fermentation, and the beer continues to develop complexity in the bottle. I like to ferment mine 7-10 days before bottling, then let it sit another 2 weeks before drinking.
This gives you flexibility for parties or last-minute gatherings. Store unopened bottles in a cool, dark pantry during this time. 💫
Bottle and Store for Later
Once bottled, your cream ale will keep for up to 6 months in the fridge if unopened. The carbonation and flavor actually peak around the 3-week mark, so plan ahead if you want the best taste.
For longer storage, transfer to airtight glass bottles (like Grolsch-style swing-top bottles) and keep them refrigerated. Label each bottle with the date—trust me, you’ll forget otherwise!
Freeze for Future Use
Freeze unopened bottles for up to 3 months if you’re not planning to drink them soon. Place them upright in a ziplock bag to prevent breakage, then thaw in the fridge for 12 hours before serving.
The texture remains smooth, though carbonation may soften slightly. This is a lifesaver for holiday parties or when you’re expecting company unexpectedly. 🧊
Batch and Reuse Ingredients
Make two 1-gallon batches at once to maximize efficiency—double the ingredients and split them into separate fermenters. This way, you can enjoy one batch immediately while the second ferments. Store the second batch in the fridge until ready to drink.
If you’re short on time, use half the lactose in the first batch for a lighter body, then add the full amount to the second batch for extra creaminess. 🔄
Use as a Mixer Base
Ferment an extra ½ gallon specifically for cocktails—this gives you enough to make 4-6 drinks without brewing a full batch. Store the extra in a sanitized growler in the fridge for up to 2 weeks.
It’s perfect for cream ale milkshakes, floats, or even a creamy IPA cocktail. Just chill it thoroughly before mixing to keep your drinks cold. 🍹
Nutrition facts
Frequently asked questions
Can I make this cream ale without a fermenter?
Yes! Use a clean, food-grade plastic bucket with a tight lid and a one-way valve (like a bicycle valve) to release CO₂ during fermentation. For a DIY airlock, poke a small hole in the lid and insert a sanitized tube filled with water—bubbles indicate active fermentation. Just ensure everything is properly sanitized to prevent contamination.
How do I adjust the sweetness level?
Reduce lactose by 1-2 tablespoons for less sweetness or add 1-2 tablespoons more for extra creaminess. For a drier finish, extend fermentation by 2-3 extra days—the yeast will consume more sugars. If you prefer a sweeter taste, bottle earlier (after 5 days instead of 7), leaving residual sugars intact.
What if my cream ale tastes flat or under-carbonated?
Flatness usually means insufficient priming sugar or improper storage. Add ½ teaspoon extra priming sugar per bottle and rebottle, then wait 1-2 more weeks for carbonation. Store bottles in a consistent 68-72°F environment—temperature fluctuations can kill yeast and prevent carbonation. If it’s still flat after 4 weeks, the yeast may have died; try force-carbonating with a soda siphon.
Can I substitute malt extract with grains?
Yes, but it requires more effort! Replace 1 lb malt extract with 2 lbs crushed 2-row malt and 0.5 lb crystal malt for color. You’ll need to mash the grains at 152-158°F for 60 minutes**, then boil the wort. This adds complexity but demands more time and equipment. For beginners, stick with extract for consistency.
How long does it take to ferment at room temperature?
Fermentation at 70-75°F takes 7-10 days, but if your room is warmer (78°F+), it may finish in 5-7 days. Monitor the airlock for activity—if it stops bubbling after 3 days, check the specific gravity. If it’s still high (1.012+), pitch fresh yeast or extend fermentation. Cooler temps (65°F) slow fermentation to 10-14 days but yield cleaner flavors.

- Pea Soup Instant Pot Recipe: Velvety Green Smoothness in 20 Minutes - November 1, 2026
- Pork Loin Pulled Pork Crock Pot Recipe: Slow-Smoked Tenderness With Zero Dryness - November 1, 2026
- Baked Potatoes in Crock Pot Recipe: Buttery Interiors and Crispy Top Magic - November 1, 2026